Well, hunting season is over. The freezers are full of meat. For the most part, most of the hunting stuff has been put away. Life is good. And yet… it’s kinda sad. The Deerslayer clan is all about hunting. It’s a weird feeling on a Friday evening not heading out to the hunting camp. It’s time to get down to the business at hand…grinding up the meat that was tossed into gallon bags and frozen to be ground at a later date. Well, the later date is NOW.
Throughout the season we’ve packaged up and labeled our meat according to how it will be used. The scrappy, sinewy bits like forequarters that have been set aside for grinding were packaged up in gallon-sized bags of approximately 5 lb. each. Now is the time that we collect all of those bags in order to grind our wild game at home. Each year we try to grind about 60-70 pounds of venison (and this year, some nilgai) that will be used in any recipes that would call for ground meat. Lasagna, tacos, picadillo, meatloaf, burgers, soup, or chili would be such recipes.
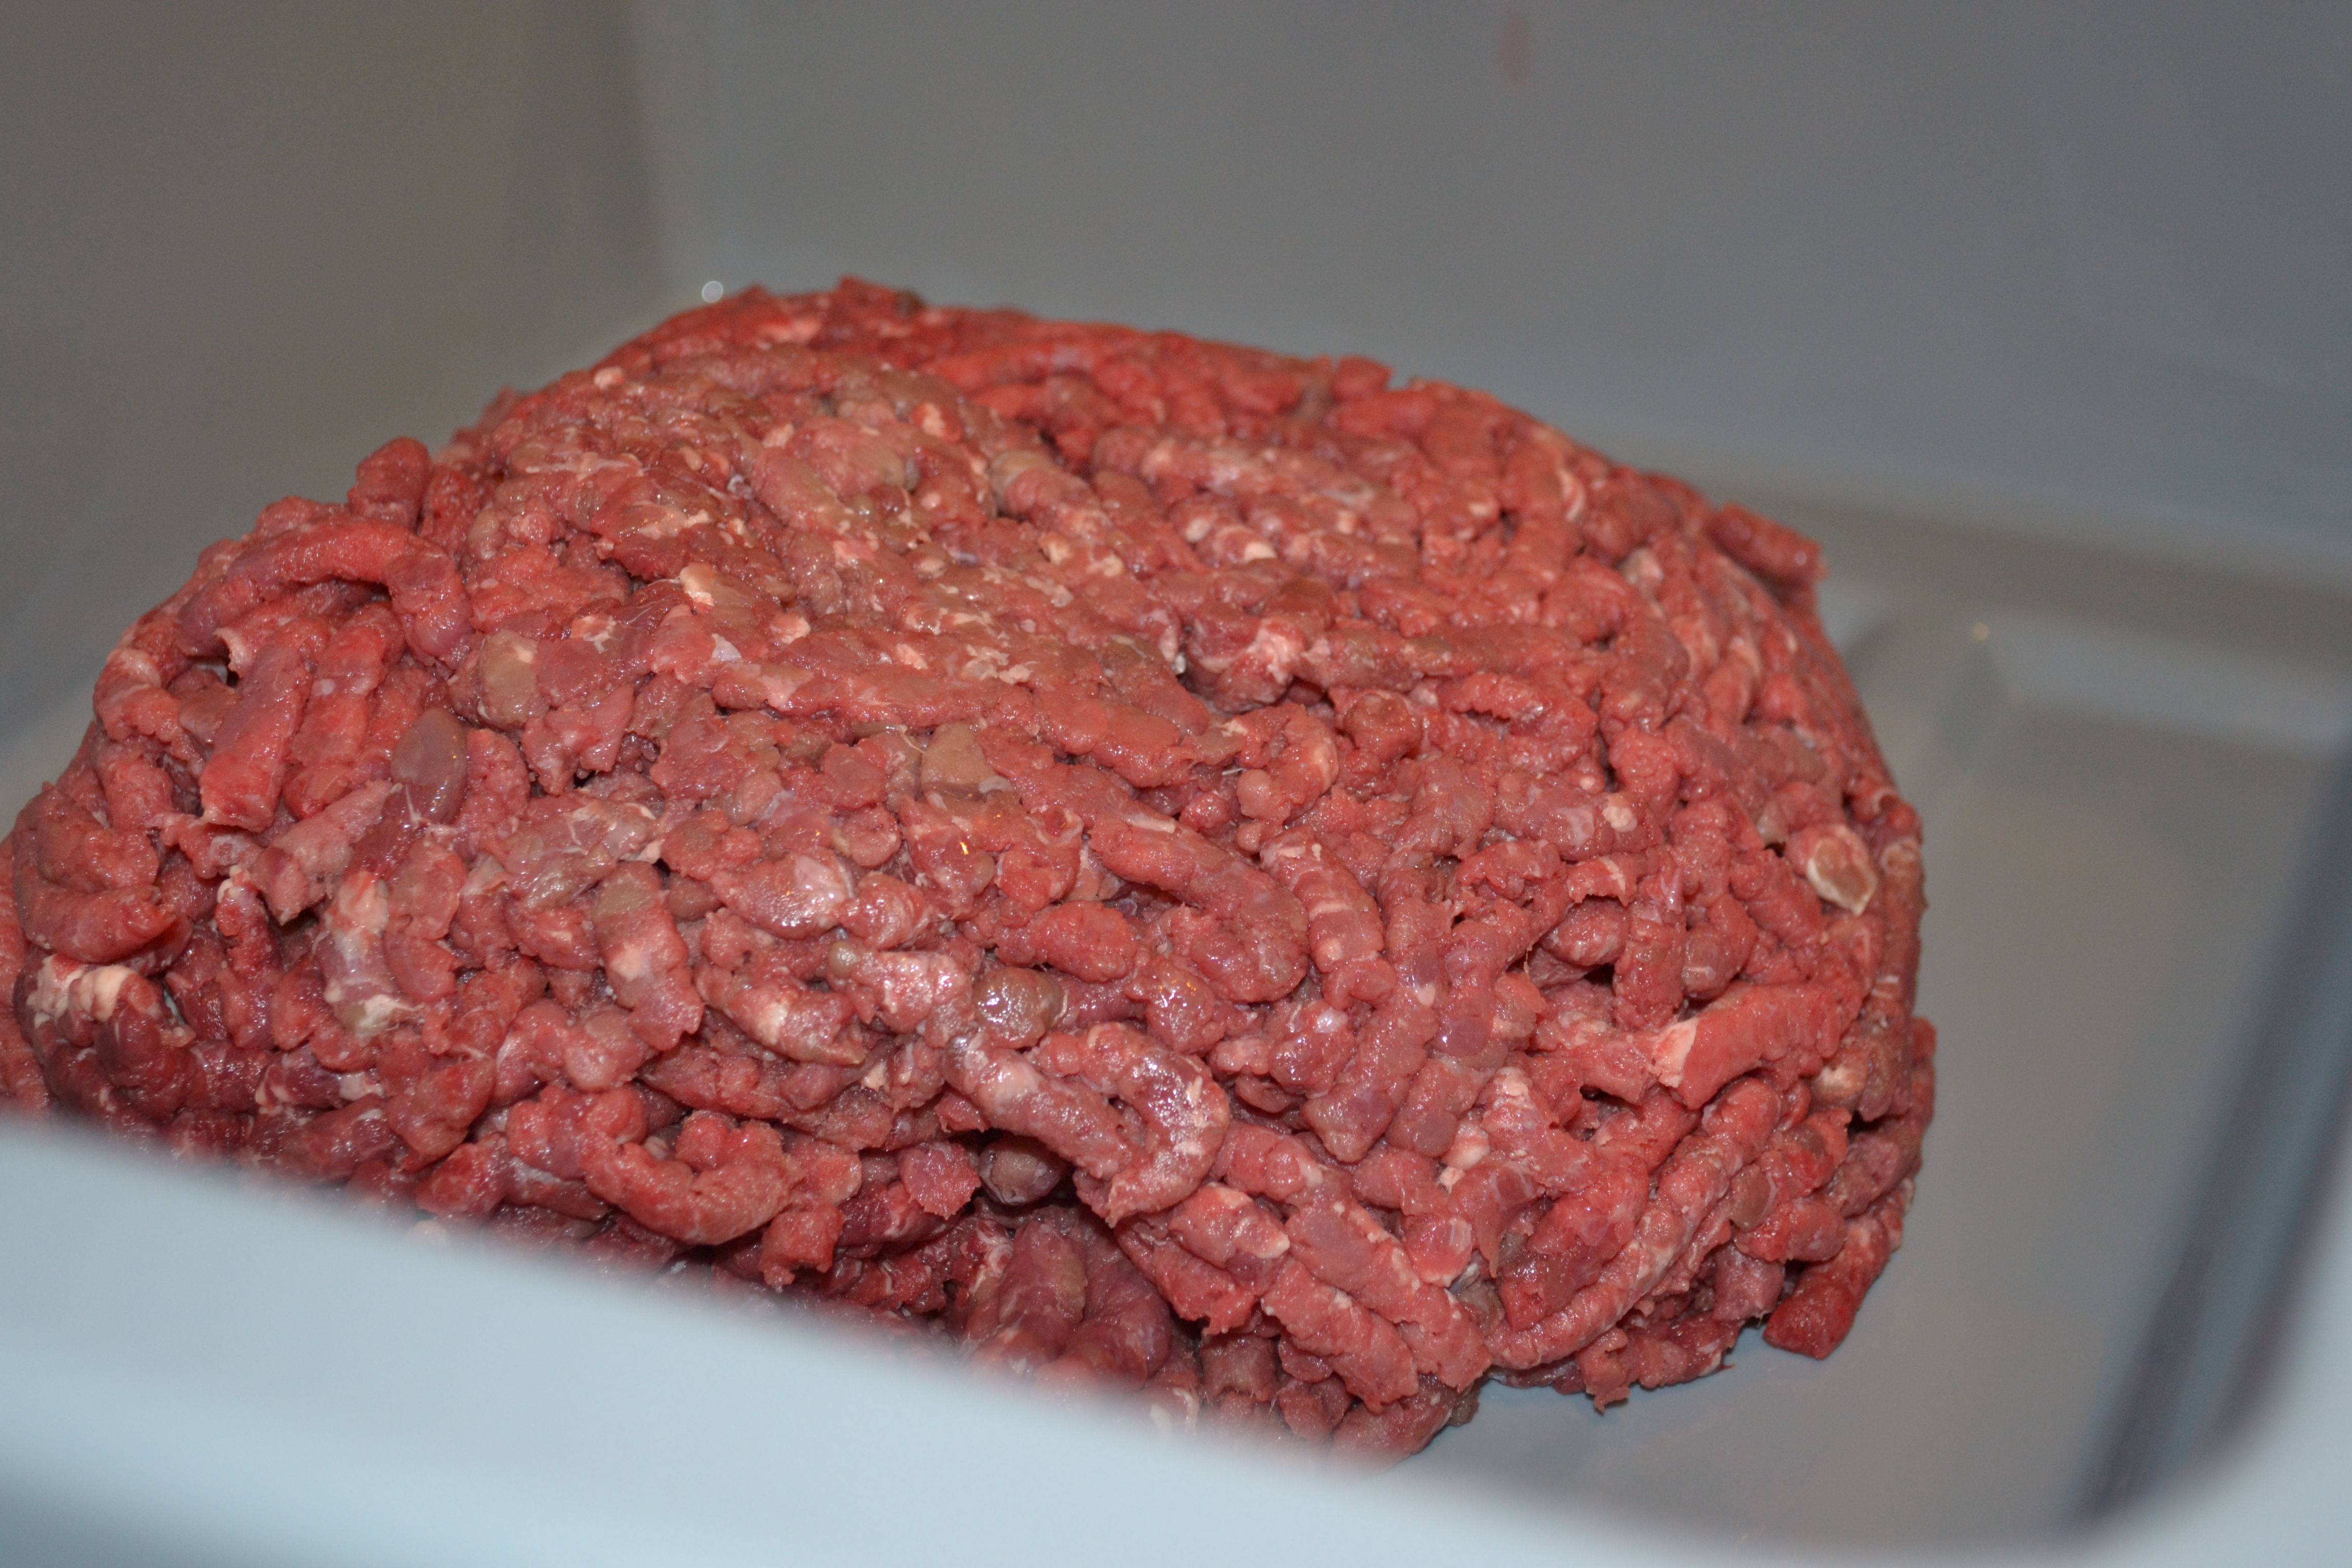
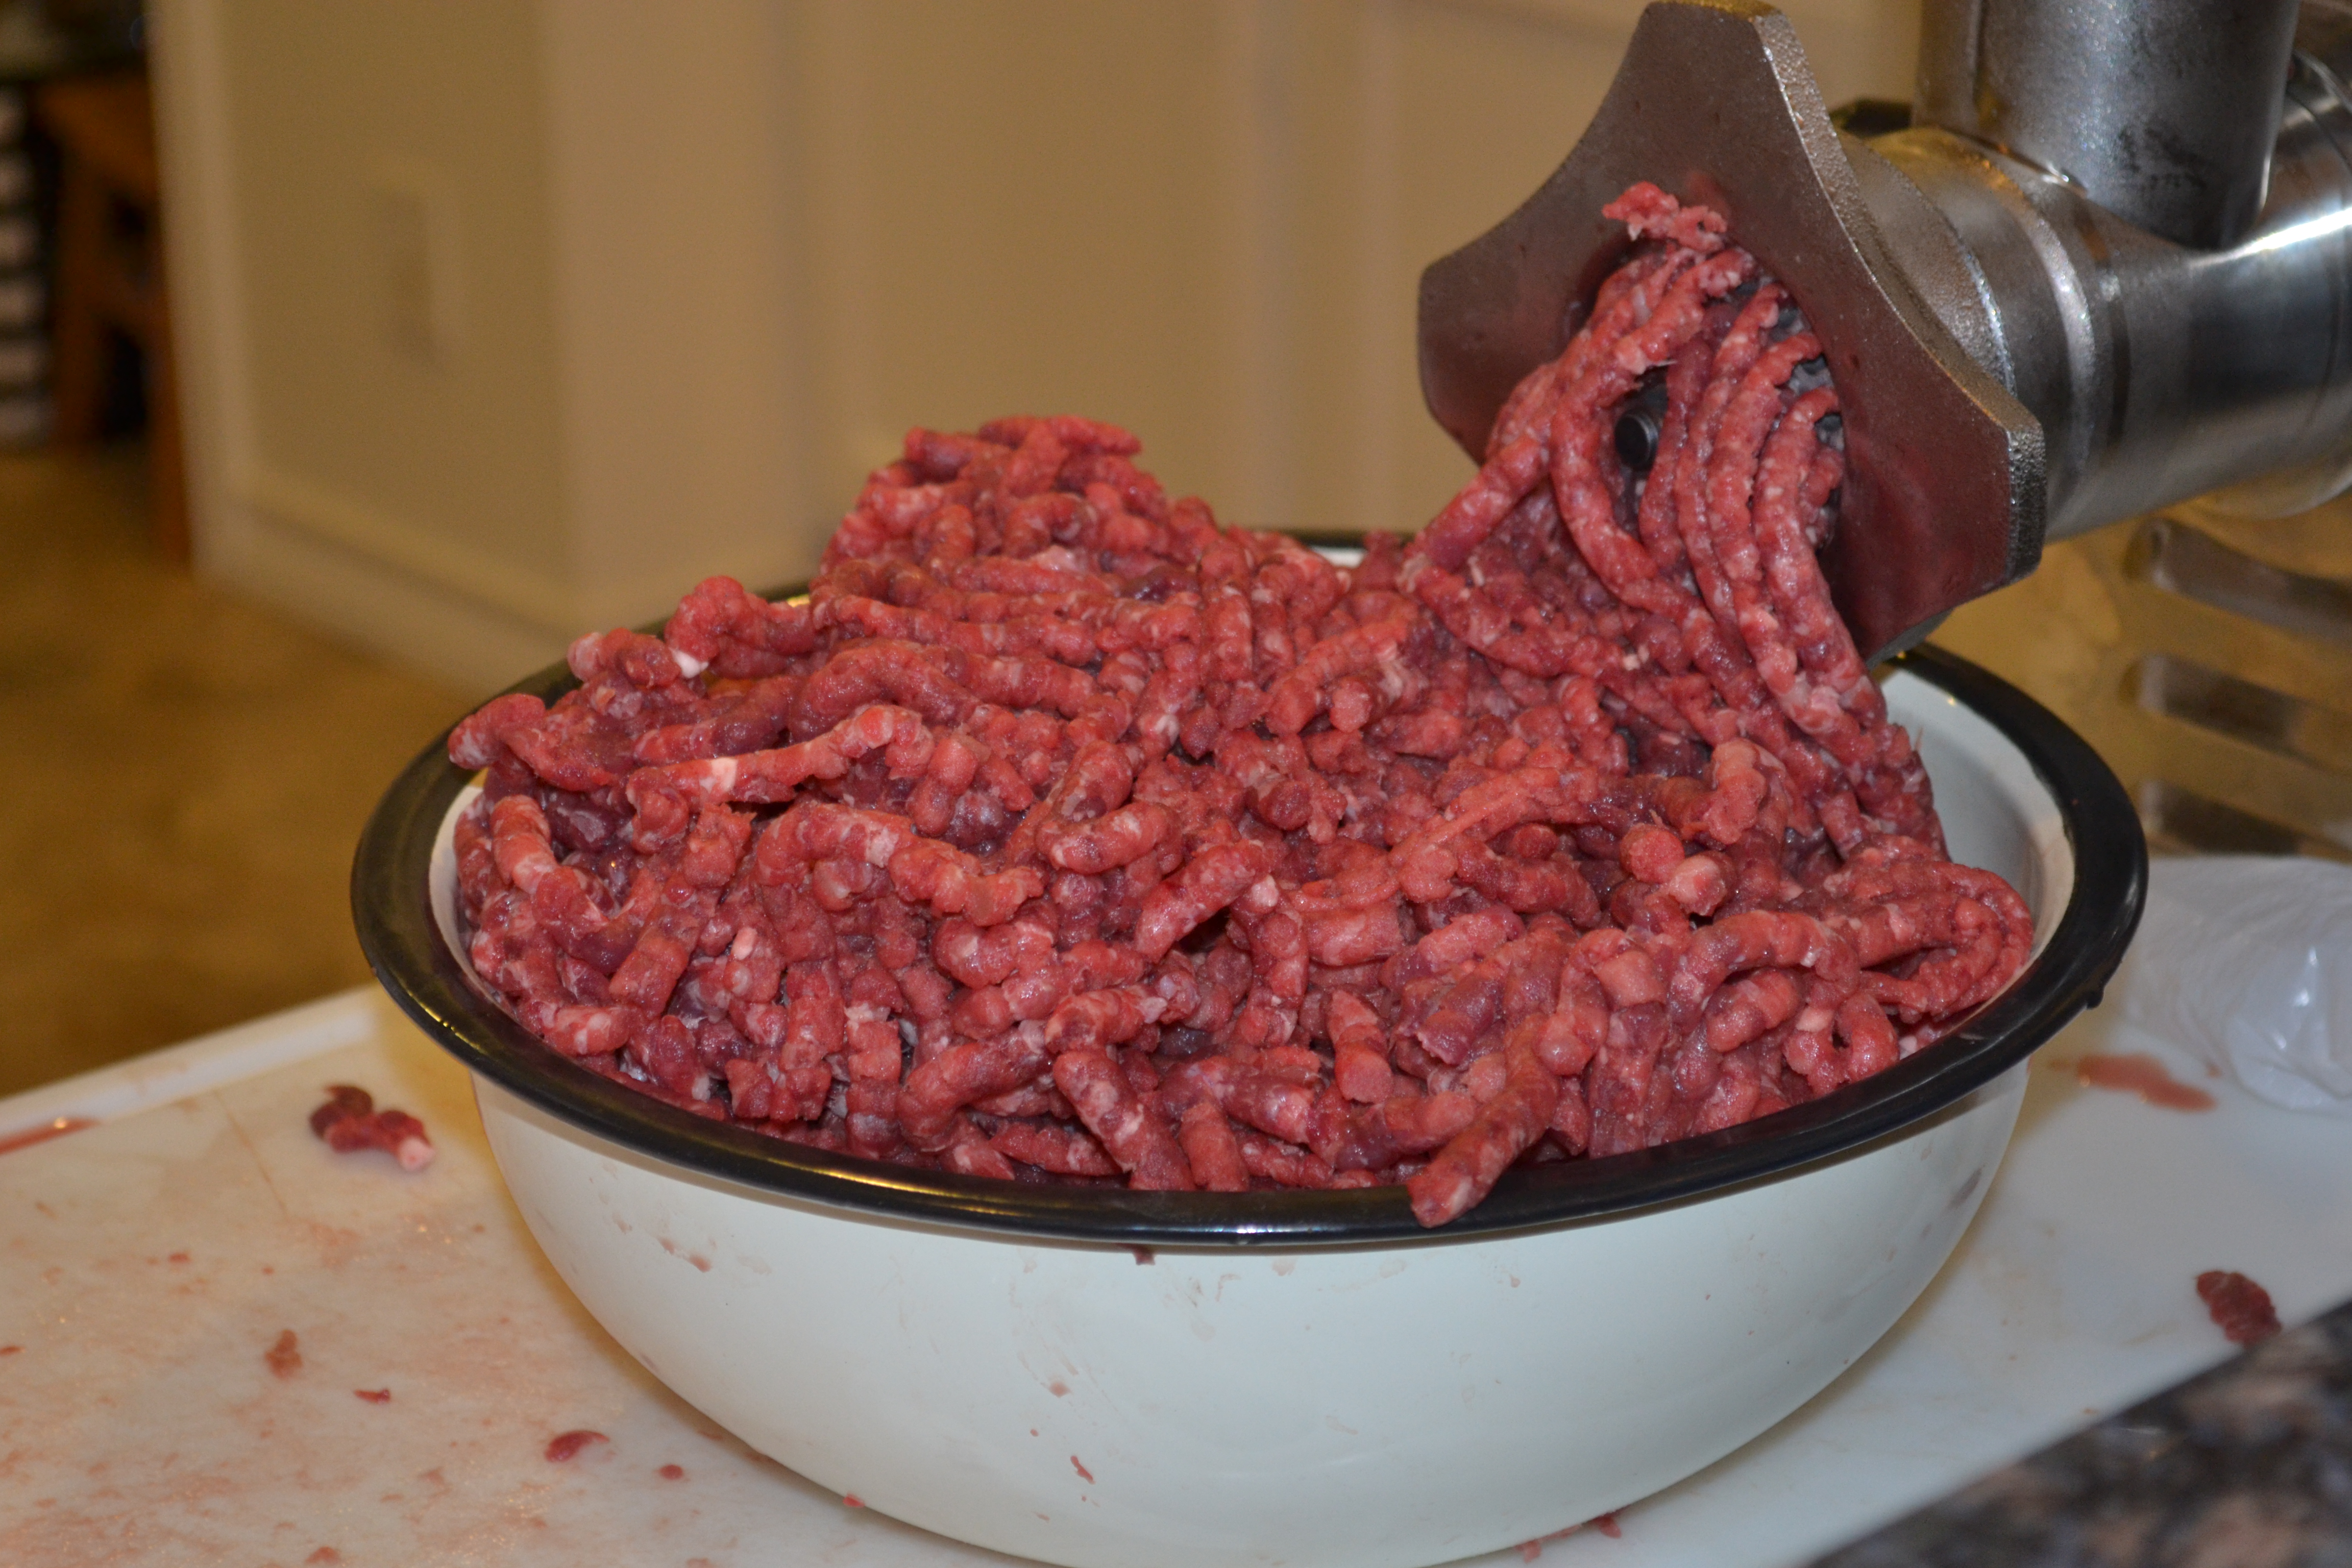
Look at the difference in the fat content of our ground wild pork compared to the nilgai and venison.
At this time, I always hope that there is some wild pork to grind as well. It can be mixed 50/50 with the venison to stretch it. It adds a nice depth of flavor and a little extra fat that many people like. Last year, we had lots of wild pork and not as much venison as we wanted. This year, since we have plenty of venison and nilgai, I’m opting to save the scrappy bits of ground pork for maple breakfast sausage.
When we first started processing our own meat, we asked for a hand-crank grinder for Christmas. It was so retro and “off-the-grid” and cheap. After much grinding (get it?) and gnashing of teeth (and cursing) we gave up. We didn’t have much success with it. It was really labor-intensive and it kept clogging up with the fascia and sinew. Finding a means to stabilize it was another issue. While there are usually places in the garage that a grinder can be clamped or immobilized, the sanitary environs of the kitchen are really the best bet.
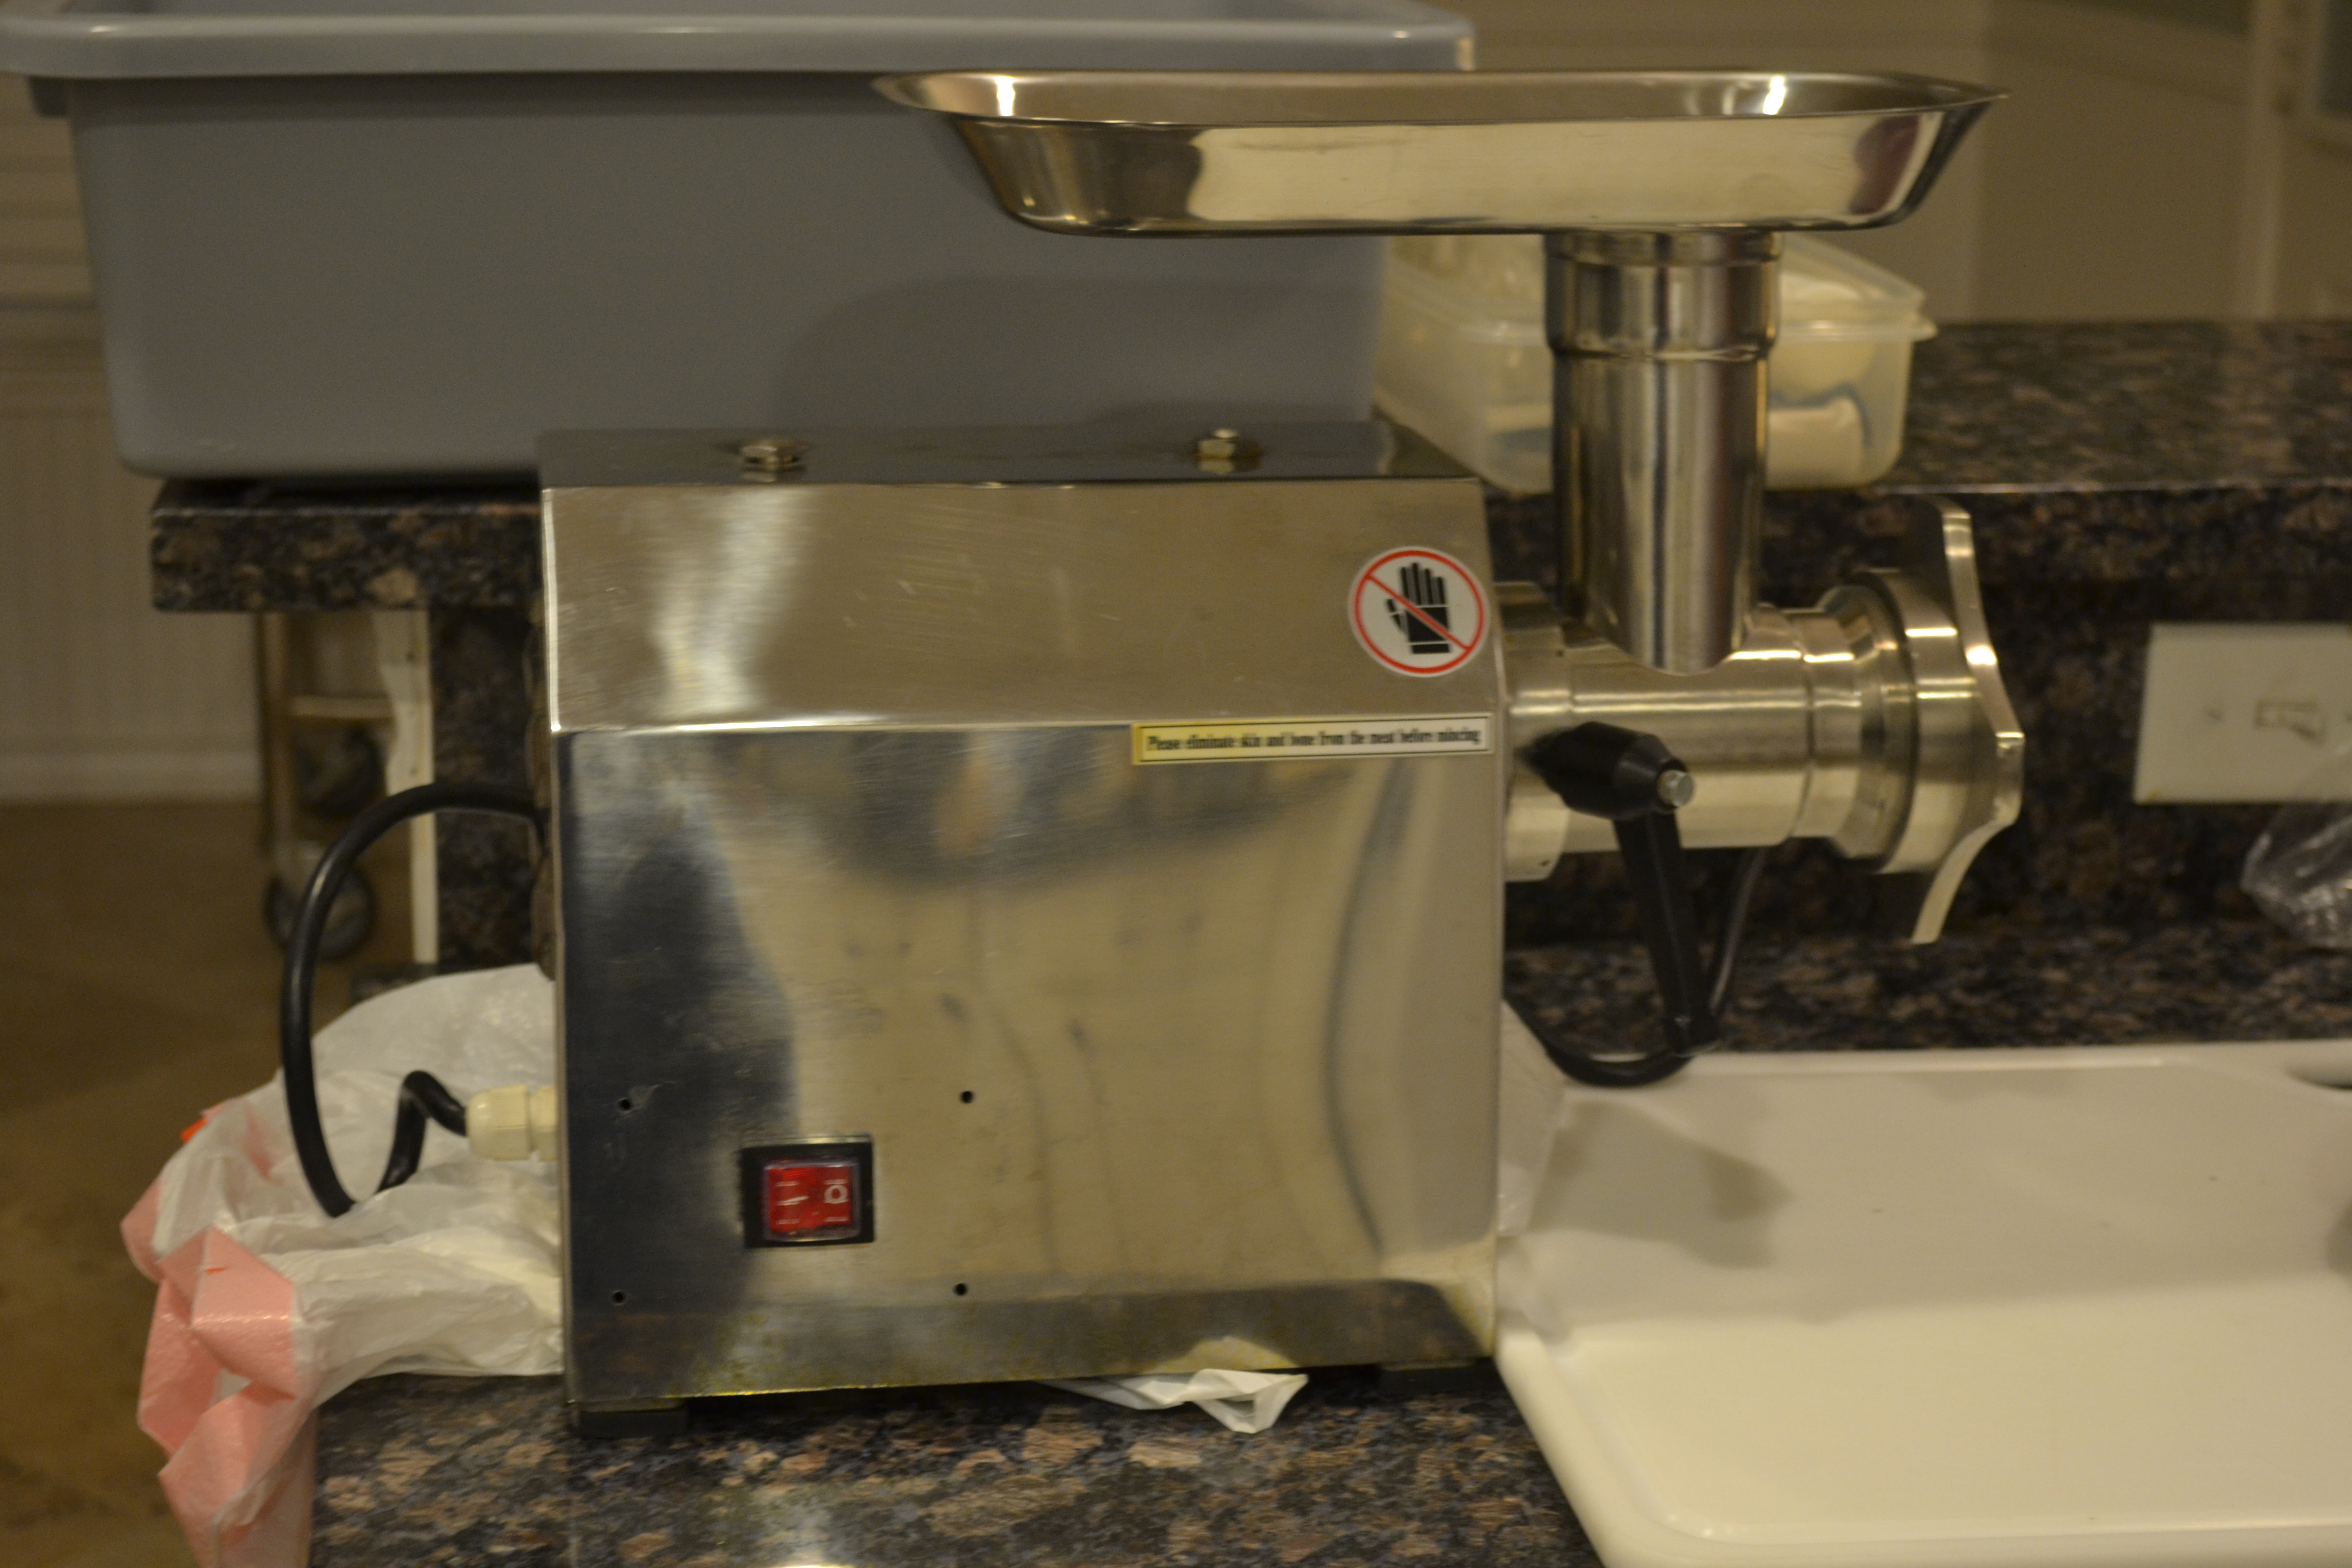
In 2002, we decided to invest in an electric, professional-grade meat grinder. Deerslayer found one online from Northern Tool. It was pricey at around $300 (which has increased quite a bit since then to $579) but when we weighed in the cost of having meat professionally processed, the security of knowing that OUR meat was what we’d be getting back, as well as being in control of the cleanliness of the equipment, well, it was priceless!
Our grinder has a 3/4 horsepower motor that gets the job done. Since 2002, the only problem we’ve had is that, once, the on/off switch did need to be replaced but Deerslayer was able to do that pretty easily. The unit came with a couple of blades and two grind discs, one fine and one coarse. I do understand that the cost is pretty daunting. Ours has paid for itself many times over since we bought it. Hunters might consider going in with another hunting buddy to split the cost of a good, commercial-grade grinder. We’ve checked into purchasing foot pedal from Cabela’s for hands-free operation. I’ll keep you posted.
Grinding the Meat
I would recommend waiting until the end of the season so that all of your potential ground meat can be processed at once. We polished off about 50 lbs. in one evening after Deerslayer got home from work but it took a couple hours of prep time by the deerslayer’s wife (me) before he arrived.
First, several hours before you’re ready to begin or the previous night, set out the meat you want to grind. Leave it in the bags, set it in coolers and let it thaw PARTIALLY. It needs to still be partially frozen when you grind it. That prevents any sinew or fascia from clogging the mechanism or grind discs. It also prevents the meat from being too slippery and floppy when feeding it into the grinding tube.
Sanitize the area, all detachable parts of your equipment and any parts that will come in contact with the meat, a large cutting board, a large serrated knife or meat saw, and containers for moving meat from one station to another. I recommend having two stations (and a worker for each), one grinding station and one packaging station. The grinding/cutting station will be pretty spread out, loud and busy. It works better to set up a packaging station in a different part of the kitchen or at least on a different counter where the scale, bags, sharpie, large container of meat, and filled bags can be arranged.
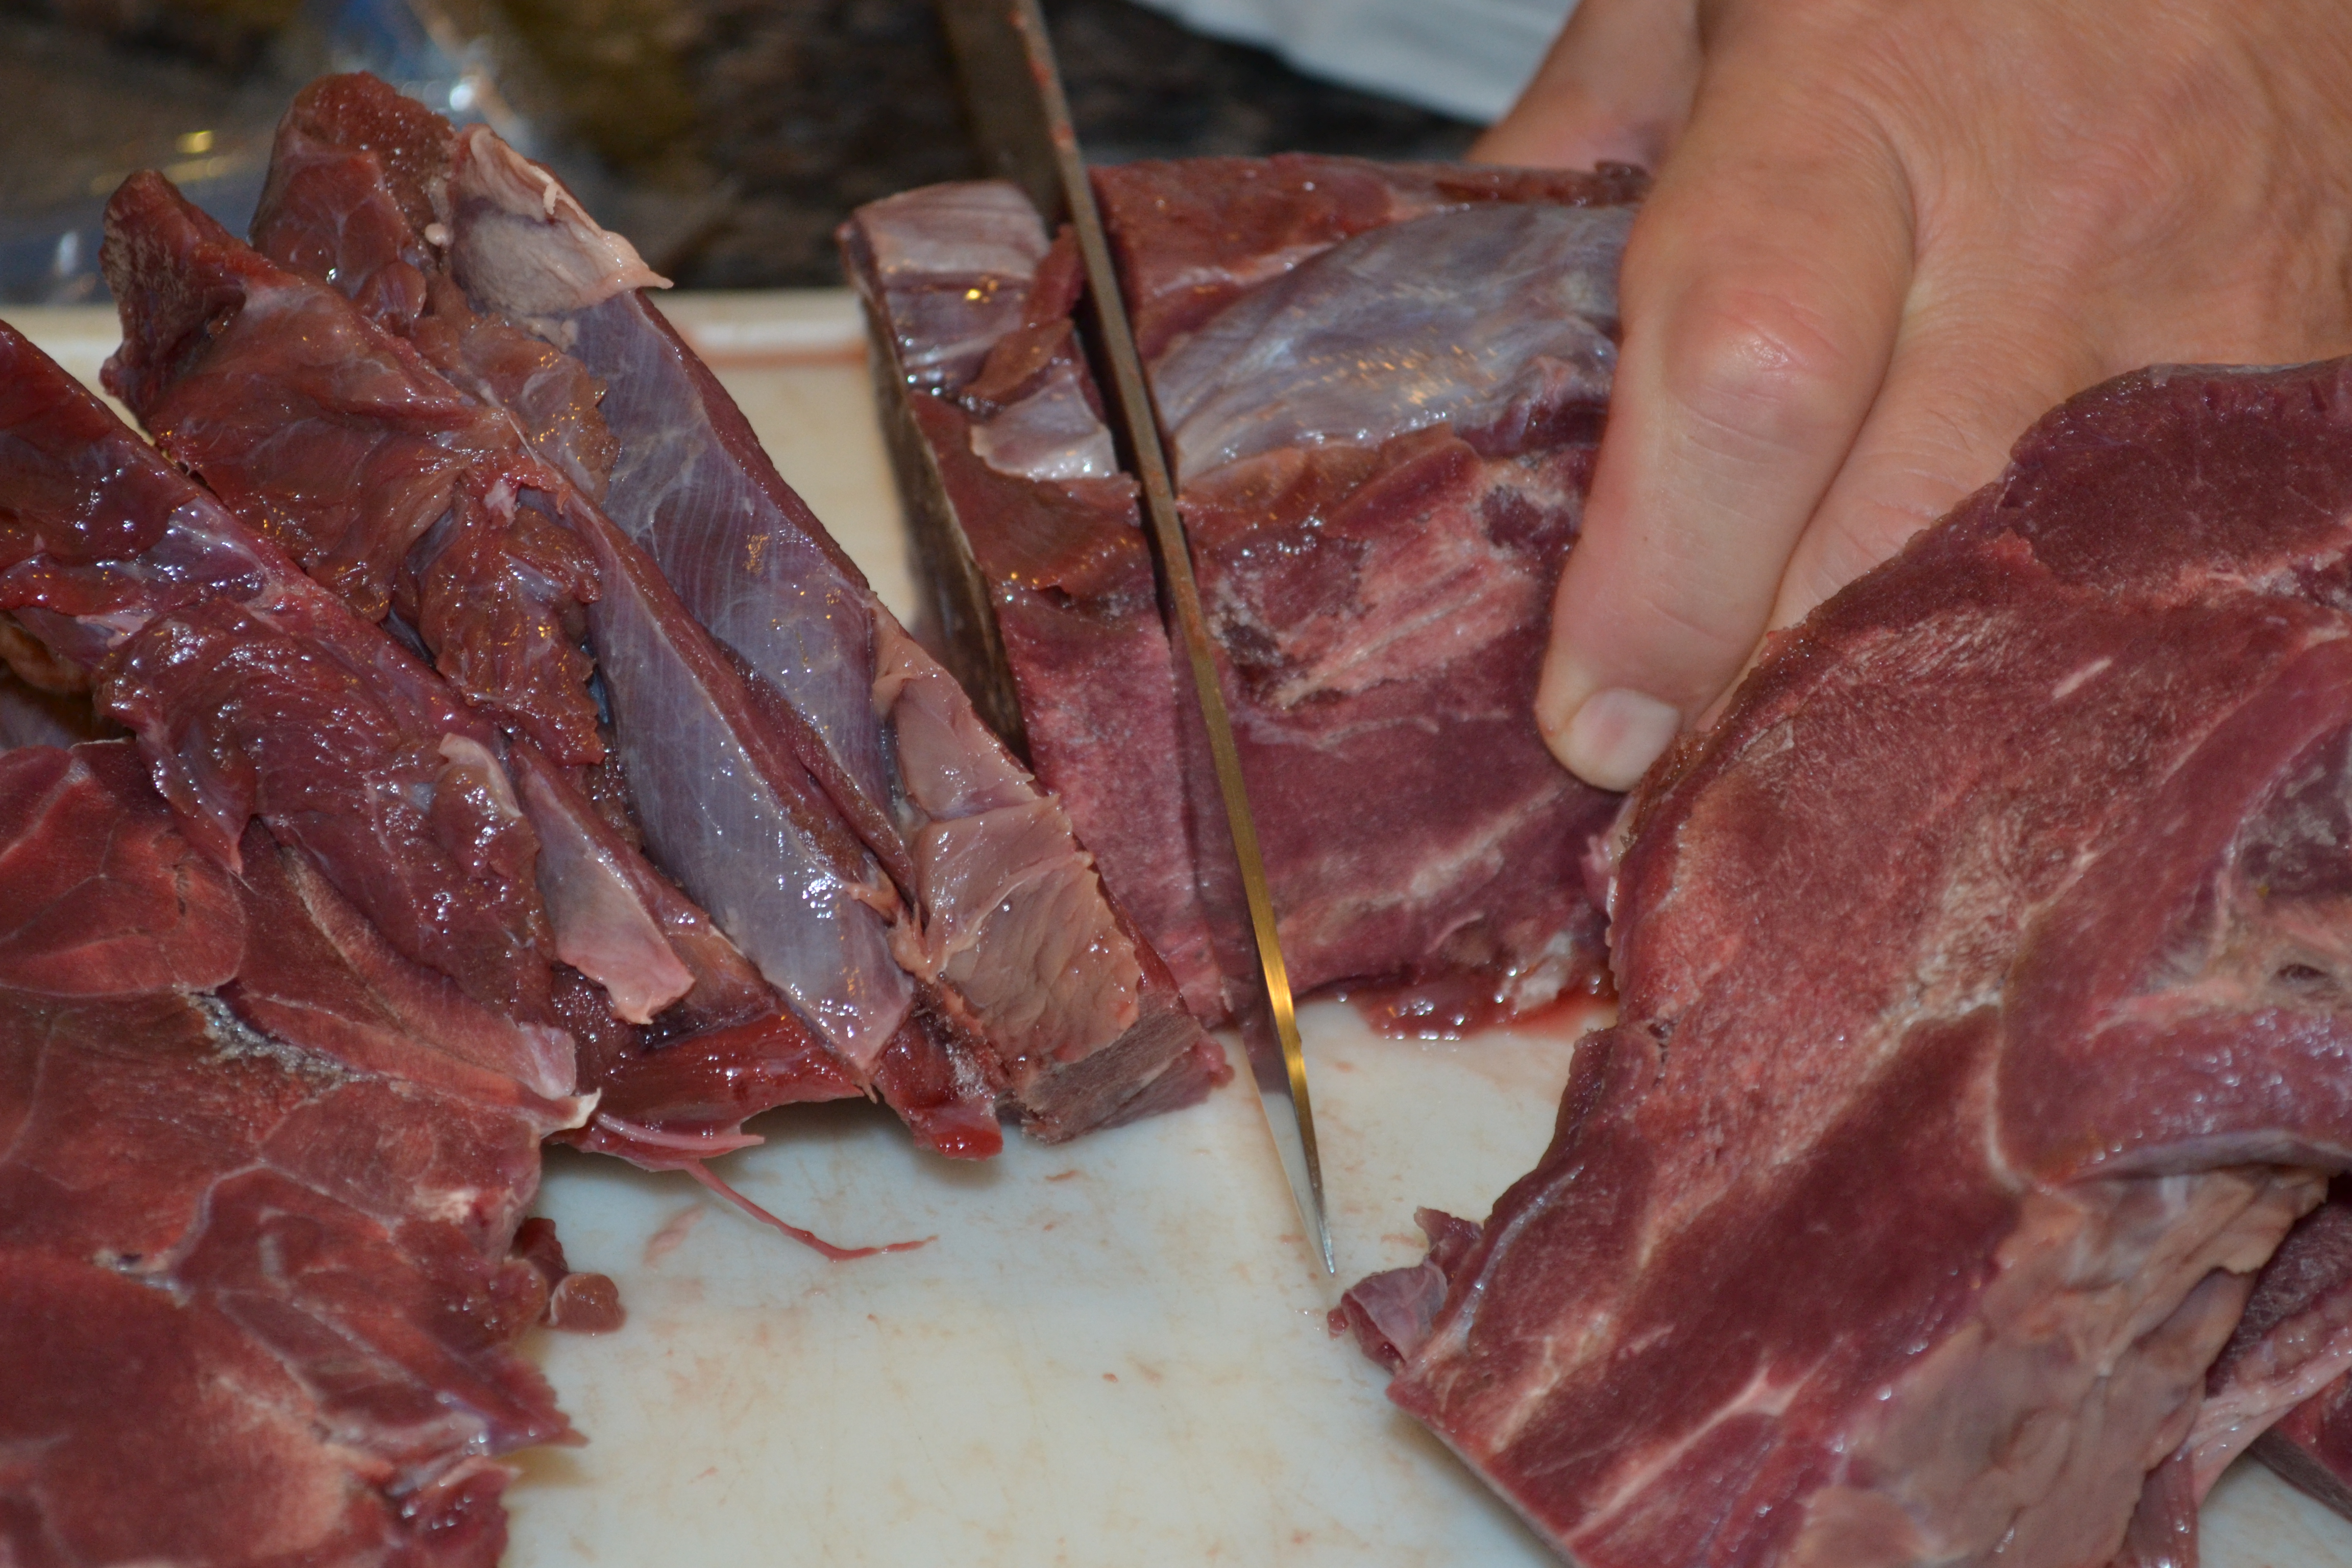
We bought two of these at Sam’s Club for moving meat from the “grinding station” to the “packaging station”Meat should be semi-frozen when it is ground. It needs to be cut (with a serrated knife or meat saw) into pieces that will easily fit into the grinding tube.The semi-frozen slices of meat are ready to be ground
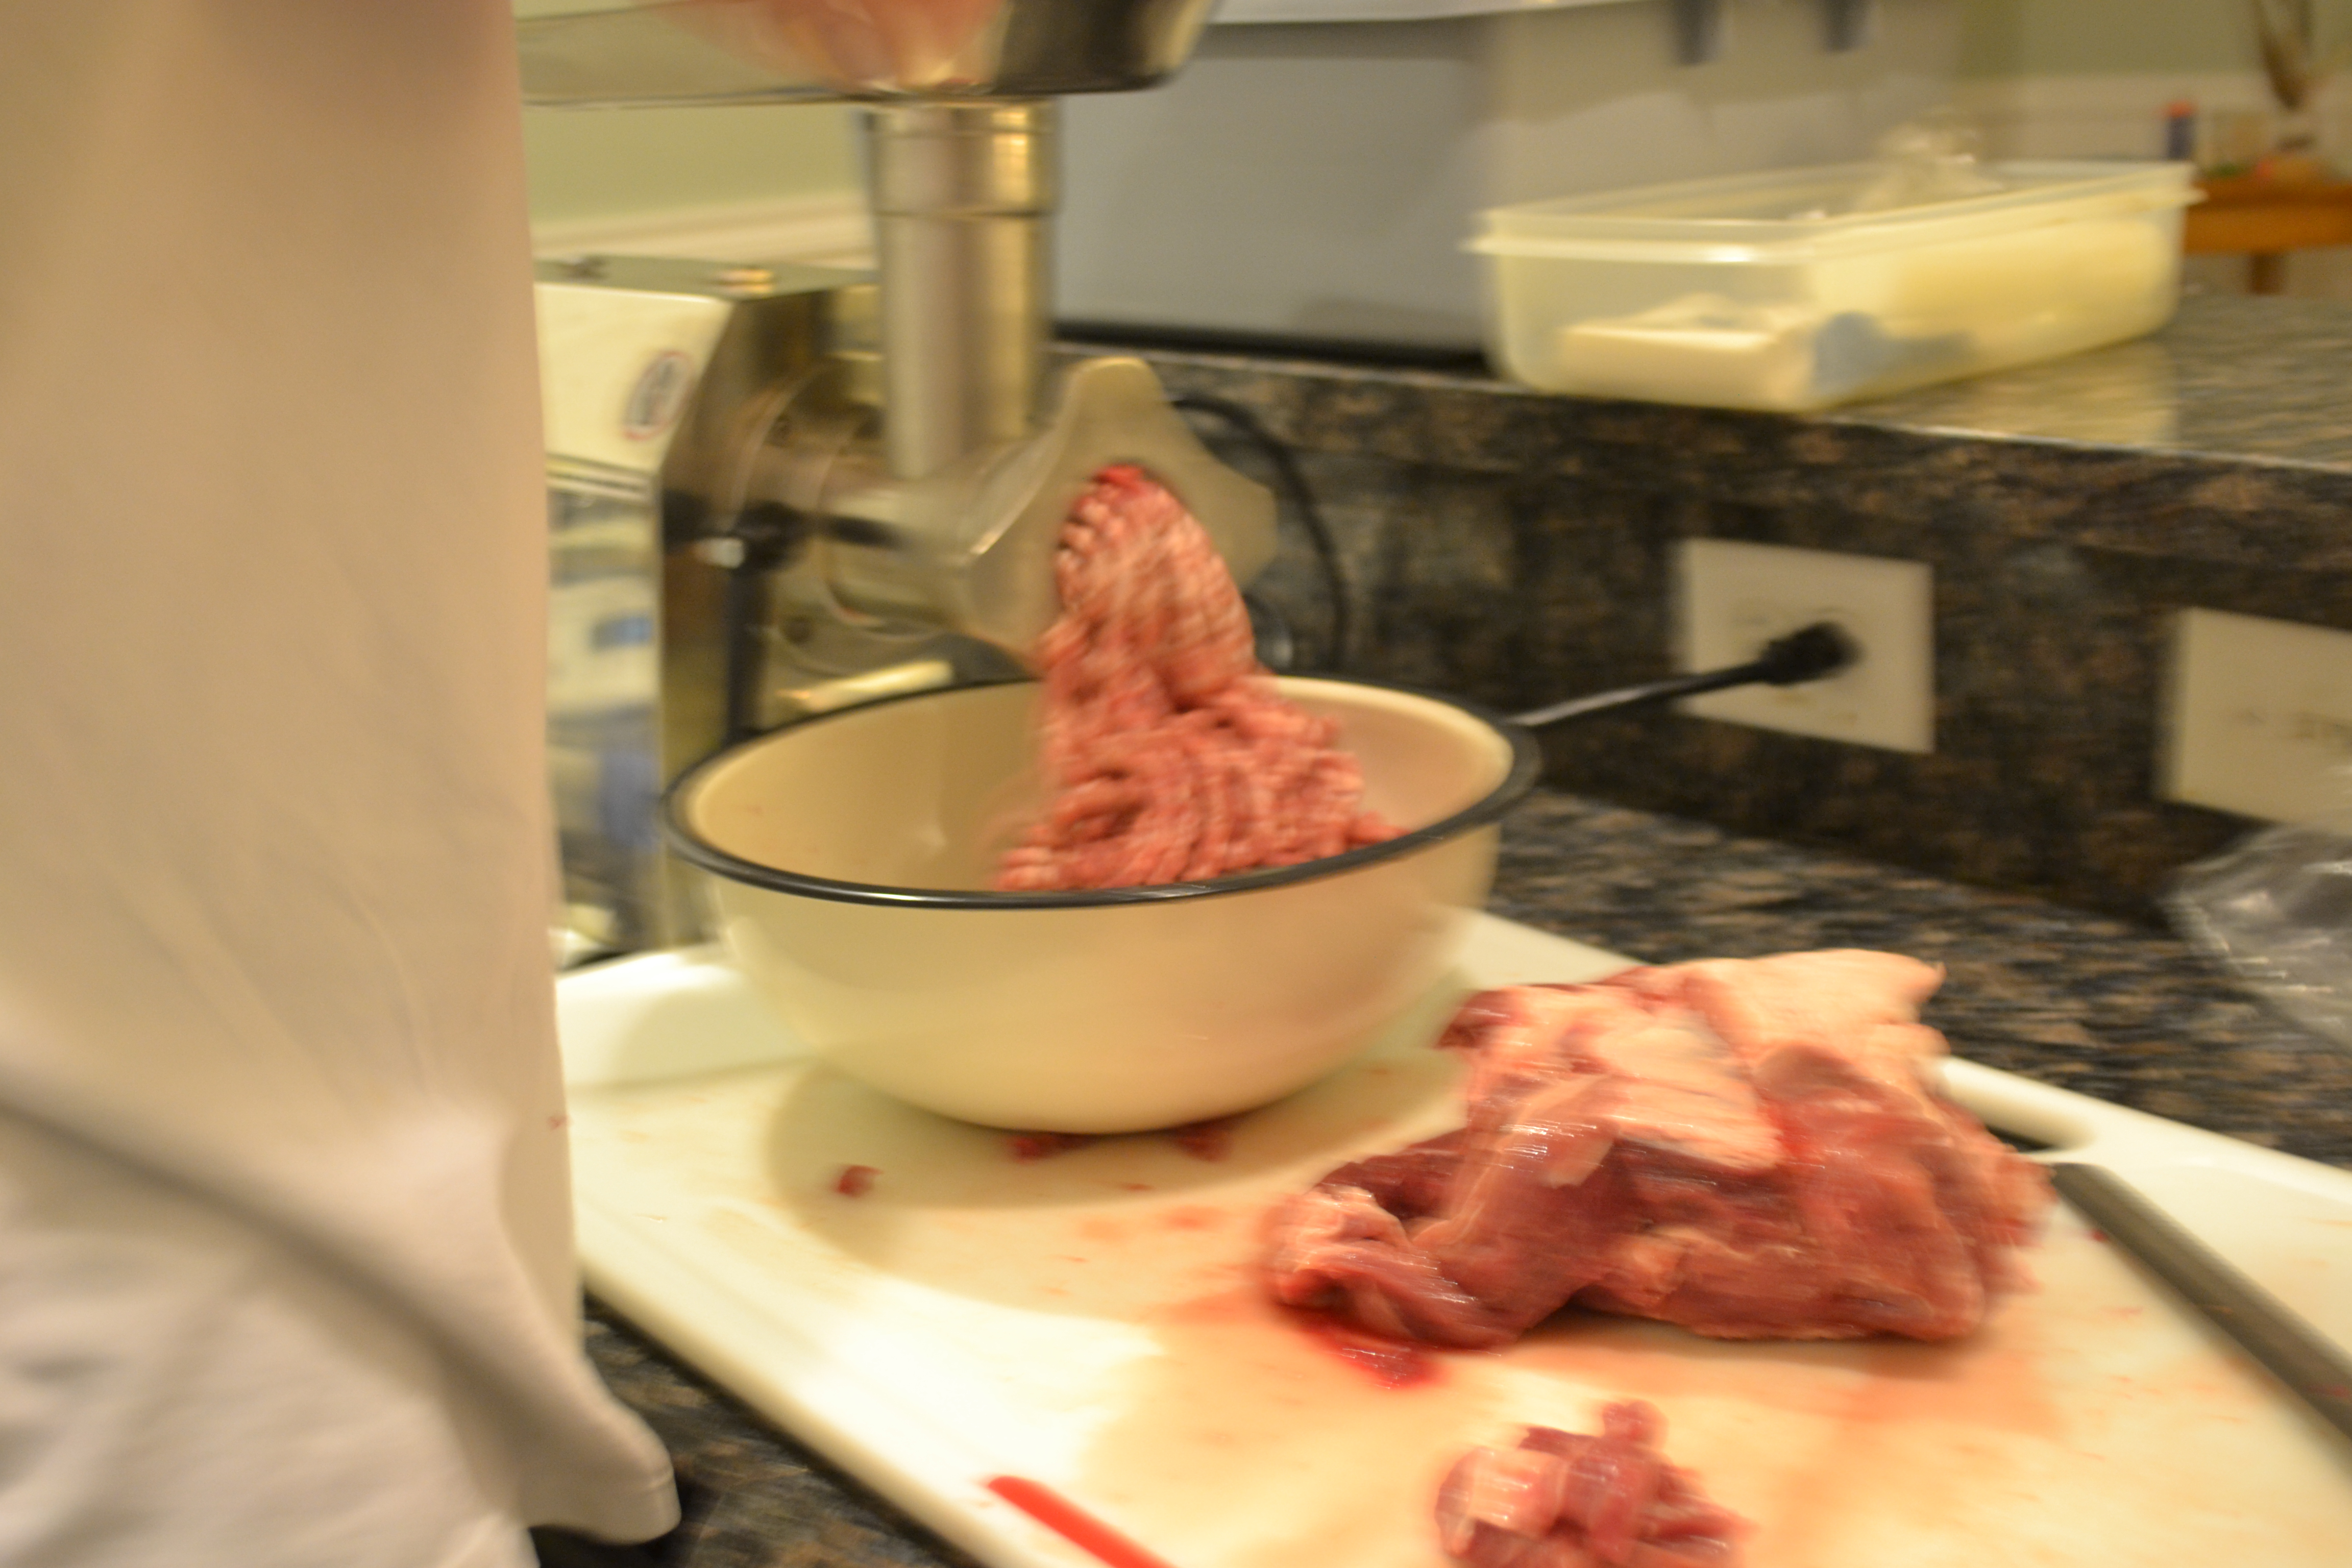
Once you are ready to begin the actual grinding, the process really goes quickly. It’s best to have 10-15 pounds of meat ready to go at a time. A large bowl or other clean container that will fit under the exit tube should be ready to receive the meat
We used an enamelware metal bowl to catch the meat.
Once the bowl is full, transfer the meat into a larger container that can transport it to the packaging station.
I package up the ground meat in quart-sized zip-lock freezer bags. I weigh it out in one-pound packages, enough for any of my recipes. More guests? Two bags. Easy Peasy.
Weigh, label, date, flatten.
Usually, I label and date all my bags with Sharpie before I fill them. I noticed, however, that I neglected to do it in the photo above. It’s easier if you do it befor the bags are filled.
Finally, flatten the bags full of meat to remove most of the air and to make them easier to store in the freezer. Take several flattened bags of meat, lay them in a single layer on a cookie sheet and place them in the freezer. It flash freezes the meat, prevents the bags from sticking together, and allows the bags to stack nicely in the freezer.
The metal basket fits nicely on the freezer shelves and holds 14 lbs. of packaged-at-home ground venison, pork, and nilgai.Beautifully organized!
I’ll bet you didn’t know that pumpkins purchased in October to be used for autumn decor will last until past the end of February! Don’t ask me how I know that. I’m a little embarrassed to admit that my family has been enjoying a beautiful assortment of Thanksgiving pumpkins, Christmas pumpkins, New Year’s pumpkins, and Valentine’s Day pumpkins. Enough was finally enough.
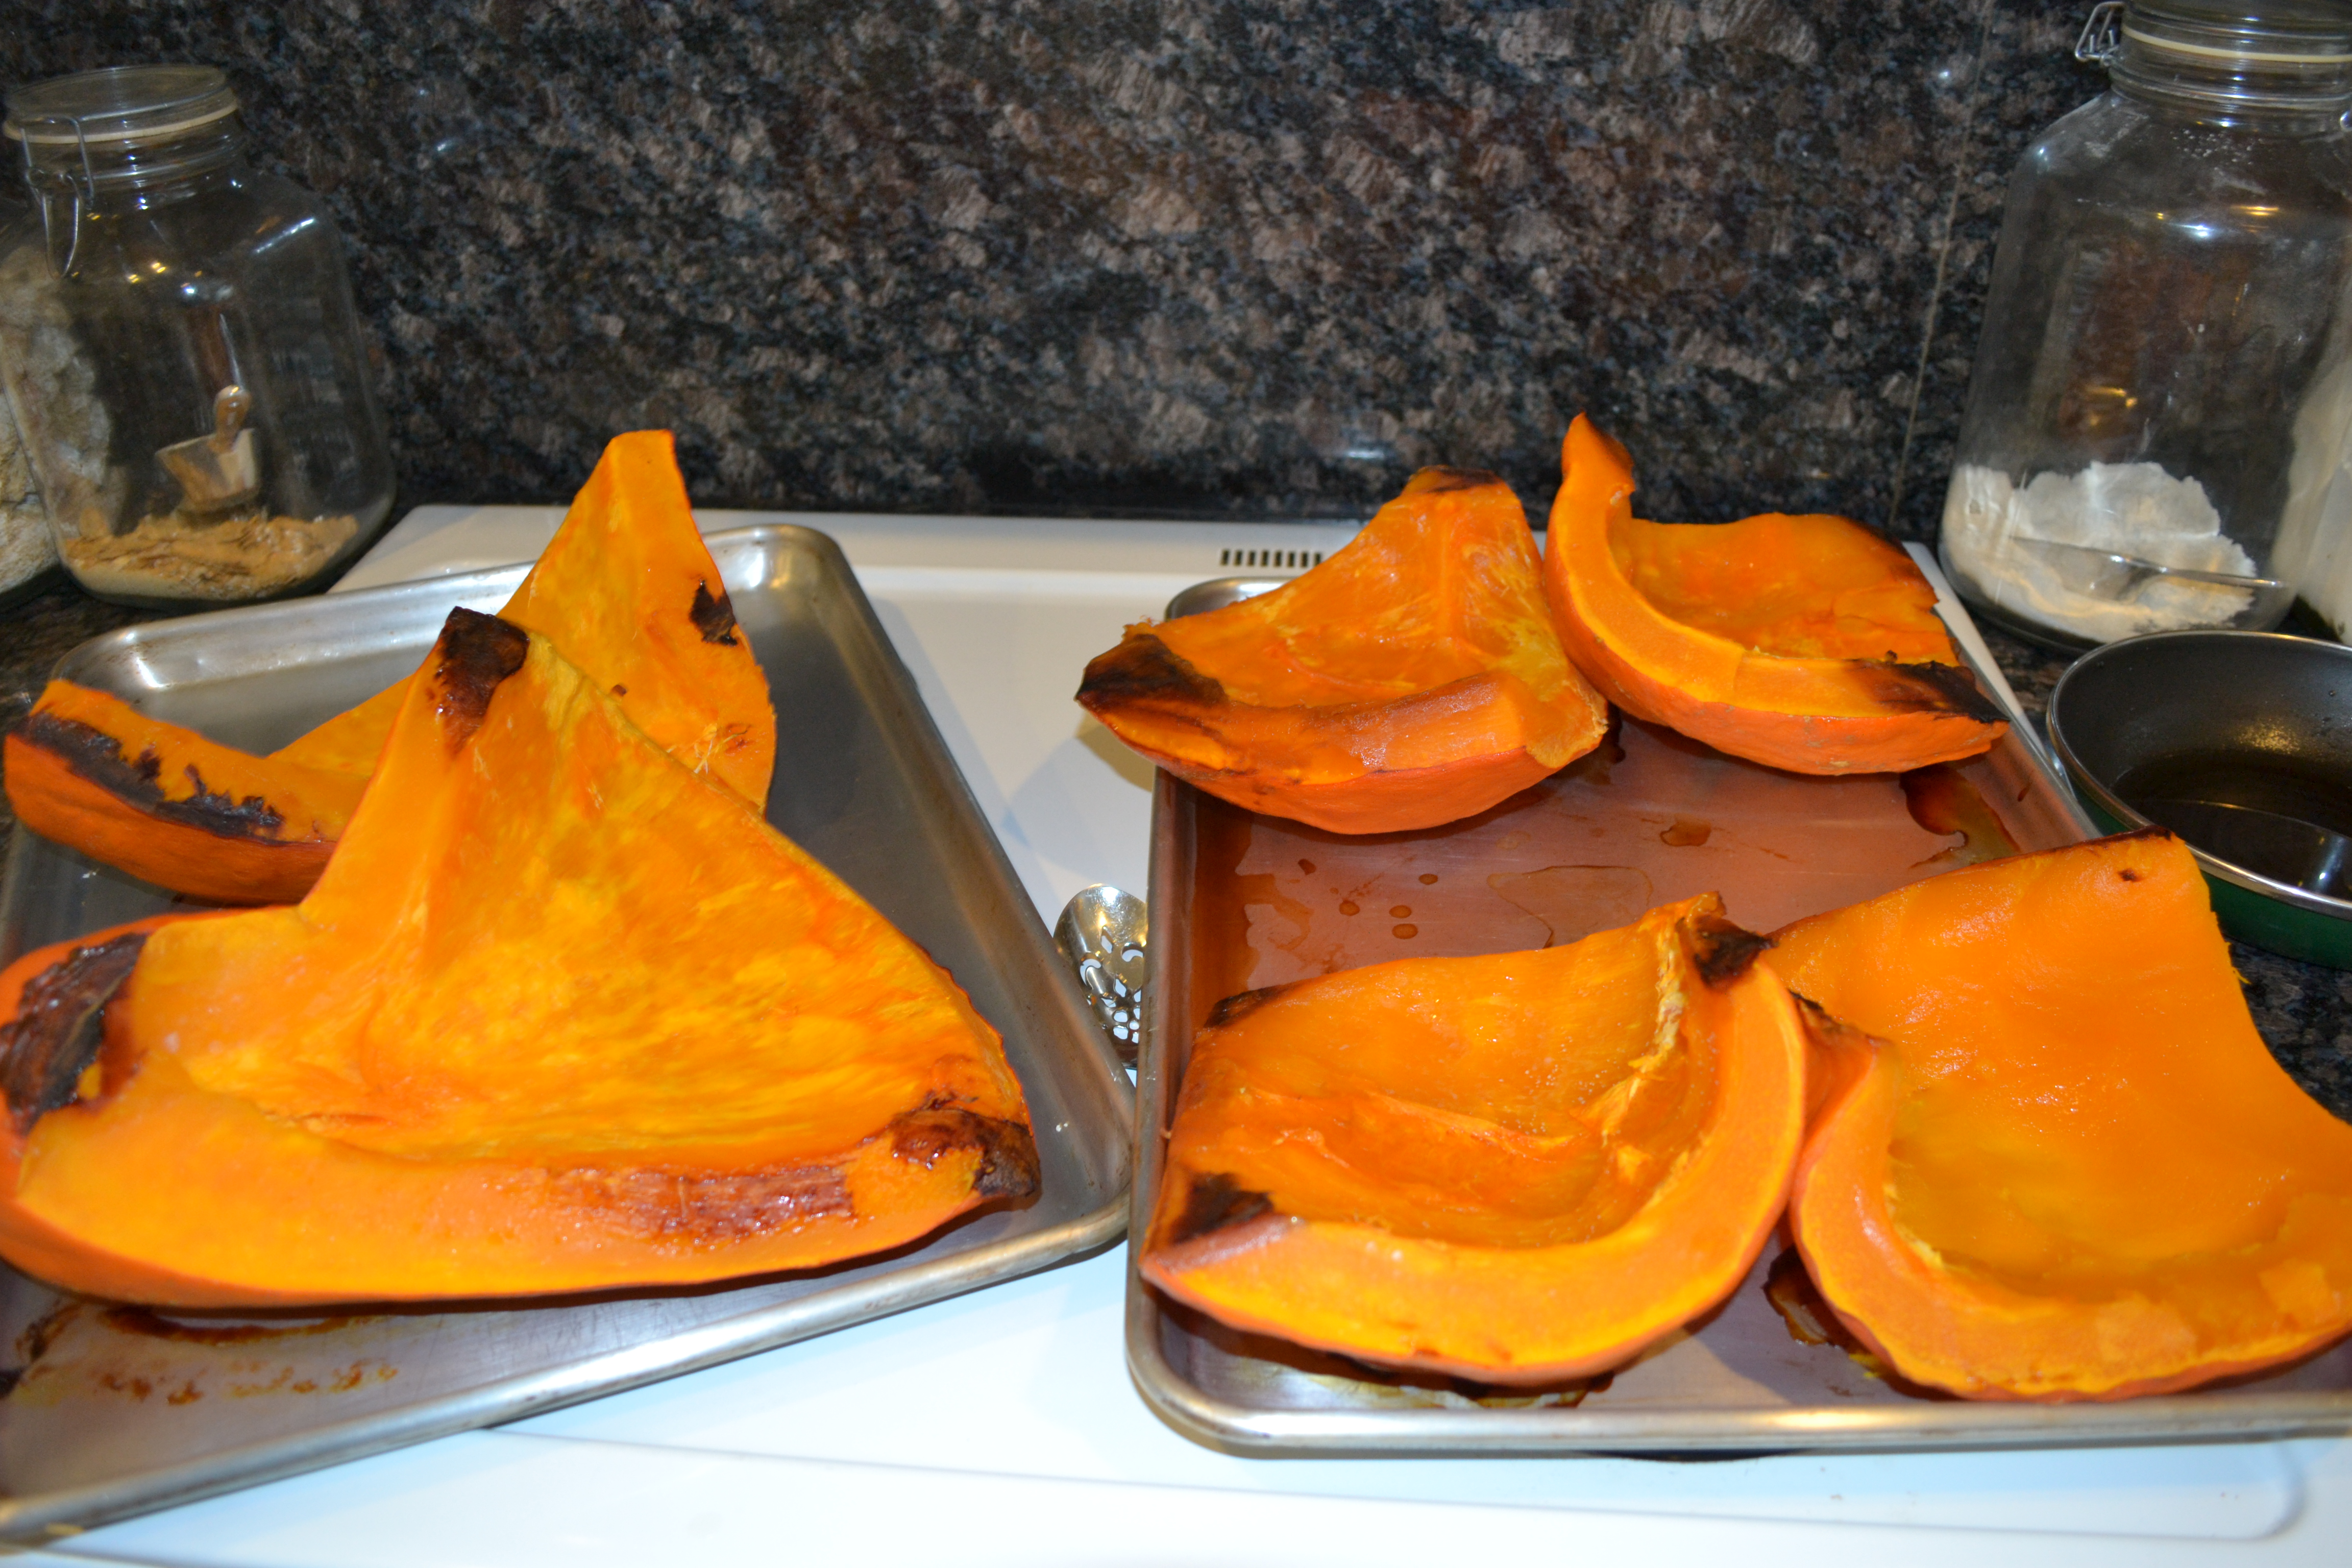
Just for the record, pumpkins, when kept relatively cool and dry last a long damned time. The flesh can then be roasted, packaged, and frozen in zip-locked bags with relatively little work. Depending on the size of the pumpkin, take a large butcher knife or extra long, serrated bread knife to cut through. Use a spoon to scrape out seeds and stringy bits. Cut again to fit onto a cookie sheet. Arrange, skin side up on the cookie sheet. Place in a 400° oven until the skin begins to wrinkle and a fork inserts easily into the flesh.
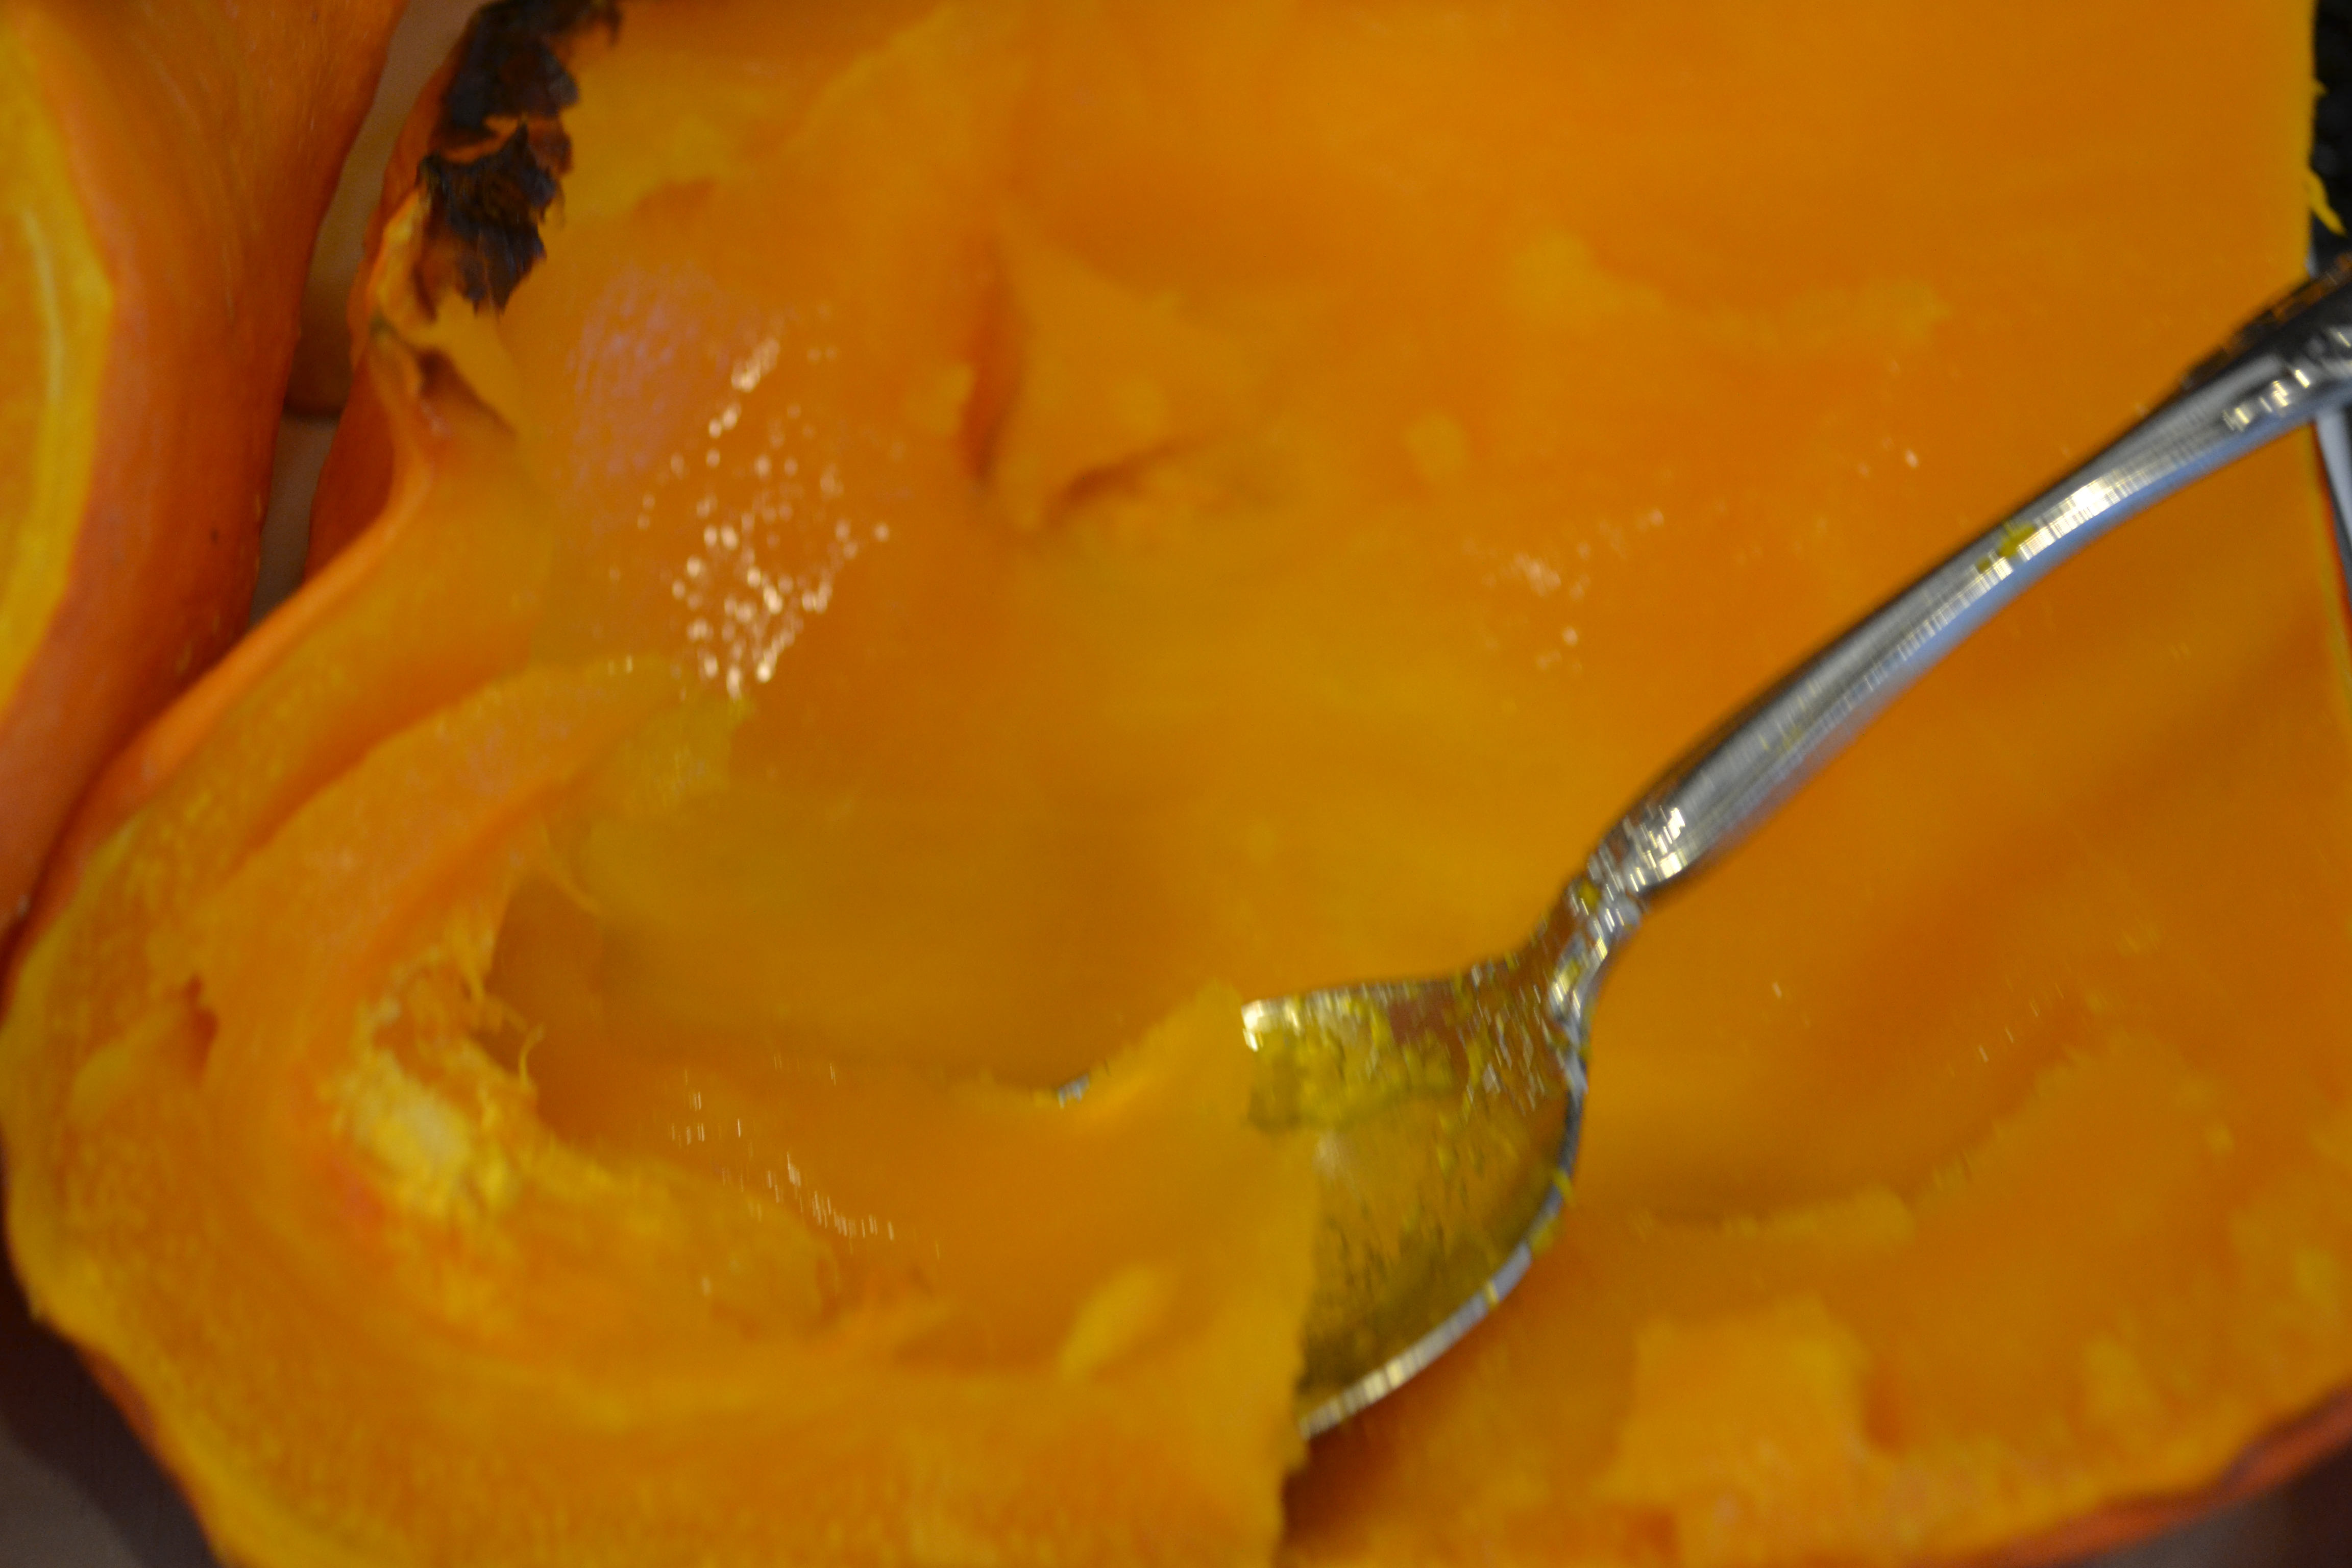
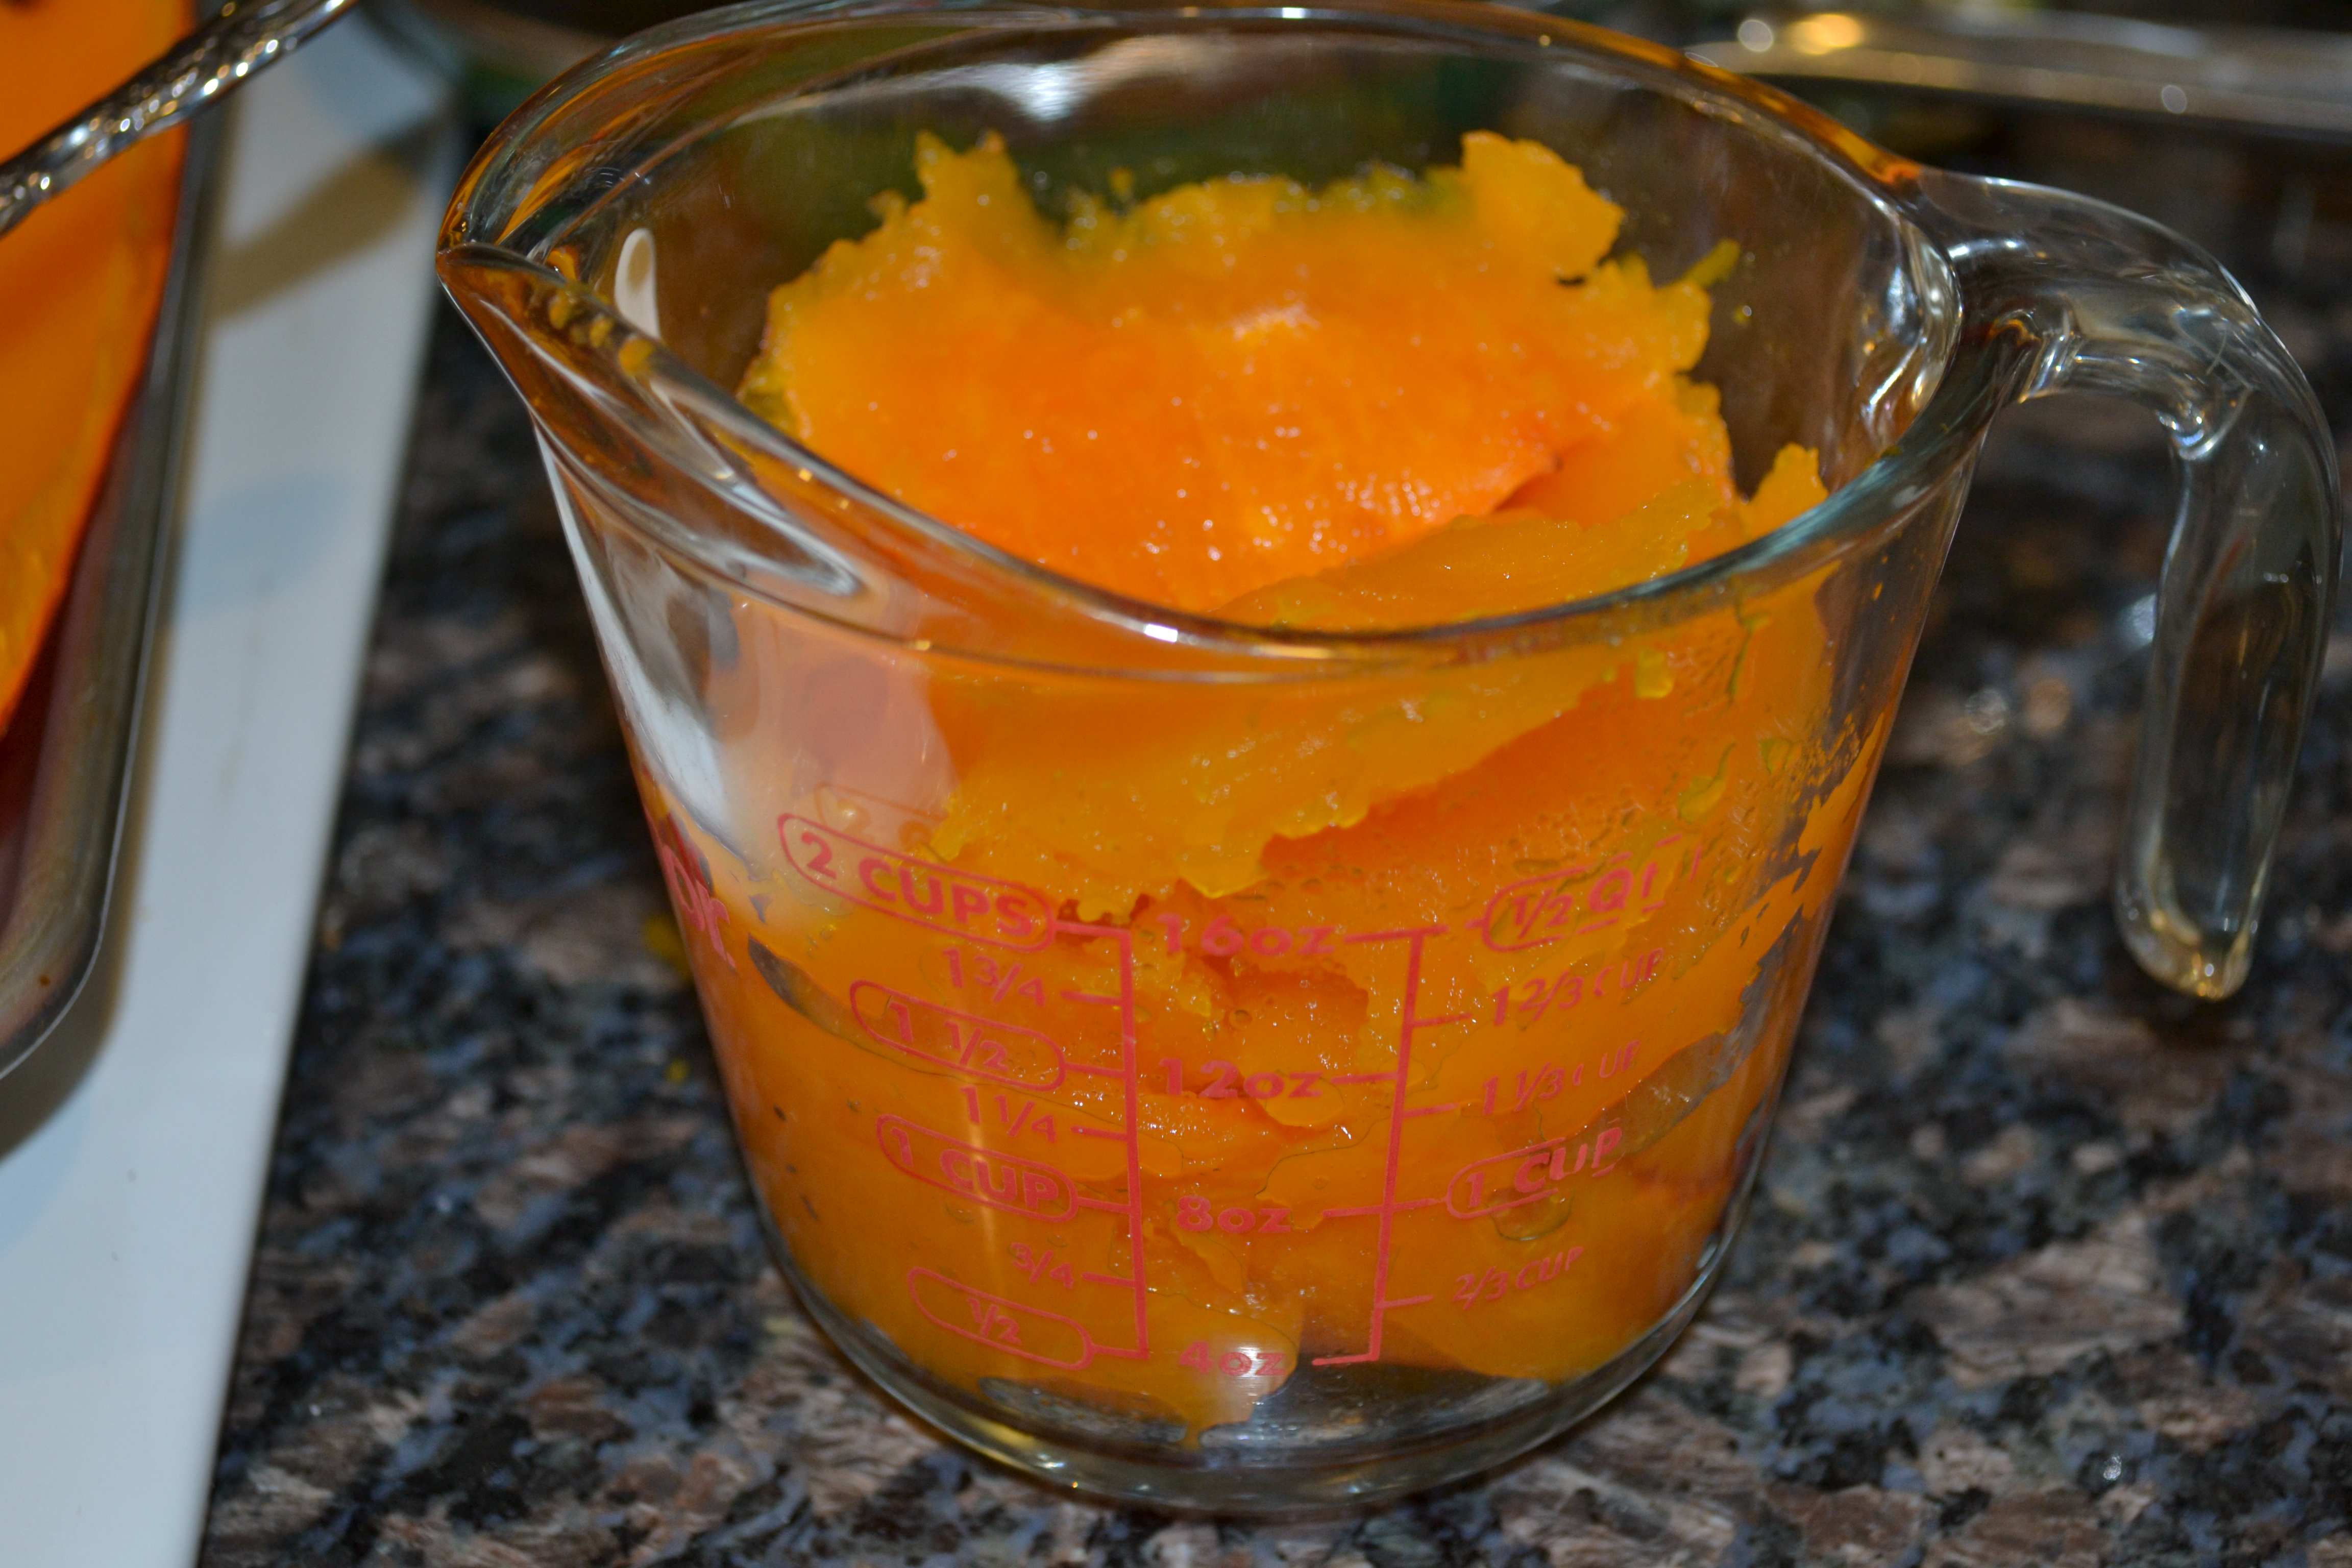
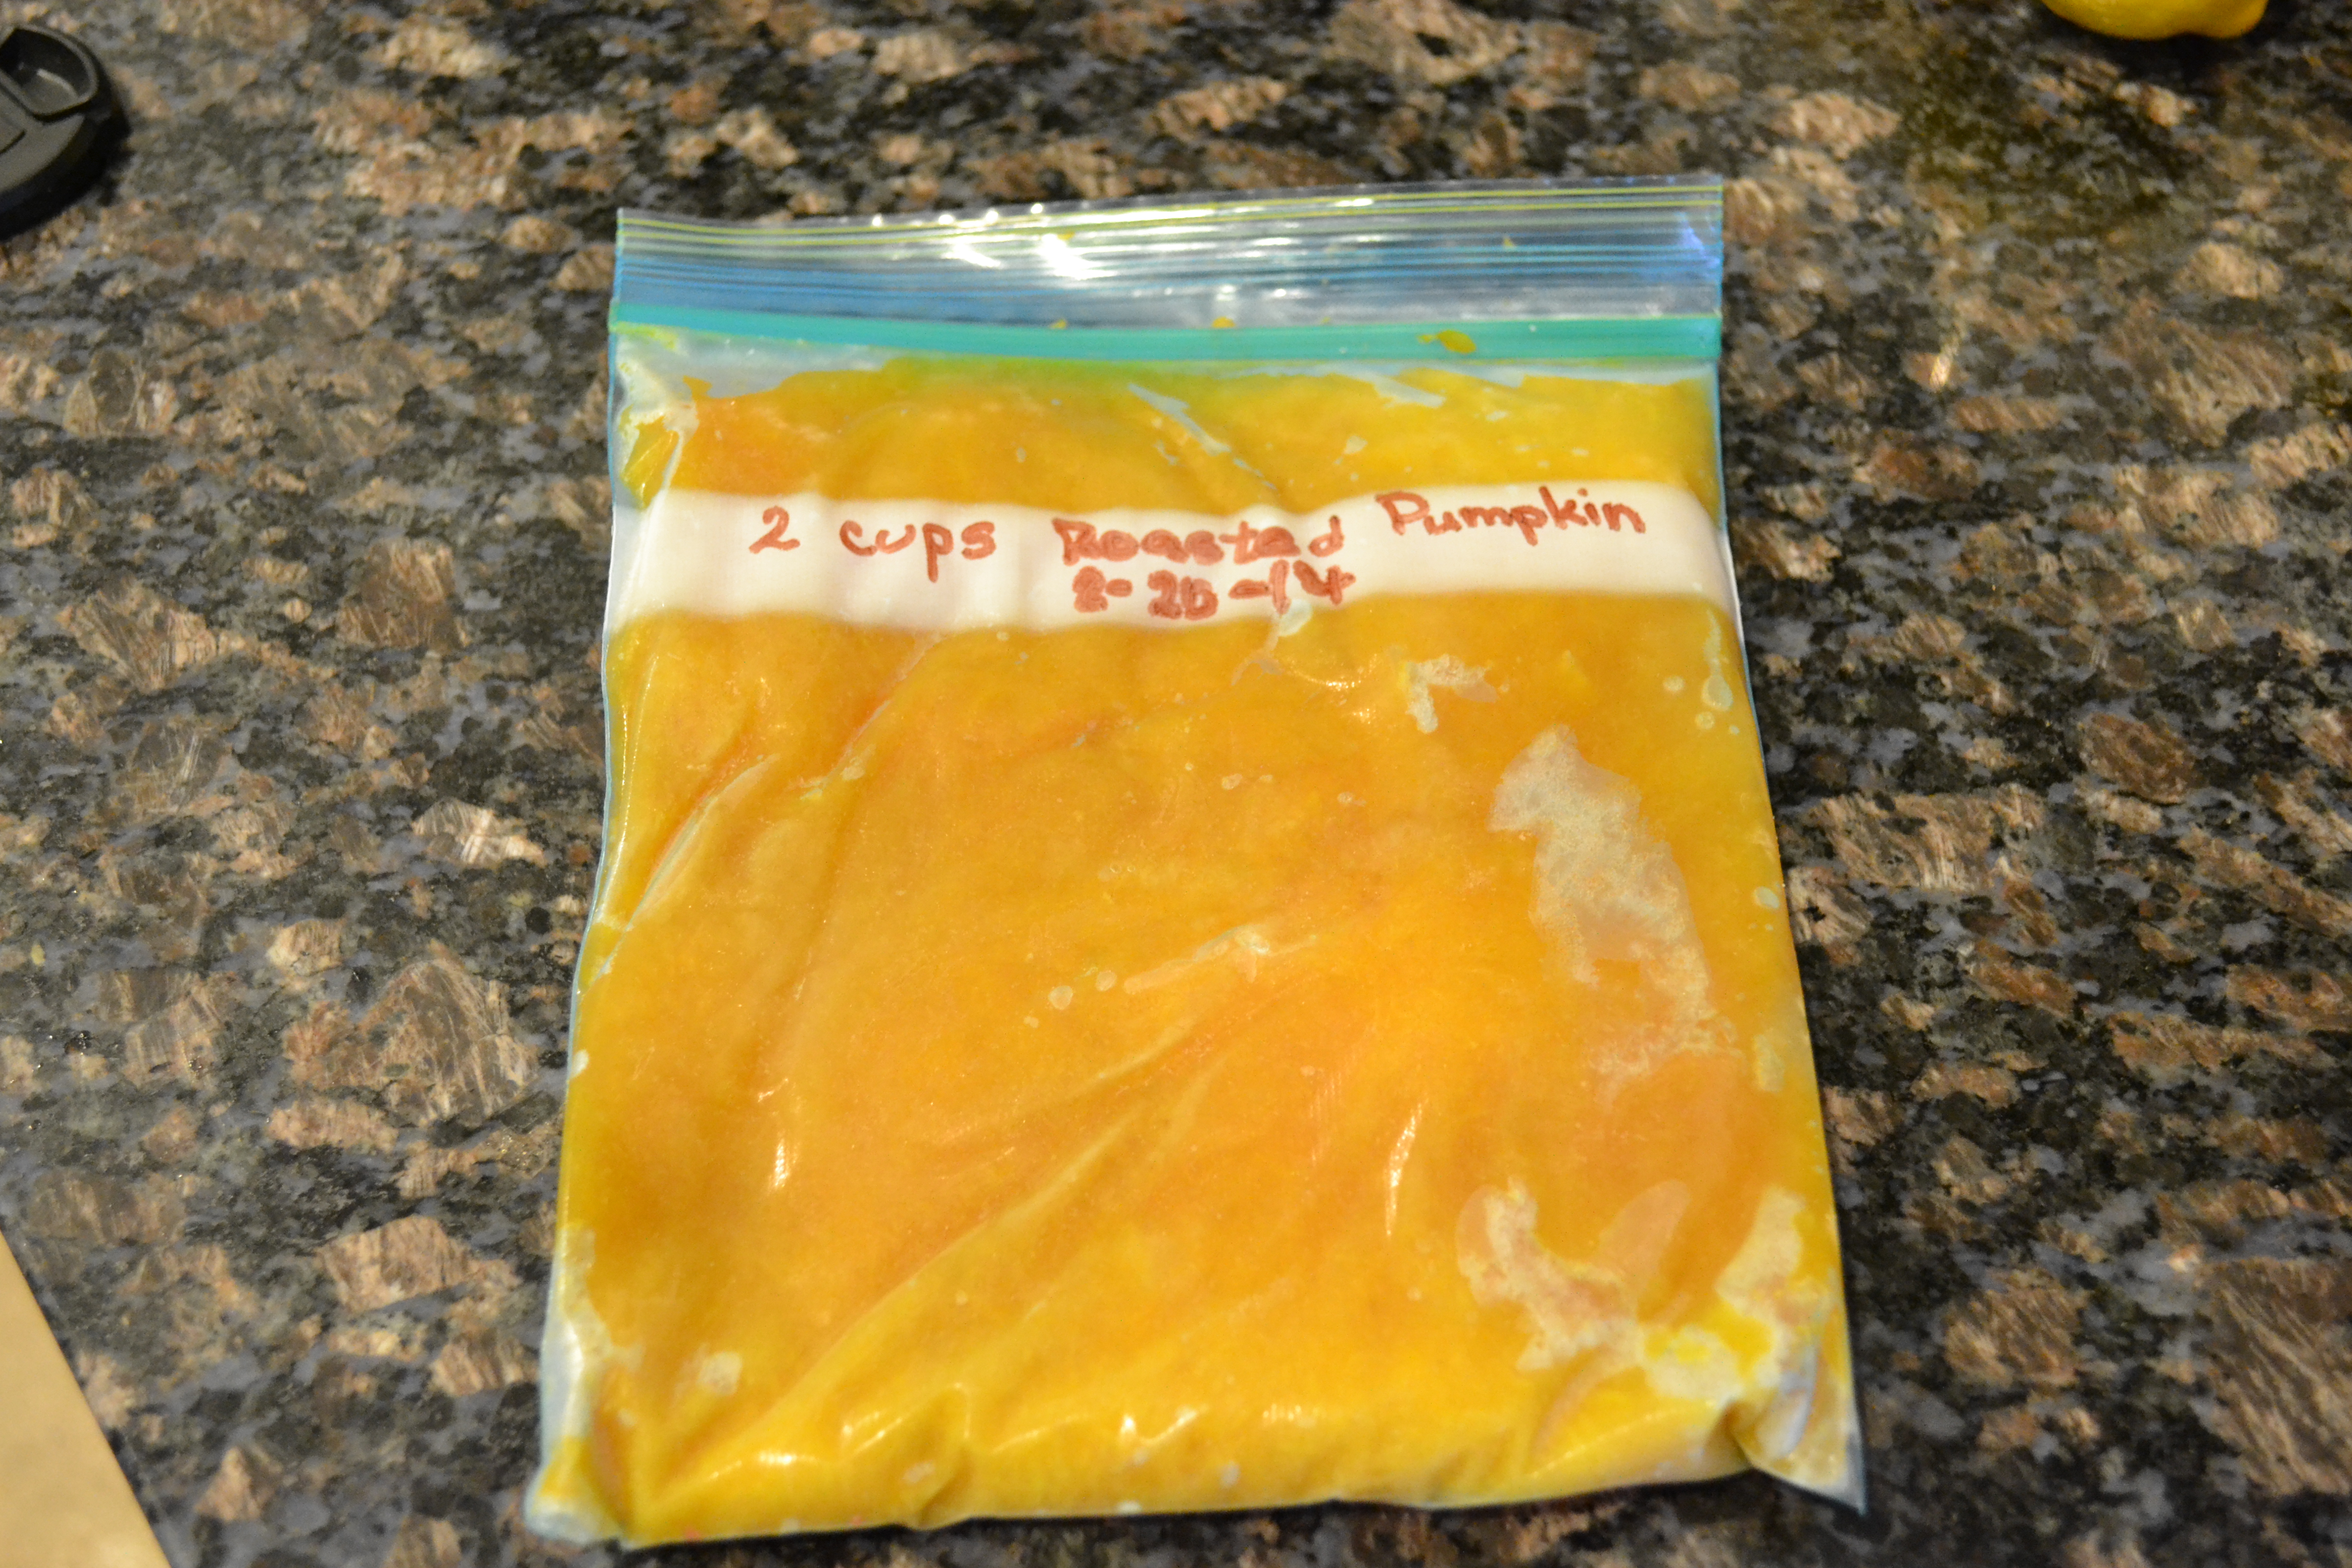
After roasting, these pumpkin bits have been flipped over to cool before scraping the flesh from the skin.Additional stringy bits can be removed easily once it has been roasted.The roasted flesh can easily be scooped out of the skin.I always transfer the roasted pumpkin into a 2-cup measure before transferring it to a zip-lock bag and labeling it.Labeling the package with the contents, amount, and date is helpful when pulling from the freezer for a recipe. Flattening out the contents before freezing allows for easy storage. Freeze flat on a cookie sheet then stack after contents are frozen. That prevents bags from sticking together during freezing.I set aside a little to make this wonderful batch of empanadas.
I have to admit, the title is a little misleading. It’s like determining the superiority of champagne with raspberries or strawberries. Gene Kelly or Fred Astaire (not in champagne, just dancing!). Both are outstanding in their own right. Don’t make me choose. While I have come to discover that the meat harvested from nilgai and venison are both superior in my book, there are a few subtle differences.
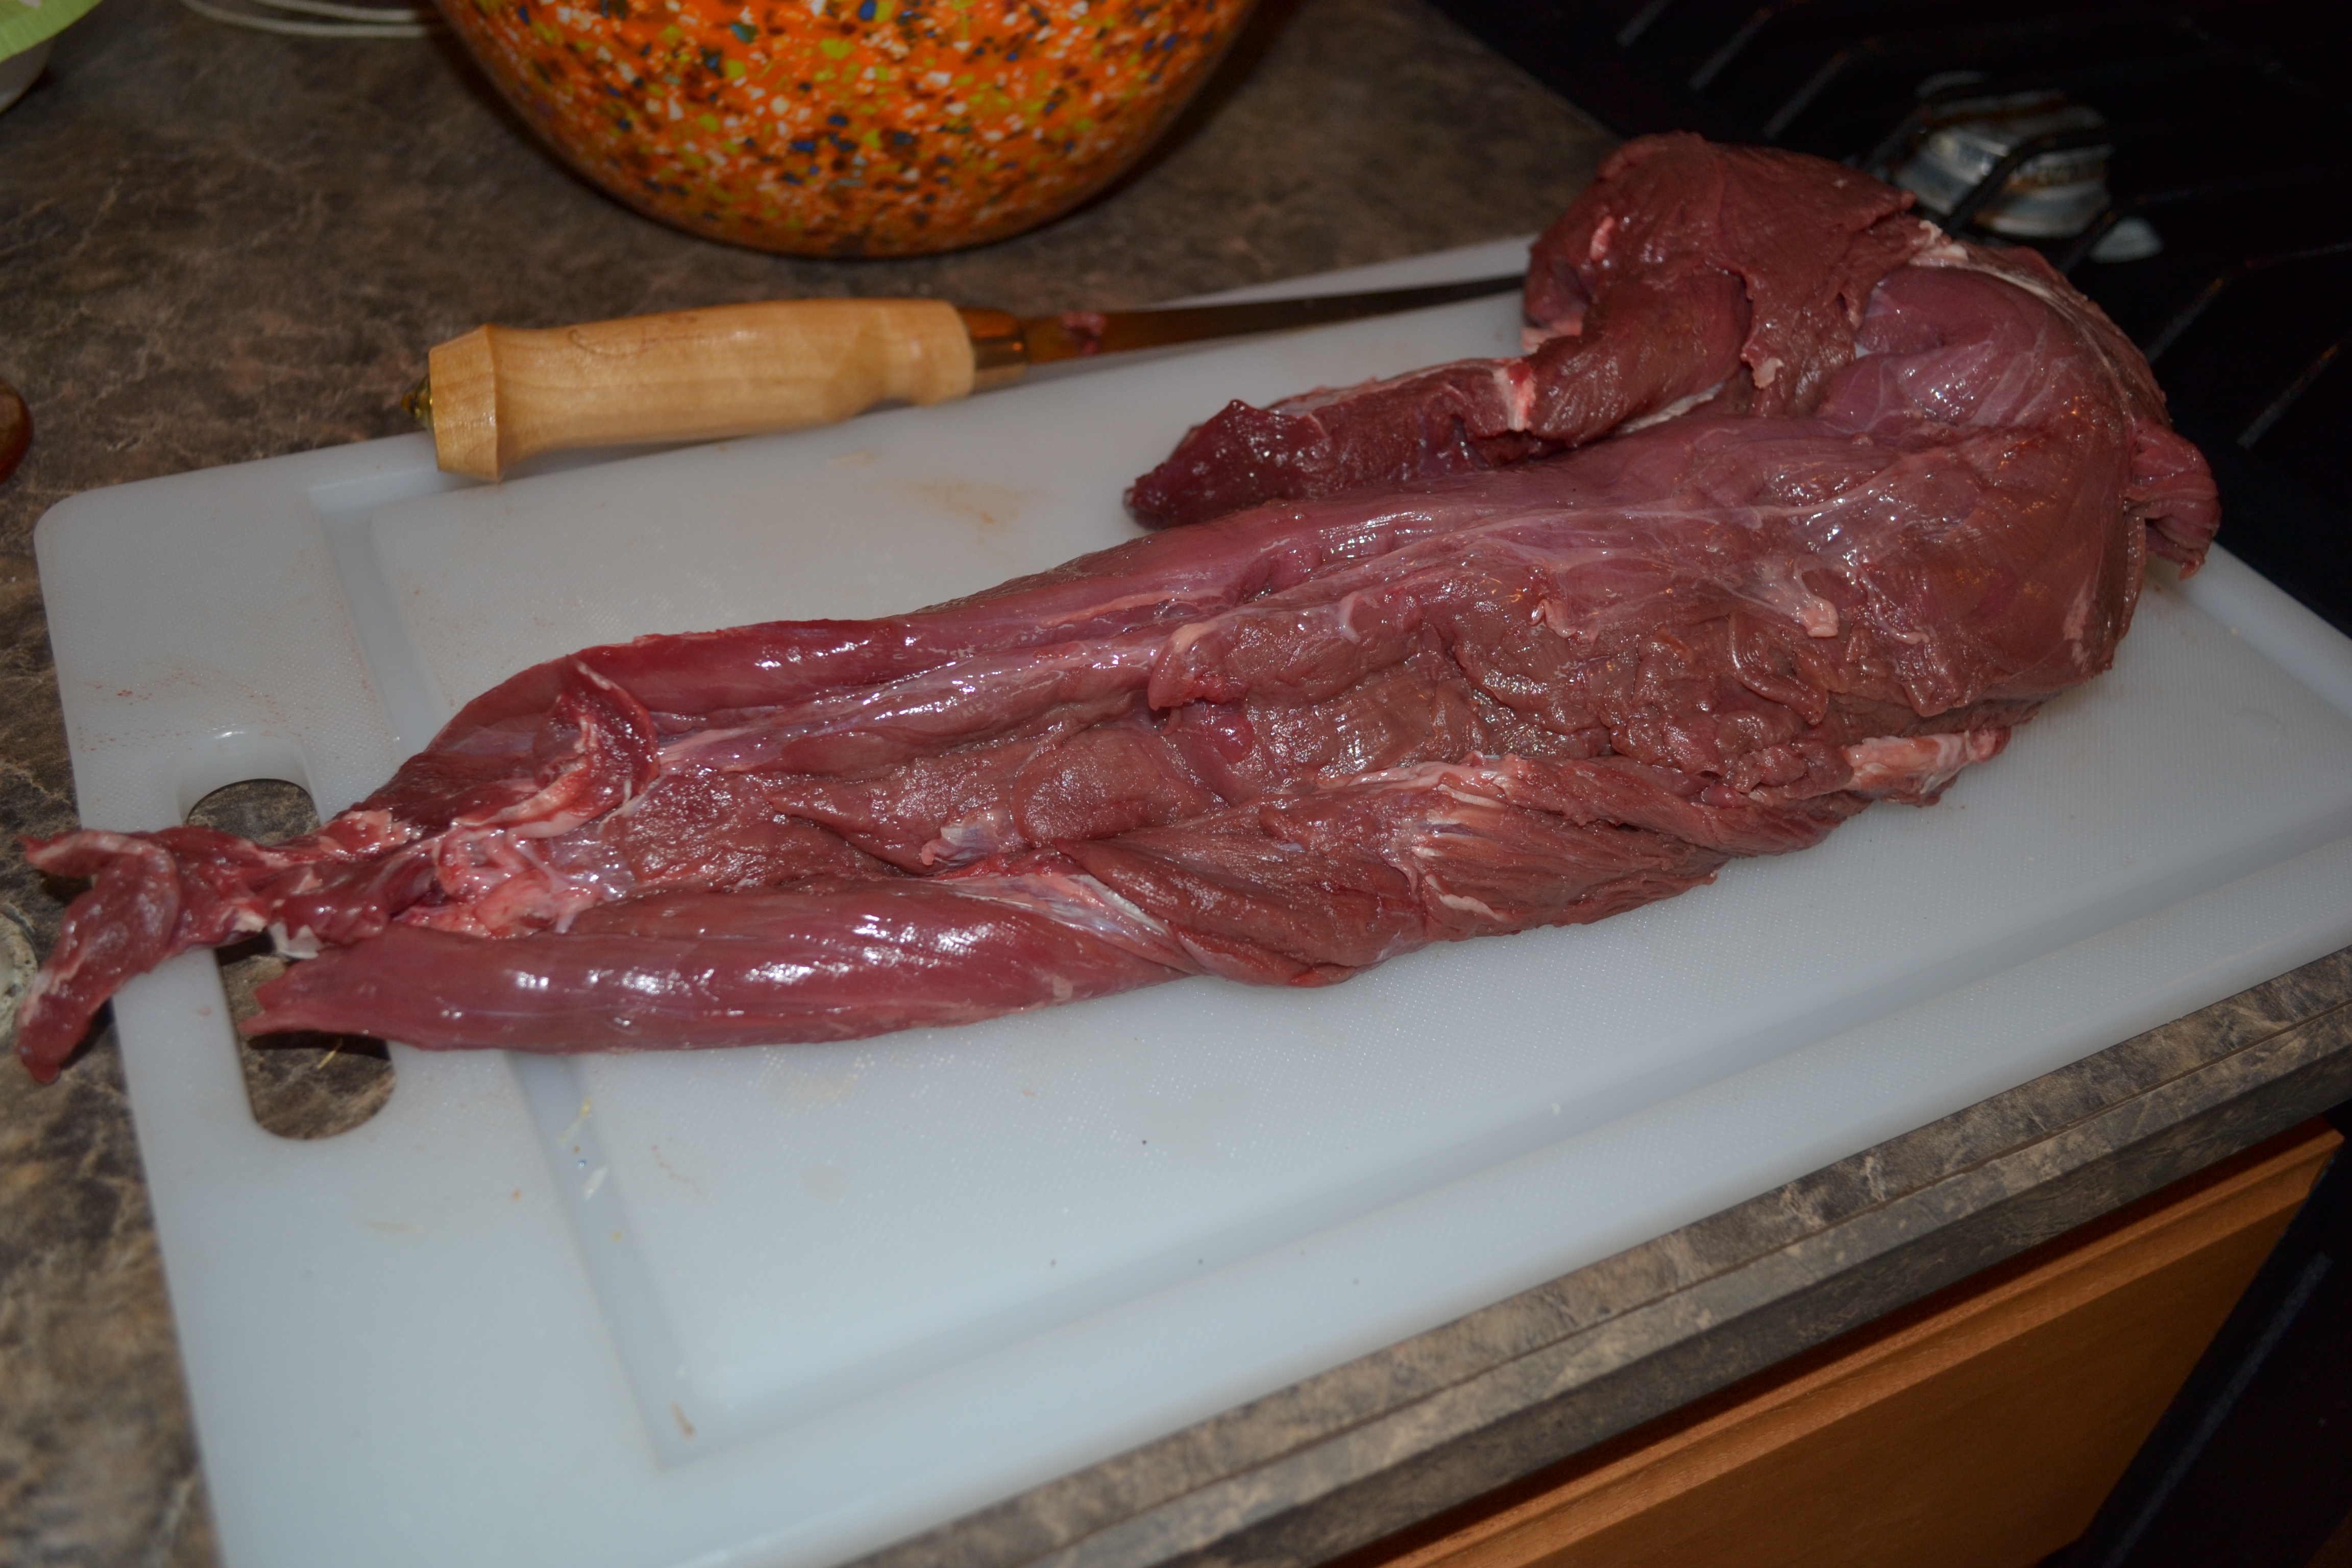
I’ve absolutely enjoyed experimenting with all my favorite venison recipes, applying them to our newly acquired exoitc meat. The first application that I tried was seared tenderloin. Deerslayer (a.k.a. Nilgaislayer) brought the most impressive tenderloin that I’ve ever seen back to our hunting camper. It was huge. Therein lies the first difference between the nilgai and venison; the size. Venison tenderloin is barely a delectable morsel for two. Clearly, the nilgai tenderloin feeds several. In order to serve it at its best (rare to medium rare) I sliced down the length of the muscle and then cut it into lengths that would fit into my skillet which enabled me to get a good sear on all sides.
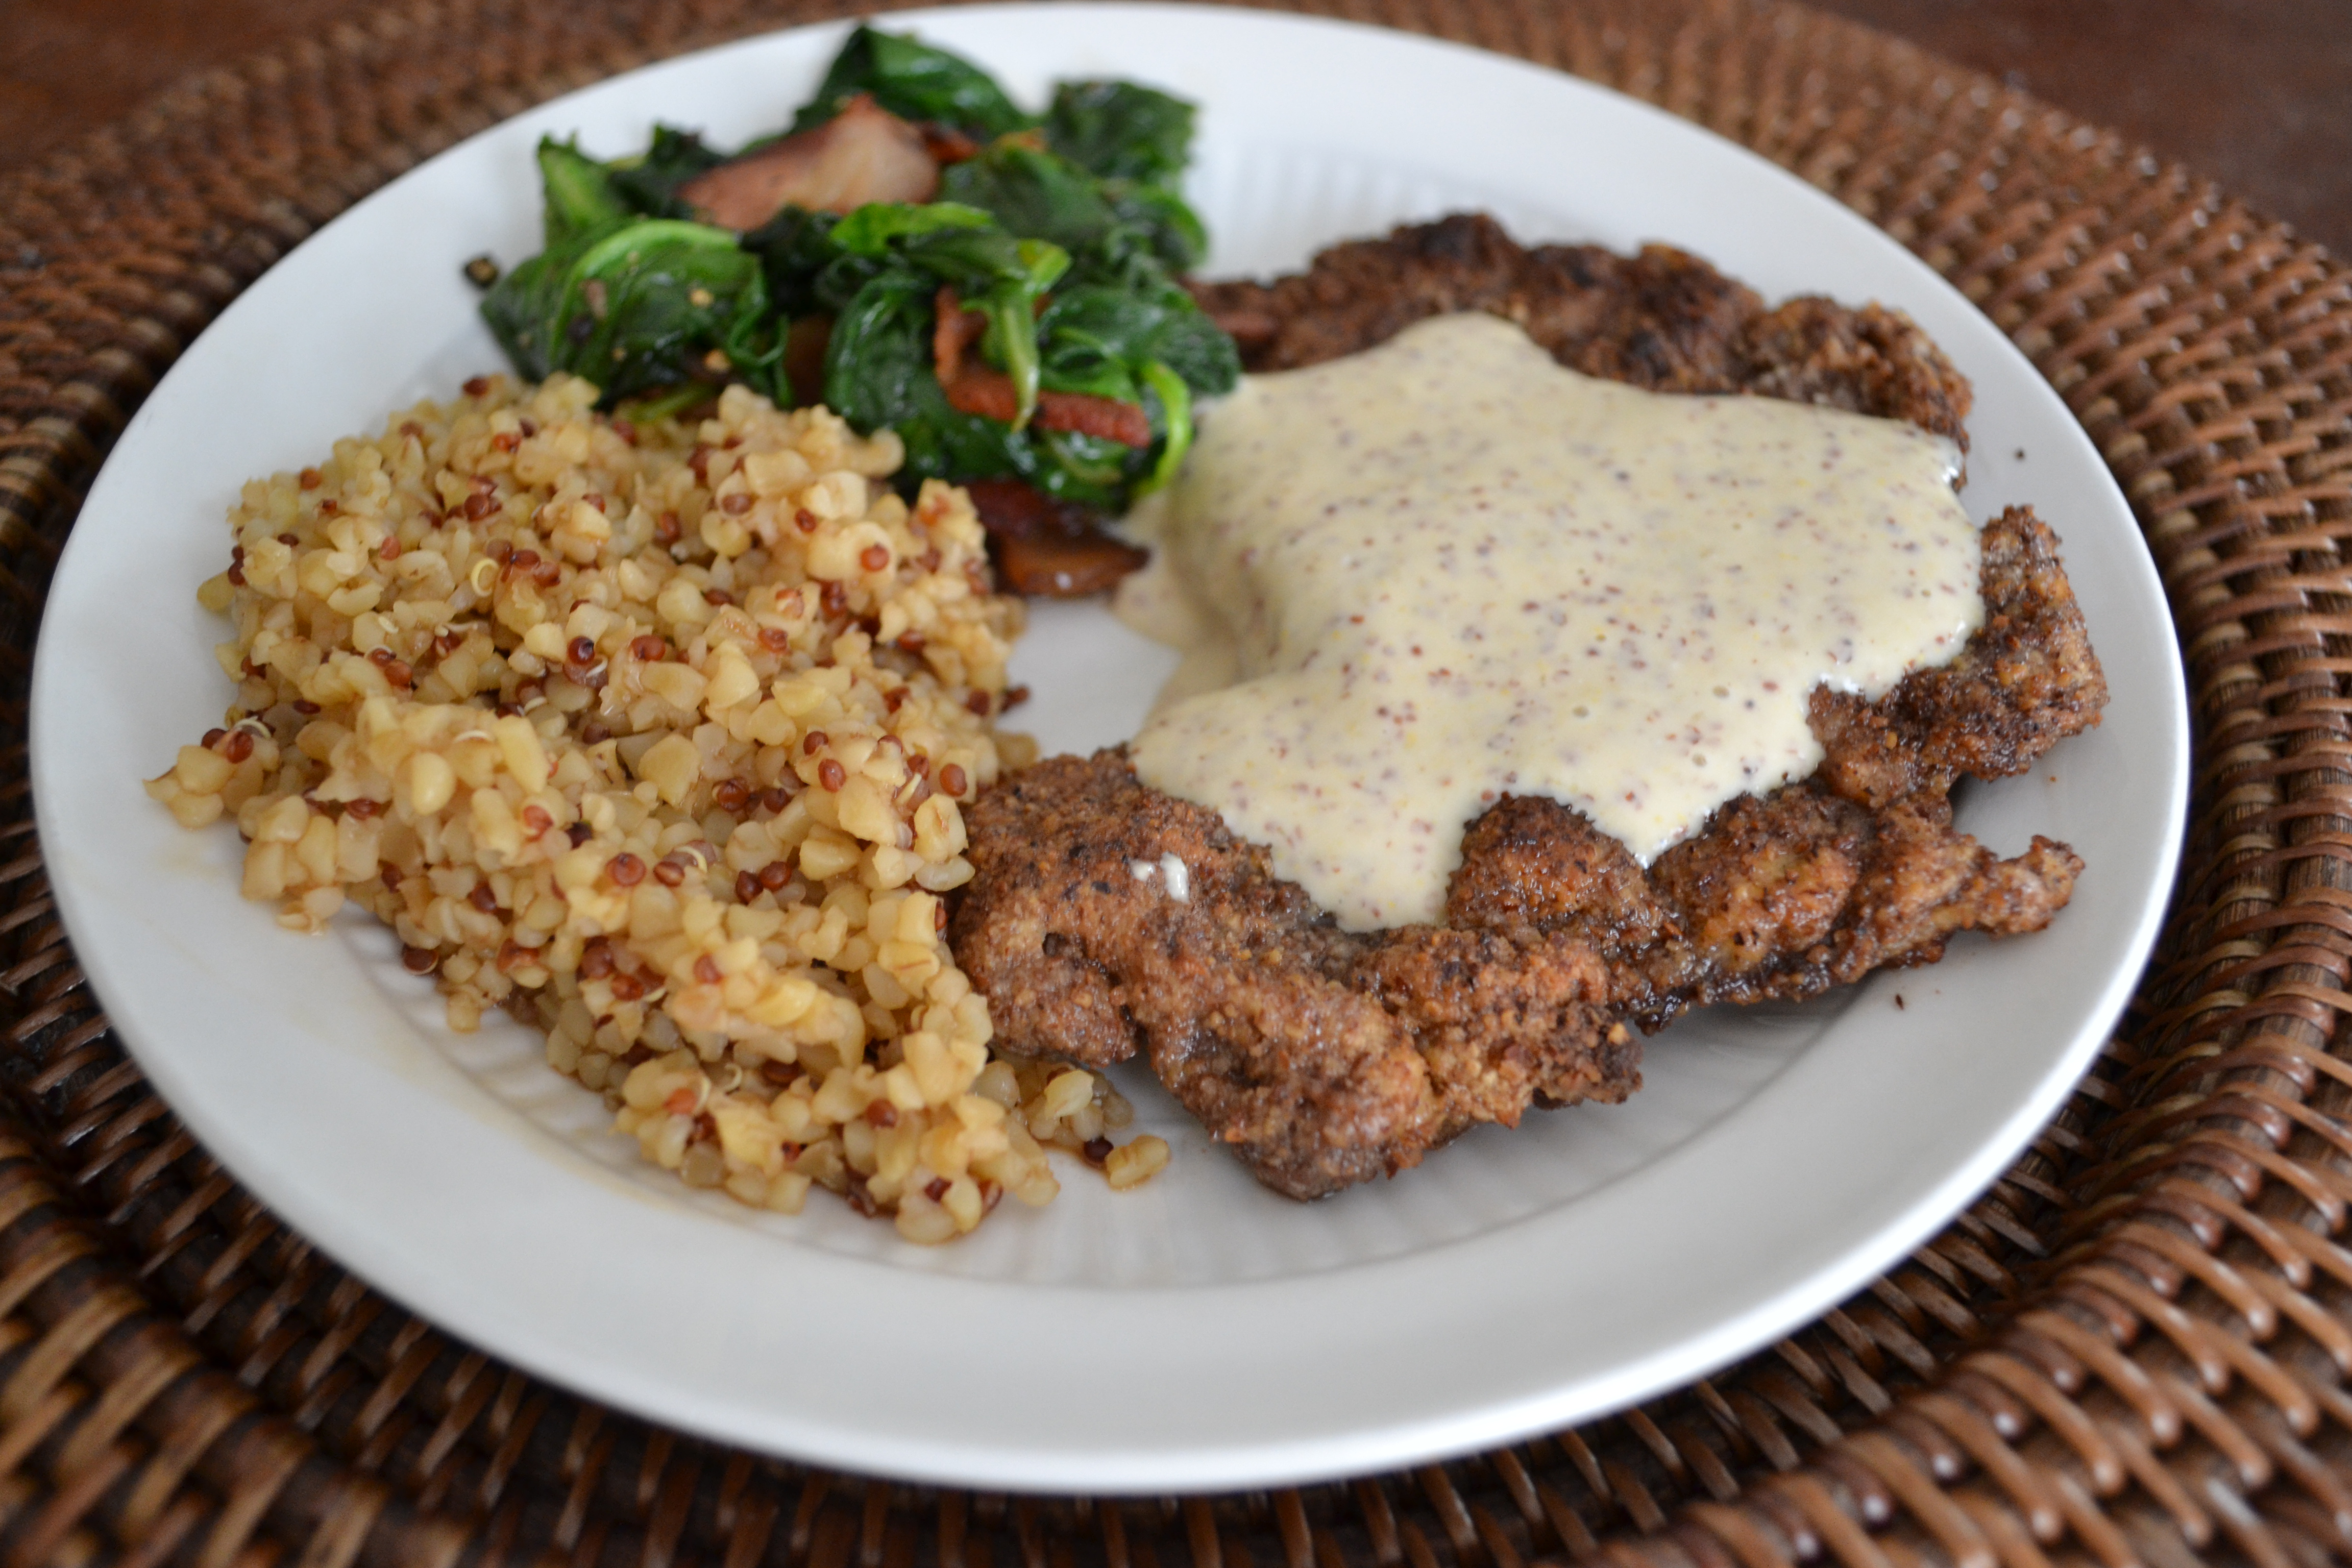
I’ve also used some of the hindquarter muscle to prepare chicken-fried steaks and pecan-crusted steaks. Both turned out beautifully, with no adjustments necessary to the recipe or cooking time. When the muscle is pounded out rather thin, the cooking time (frying time) will not be affected.
We ground our first batch of nilgai this past week. I say “first batch” because we only ground up about 50 pounds and still have quite a bit of “scraps to grind” left in the freezer. The amount of fat in the meat appears to be the same with venison and nilgai both (almost none)! My family prefers it that way. Others may wish to add in some pork or beef. We’re just purists, I guess. We enjoy allowing the flavor of the meat to shine through. In previous years, however, we’ve stretched our venison by adding wild pork that we had in abundance. The meat was good, while fattier, but the complexity of flavor was nice. I’d do it again if necessary. Given the choice, though, I’d save the pork to grind by itself for pan sausage.
I’ll be posting photos and our procedure for grinding meat later.
As I continue to use the nilgai meat, the differences I’ve noticed are few, but noteworthy. I noticed right away that the smell of the uncooked meat differs slightly from that of venison. Don’t be put off by it. The connective tissue, silver skin, or fascia adheres to the muscle much more than with venison. The removal of these layers and bits is definitely more time-consuming. Lastly, when cooking whole-muscle recipes, like backstrap, tenderloin, or a roast, it’s important to realize that the muscle is denser than venison, which will, in fact, affect cooking time. More time will be needed in the oven at a lower temperature (say 300°). How much time will depend on the size of the meat.
Over the next few weeks, I’ll continue to use the nilgai and document my progress. I’d appreciate any input from my hunting friends who may have experiences to share.
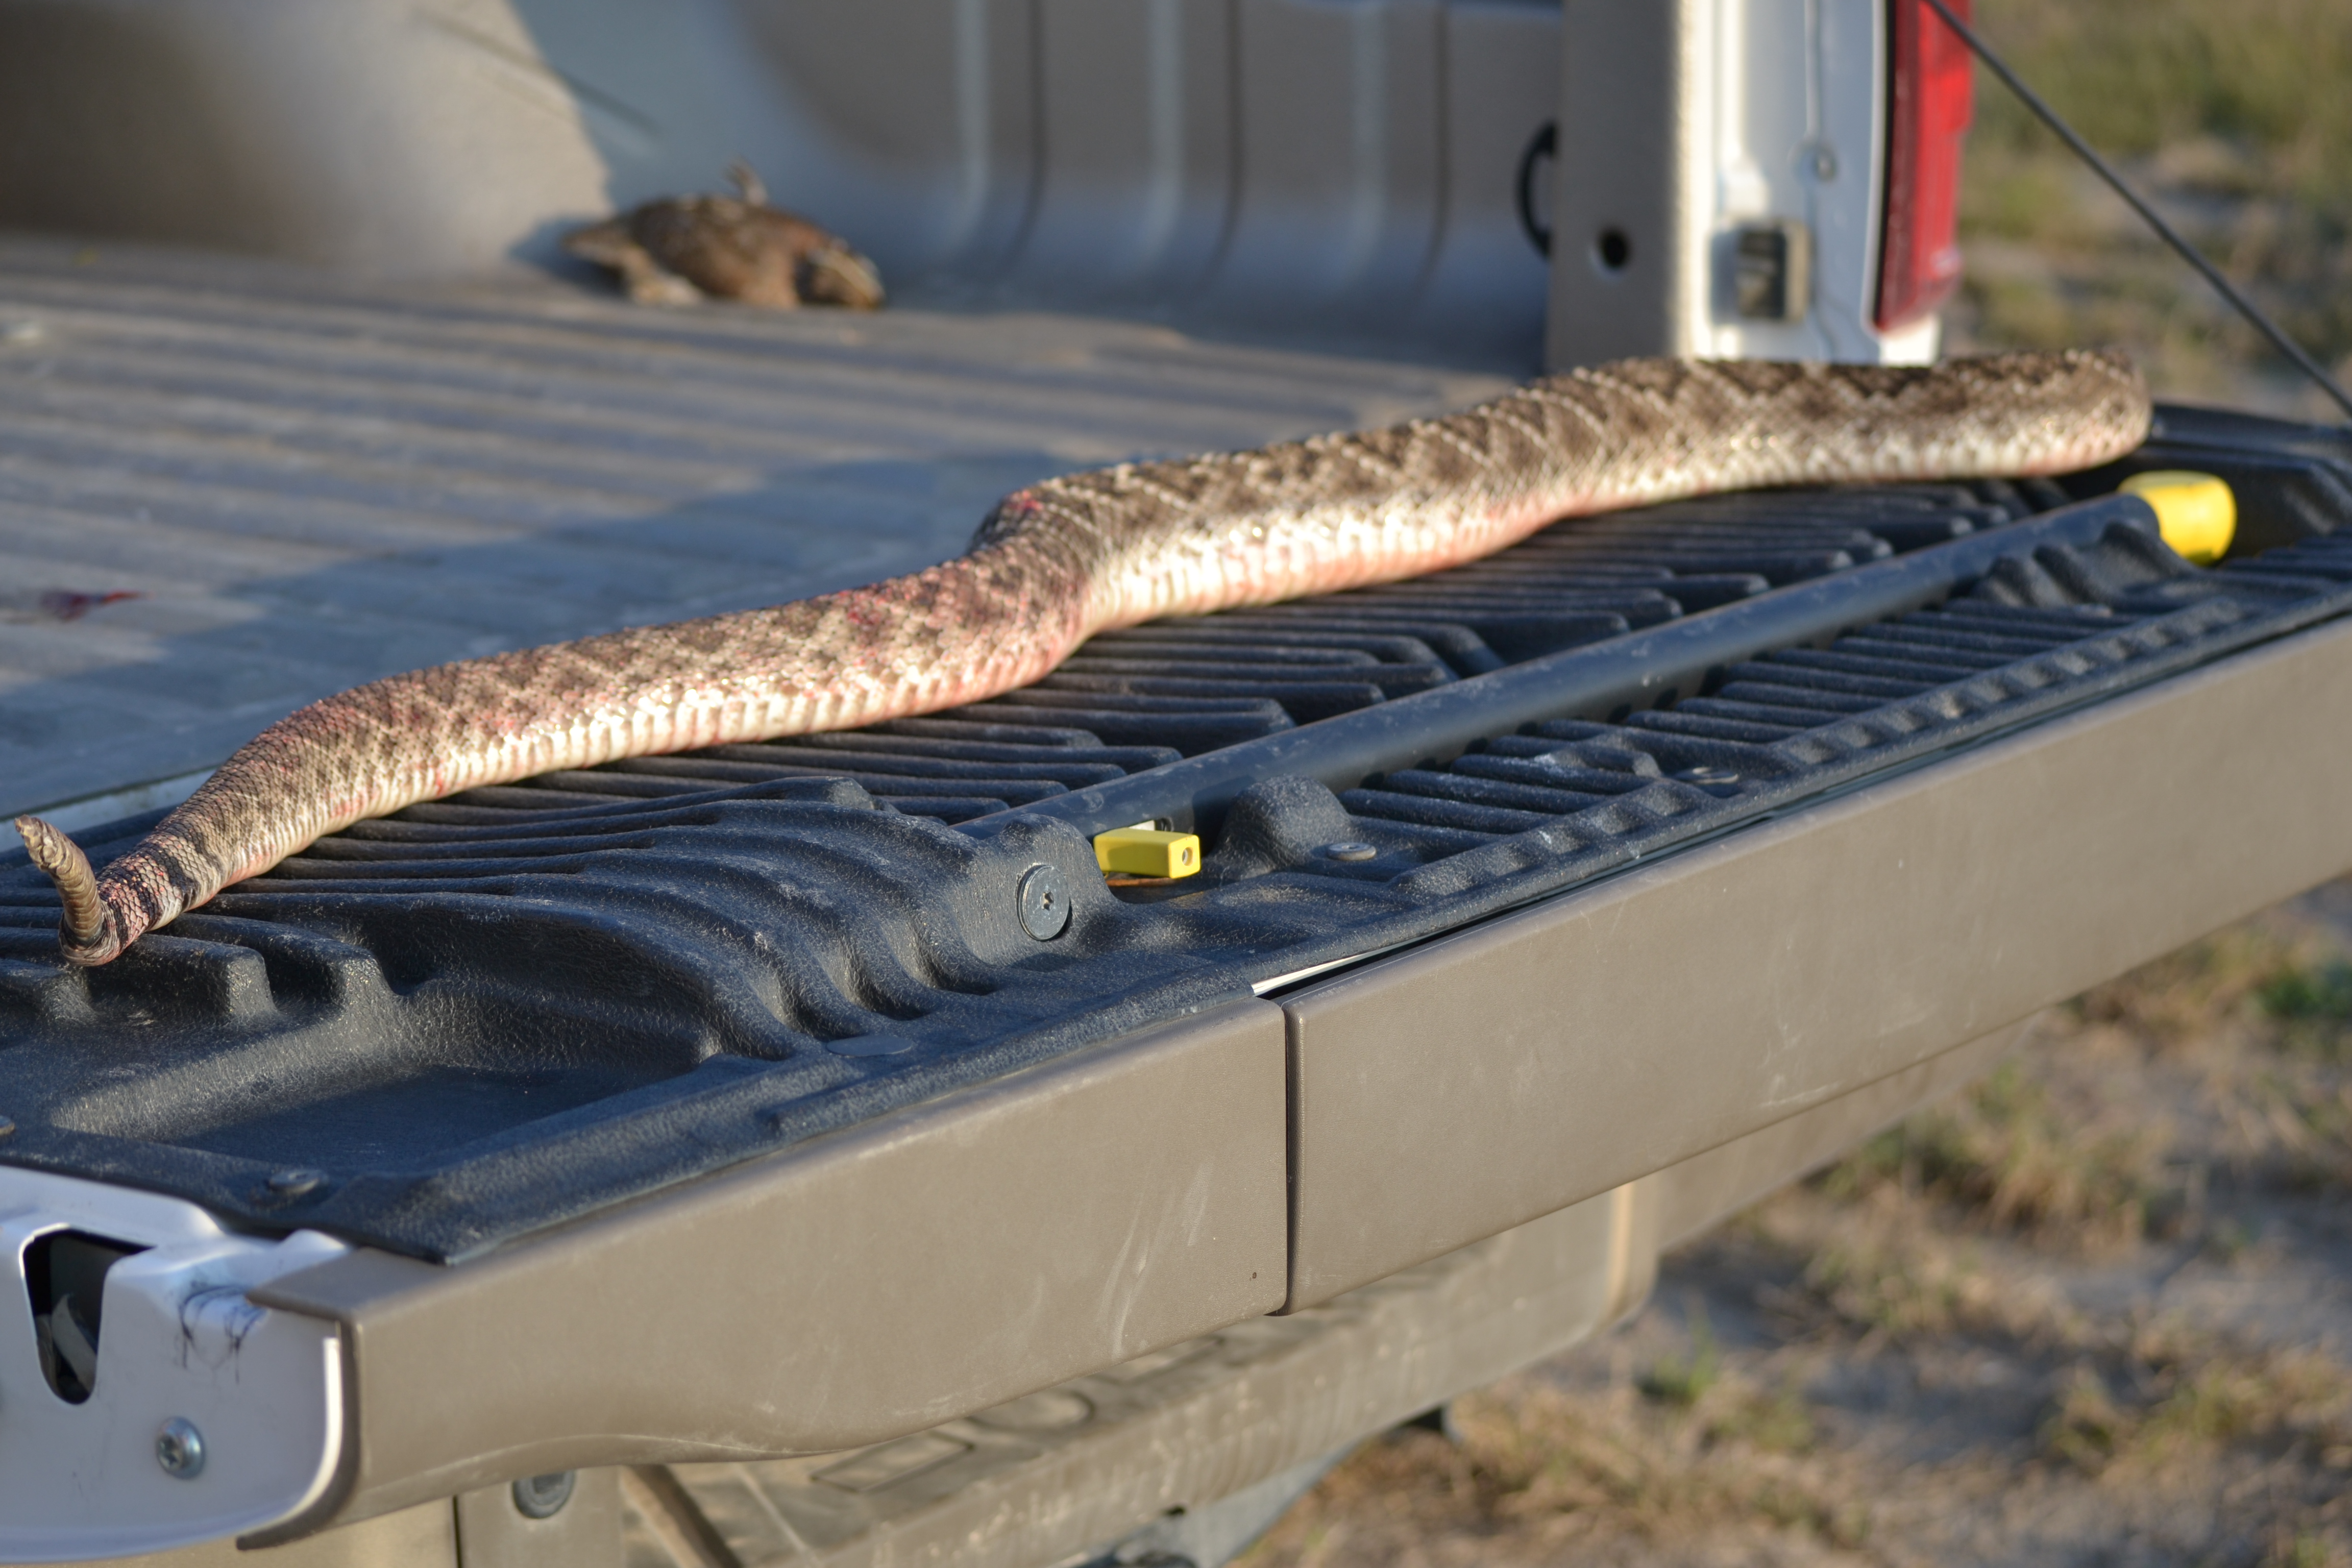
In the two years that we’ve been hunting at the ranch in South Texas, Deerslayer has killed 4 sizable rattlesnakes, the one pictured being the smallest. Living with snakes is just part of life down here. It was after finding the first and largest rattler that the fine line between fashion and function became blurred to include Cabela’s jaunty and ever-so-chic snake boots. I’ve come to appreciate the rich earth tones, the fashion-forward suede and zippered accents, the fact that I can walk through the grass and not be killed by a snake bite..
The largest rattlesnake that we’ve seen on the ranch was as long as Deerslayer is tall, about 6’5″. The shortest was about my height, 5’4″. Spotting a venomous snake really brings to mind thoughts of instinct, self-preservation, and survival of the fittest. The heart starts to pound. Breathing becomes fast and shallow. I found myself sputtering things like, “Run over it with the truck! Run over it again! It’s still moving. Shoot it. Squash it with a rock. No, use a stick. Don’t get close. It’s still moving! Run over it again. Shoot it again! It’s still moving!”
I suspect that in earlier times, I wouldn’t have been considered one of the “fittest”.
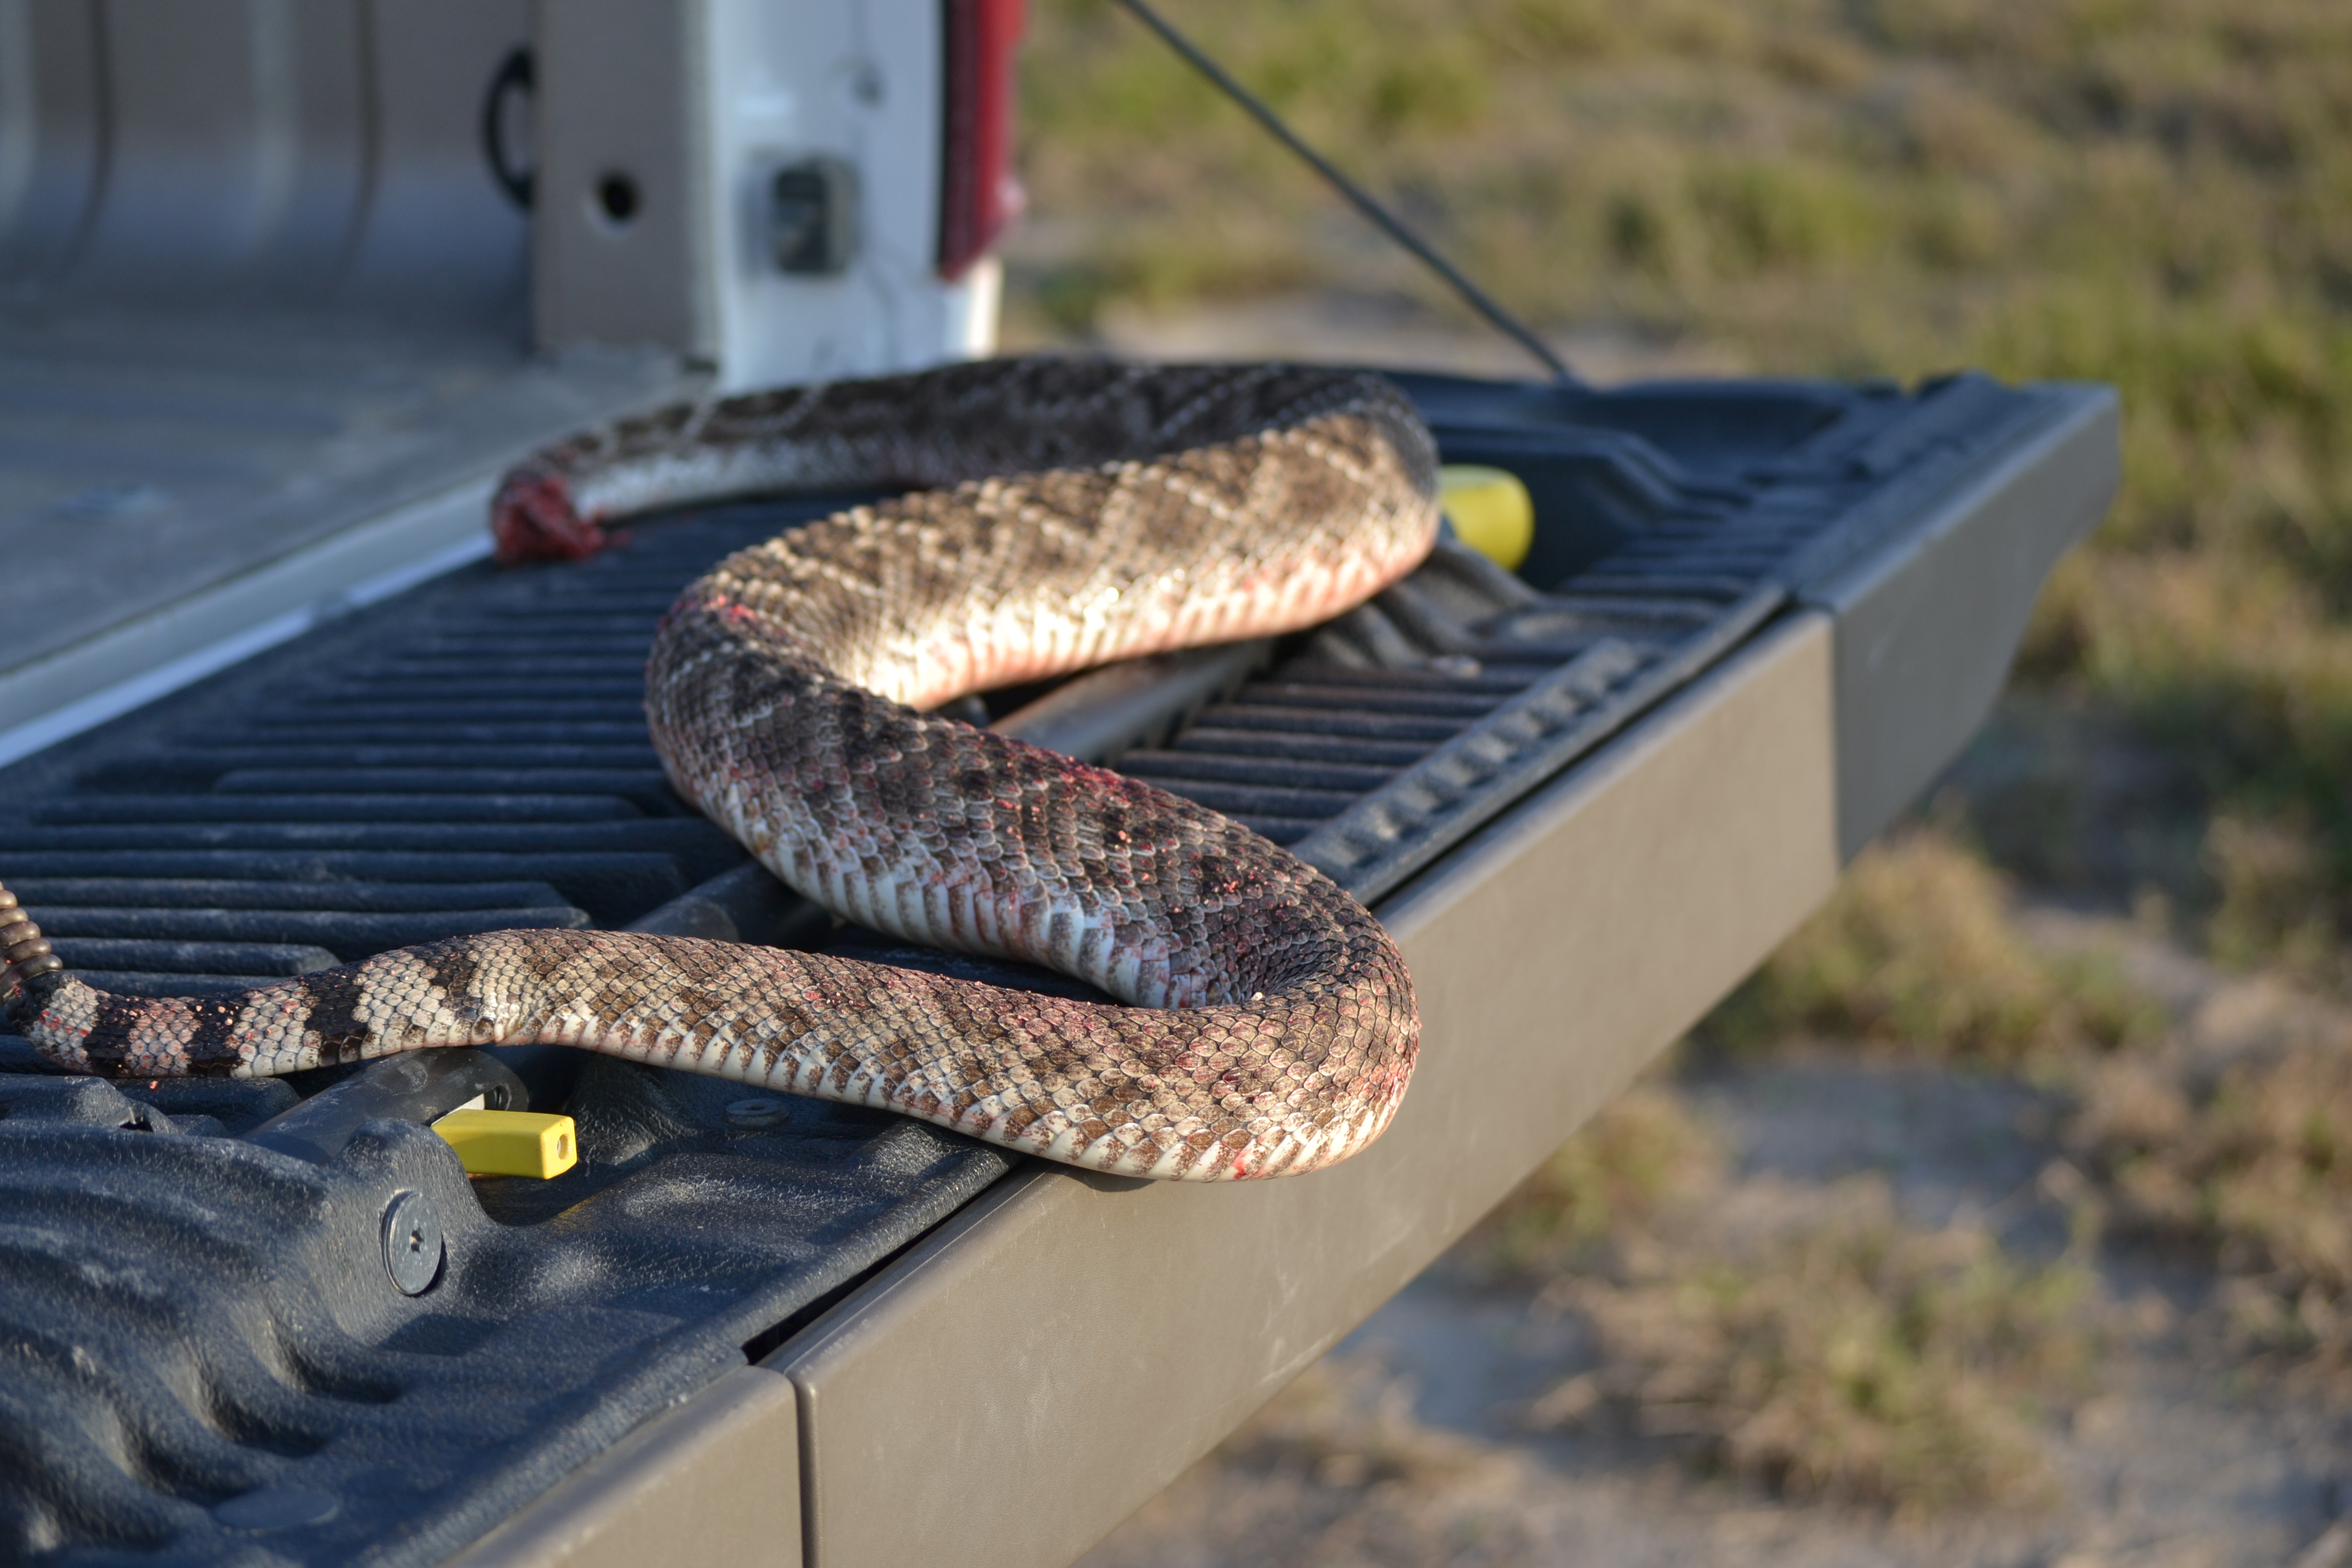
Back to our most recent encounter, before Snakeslayer placed the slithering monster in the back of the truck, the head was removed. While I’m sure everyone knows this already, it bears repeating: A dead snake is just as dangerous as a live one as long as the fangs are intact. People have suffered serious injury and, I’m sure, even death as a result of snake bites from snakes that were already dead. Don’t mess with the head of a venomous snake even after it’s dead. The mouth can still open of its own accord. Nasty business, just don’t! That said, let me continue.
The rattler continued to writhe and thrash about, headless, for at least an hour and a half. With the tailgate down, it slithered off the back of the truck. When Snakeslayer decided to save the skin, there was quite an episode. The decapitated snake thrashed, and wrapped itself around my beloved’s arms as it was being “dispatched”. My job in the proceedings was to gesticulate wildly and suggest poking it with a stick or perhaps run over it with the truck, or shoot it again.
It made for interesting stories to share at the hunting camp that night. I was asked by several of the other hunters whether I was going to cook up the snake. I guess I better start looking for recipes. Everyone had their own stories to tell. Eyes got big, smart phones were brought out and pictures passed around. Arms stretched in all directions to indicate size and length. When referring to snakes, I guess size really does matter. There’s just something about big snakes that reminds us of our place in the grand scheme of things. Thank God for snake boots!
Wild game jerky is awesome! The Deerslayer clan loves it. There are several types; whole muscle jerky, some that is made from extruded ground meat (pressed out, ribbon-like, through an implement that looks like a caulk gun) and some that is pressed into casings like Slim Jims.
I’ve only made one type, whole muscle jerky. Since it’s what my family prefers, and doesn’t require too much extra equipment, it seemed like the logical choice. I’d recommend starting with a prepared curing mix to start with. It will allow you to learn the ropes and adjust the mixture later on according to your preferences. The mixes are readily available at hunting/camping/outdoors shops and online. I’ve used Hi Mountain brand and, after a few adjustments, have been quite pleased. I was able to use the oven rather than a dehydrator. The jerky ends up softer than other brands I’ve tried, which I liked. It was also very flavorful. I used the original blend and thought that it tasted like what jerky is supposed to taste like. There are 21 jerky flavoring blends available, including teriyaki, hickory, bourbon, Cajun, and others. So there is a flavor to suit every taste.
Very thorough instructions are included in the package as well as a package of cure, seasoning, and a shaker.
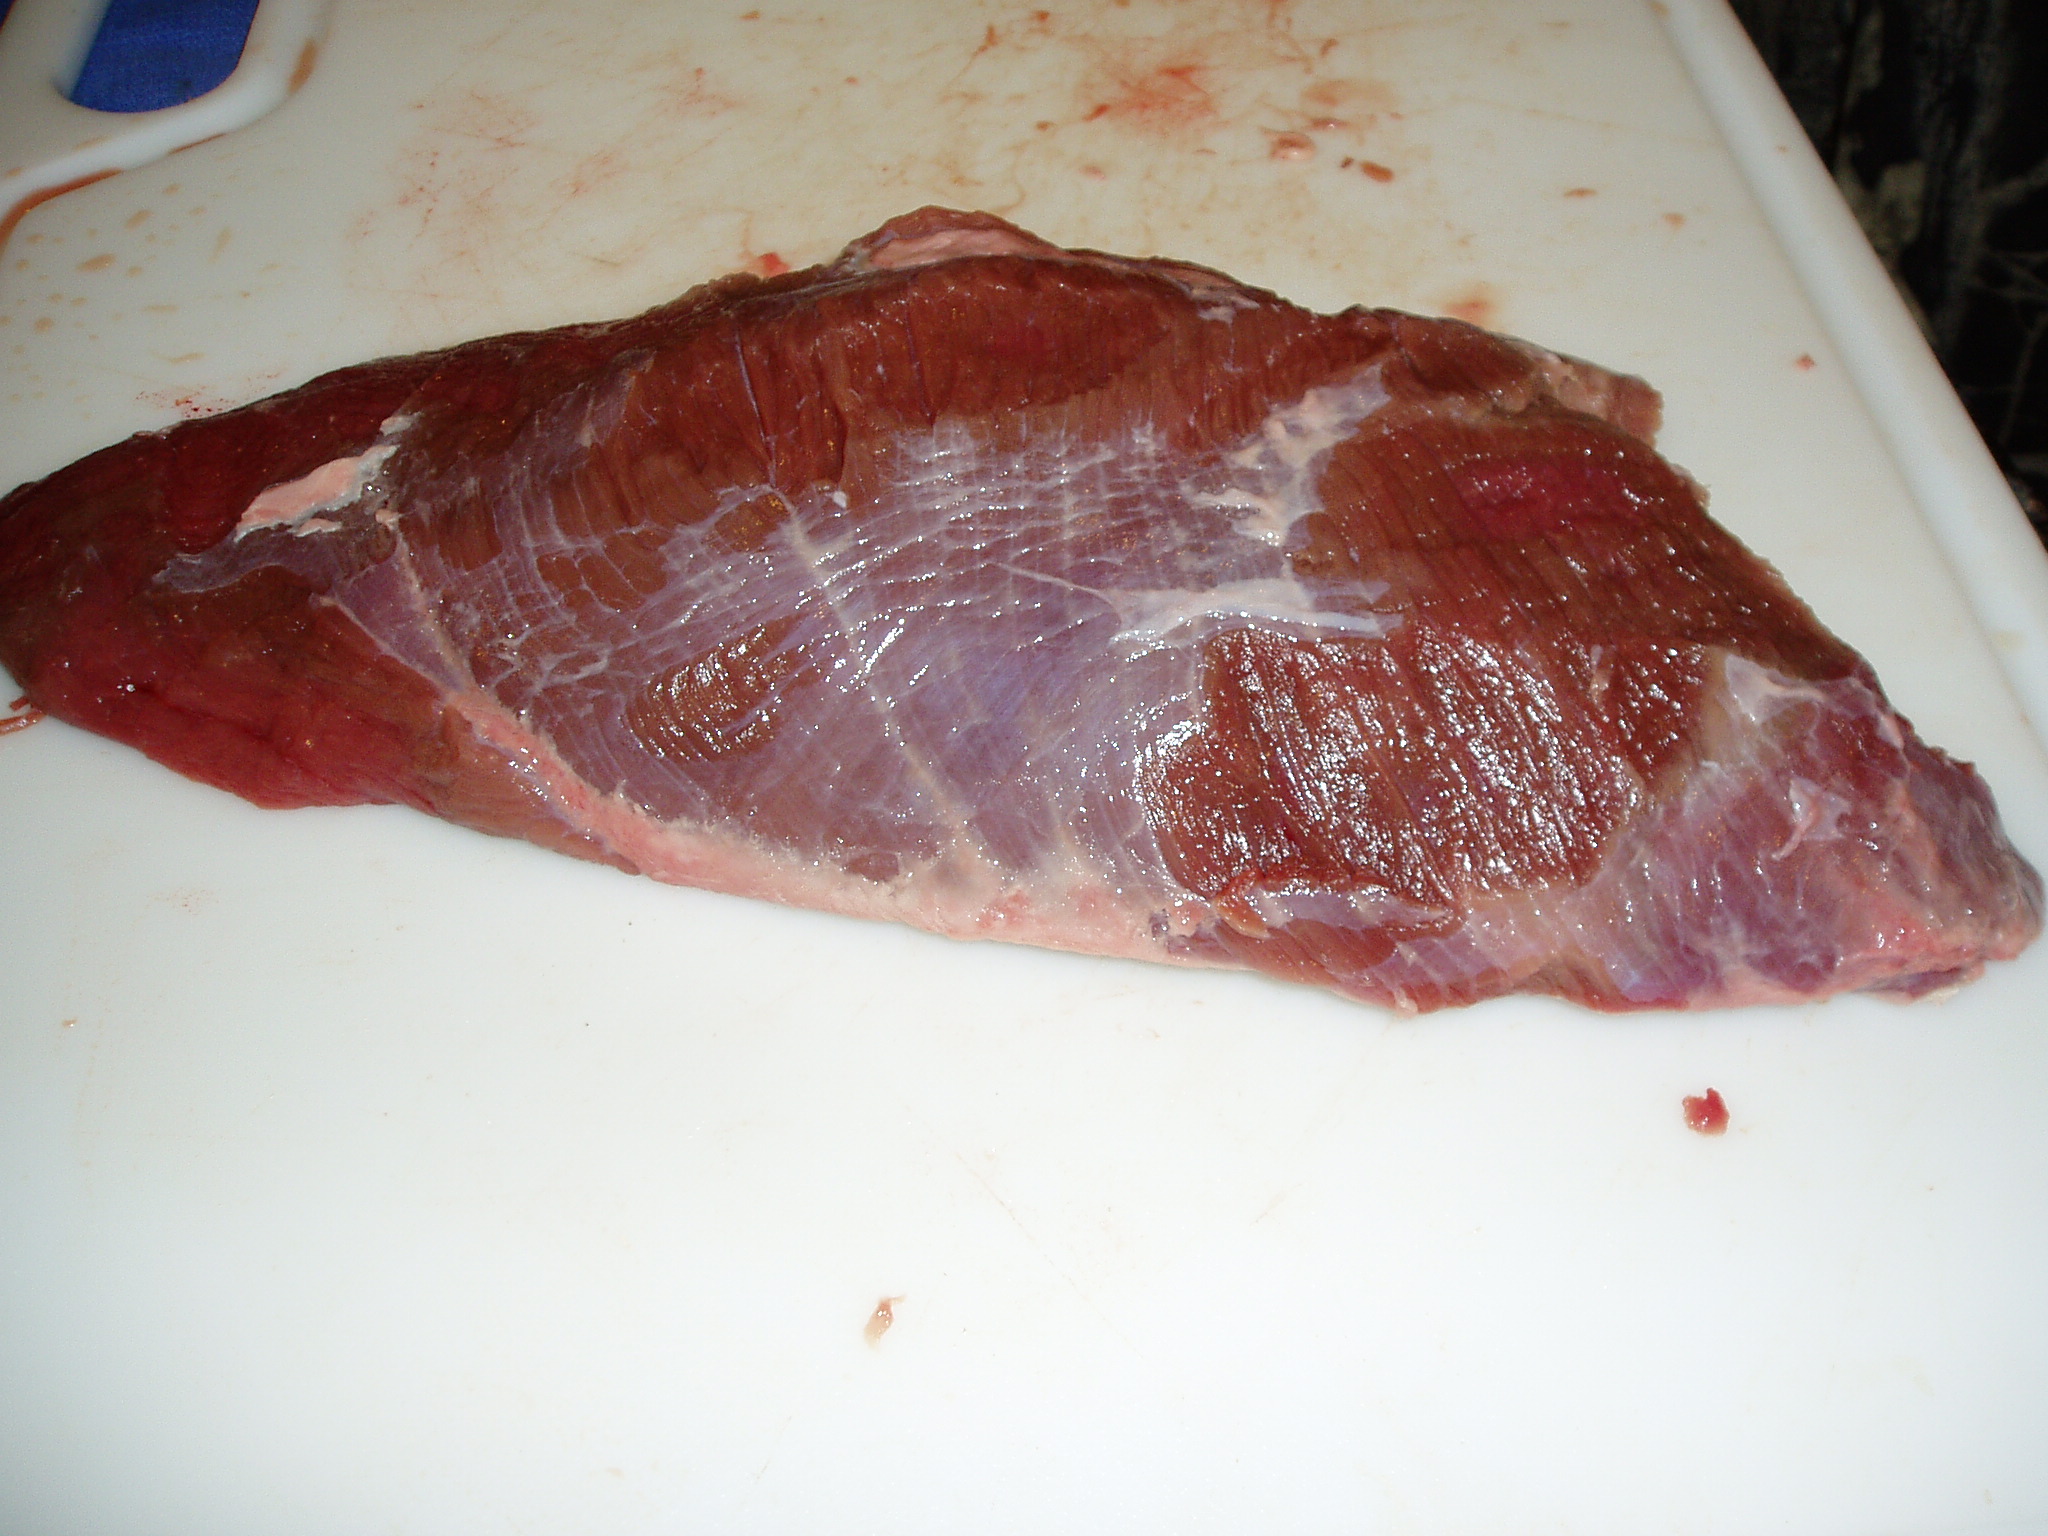
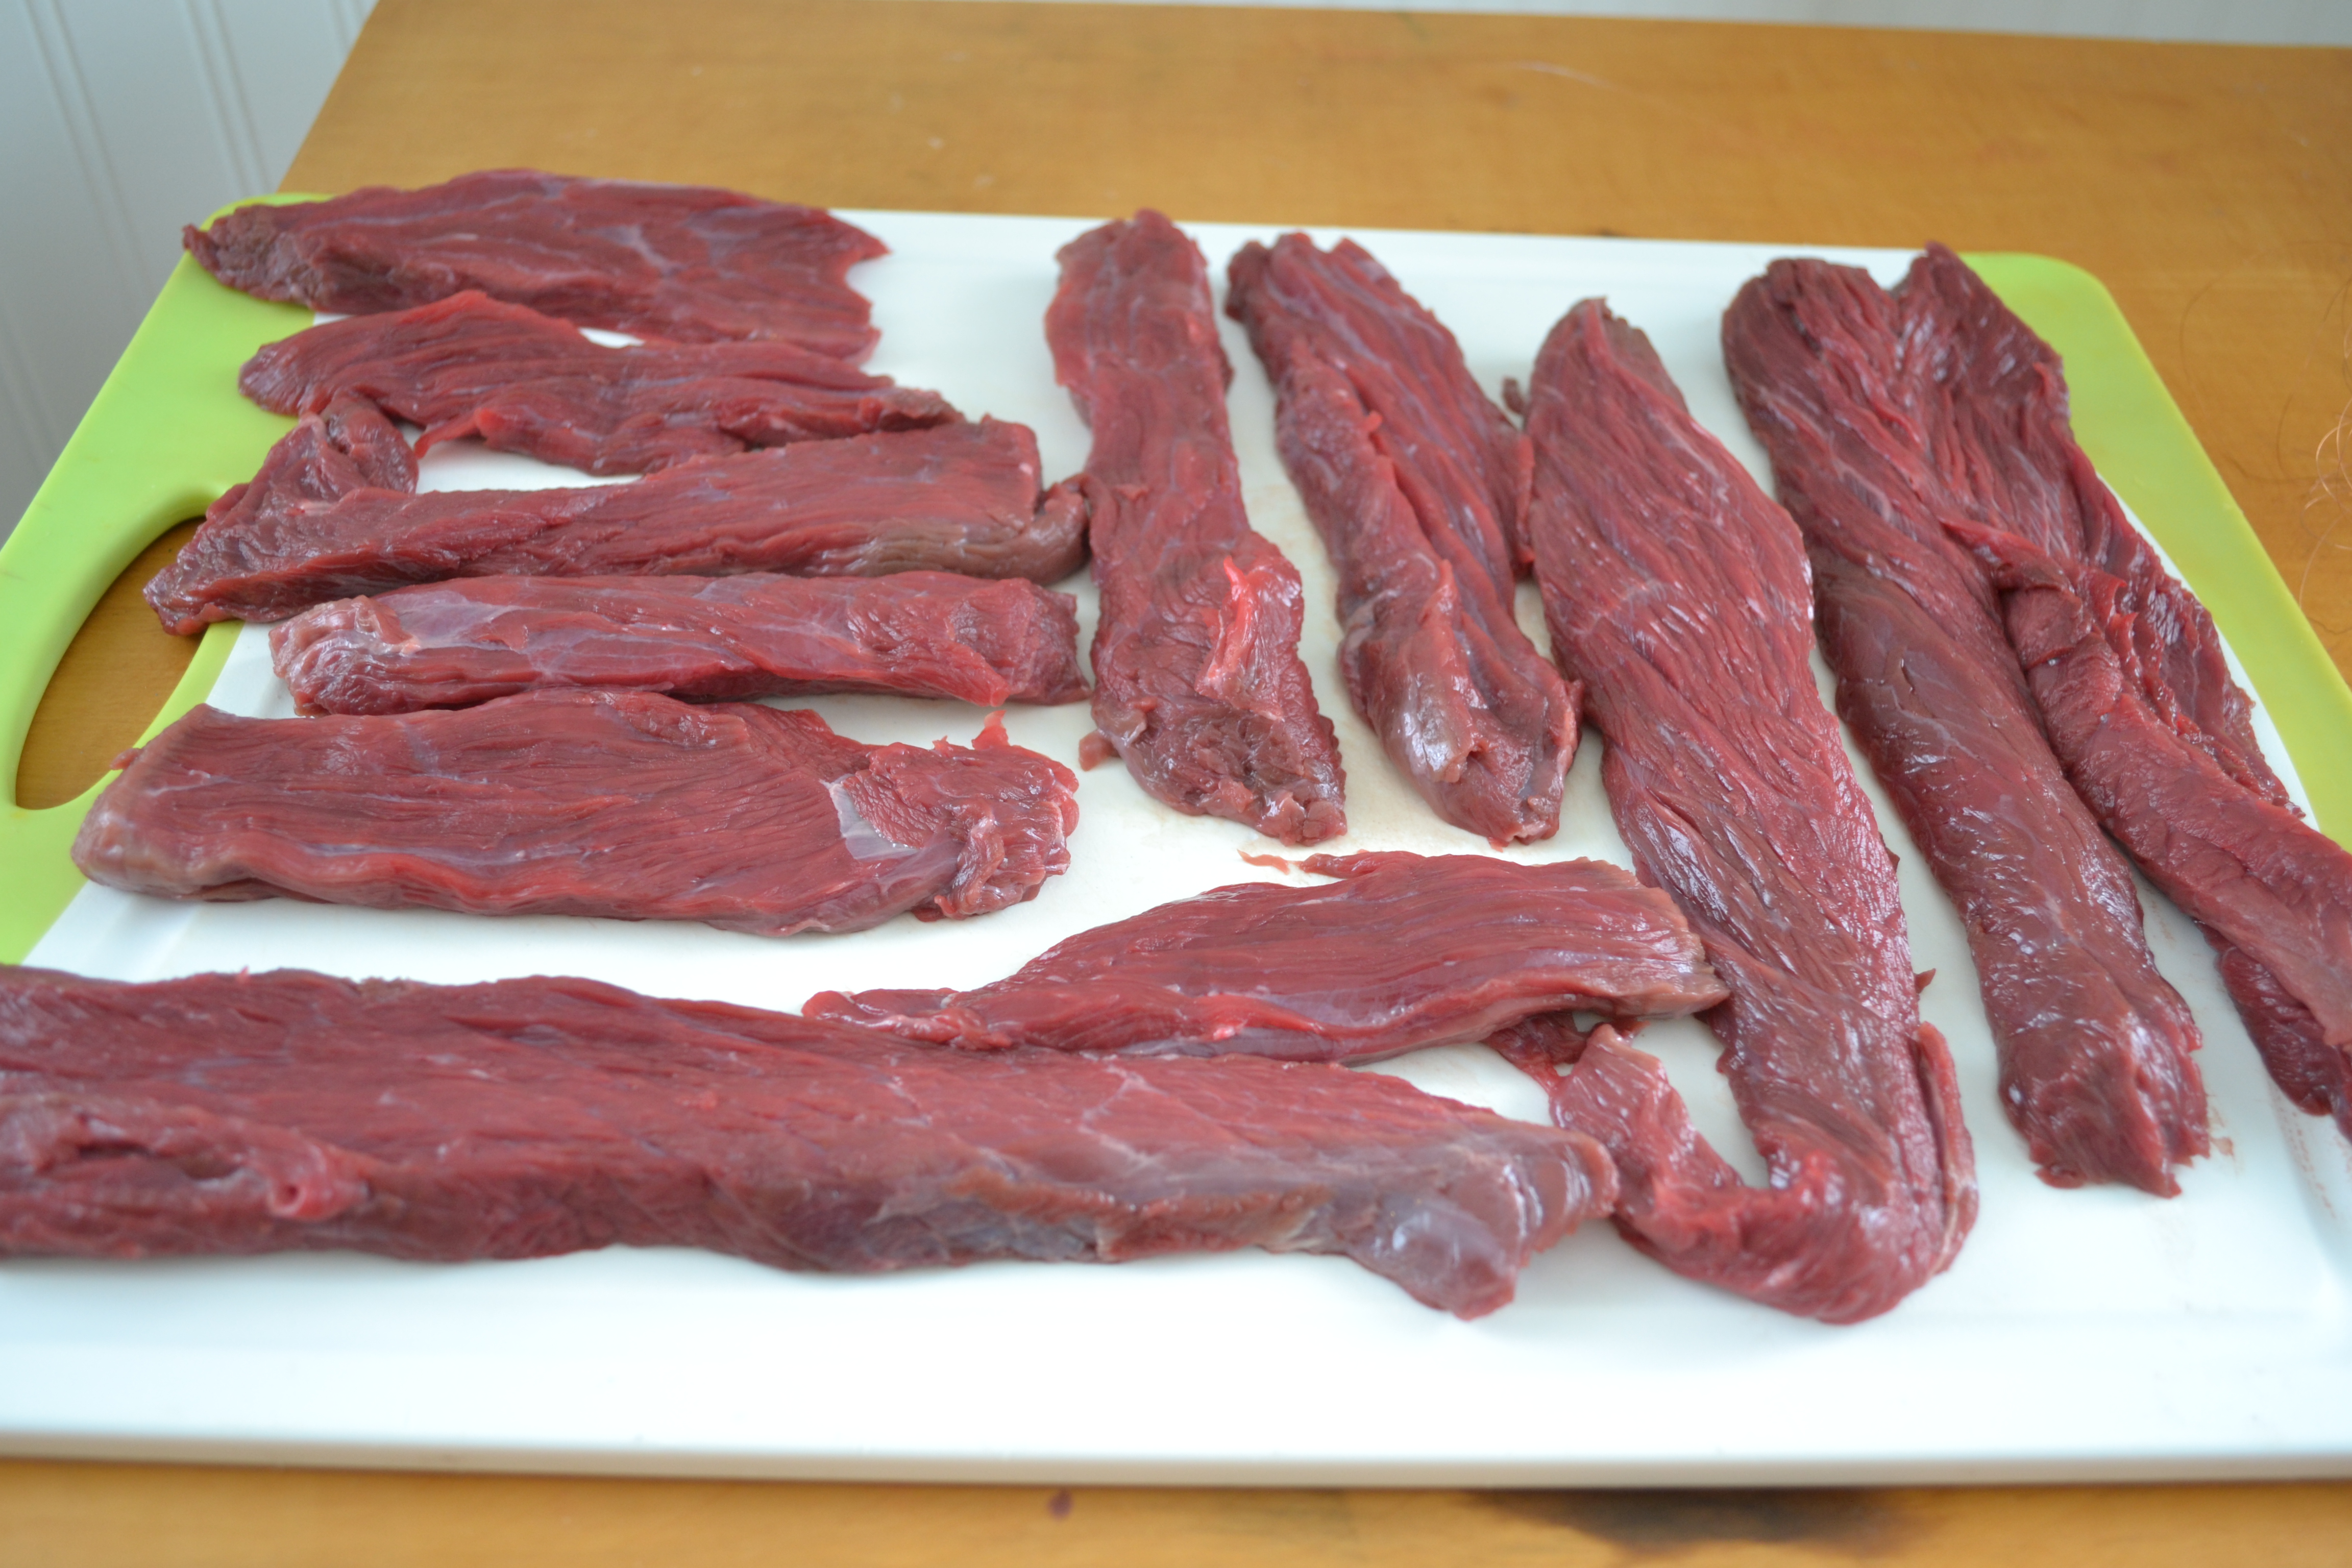
The most important thing to remember when making whole muscle jerky with wild game is to start with a large enough muscle that can easily be cleaned of as much sinew, silver skin, and fascia as possible.
There are several large muscles in the hindquarter of large game animals that lend themselves nicely to this process. Smaller muscles will often have sinew, silver skin, and fascia that marble through the meat creating an unpleasant “flossing effect” when trying to eat the jerky.
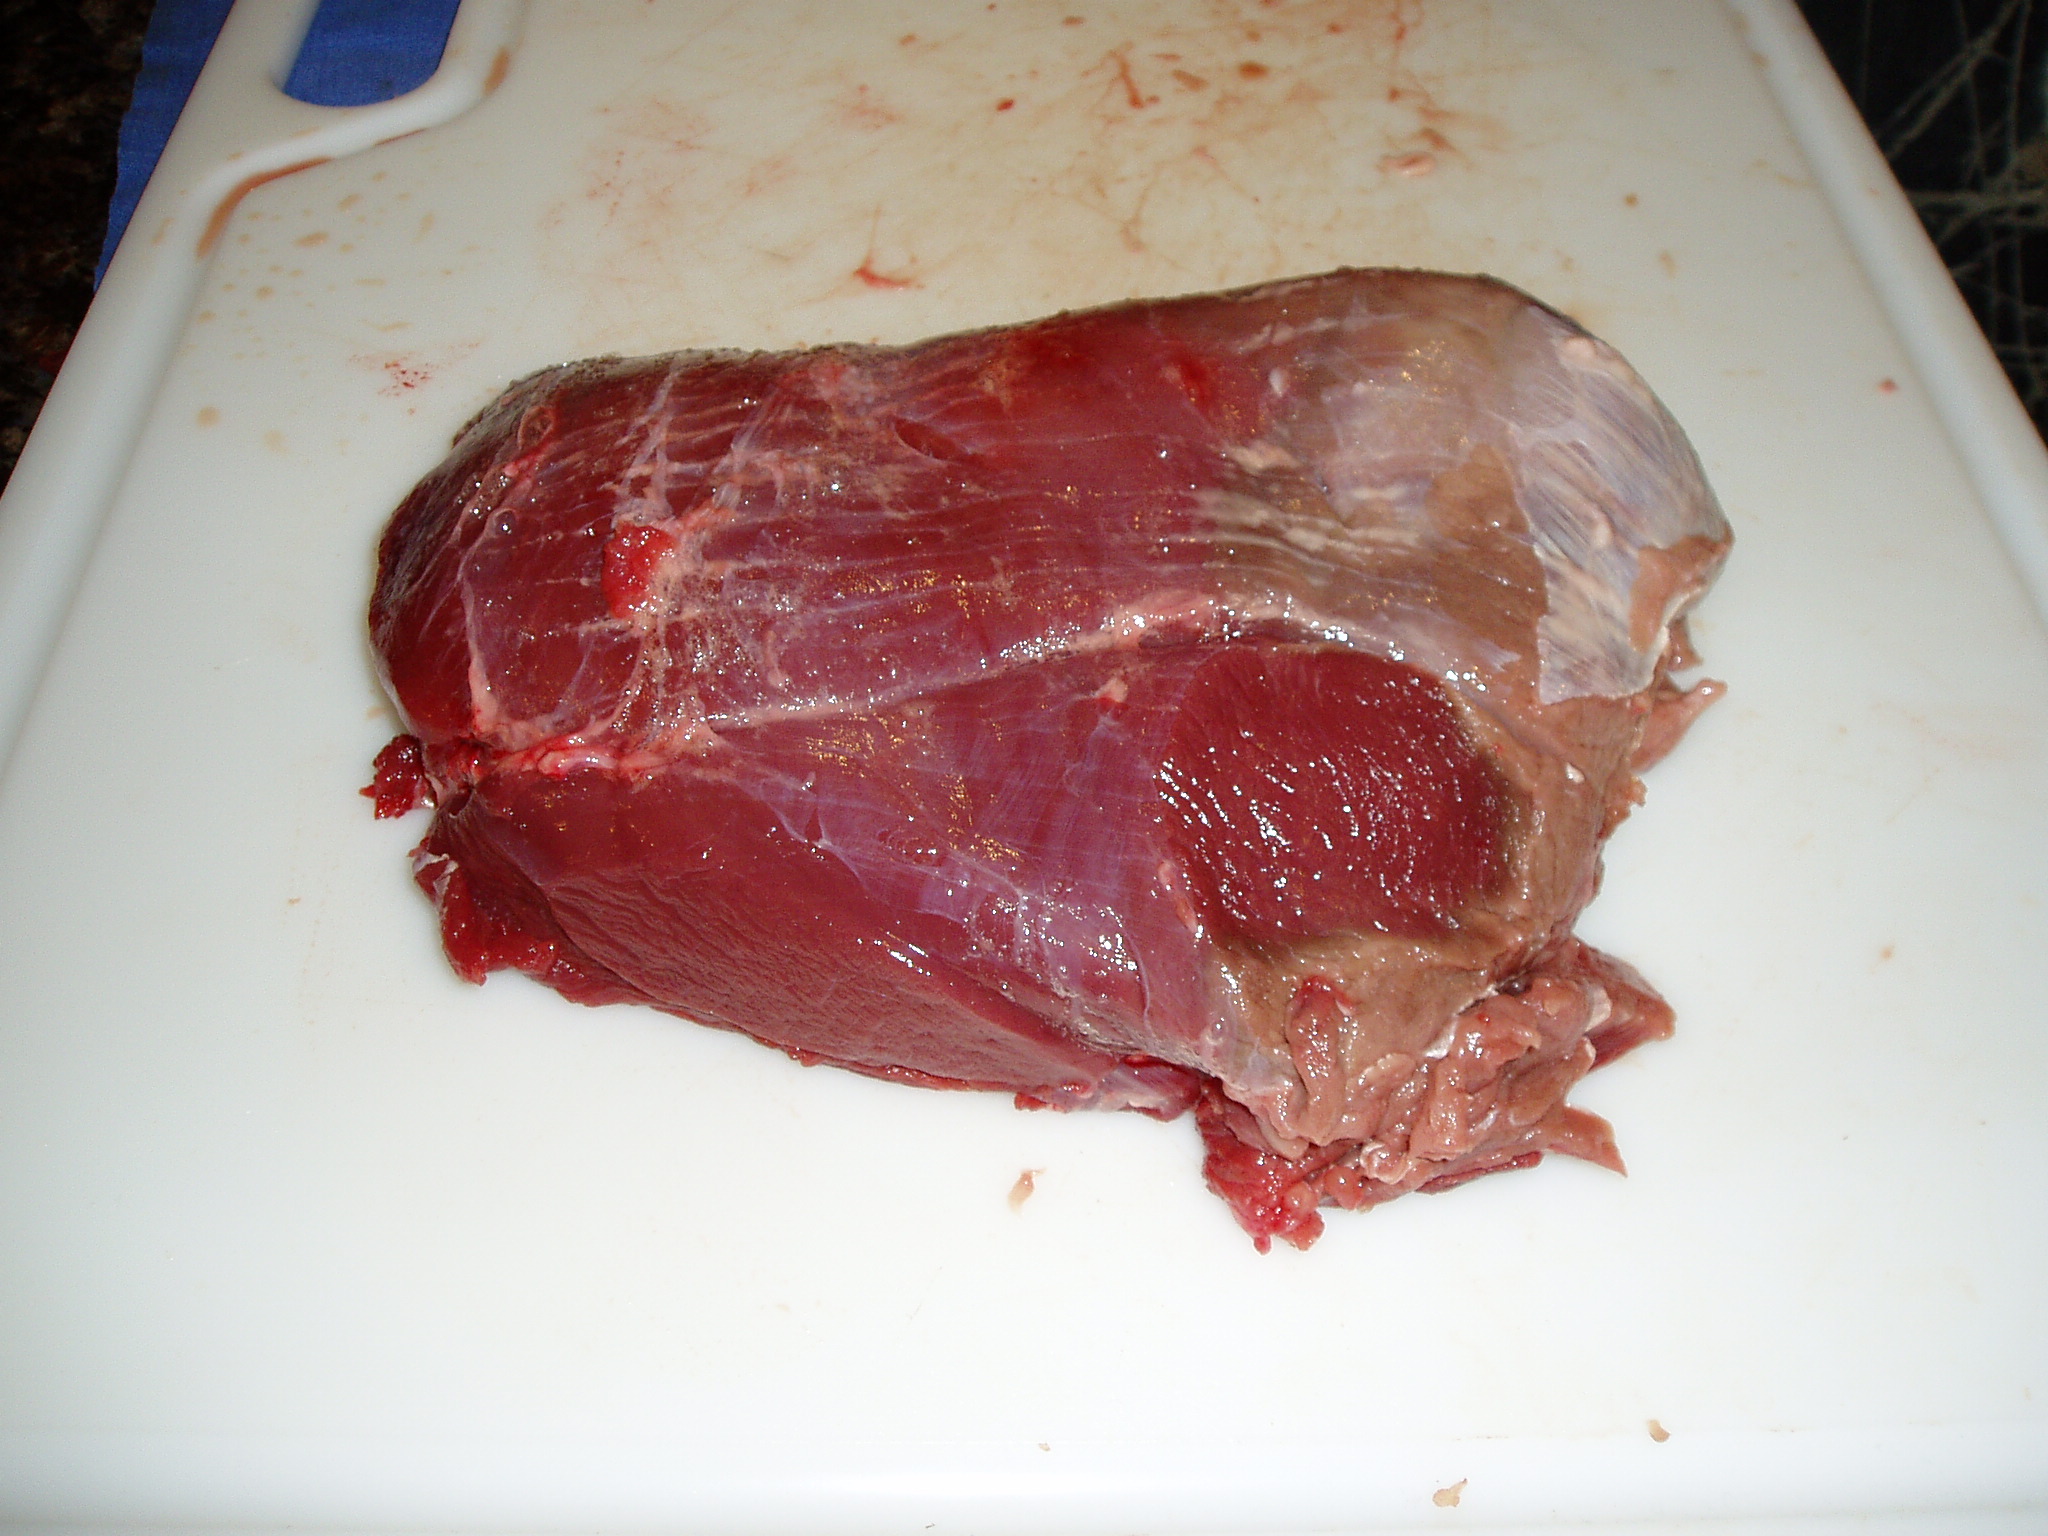
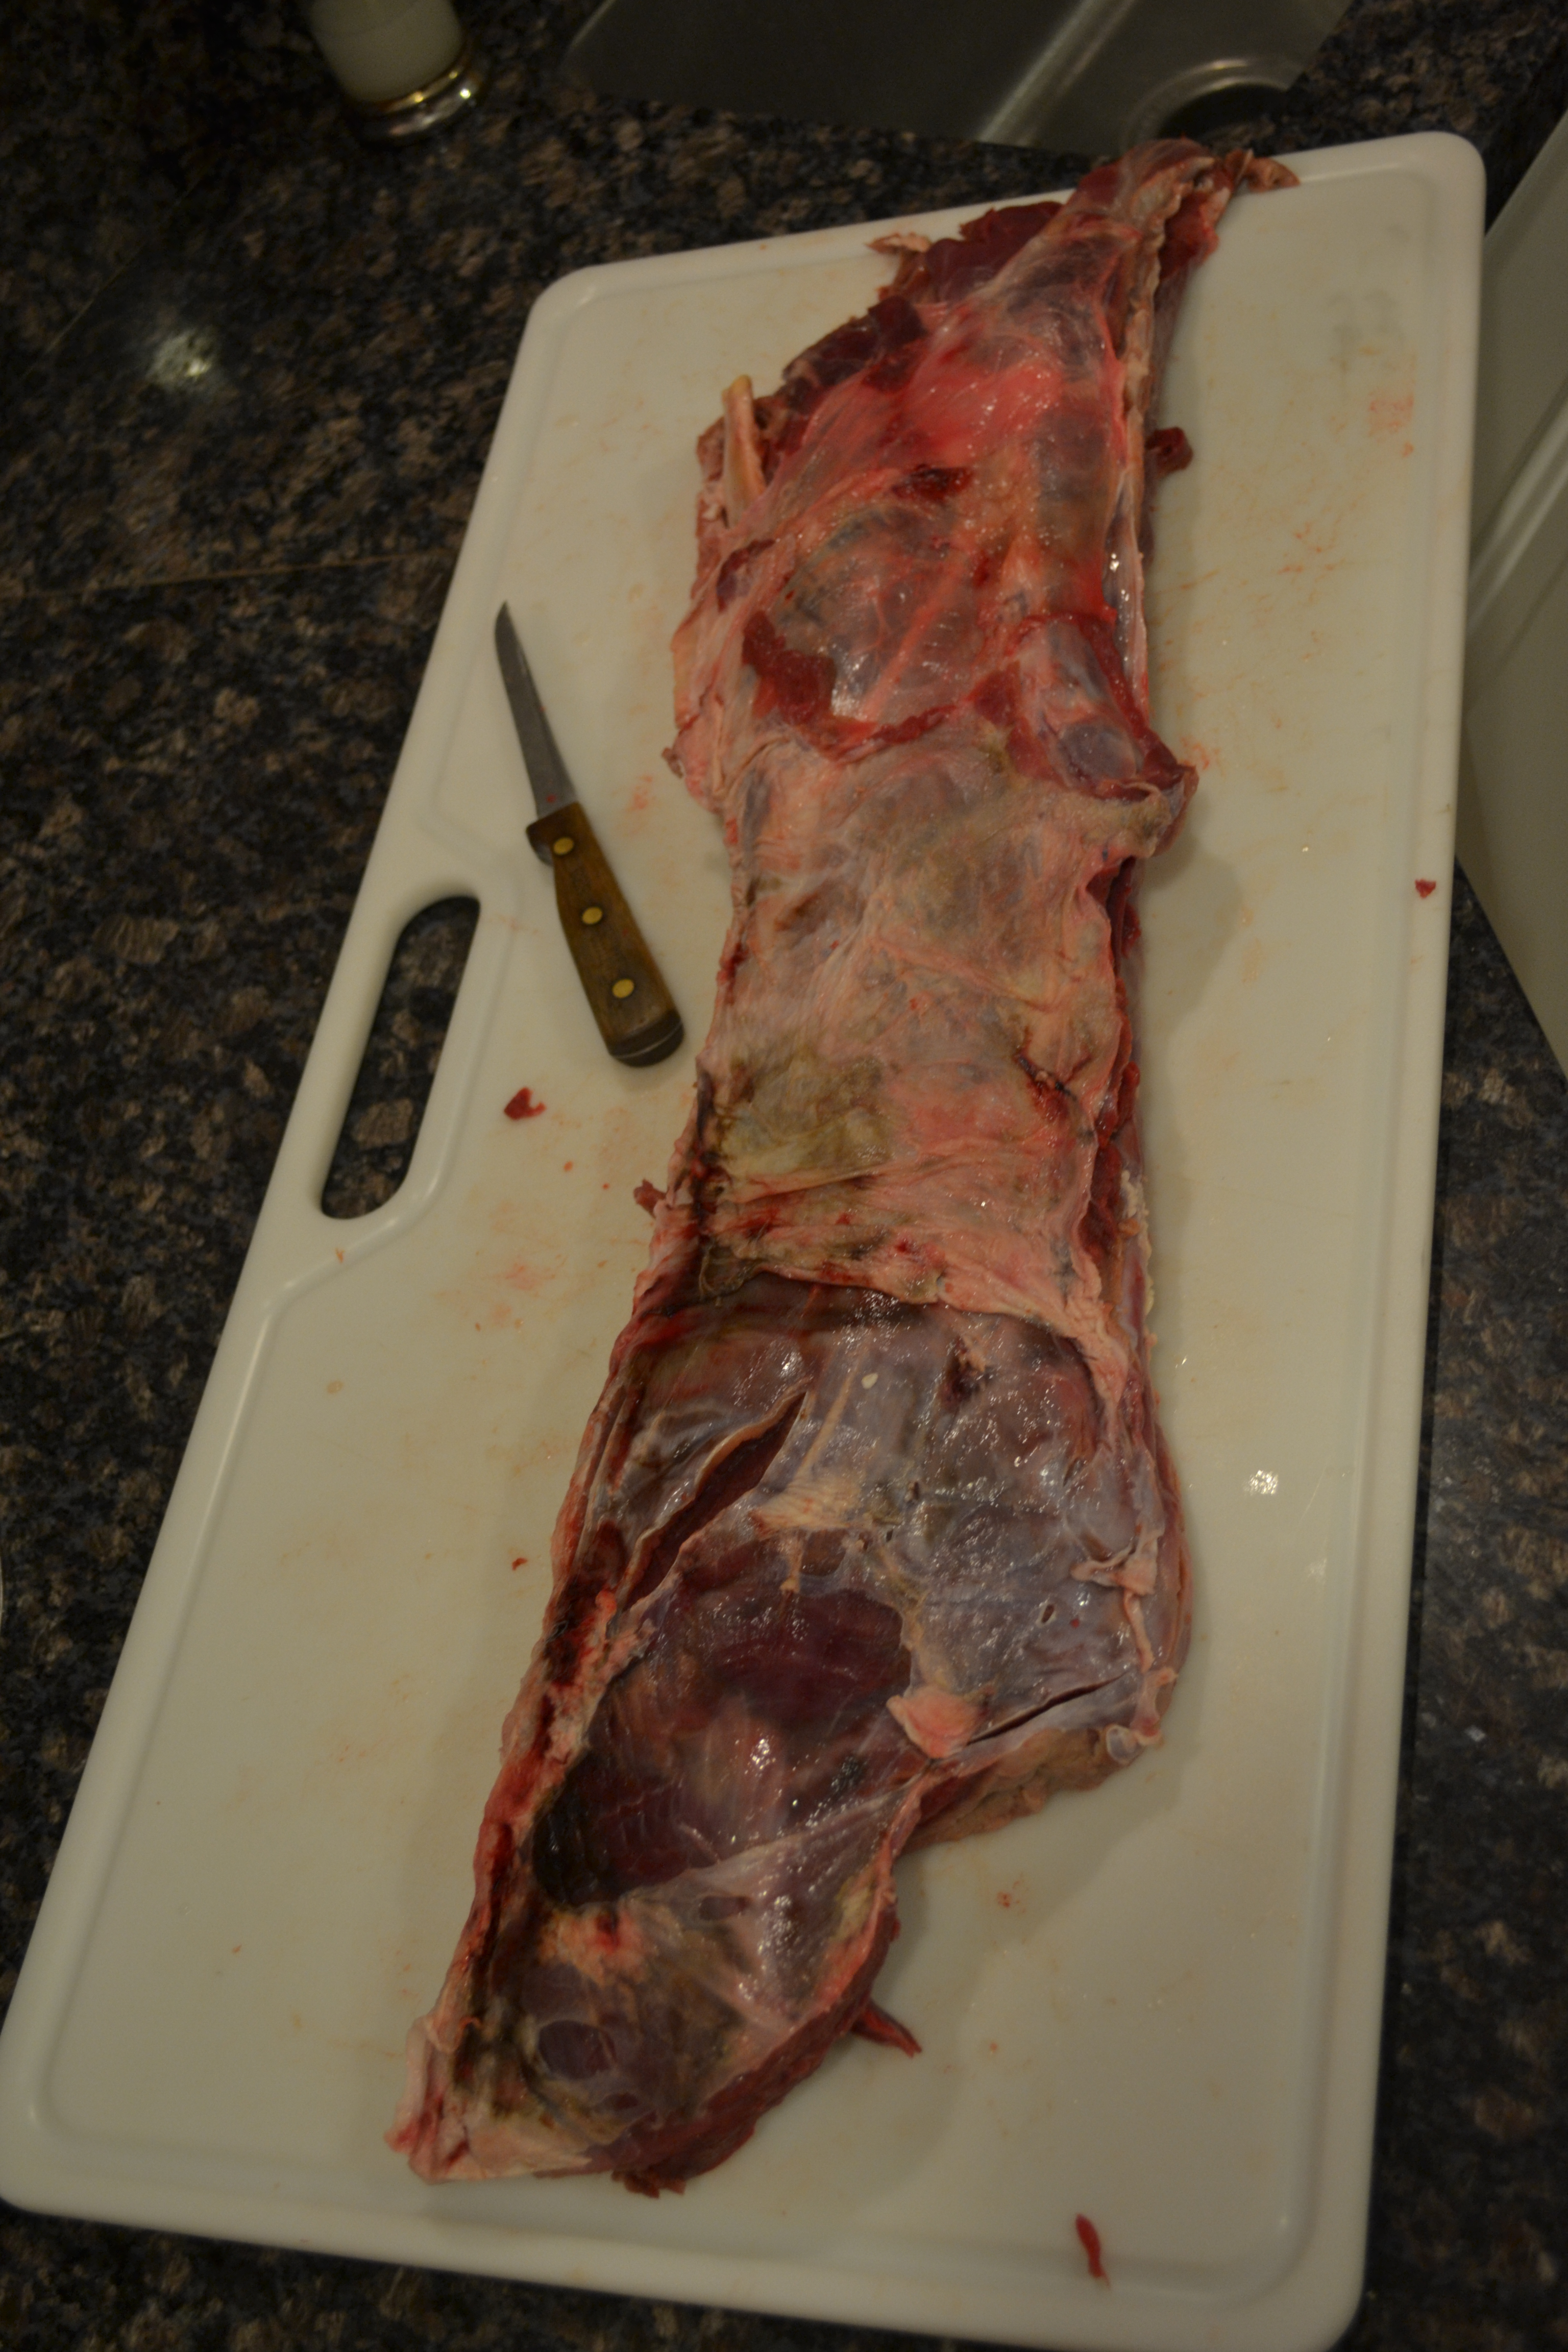
This is a venison hindquarter muscle that I’d use for jerky. All white membrane would need to be removed before slicing.Another hindquarter muscle that would be nice for this purpose. Once again, all white membrane would need to be removed.
This is one more reason I was so excited about having a nilgai in the freezer! The hindquarter muscle is so large it provides an exquisite “canvas” on which to work.
This is 1/2 of a large hindquarter muscle from a nilgai. It’s the same muscle as the venison shown above but twice as large.– This is one gorgeous piece of meat. The other half of the muscle is gonna make fabulous steaks! It helps the process to toss the meat in the freezer for 30-45 minutes before slicing. I use a serrated bread knife or a filleting knife for the thin slicing.I cut the meat 1/4 inch thick and sliced the wider slabs into more slender bits. I cut some of the meat along the grain as the directions suggest. Some, however, I cut across the grain, as an experiment. It worked just fine and didn’t require as much effort to tear off.
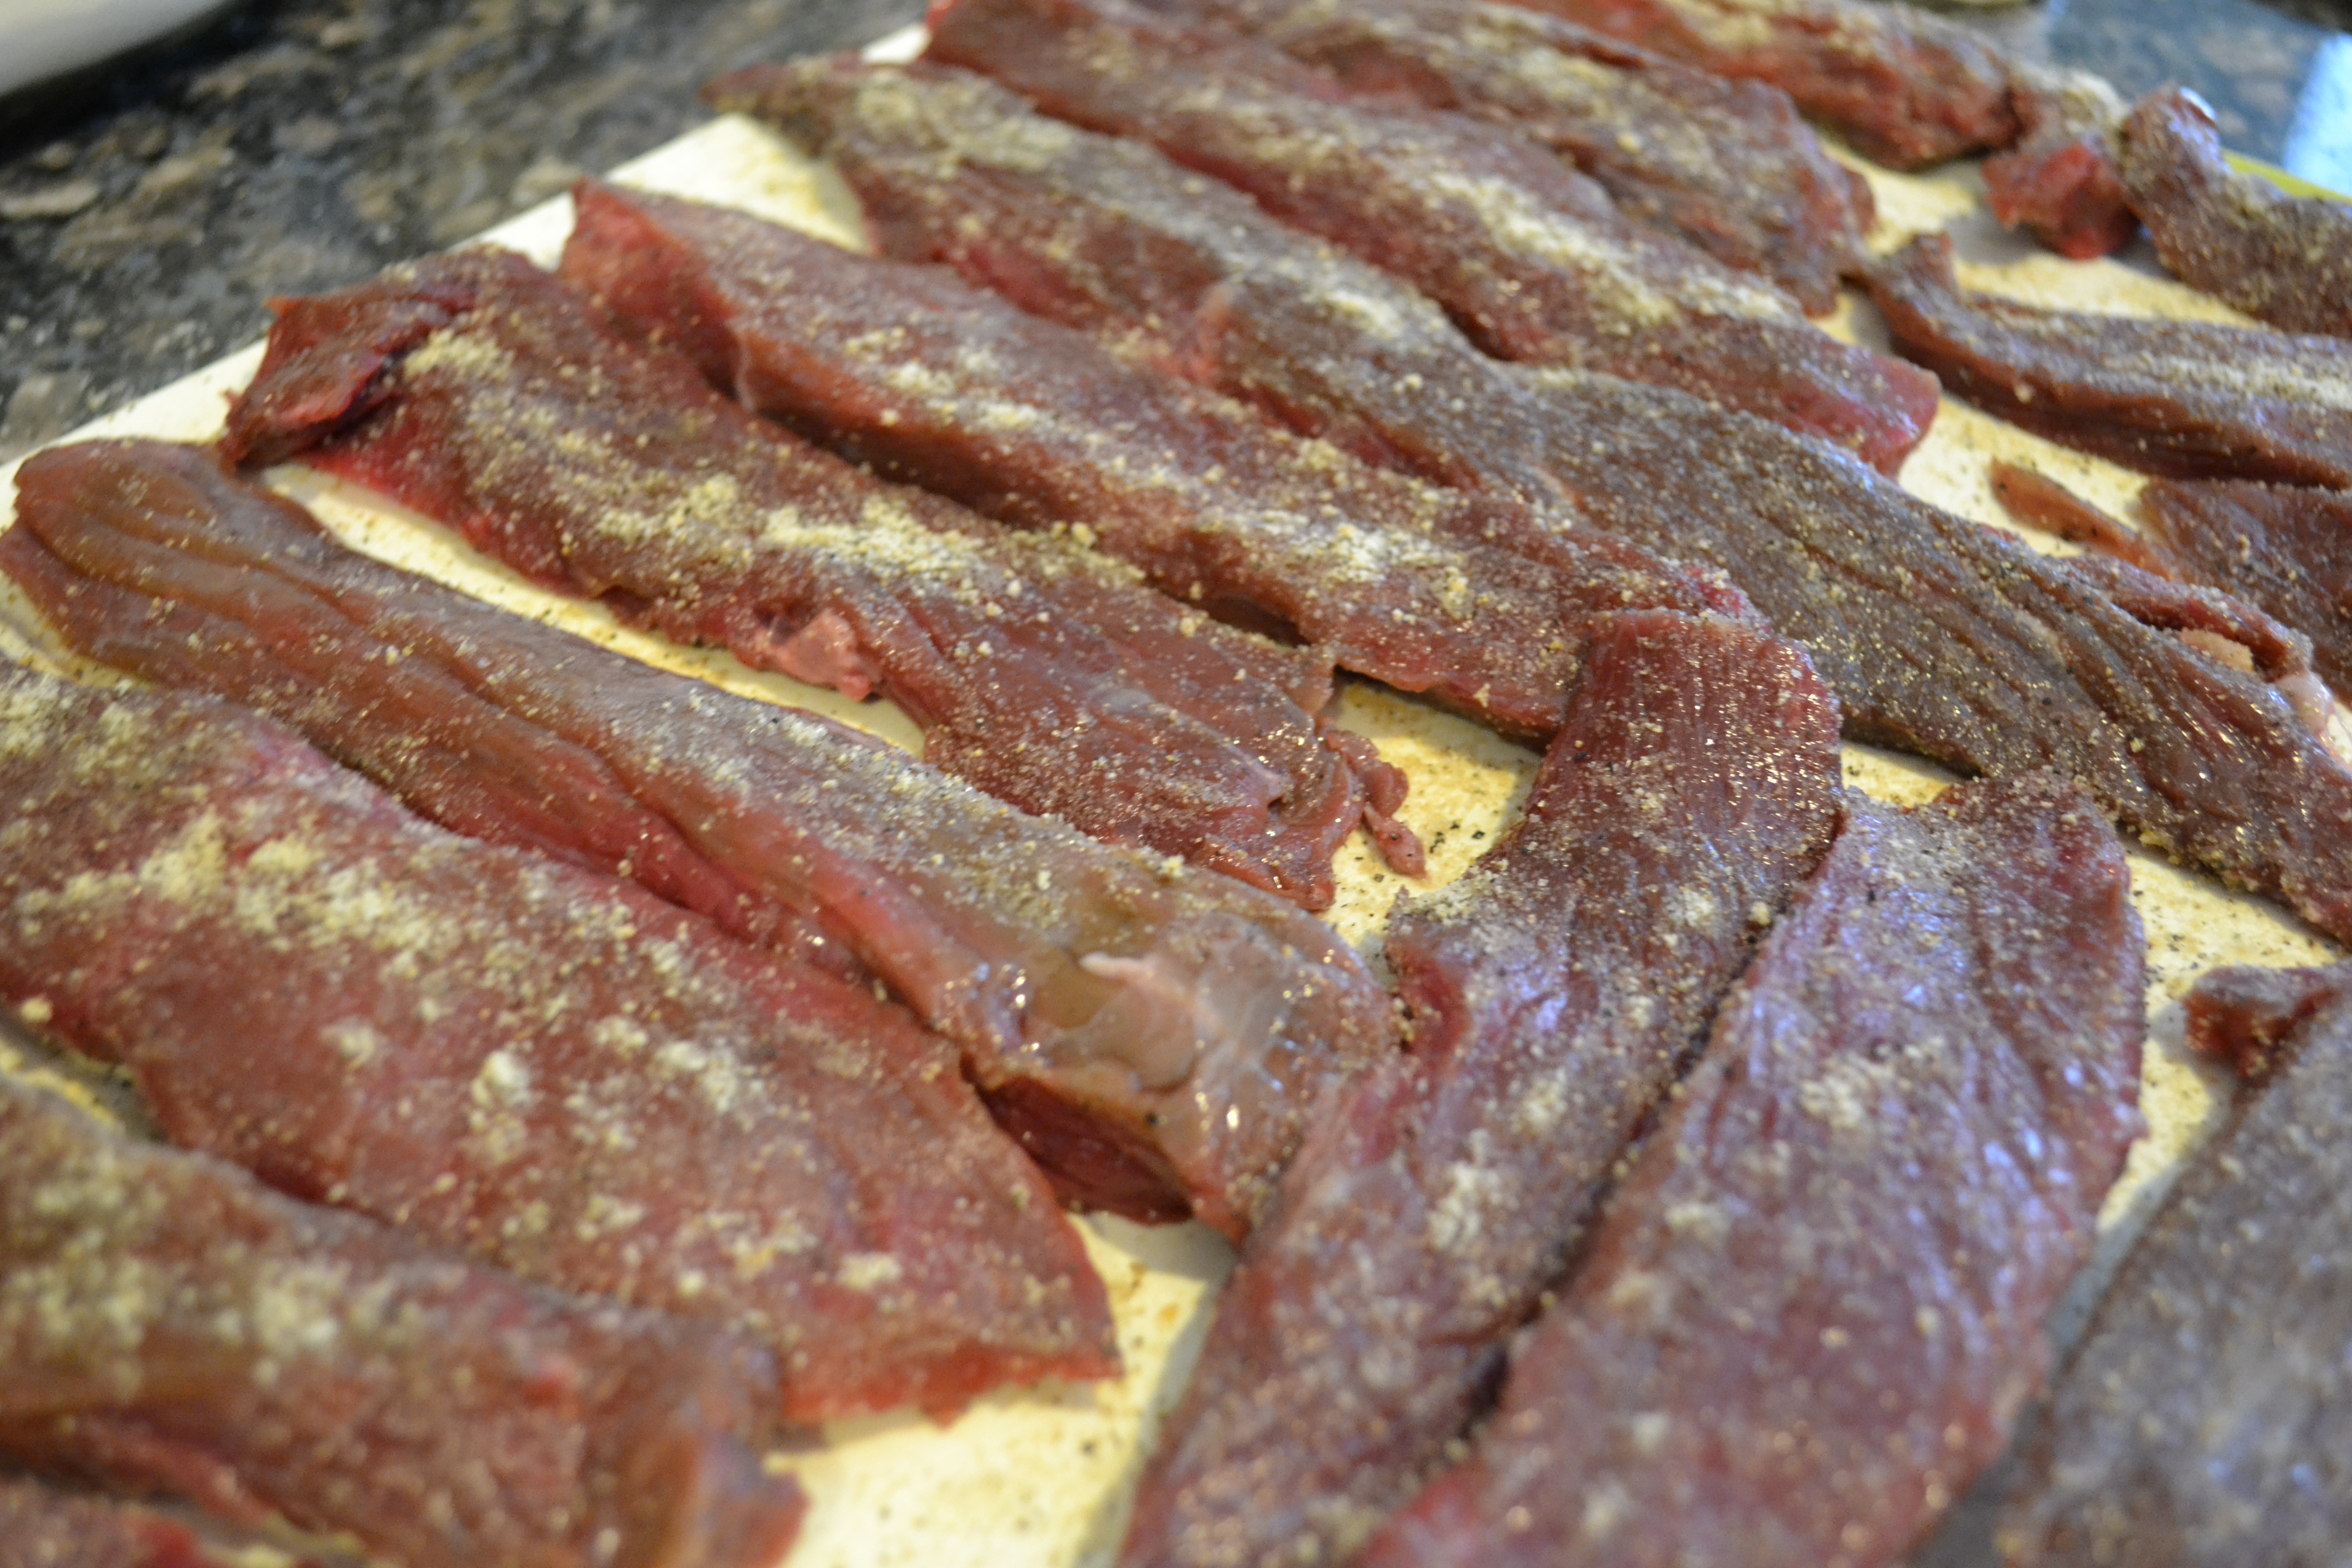
I mix my cure and seasoning in a jar rather than the shaker. It gives me room to shake and mix (and perhaps dance just a little bit.) I decided to use 1 1/2 to 2 times the amount recommended in the instructions. It allowed me to thoroughly coat the meat and end up with a more flavorful end product.
According to the directions included in the Hi Mountain Jerky mix, I used a maximum of only four pounds of meat (after trimming) for my batches.The thinly sliced meat was liberally sprinkled on both sides with the cure and seasoning mix
Cure and seasoning were “massaged” into the meat before it was put in a zip bag and left in the fridge overnight.Slices were arranged on two cooling racks and placed in a 200 degree oven for approximately 1 1/2` hours. The lower cooling rack was placed on a cookie sheet to catch drips. The oven door was held ajar with a wooden spoon. The four pounds of meat actually required 4 racks and two oven’s full of cooking.
The dried meat that results is flavorful and pleasant to eat. It must be placed in plastic bags and refrigerated or placed in the freezer.
Valentine’s Day is upon us. Actually, it’s been lurking in the stores since Thanksgiving. Junior Deerslayer refers to it as “Singles Awareness Day”. Everyone in our family has decided that it would be a sneaky move for all of us to secretly decide to celebrate Valentine’s Day on February 16th instead. All the cards, flowers, and candy will be 1/2 off. The restaurants will have put away their “special occasion menus”… the ones that feature only a couple of entrees that cost about four times the regular price. There are 364 days a year that my dearly beloved can show me how much he loves me. He lavishes me with tokens of his affection every day. Okay, most days, pretty often, often enough. No need to run these things into the ground.
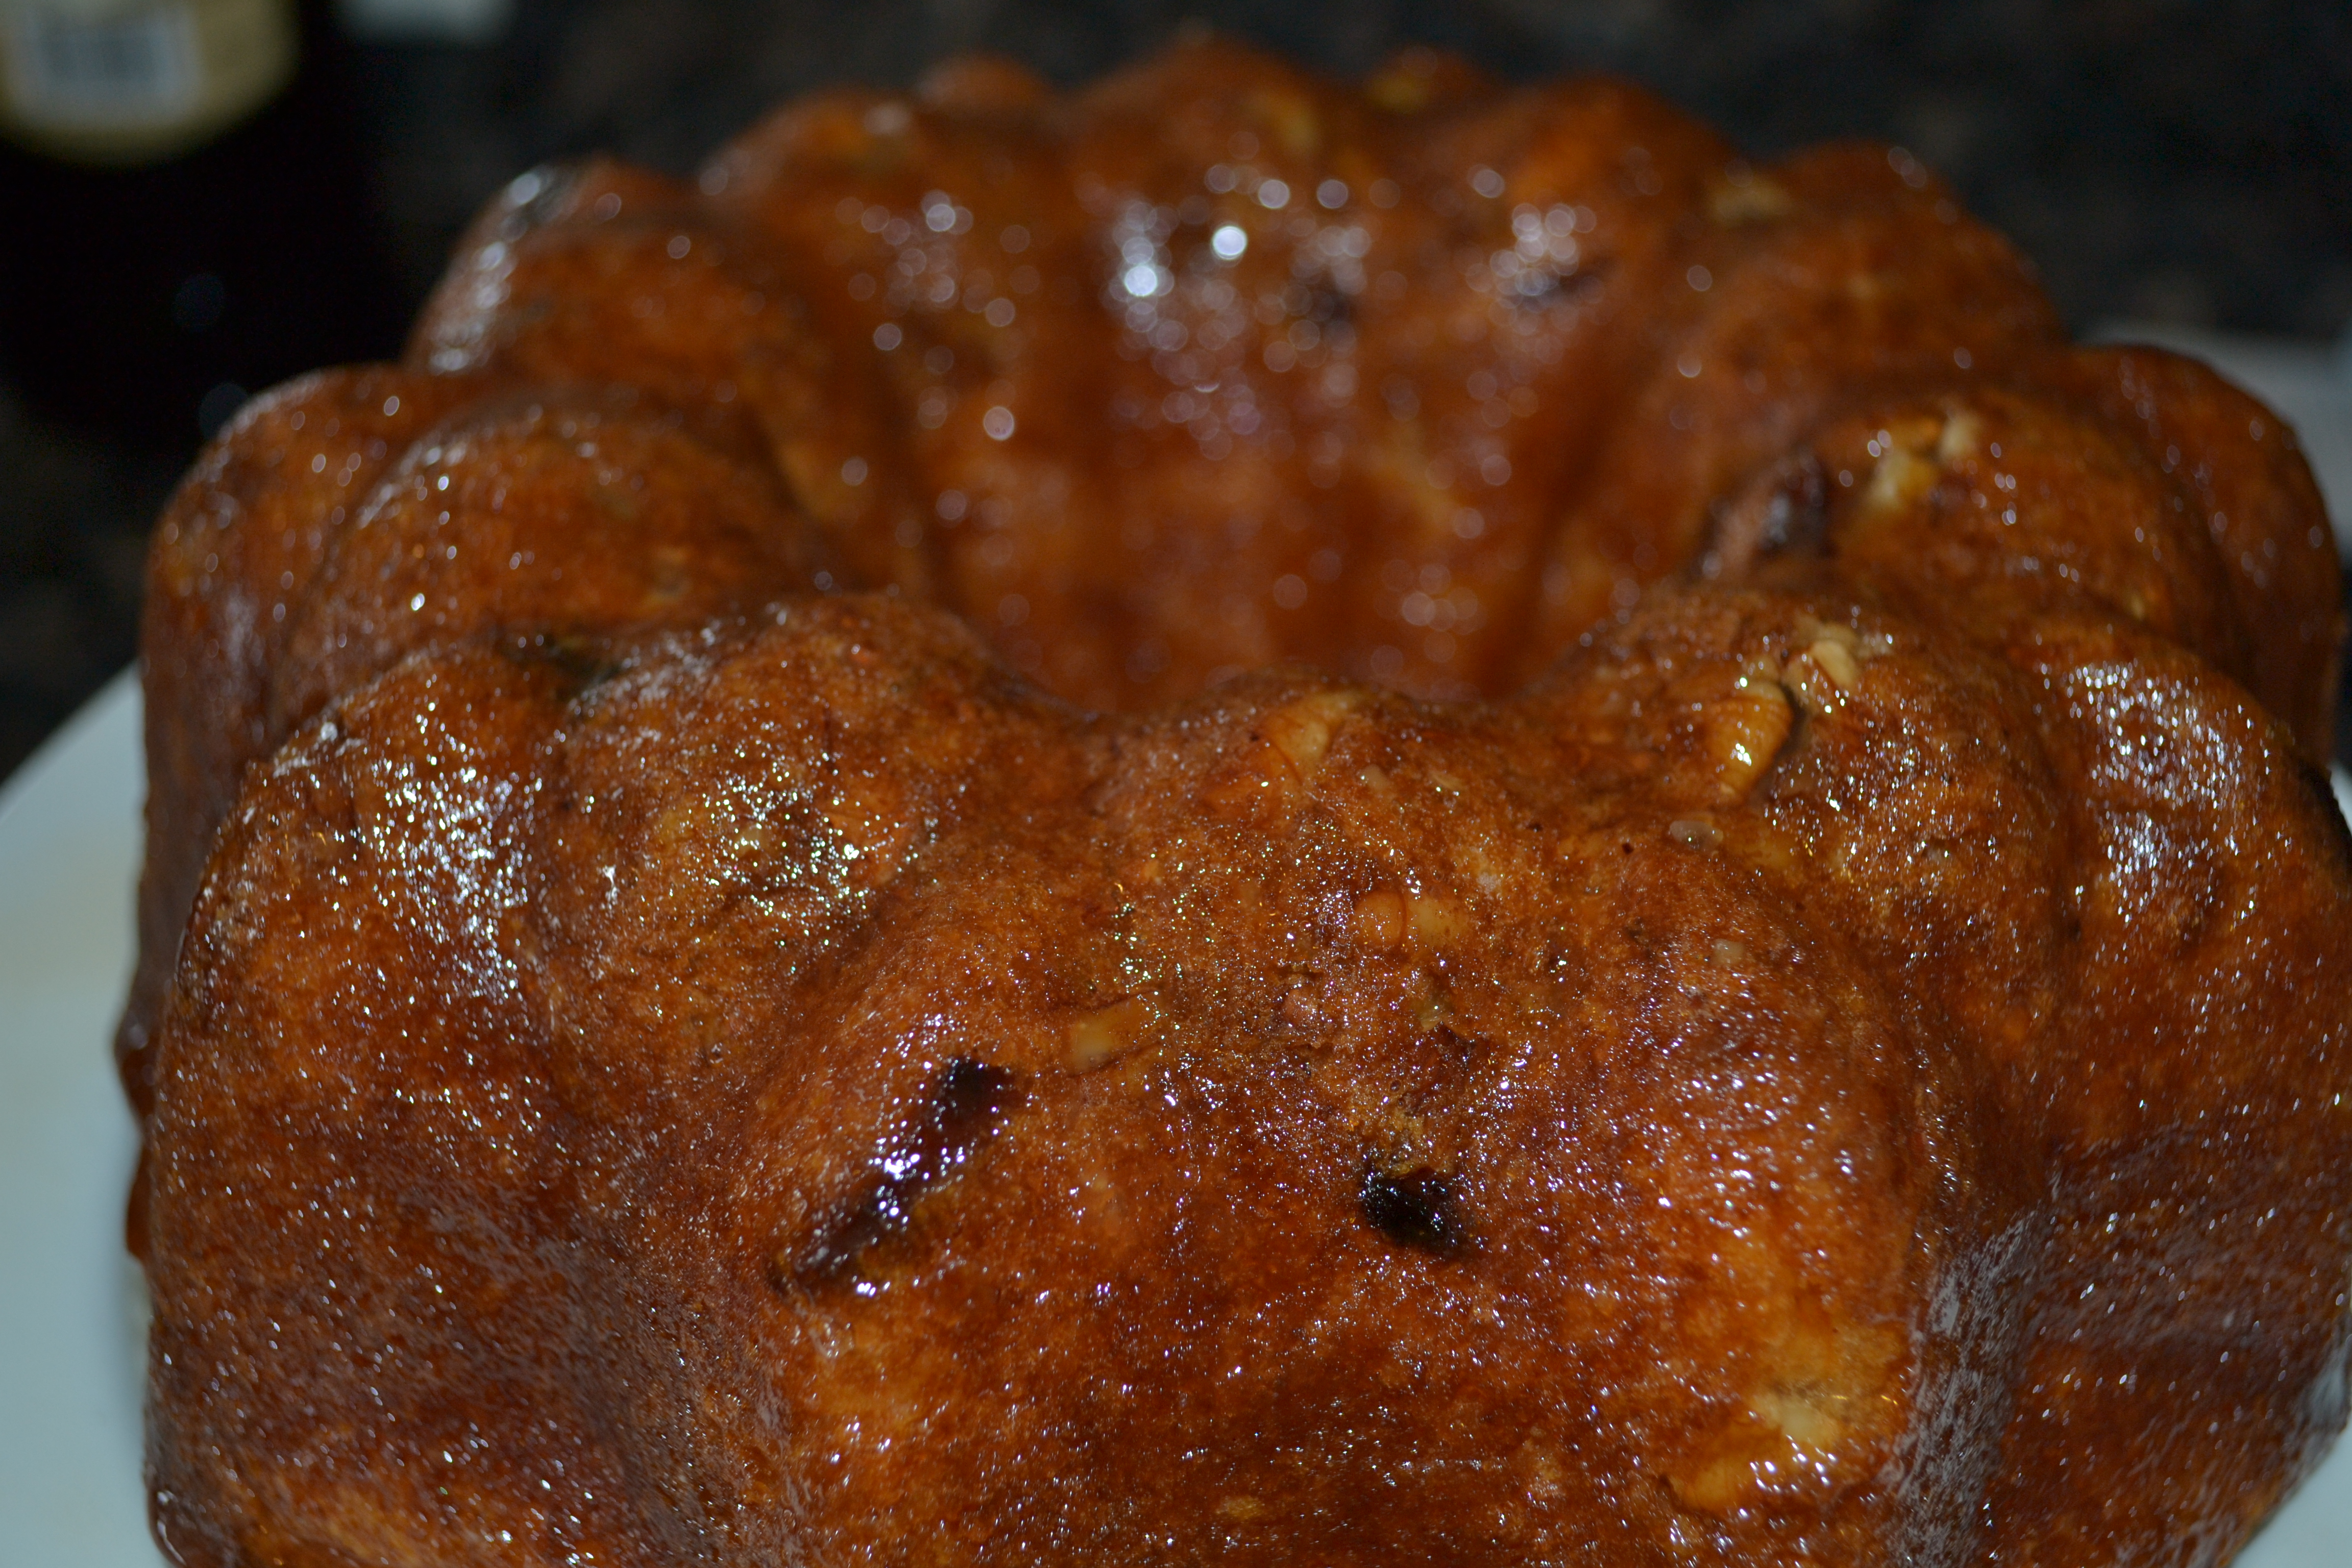
For anyone who succumbs to societal pressure and feels the need to come up with SOMETHING before February 16th, try this delicious cake. Save the $6 for a card, $100 for flowers, and $200 for dinner out. Prepare this wonderful cake. prepare a small personal note, and fix a nice dinner at home. Priceless!
Apricot Brandy Cake Ingredients
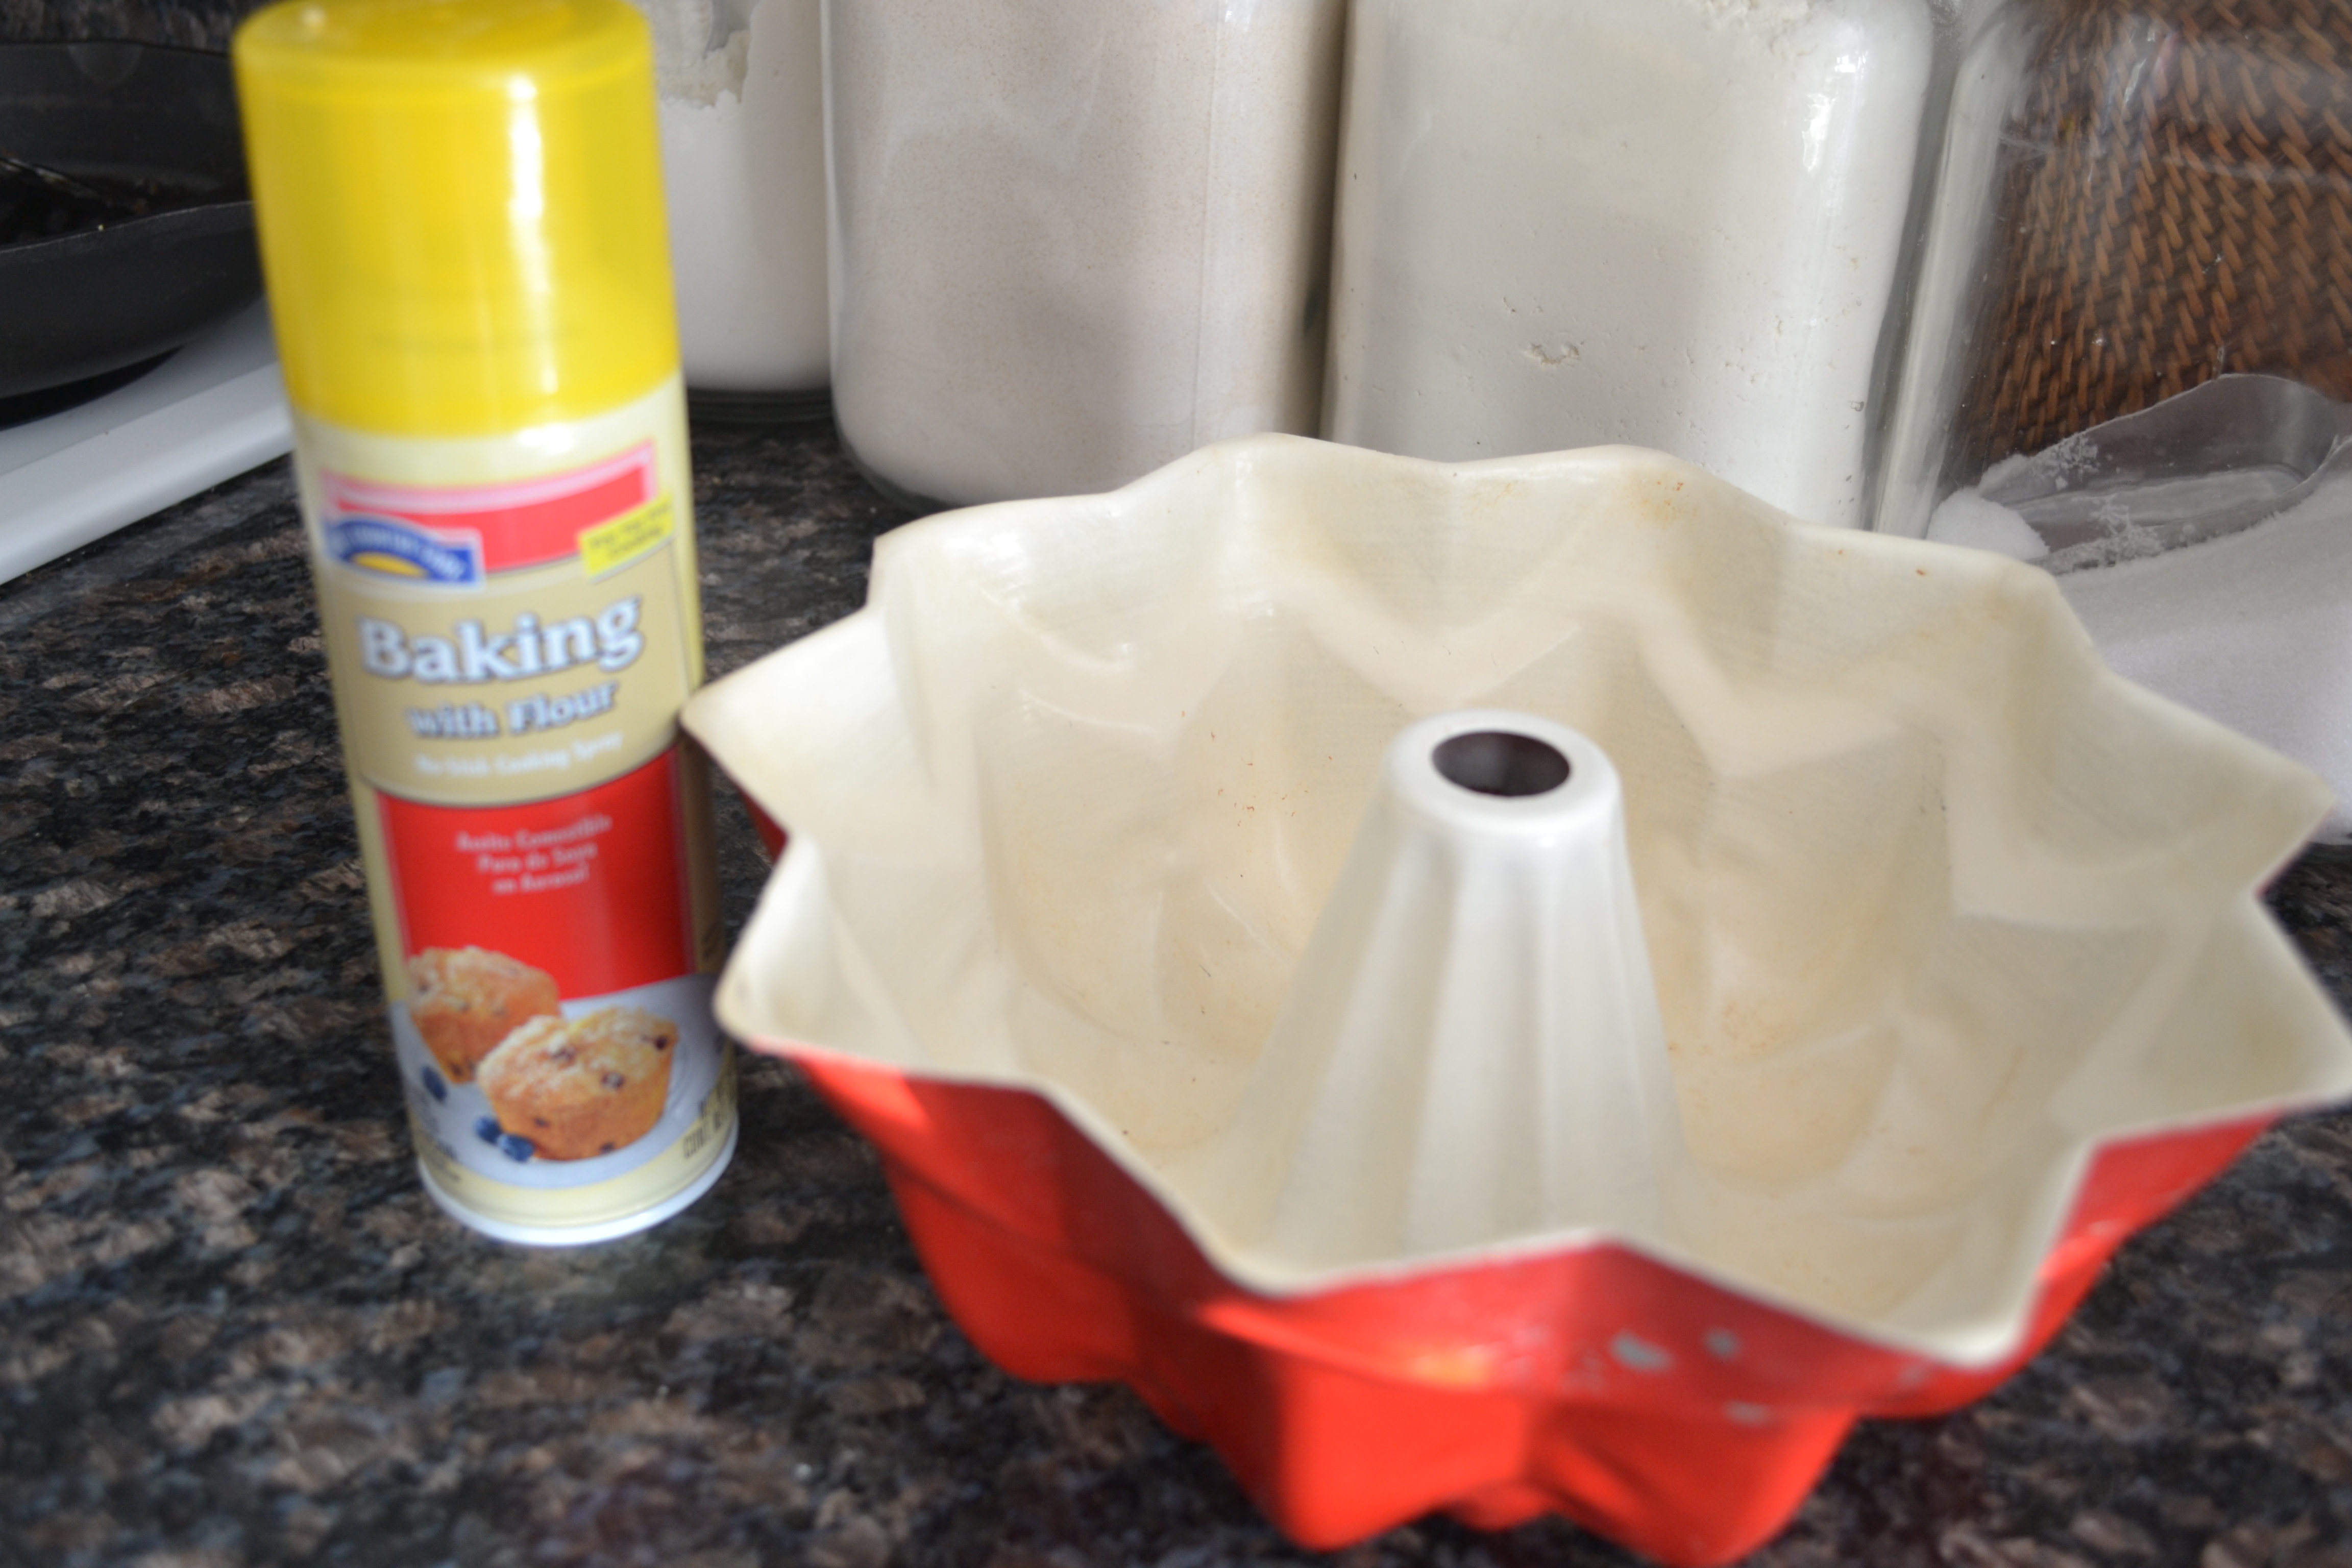
cooking spray with flour
1 cup chopped pecans
1 cup dried apricots, chopped
1 package yellow cake mix with pudding in the mix
3 eggs
1/2 cup cold water
1/3 cup cooking oil
1/2 cup apricot brandy
Directions:
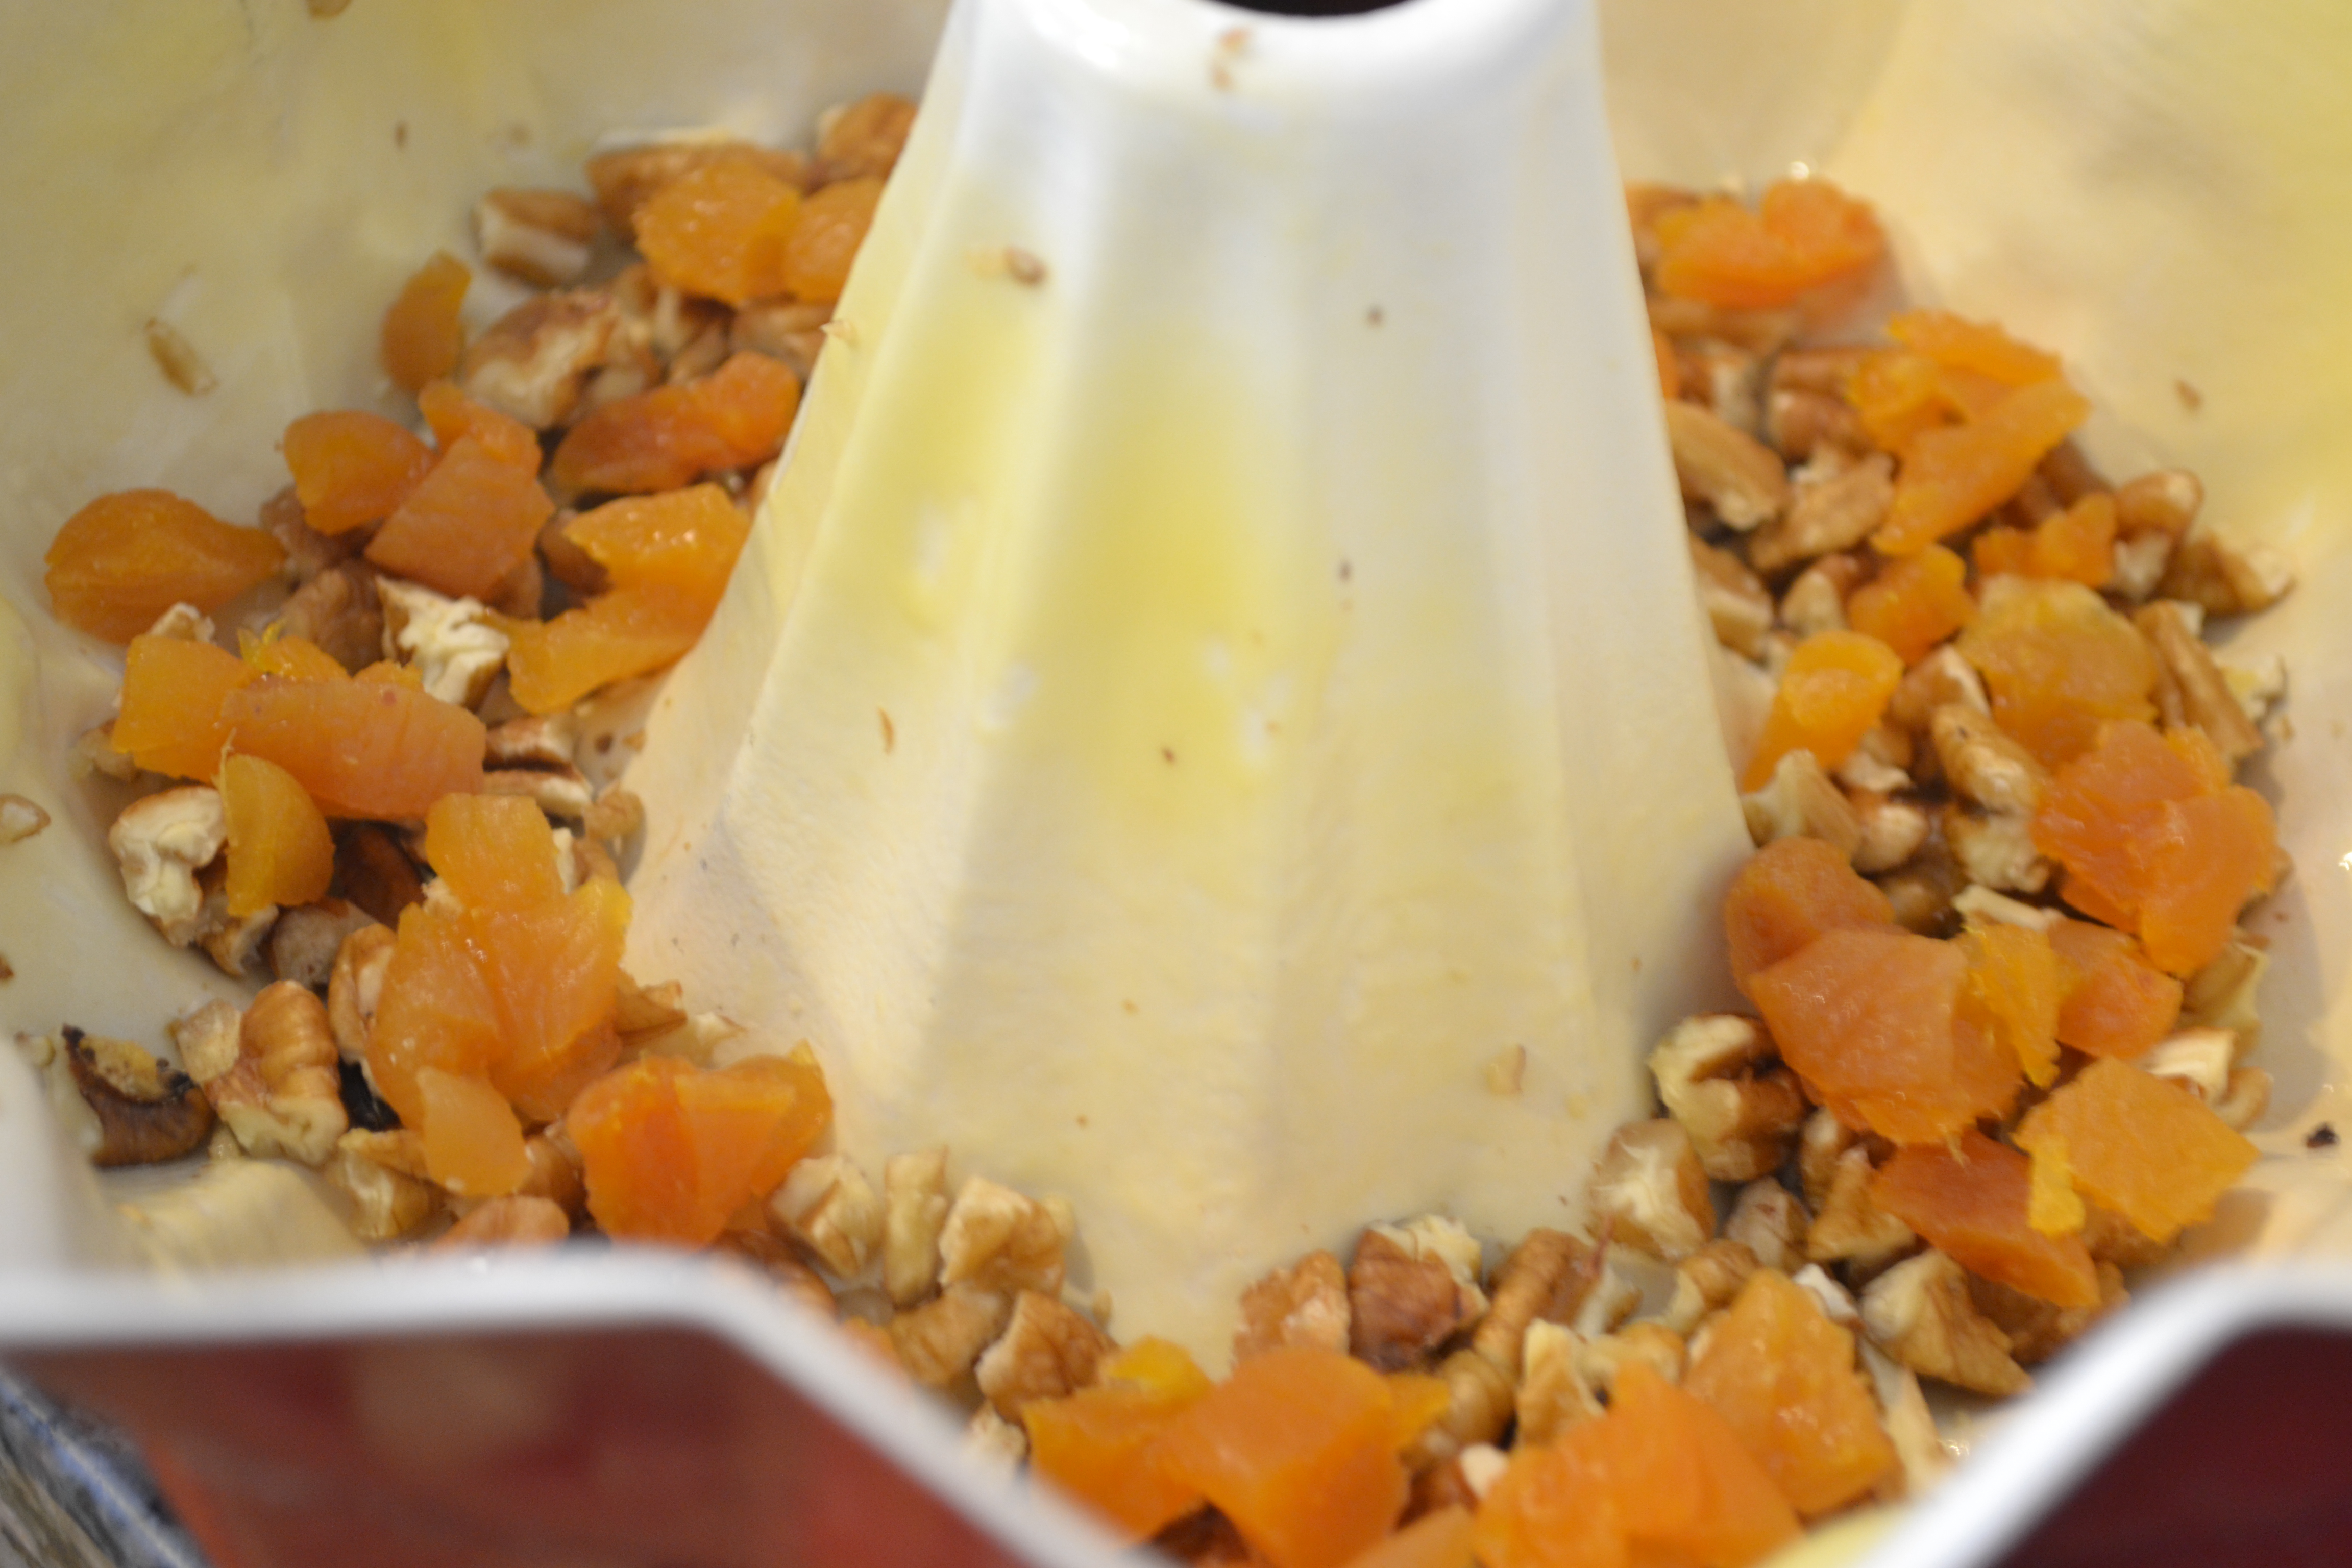
Sprinkle nuts and dried apricots over bottom of a 10 inch tube pan or 12 cup bundt pan that’s been liberally sprayed with cooking spray w/ flour.
Stir together cake mix, eggs, water, oil and apricot brandy.
Pour batter over nuts.
Bake at 325 in oven for 1 hour or until knife inserted half way between center of tube and edge comes out clean..
Cool 10 minutes in pan.
Invert onto serving plate with a lip around the edge (to collect glaze) and prick top with skewer or knife so that glaze can soak it.
Glaze
1/2 cup butter
1/4 cup water
1 cup sugar
1/2 cup apricot brandy
Melt butter in saucepan.
Stir in water and sugar.
Boil 5 minutes, stirring constantly.
Remove from heat.
Stir in apricot brandy.
Brush glaze evenly over top and sides of cake. (It’s pretty tasty! You might want a sip or two.)
Allow cake to absorb glaze. As glaze collects in serving plate, I pour it back into the pan and reapply until fully absorbed.
Repeat until glaze is used up.
This cake is even better the second day. Good luck with that, though!
550 pounds of nilgai to fill the freezer and for me to experiment with!
I have to say that I was almost as excited as Deerslayer when I found out that he’d gotten his first nilgai. We’d driven around the ranch looking for a blue bull for quite some time. It was decided that night around the campfire that it must have been the rut since several males were seen in one day. Usually, they’re very elusive but not on Deerslayer’s day of glory. He got his at 7:00 in the morning. I saw one as I drove onto the ranch around 10:30, and spotted another near the camp around 2:30 in the afternoon. Everyone made a mental note. I enjoy experimenting with wild game and everything I’ve heard about this meat has been extremely positive. I hadn’t really thought about how the size of the muscle would influence how I would prepare it.
Trimmed backstrapUntrimmed backstrap
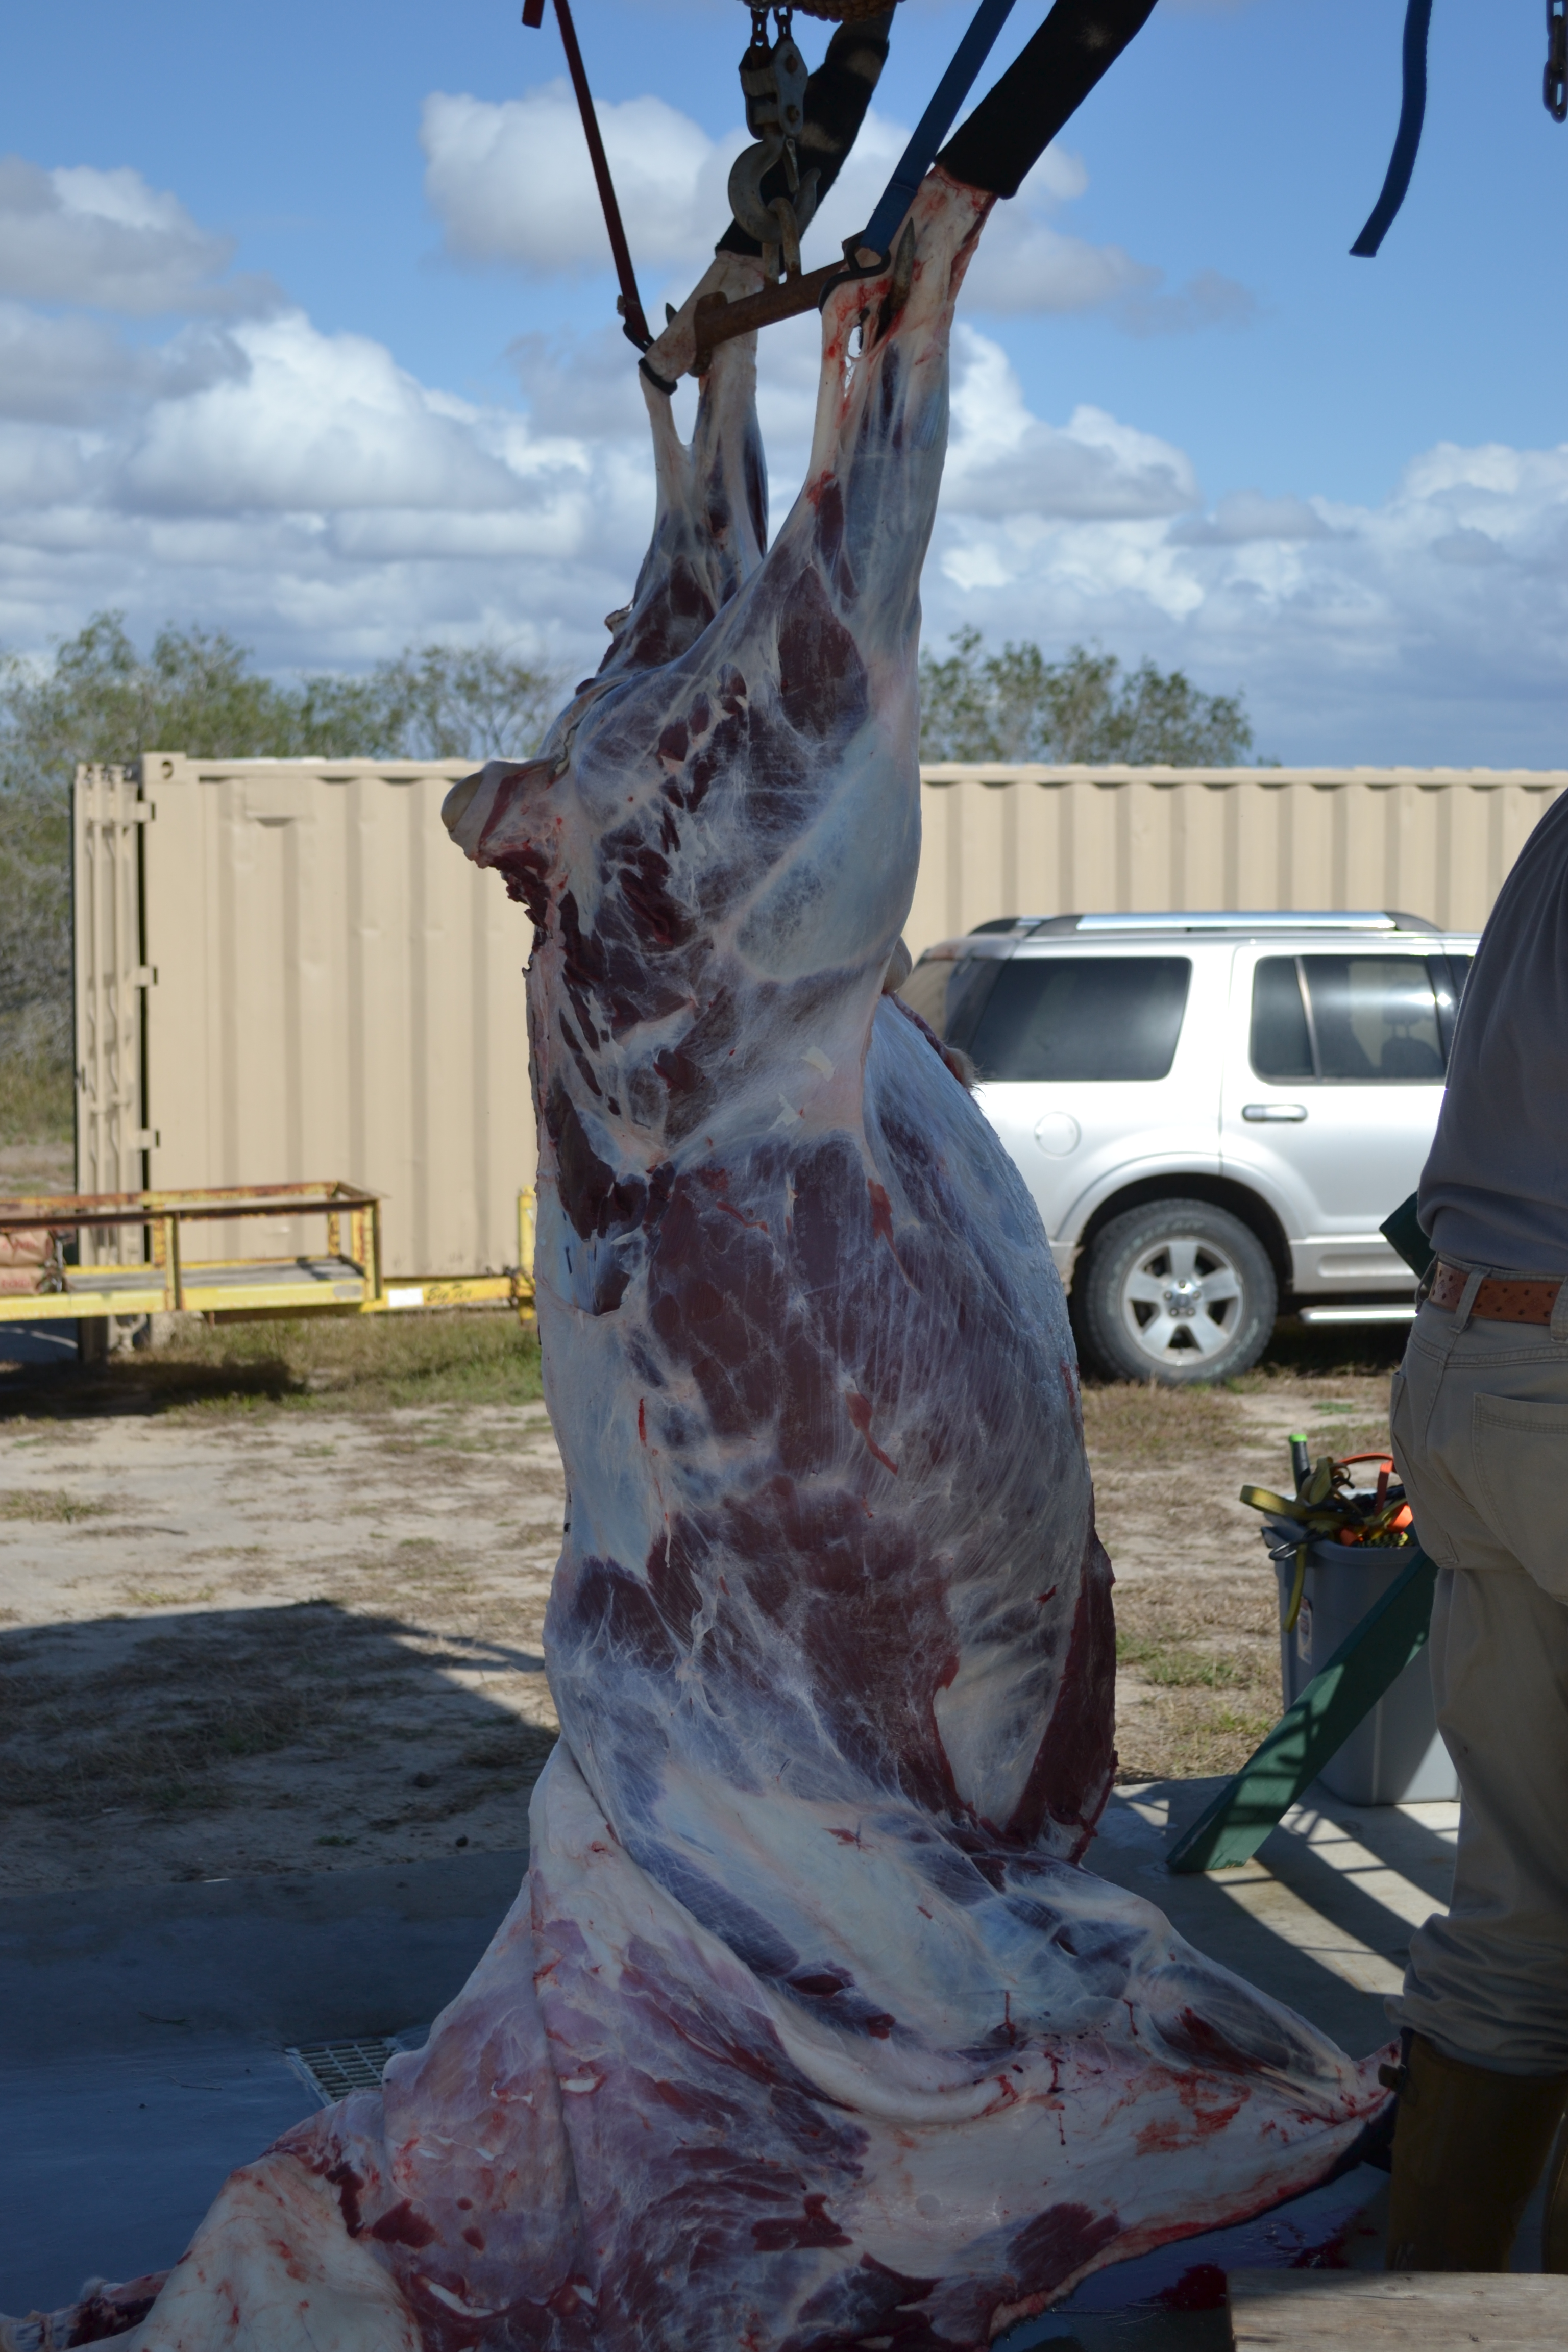
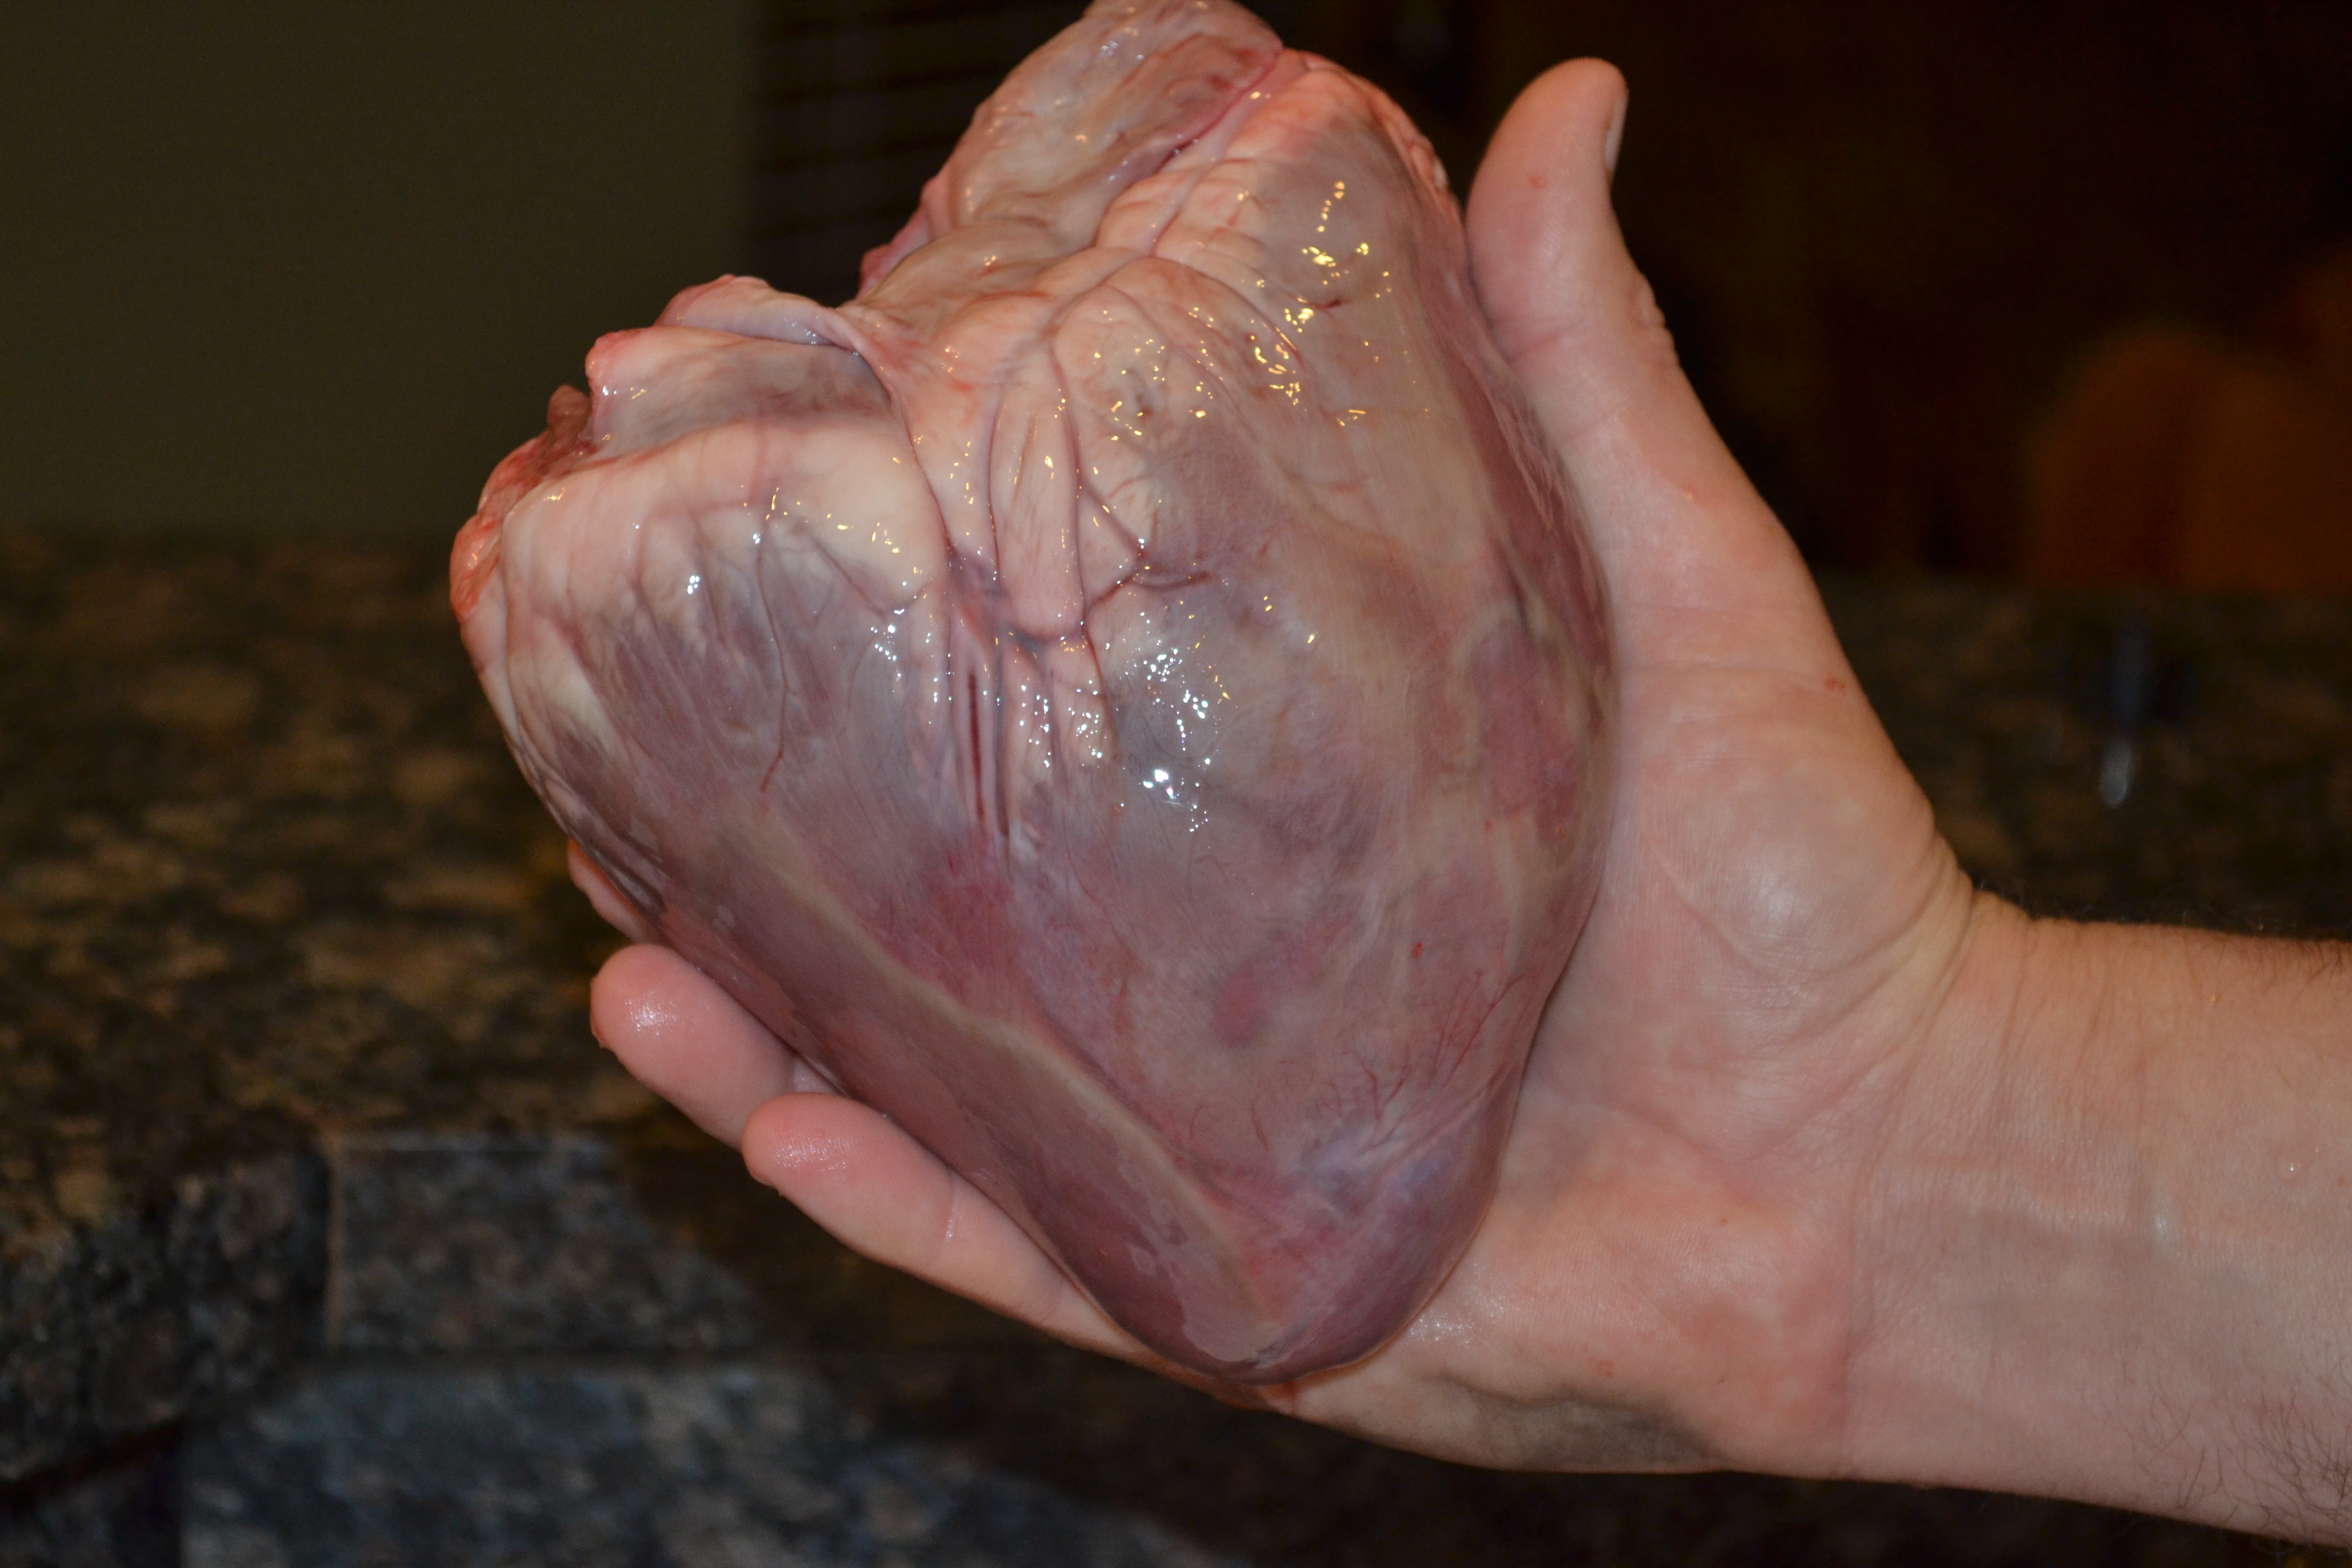
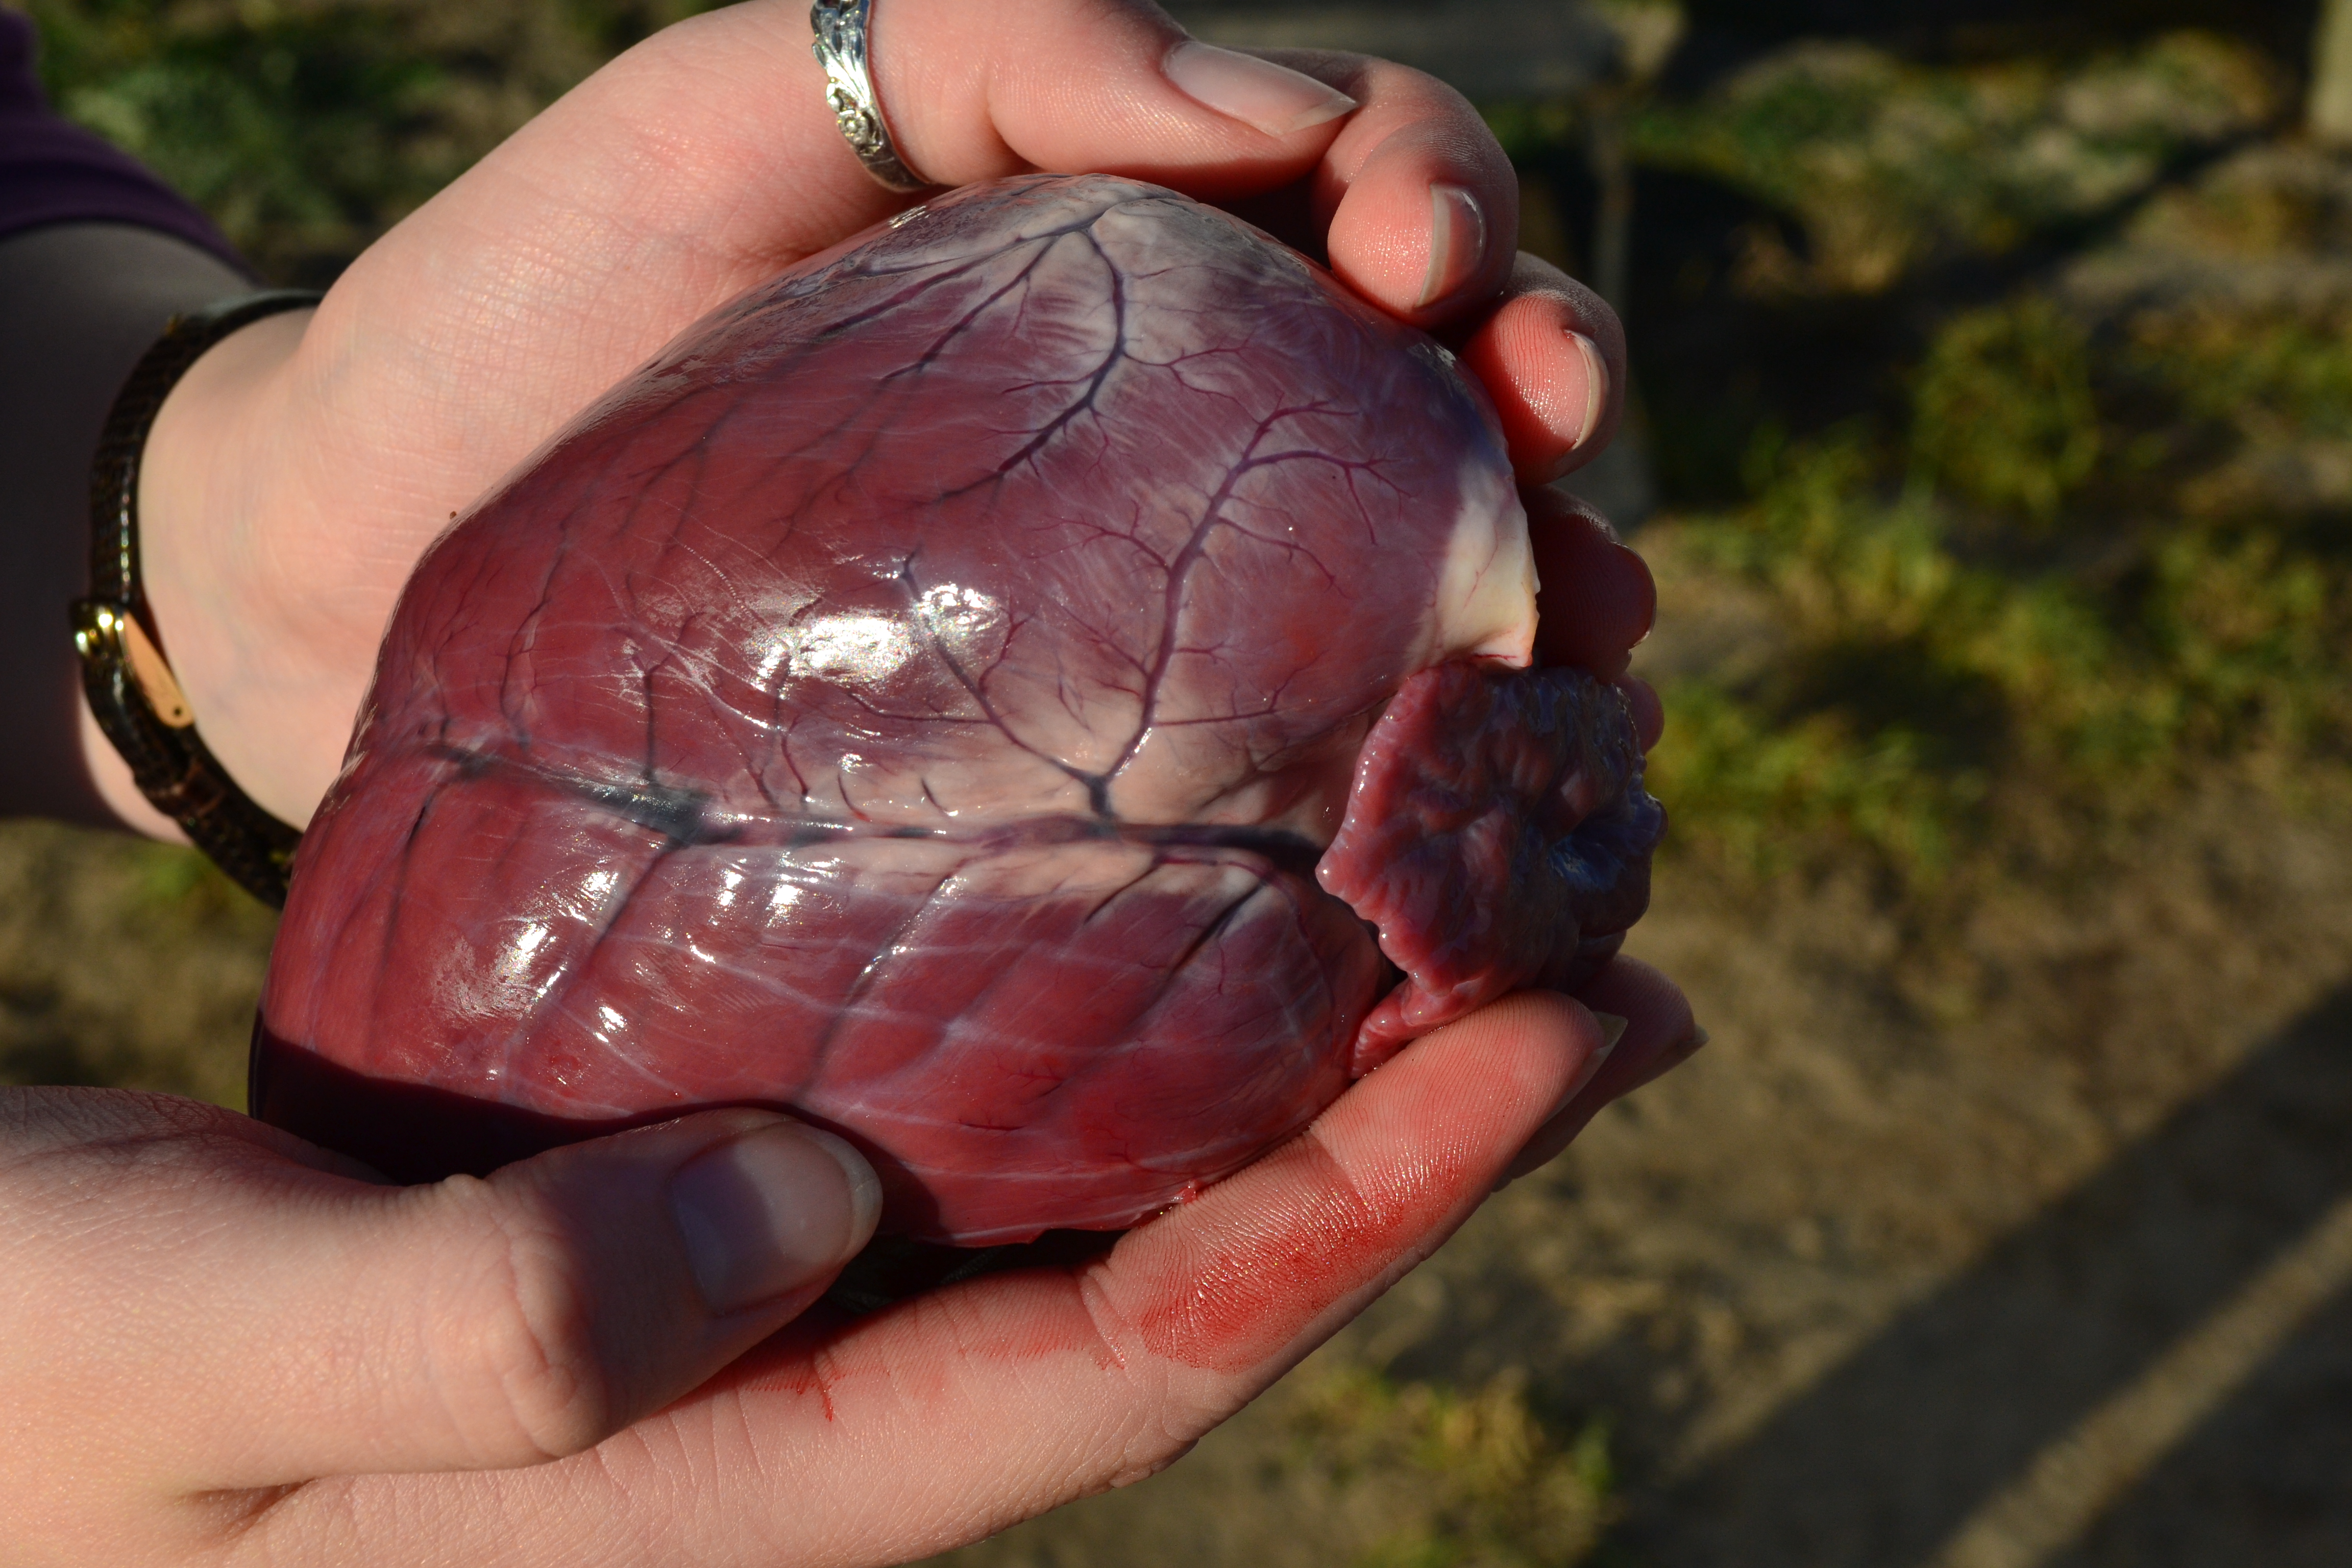
The backstrap is pictured on a cutting board that measures 32 inches. It was a refreshing surprise to discover that a prized cut of meat like backstrap, one that, if referring to venison, is set aside for a couple of special meals. will provide several delectable meals for 4 to 6 people. I felt like Jack (of beanstalk fame) in the giant’s castle. Everything was so much bigger than I was used to. Suddenly, I had at my disposal two to three times the best cuts of meat. The heart was enormous! Deerslayer is holding it in this picture. It will be prepared just as I would a deer heart.
After packaging up all the meat, I was eager to try my first batch of “cook all day” nilgai. Just the “tendony” shank meat and neck meat filled my roasting pan so I started with that. I was pleased to discover that it cooked up just like venison or wild pork. The meat was some of the best I’ve ever eaten. It was a glorious mahogany color with a rich, full flavor. I was sold.
Rich, mahogany-colored meat. Lean and flavorful. Ready to be used in Carne Guisada, Stews, Soups, Pot Pies. BBQ sandwiches.
Next, I think I’ll be taking full advantage of the extra-large, hind-quarter muscle to make some jerky. I’ll keep you posted. Then we’ll grind up our meat for the year. Once again, I’ll share the process.
I received the text from Deerslayer shortly after 7:00 a.m. He wanted to know if I wanted to get some snapshots of a Nilgai for my blog. It was short and to the point but it spoke volumes.
The unwritten meaning behind the text was: “Oh, my gosh! I got a nilgai. I’ve been stalking them for two years and I finally got one. Whoop, whoop! Let’s fill the freezers. I think we should buy another one and dedicate it to the keeping of my nilgai, exclusively. Perhaps a shrine should be erected!”
I hadn’t headed out to the hunting camp with Deerslayer on this particular weekend. It’s only about an hour and a half from door to door. Deerslayer headed out after work. Over the past year and a half, he’d decided that one of these creatures would fill the freezer nicely. At 500 to 750 lbs. of lean, flavorful meat, I had to agree.
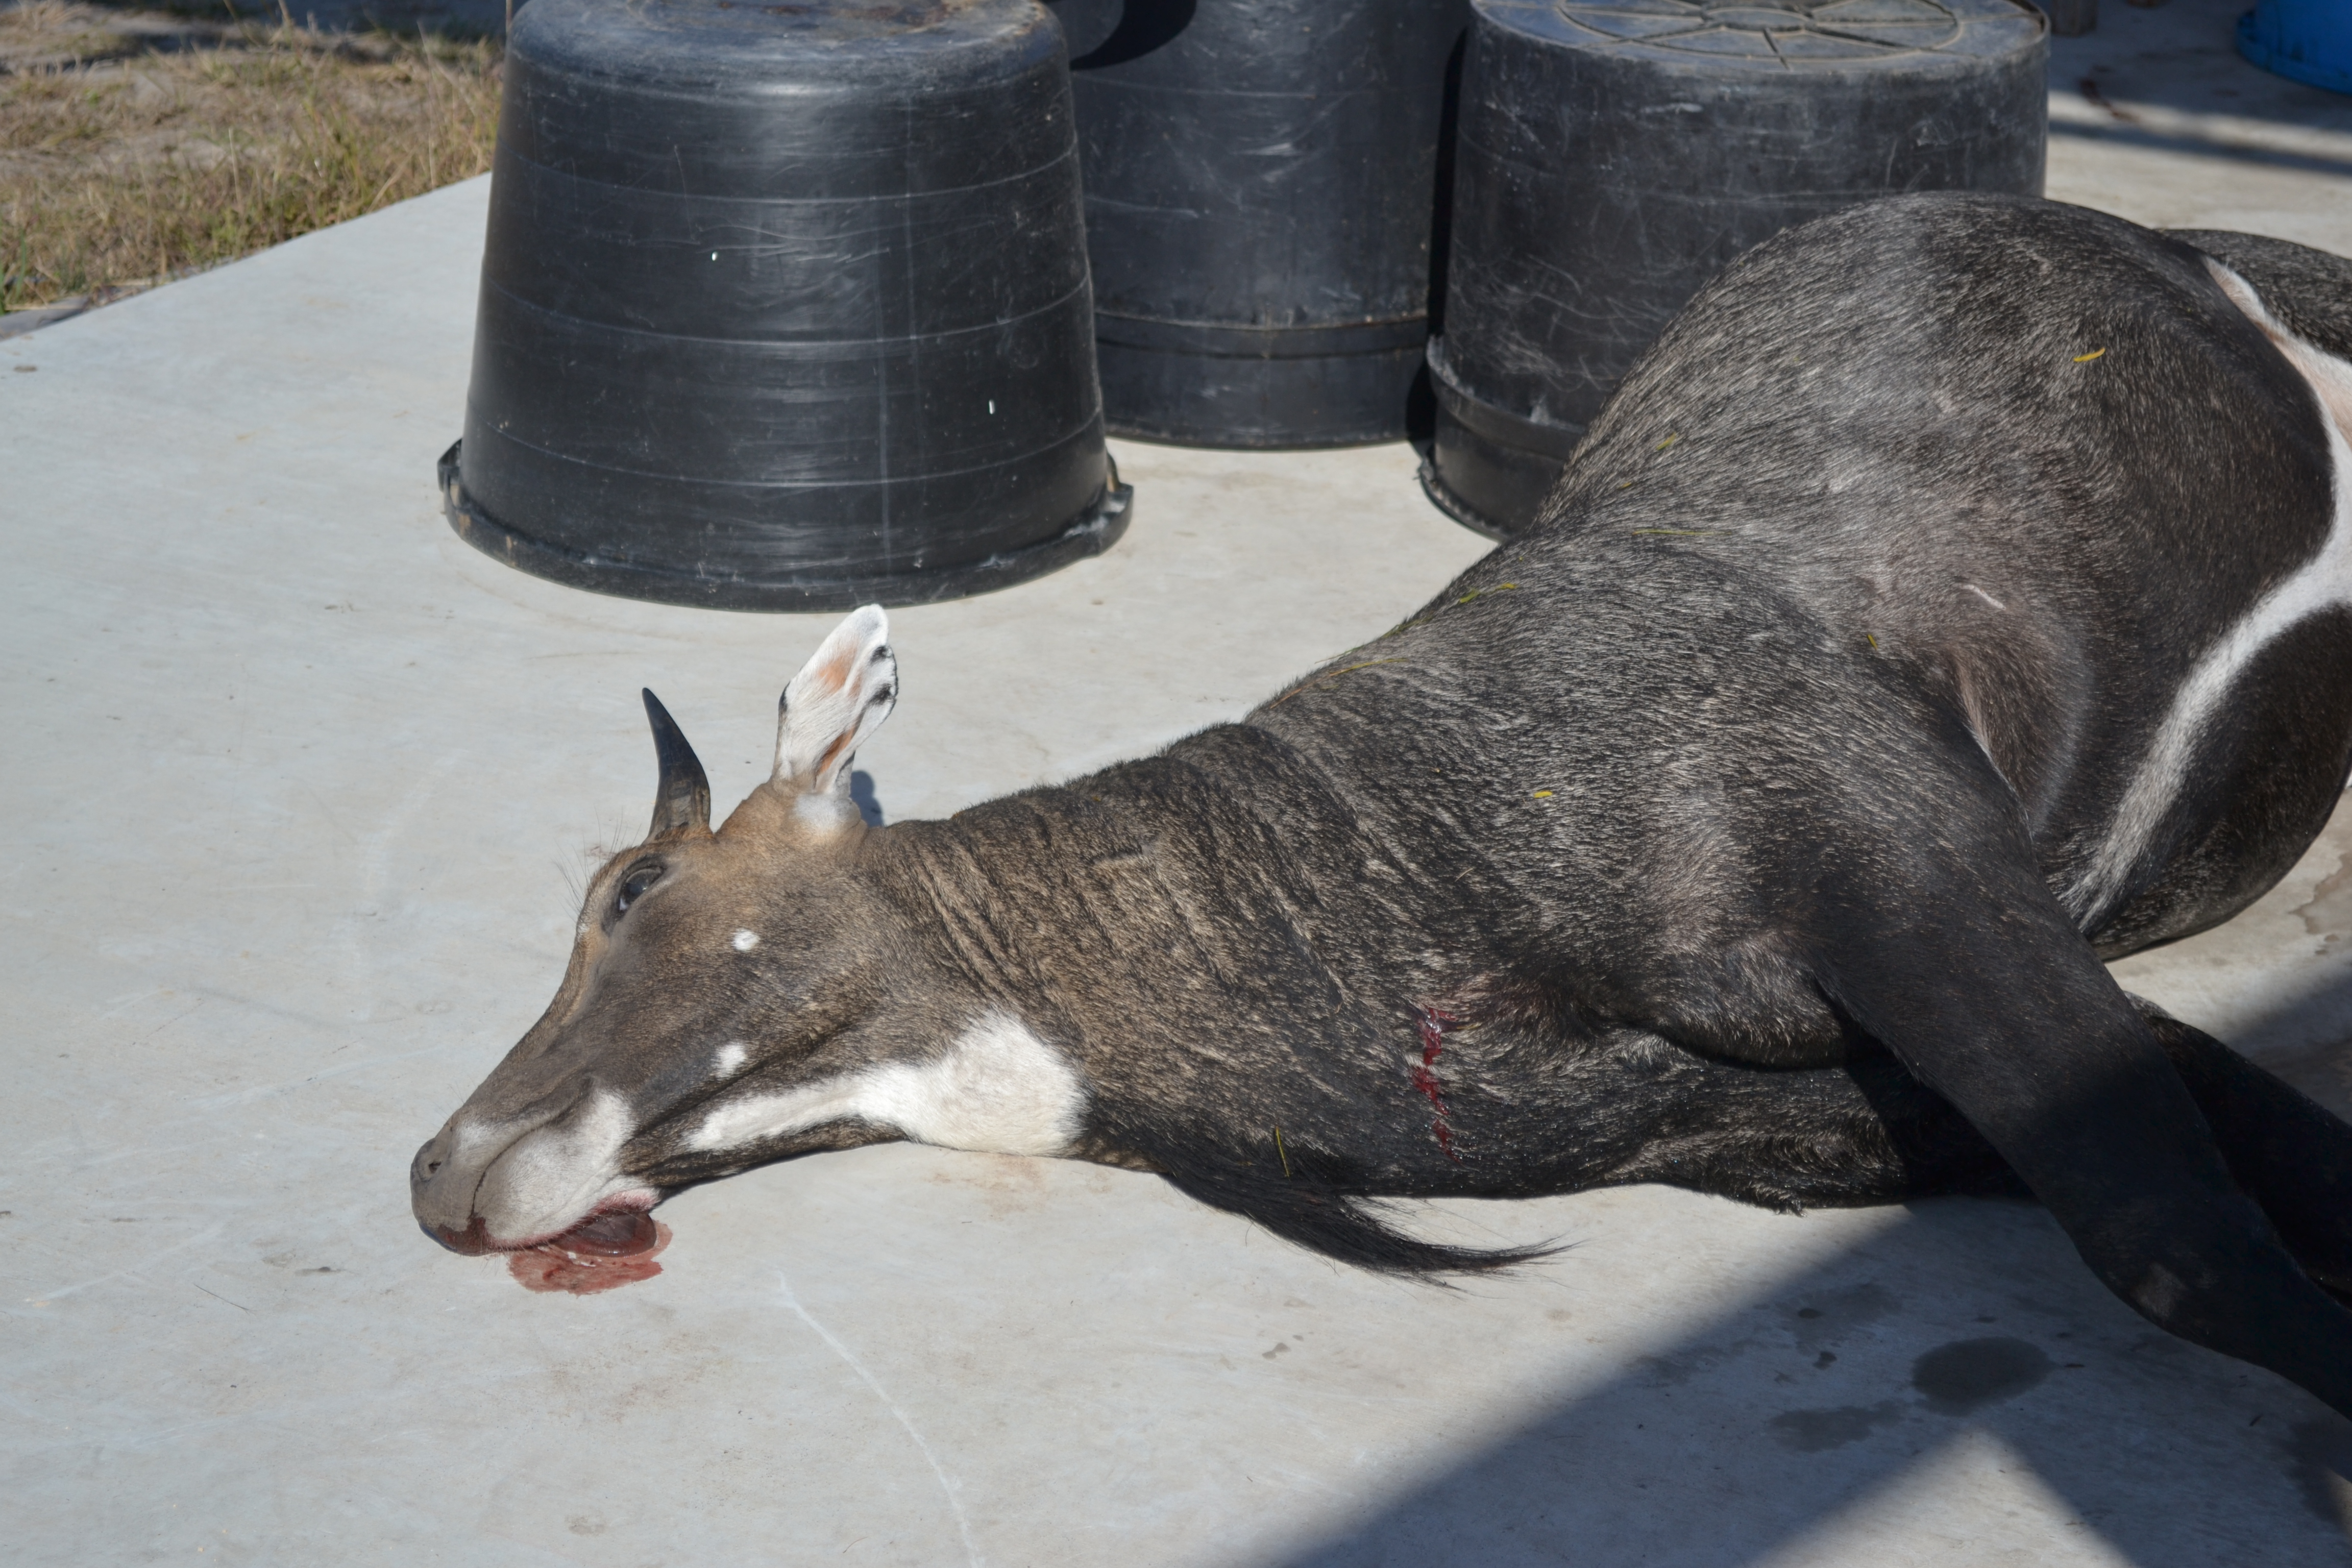
These creatures have been around South Texas since the 1920’s, when the King Ranch imported them from India to keep as exotics and have available for hunters. They are members of the antelope family. The males are sometimes called “blue bulls” because of their coloration. Escaping through breaks in fences and roaming the area without natural predators, the nilgai population has continued to grow in the region. While they are unique looking animals, (not much to look at if you ask me), they are really big and skittish. Getting a glimpse of one is a rarity.
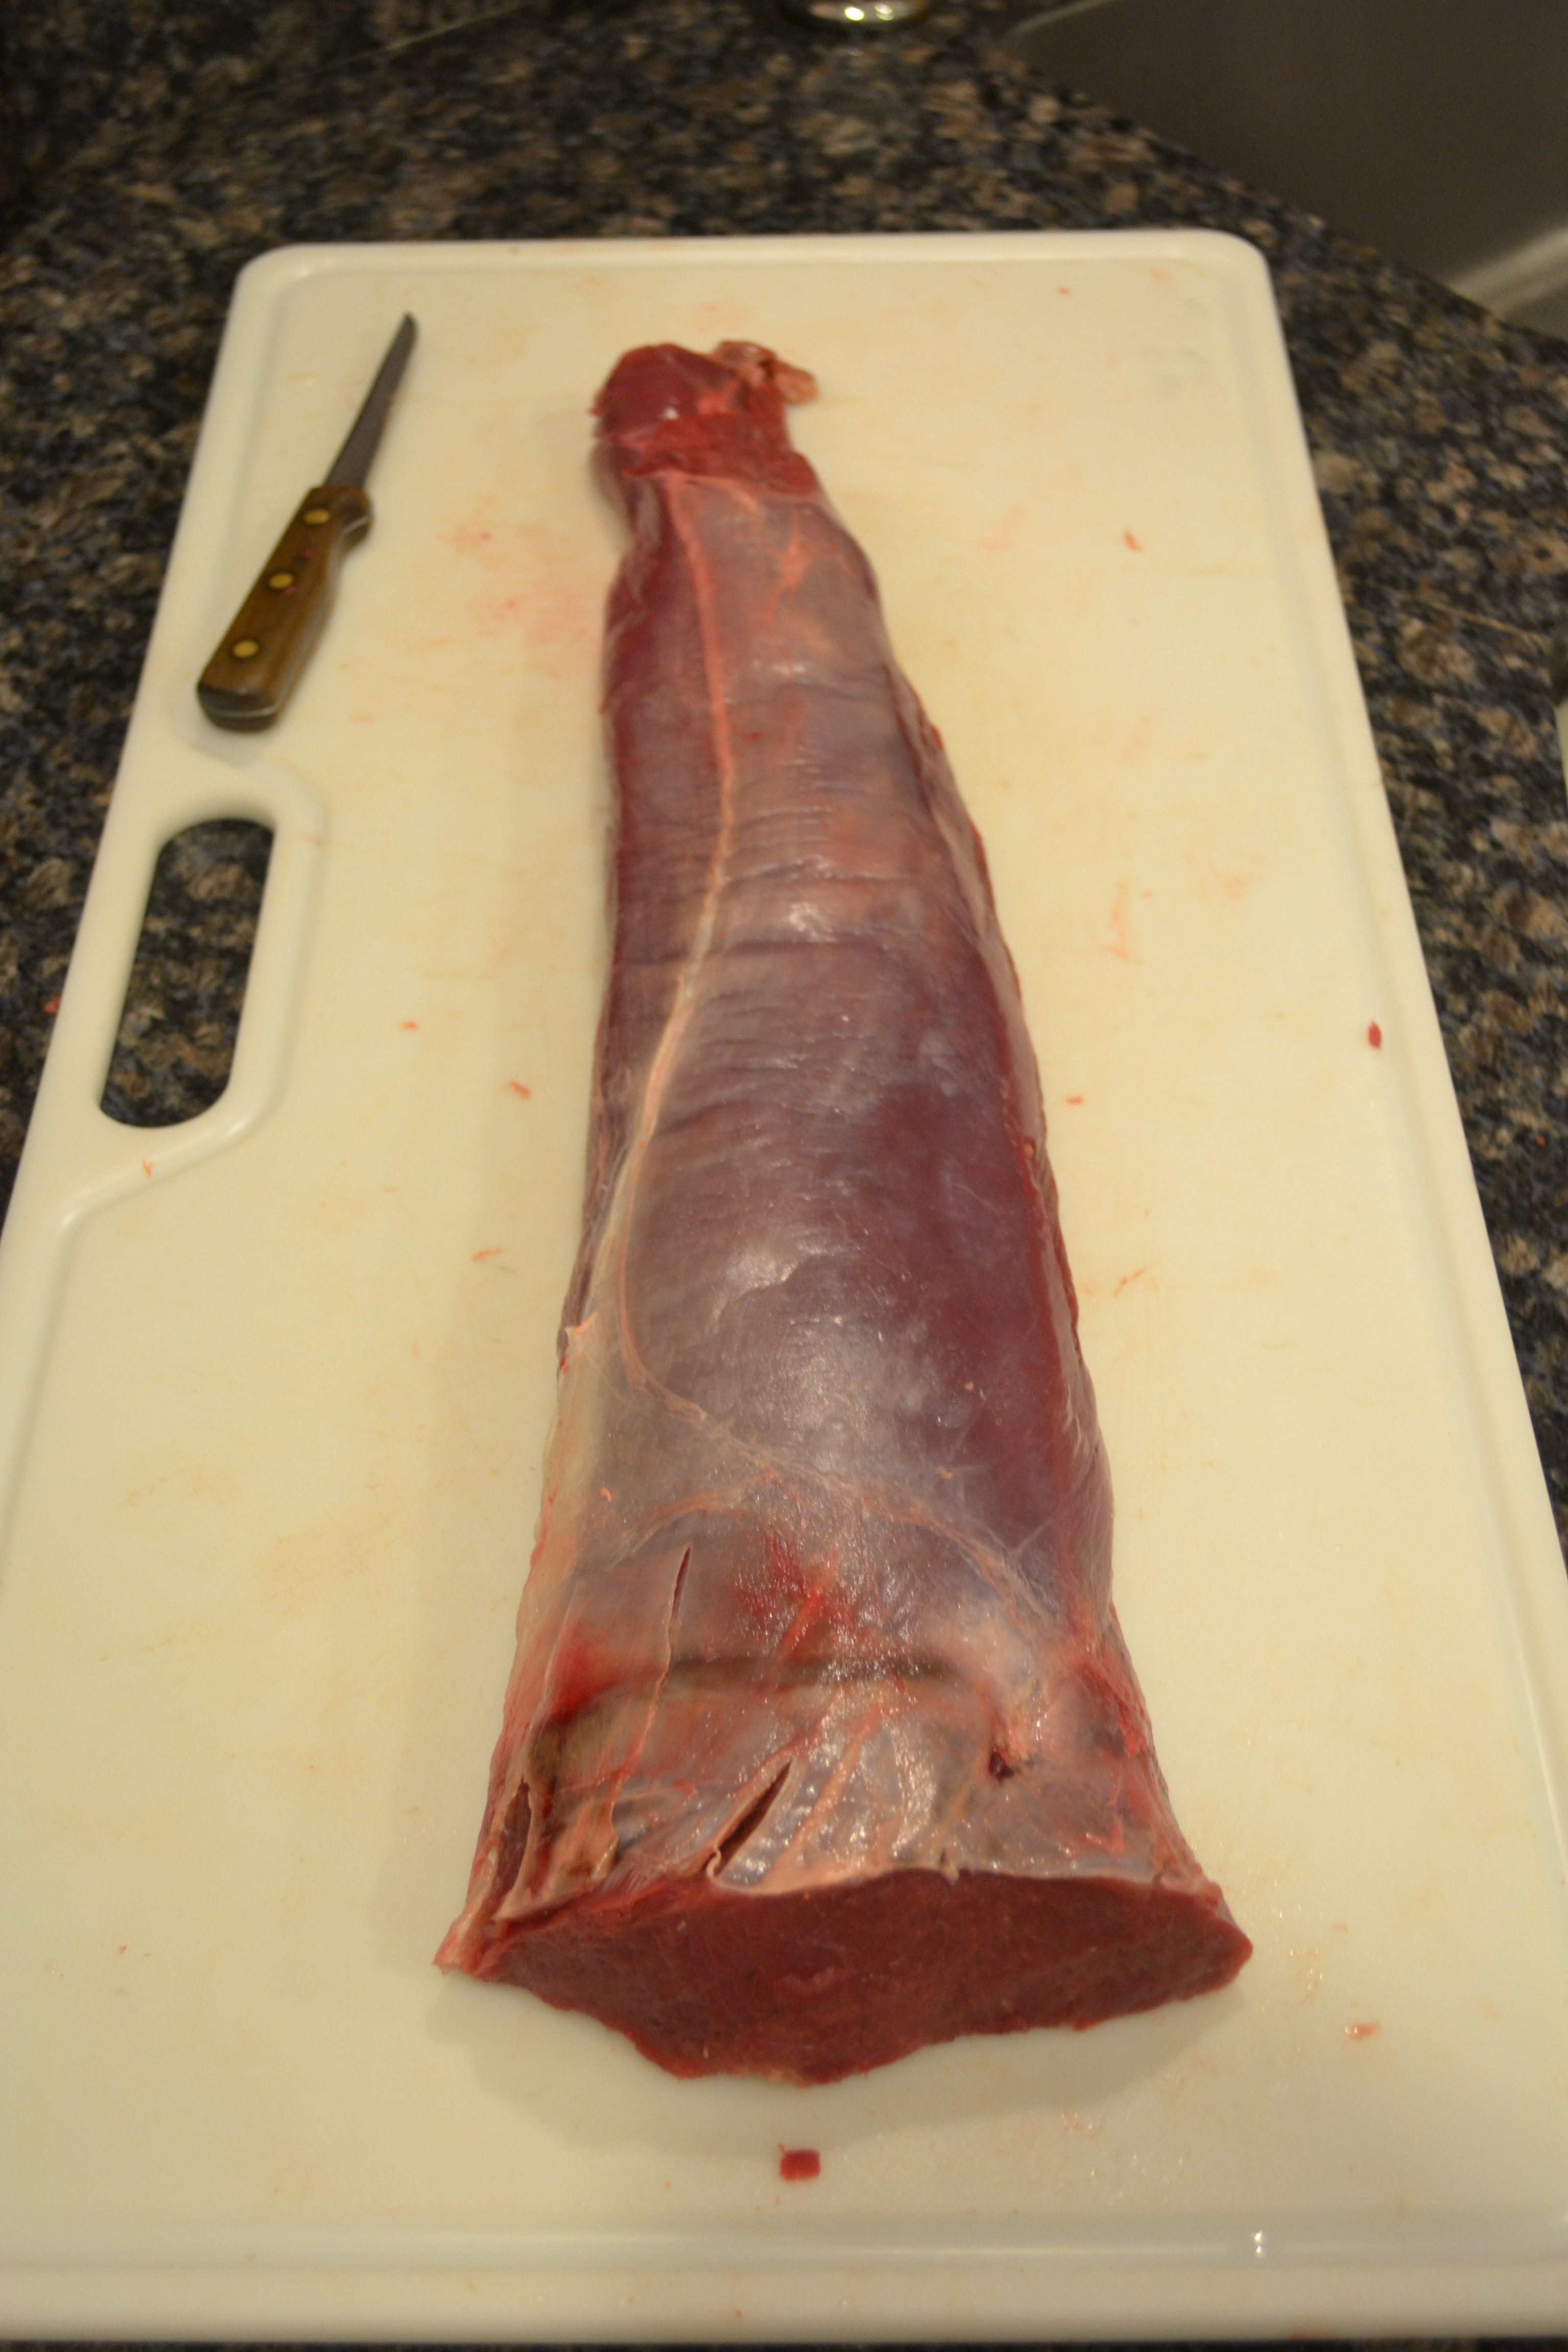
As I’m sure you know by now, I’d never processed or prepared the meat of a nilgai. My first experience came on the night of the big celebration. It’s gonna take some time for me to wrap my head around how large the muscles are on this beast. I’m not complaining, mind you. But when Deerslayer (nay, Nilgaislayer) said he was bringing the tenderloin into the camper for me to prepare, I wasn’t expecting this:
This is one tenderloin, at least 20 inches long and bigger around than my upper arm. (I’m not particularly robust, keep in mind.)
I liberally seasoned the meat with salt and pepper mix and seared it in a cast iron skillet with a drizzle of olive oil. There is practically no fat on the meat which means that it can either be prepared quite rare or cooked all day in the oven or on the stove. After letting the meat rest for 15 minutes, I cut the seared tenderloin into bite-sized pieces and served it up as an appetizer to the nine hunters who had gathered around the fire. It was hugely popular. I’m gonna call it a success.
Over the next few weeks, I’ll be learning the nuances of nilgai vs. venison. How will it cook up? How’s the taste? It’s gonna be fun.
Nilgai sport a jaunty beard and some interesting coloration. This one will be named “Smugly” and will hang in our library.
As I read a post recently, from Andy at Tremendous Whatnot, I was reminded of the Deerslayer tradition of preparing a celebratory dinner for the lucky hunter who triumphantly brought his/her bounty back to camp. Photos are taken during all steps of the cleaning process. Yuck! With a certain amount of “tongue-in-cheek” pomp and circumstance, the deer’s heart is delivered to the cook (me) to be pan fried, served with cream gravy, garlic mashed potatoes, and some sort of veggie.
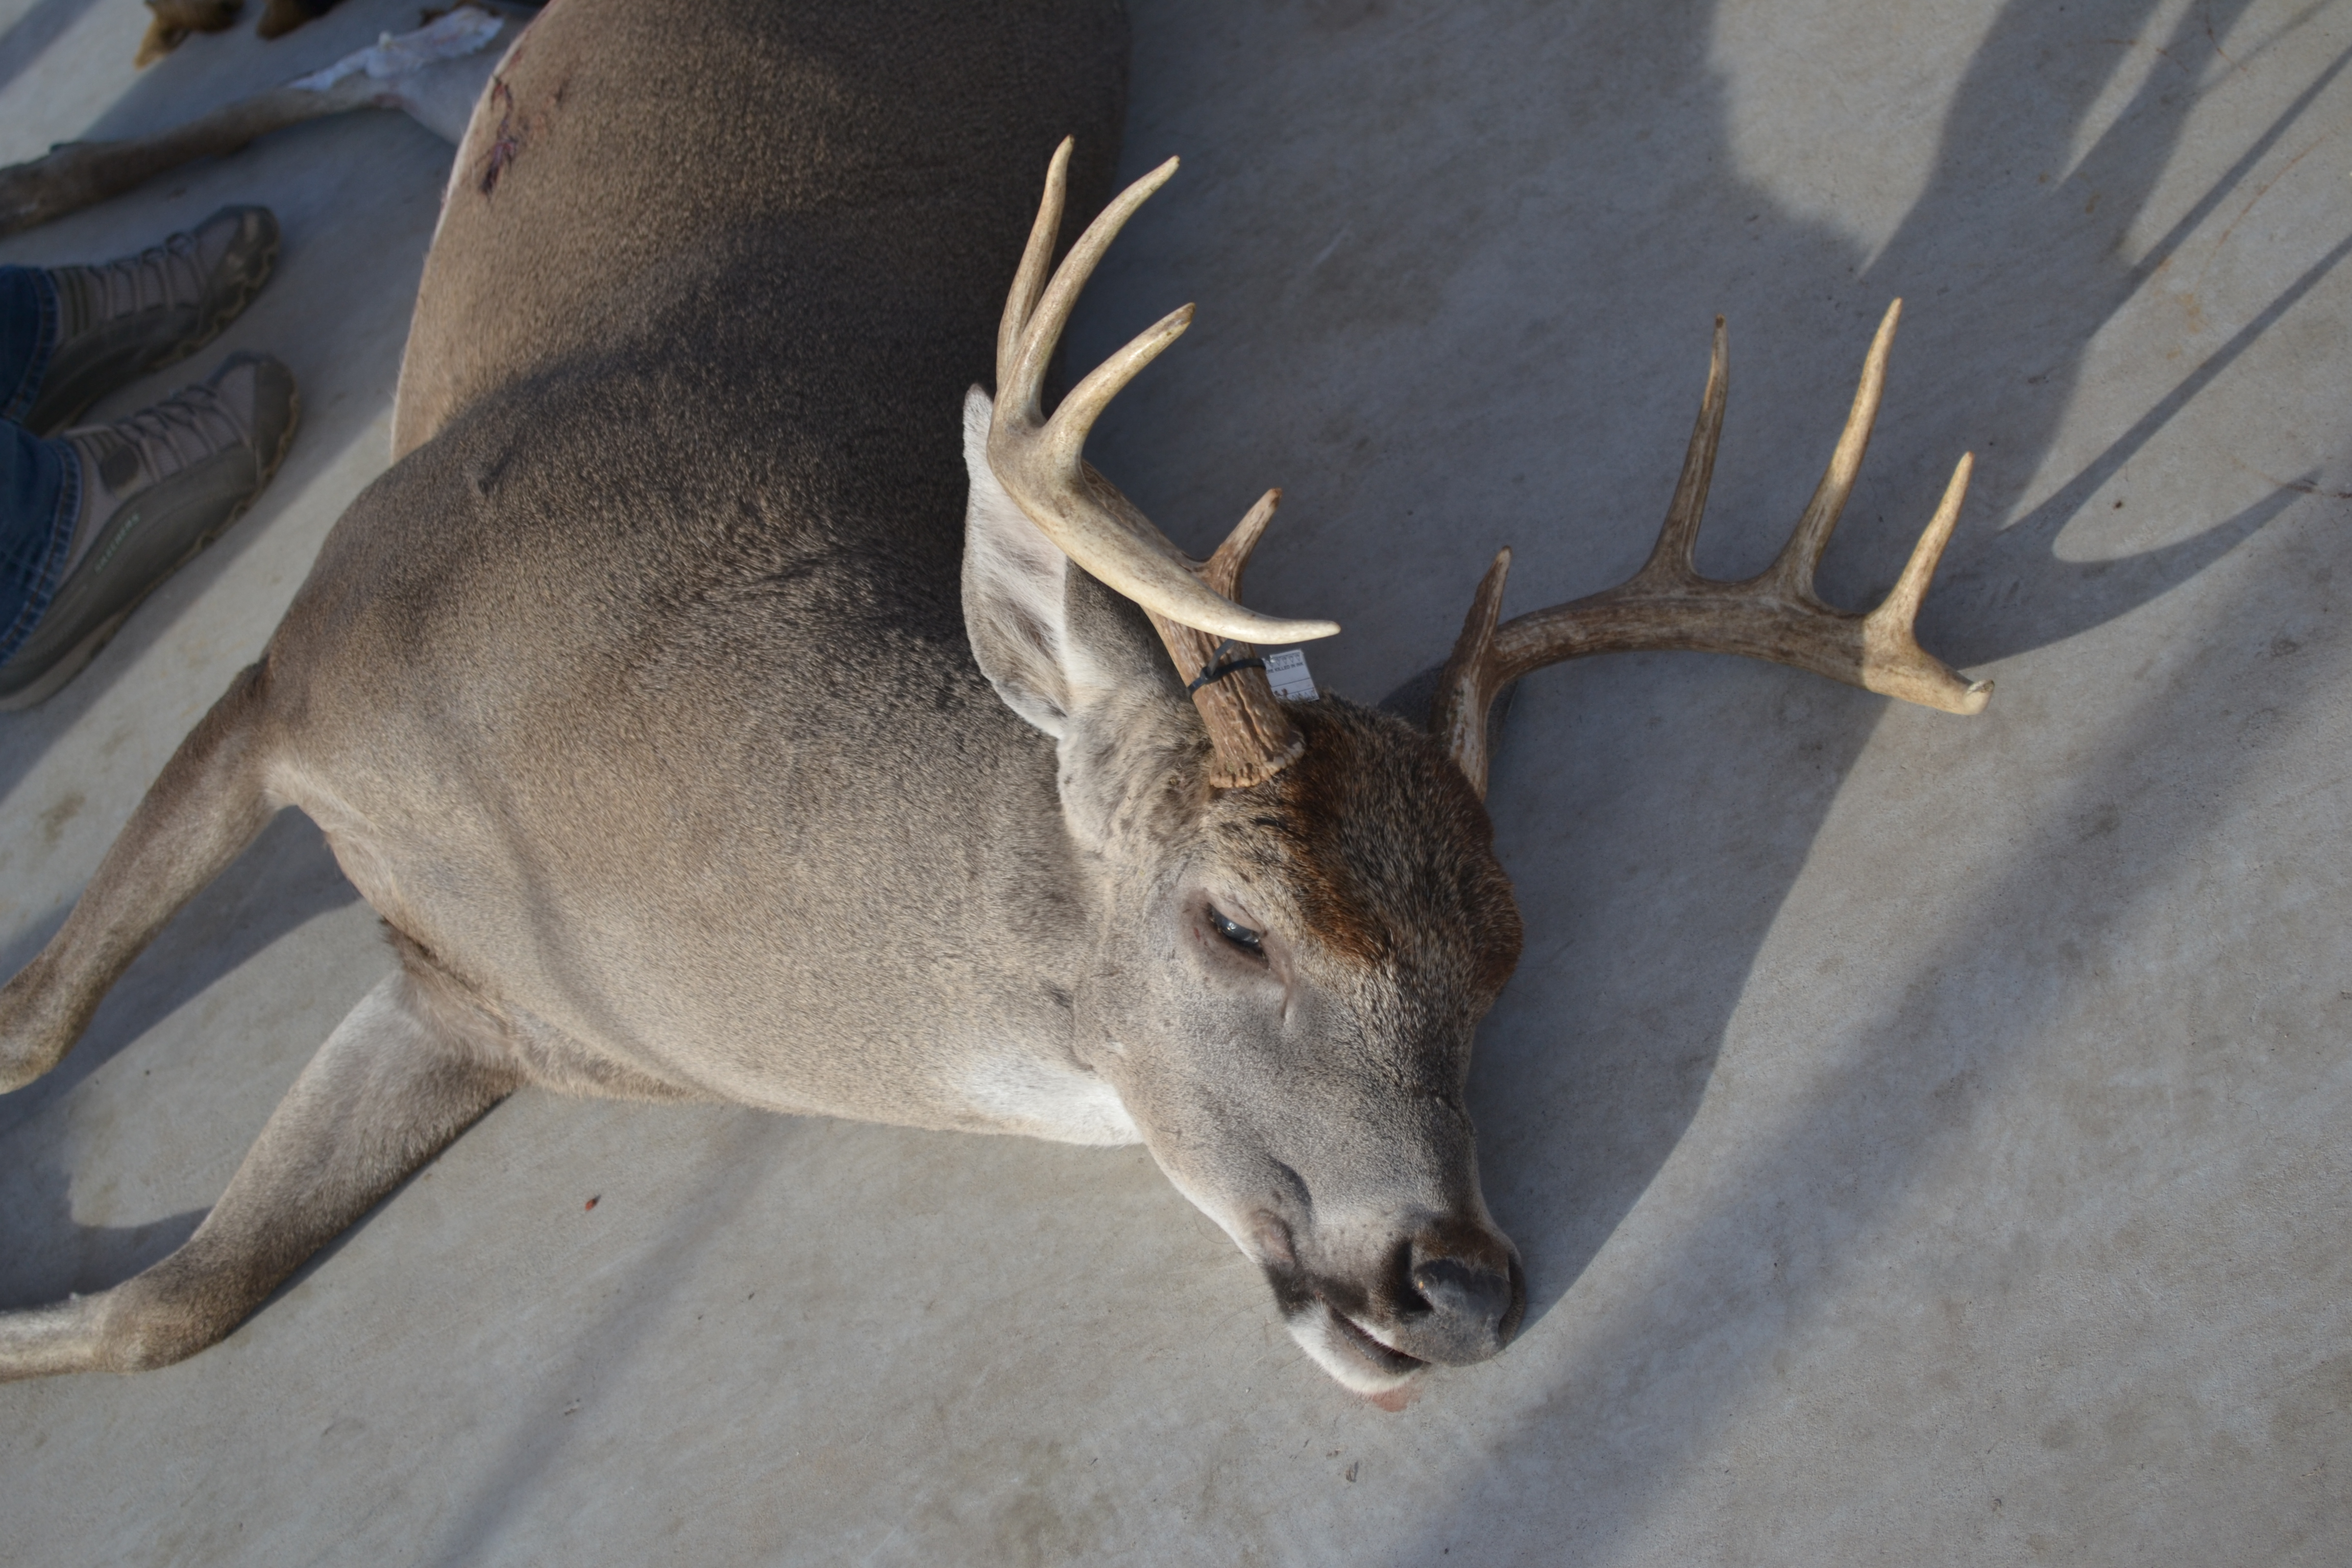
Well, usually, I’m pretty much on top of things when it comes to hunting camp prep. This time, however, I completely dropped the ball. My younger junior deerslayer produced the goods, as it were. She brought to camp the most beautiful ten-point buck ever to grace the books. Calls were made, photos were taken, and texts and e-mails were sent. For the first time ever, I didn’t have the necessary ingredients to fulfill the tradition. I was missing potatoes, garlic and cream, eggs for breading, and enough milk for gravy. I was afraid I’d be fired. So, with tail between my legs, I asked that we do the do, at home, with all the trimmings and appropriate hoopla the next day. When presented with the choice of a marginal meal, at best, or one done to a fair-thee-well at home, my junior deerslayer chose wisely. Do it up big. Do it up right. Do it up at home.
Lesson learned. I don’t know that I will ever leave the house again without potatoes, garlic, cream, milk, flour, Tommy’s Salt & Pepper mix, eggs, and cooking oil in my purse or on my person ….. just in case.
Pan-Fried Venison heart
One or Two venison hearts
Enough flour to dredge (about a cup and a half)
Tommy’s Salt & Pepper Mix*
2 eggs, whisked in a pie plate
Cooking oil and 1/2 stick of butter, enough to make about ¼ inch in cast iron skillet
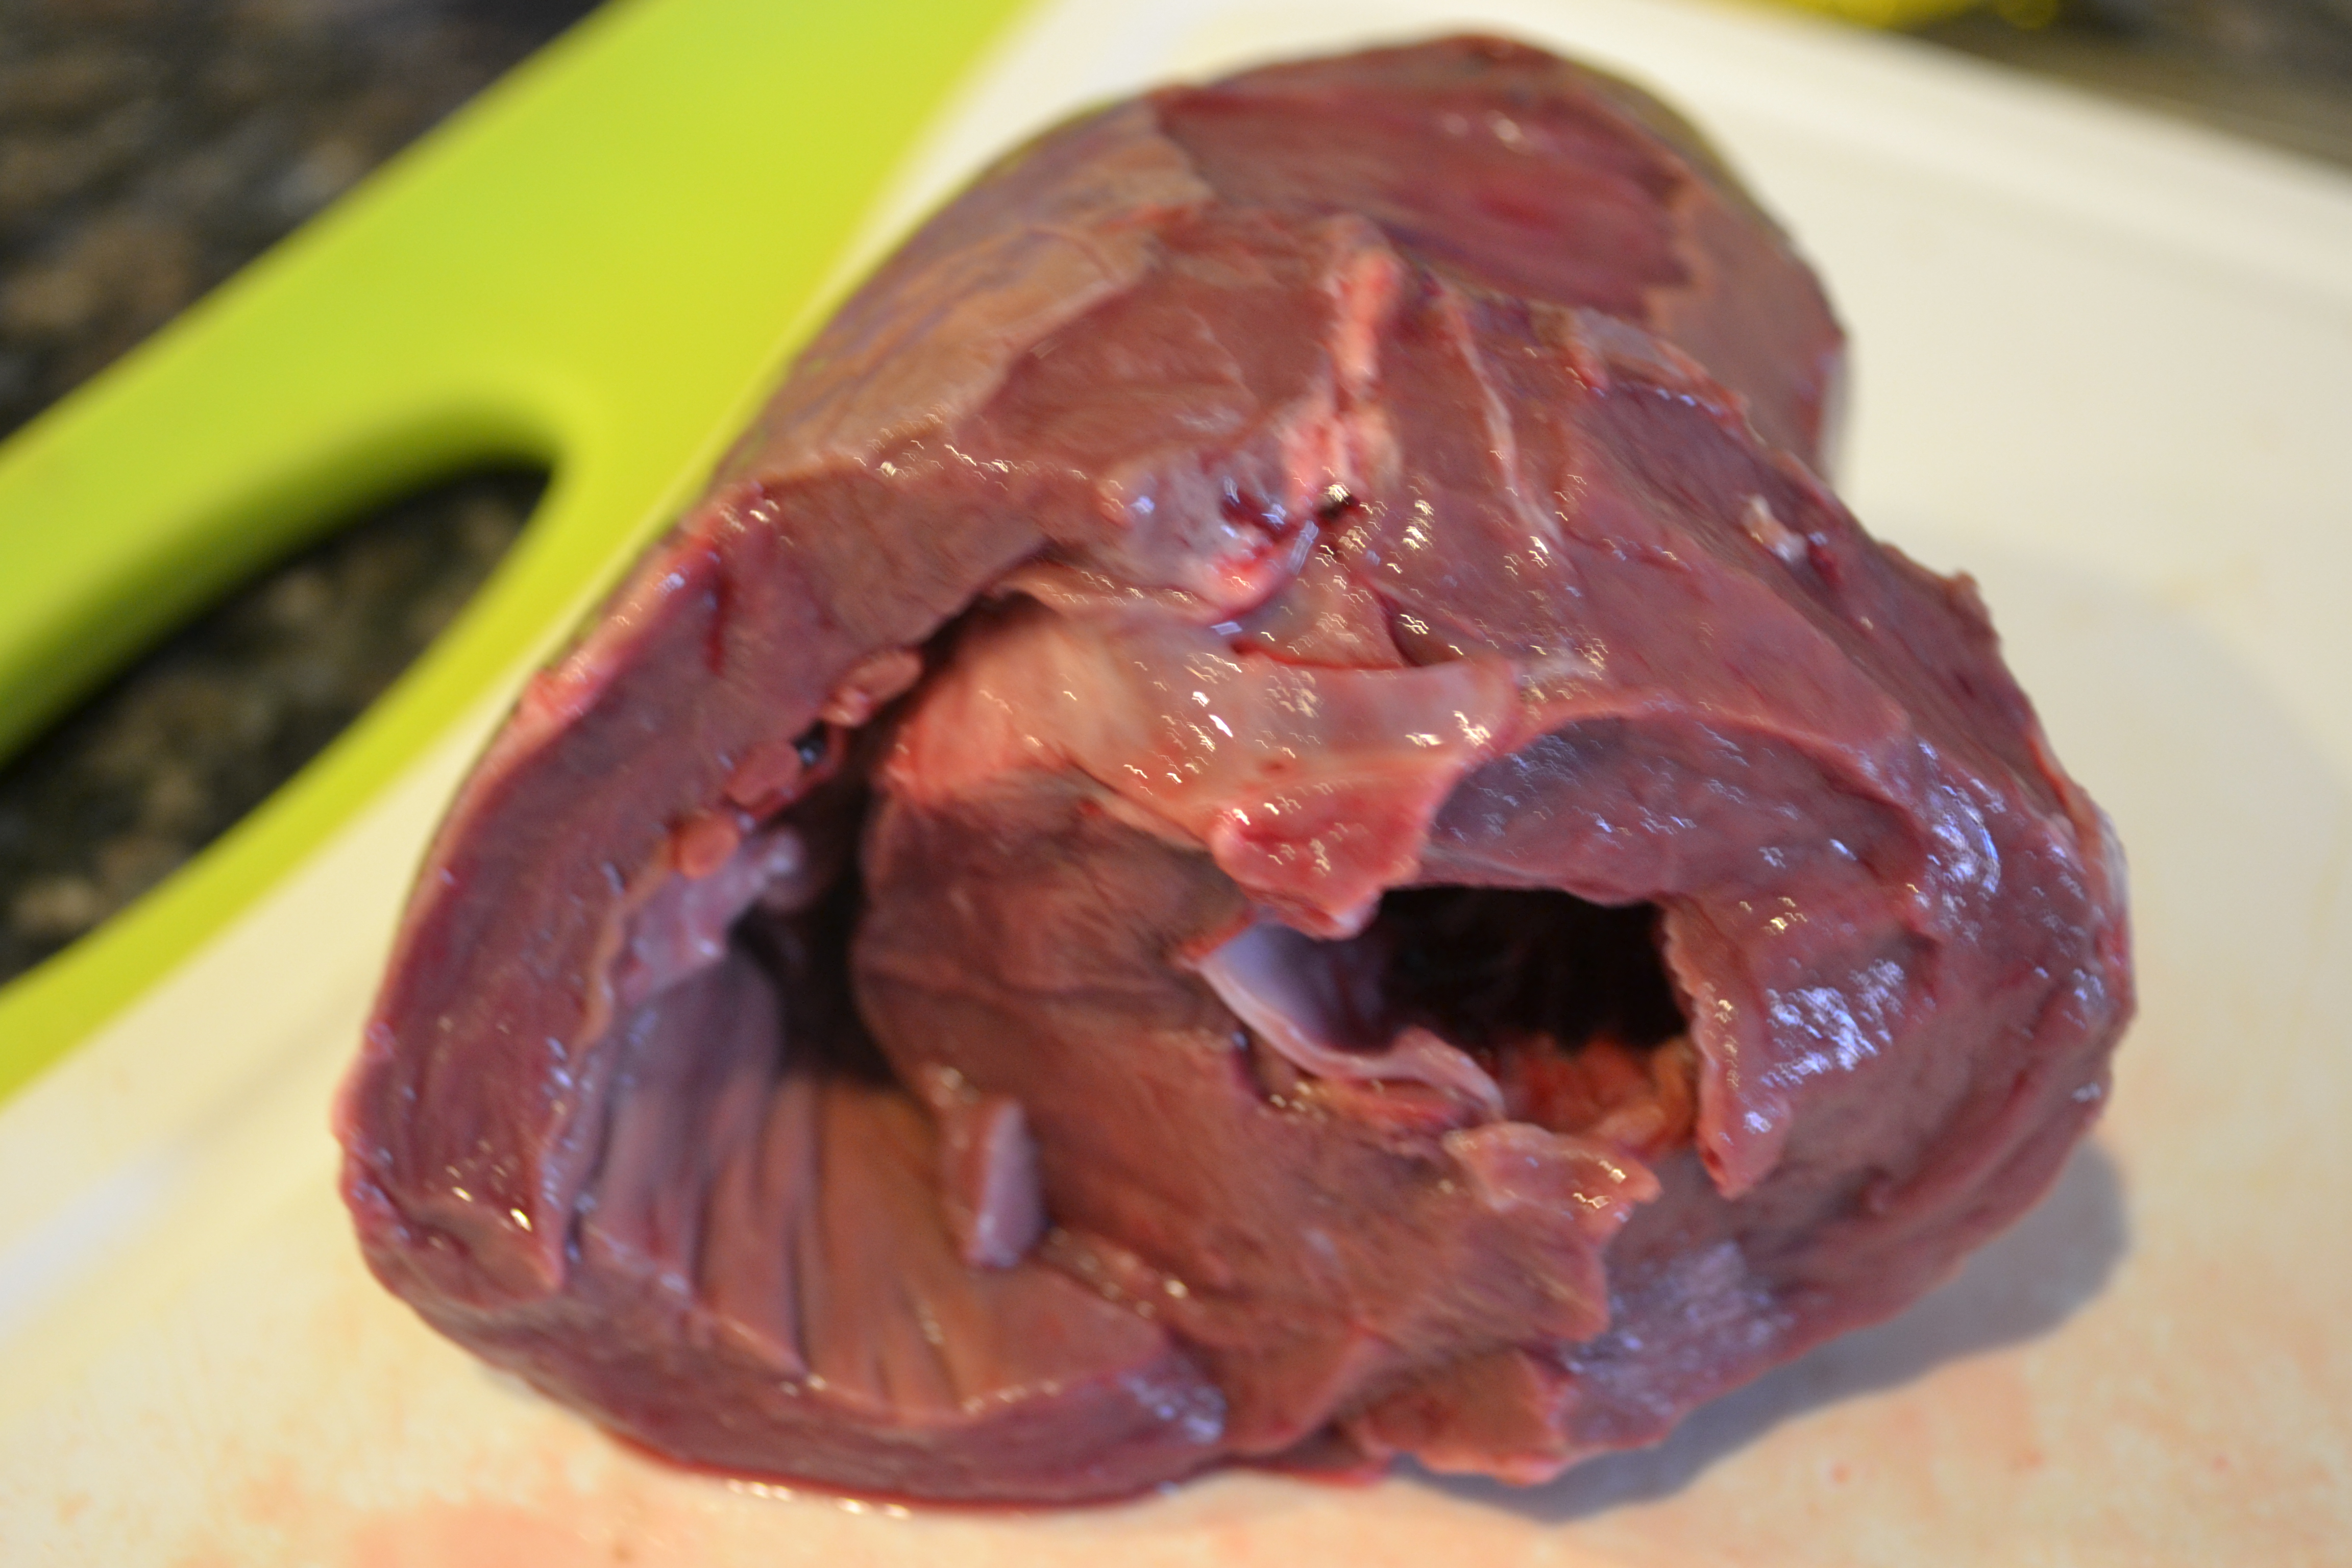
Rinse heart thoroughly. Be sure to clean out any blood clots which can sometimes be in ventricles. Trim white membrane from muscle.
Slice heart into 1/2 inch slices.
Notice the blood clot. It should be rinsed away. The fibrous tissue in the ventricle should be cut away also.Season slices liberally with Tommy’s Salt & Pepper mix.
Set up a work station of eggs, whisked together in a pie plate, and flour on a paper plate.
This is a silly idea that I came up with and love, love, love! I always wind a rubber band around the end of the fork that I use to whisk eggs. It keeps the fork from sliding into the sliminess. Not a big deal, but it makes my life a teeny bit easier.
Coat heart slices in flour, then egg, and additional flour to create a good coating. I usually use disposable plates to ease the clean-up. Even the deerslayer’s wife needs a little bit of a break! These coated slices of heart can be set aside on a cutting board, foil, or other surface. Heat cooking oil and butter in a cast iron skillet, just enough to cover the bottom. The slices of heart can then be fried in the hot oil until each side is nicely browned, about 4 to 6 minutes per side depending on how hot the oil is. Set aside on warm plate.
Cream Gravy
Oil and crispy bits from frying heart
Flour
Milk
Salt and pepper to taste
Once the steaks are ready, you can prepare the gravy by pouring out most of the oil from the skillet, leaving a couple of tbsp. and the crusty bits in the skillet. Whisk about a quarter cup of the flour that was left over from the meat preparation into the oil mixture until it is the consistency of thick paste.
Return to low heat and add enough milk and continue whisking until the mixture is thickened and bubbly. Add salt and pepper (or Tommy’s secret salt & pepper mix) to taste. We like lots of coarse ground pepper in our gravy!
We always accompany our chicken-fried game with garlic mashed potatoes and the aforementioned cream gravy. See below.
Garlic Mashed Potatoes
Medium red potatoes, skins on, one per person, plus one extra
2 cloves of garlic per potato
1/2 stick butter
half and half, about 1/2 cup
salt & pepper
Scrub potatoes. Cube and place in a pot of boiling water. Peel garlic cloves, place in water. Boil until potatoes are fork tender. Pour off water, add butter and mash.
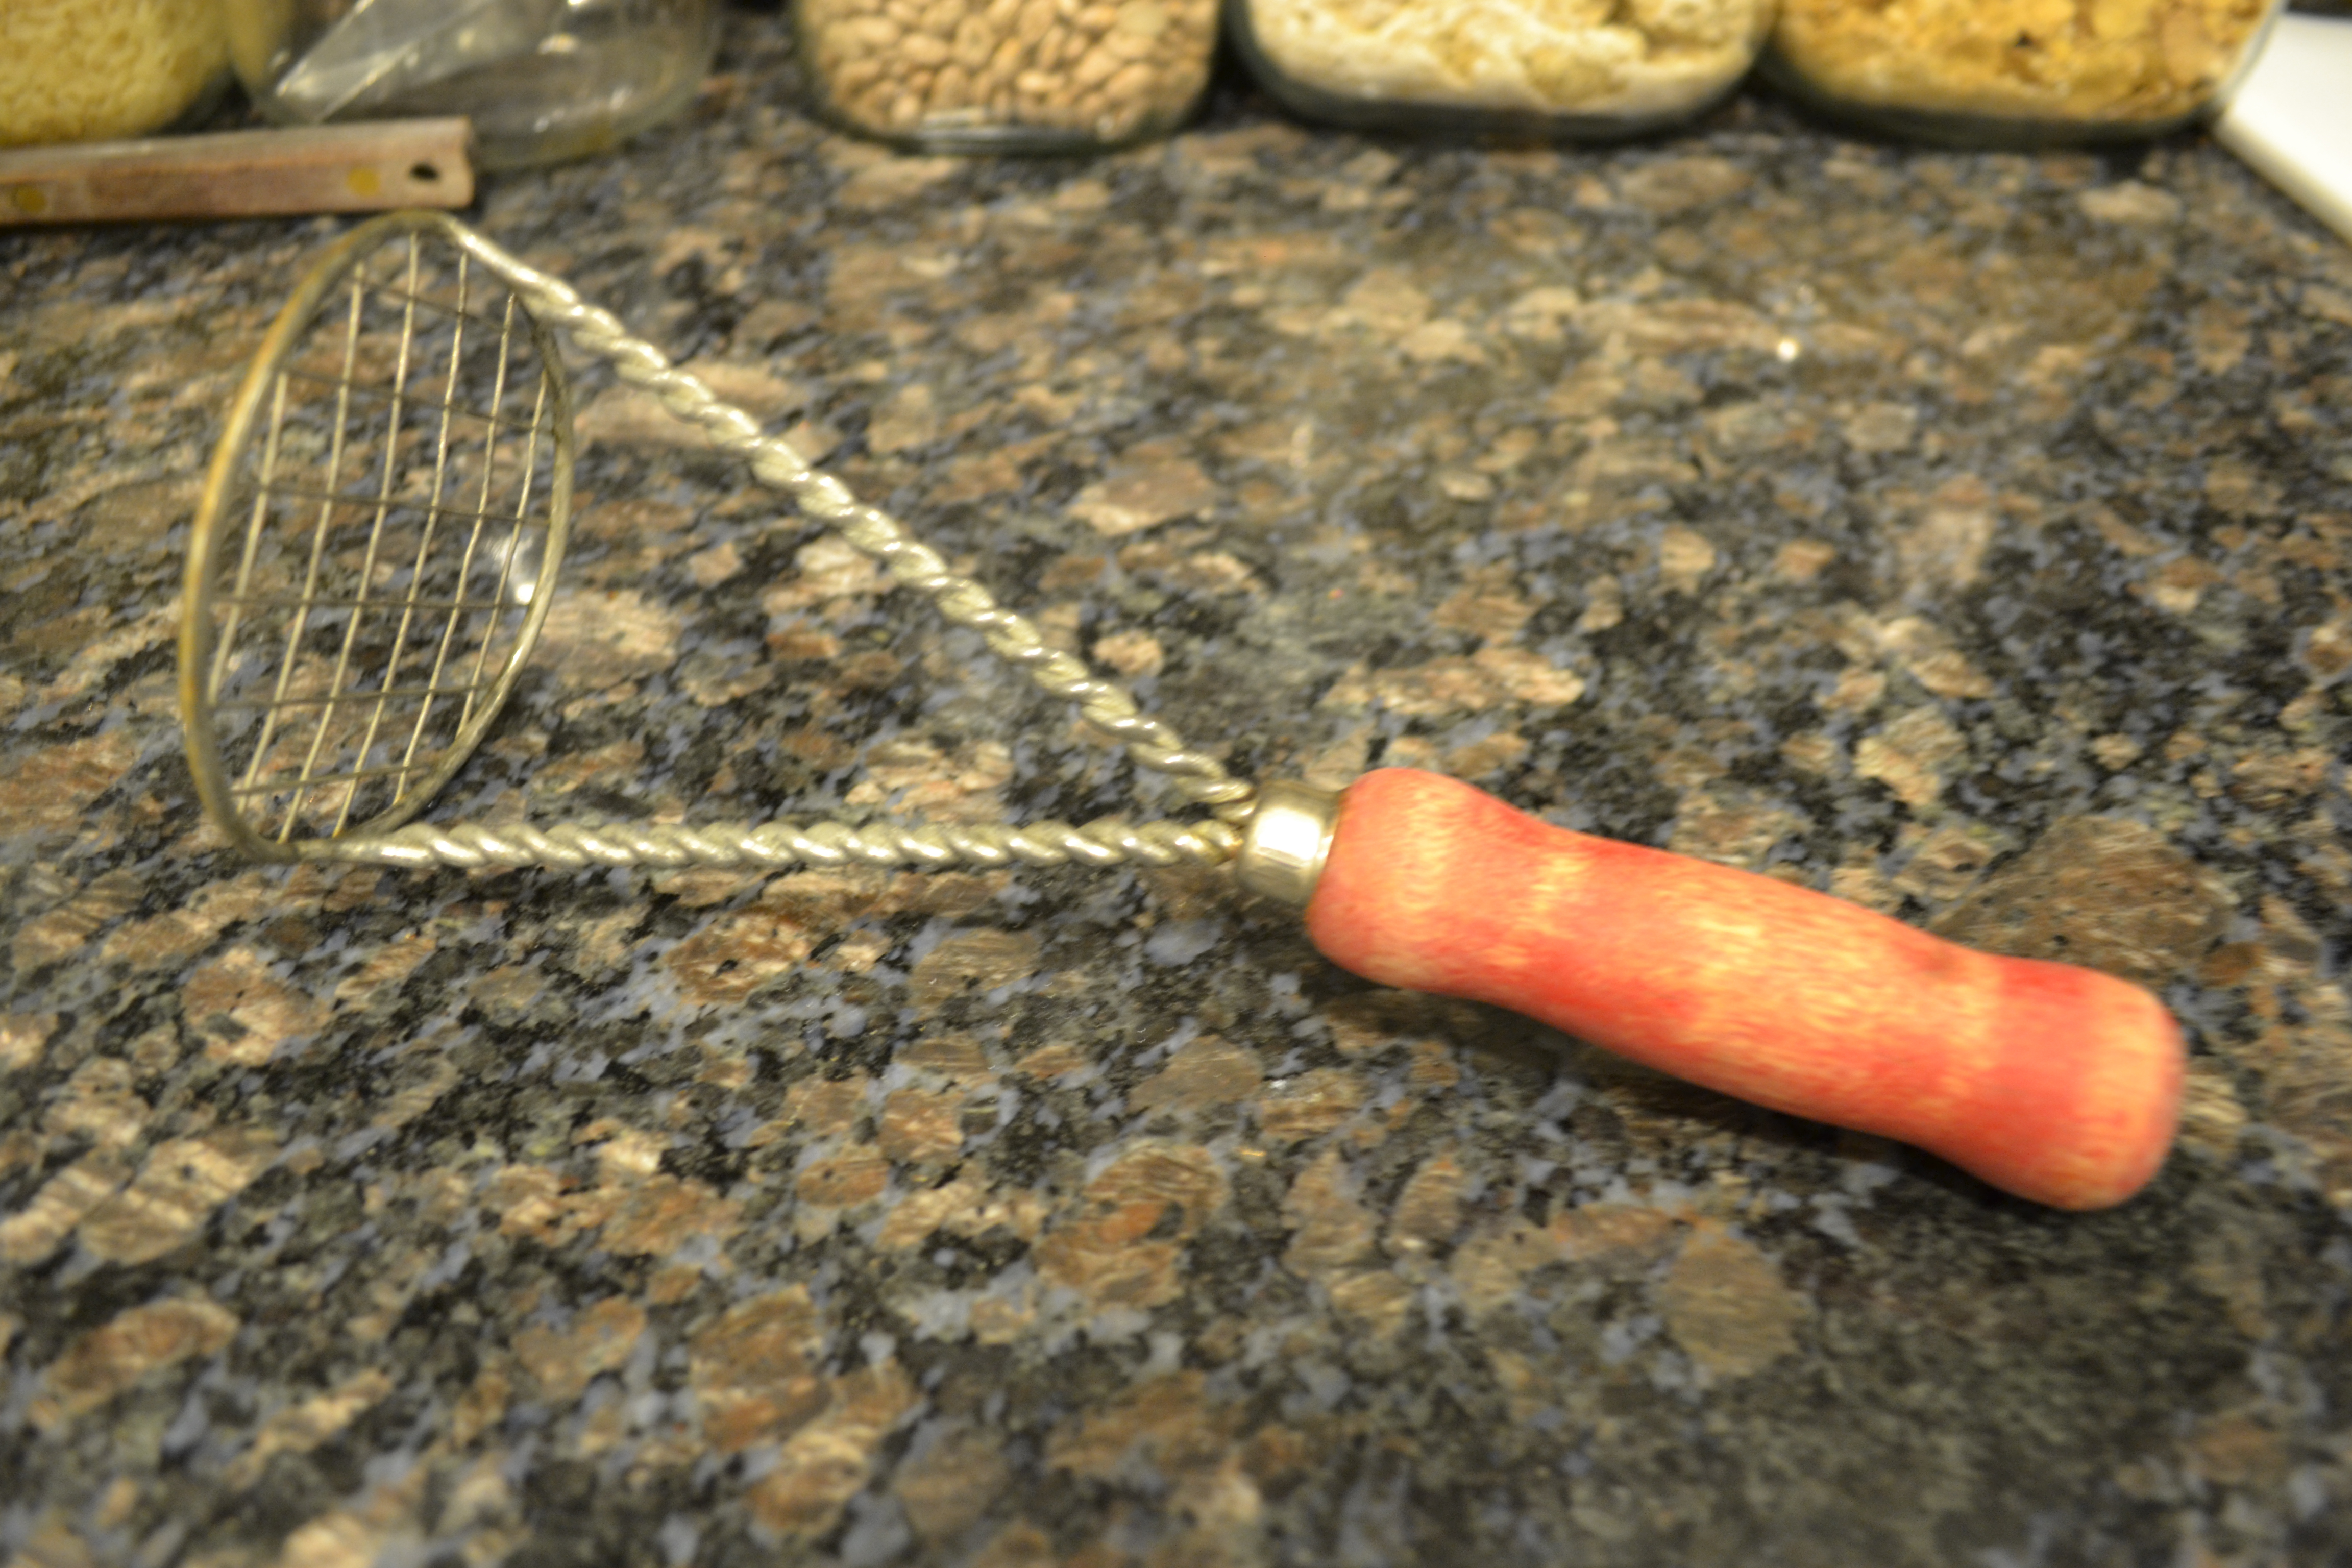
This is my very special potato masher. It belonged to my great-grandmother.
Add half & half until your preference for glorious garlic mashed potato consistency is achieved. Season to taste. Enjoy.
*Tommy was Deerslayer’s dad, head of the clan, if you will. He was an amazing man. Any number of blog posts could be dedicated to examples of his generosity, kindness, daring exploits, child-rearing philosophy (he raised eight), strong faith, and brutal frankness. Deerslayer is the man that he is because of Tommy. For that I am very grateful…. most of the time. He also was an extraordinary cook and grill-master. Here is a simple recipe that we got from Tommy. I use it on just about everything I cook except cake and ice cream.
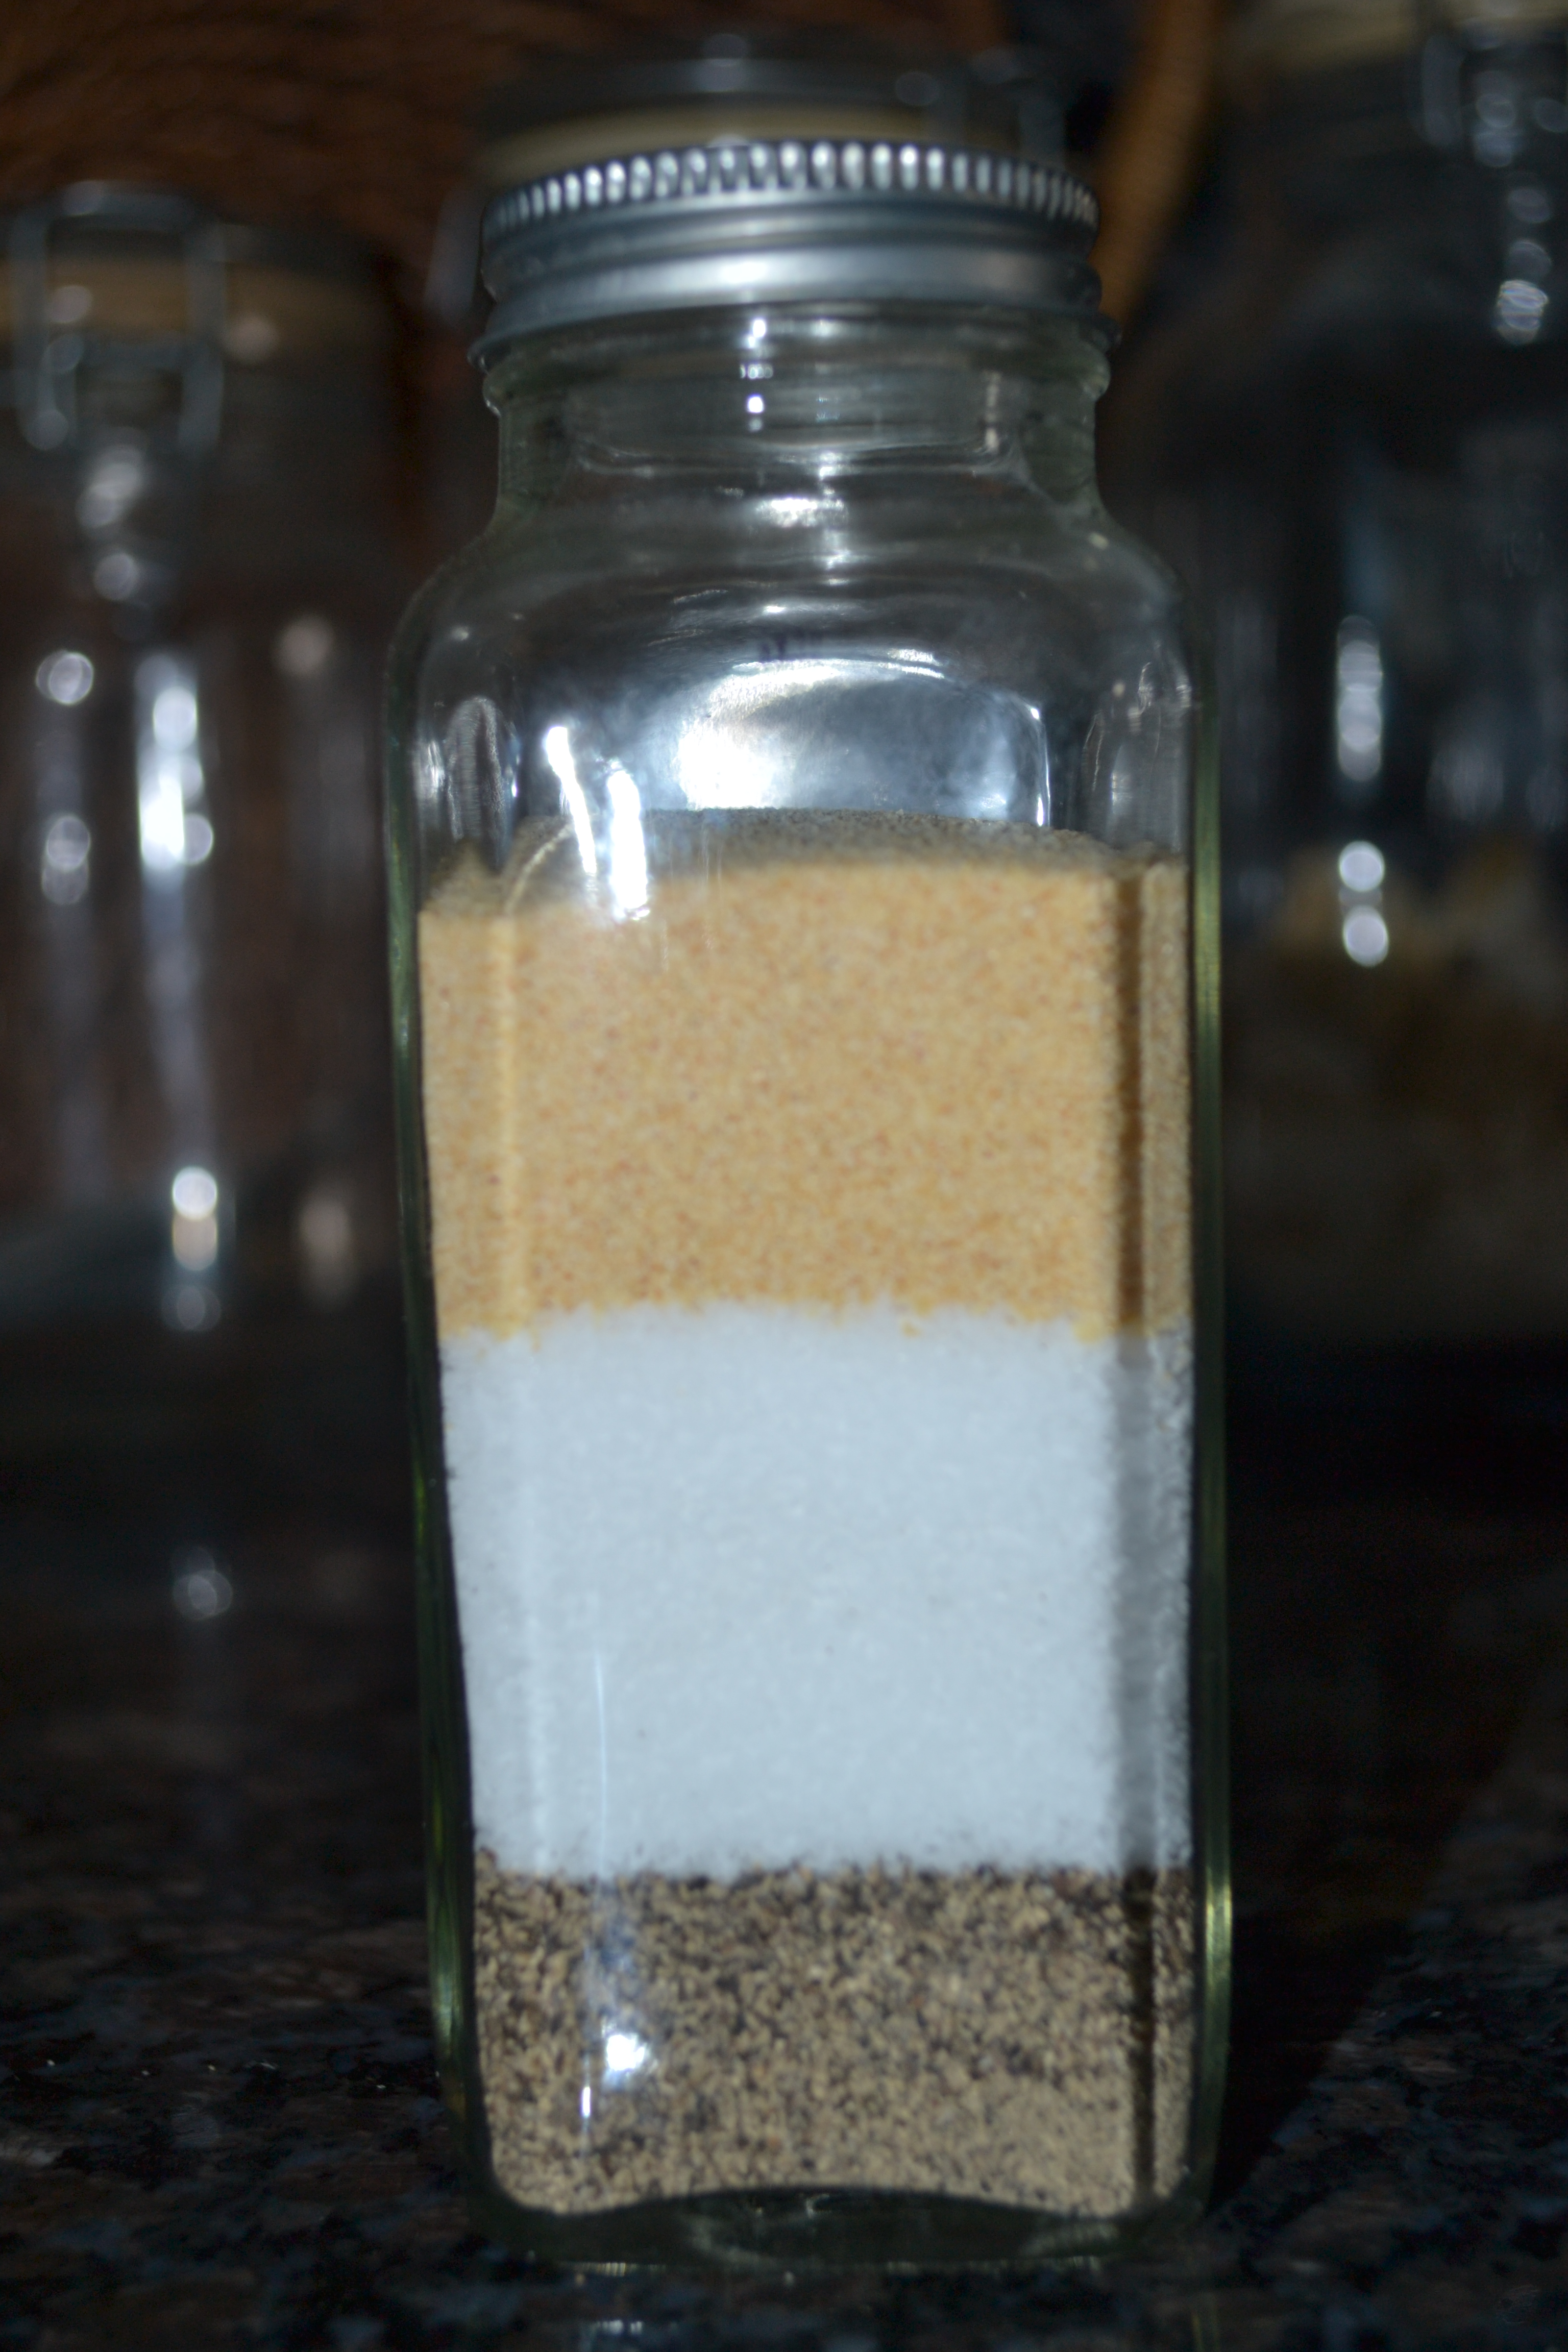
Tommy’s Salt & Pepper Mix
2 parts kosher salt
2 parts garlic powder
1 part black pepper
Pour ingredients into a jar. Shake until well blended. Pour into a shaker. Use freely on EVERYTHING!
Living in South Texas, tamales have always been a staple and still a delicacy. The making of tamales has always inspired awe among those of us who were not lucky enough to have a heritage steeped in chilies, manteca (lard), beautifully seasoned meat, and masa. The experts, specialists, nay, artists are the lovely little ladies who learned from their mothers, who learned from THEIR mothers, down through the generations.
I was lucky enough to finagle an invitation to a “tamalada” which is a gathering of families and friends who come together to make (and eat) tamales. From the cooking and seasoning of the meat, the preparation of the flavorful masa, the soaking and cleaning of the dried corn husks, the assembly of the actual tamales, and finally the steaming of the lovingly prepared treats, everyone helps… and tells stories, and sings songs, and enjoys being part of the age-old process.
The tamalada that I attended was hosted by the Guadalupanas, a group of faithful men and women who honor Our Lady of Guadalupe, the patroness of Mexico and many parts of North America. These men and women came together to make 300 dozen tamales for the festivities surrounding the feast day of Our Lady, on December 12th. What a wonderful, joyful, and educational experience it was. These people had so much to share with me. I wrote feverishly. I let them know that I had looked up directions on the internet. While I don’t speak much Spanish, I did hear the word “internet” come up in some of their conversations and some good-natured chuckles. I smiled apologetically and continued working and taking notes.
The great thing about tamales, other than their out-of-this-world flavor, is that the ingredients are very inexpensive and are available at every grocer in South Texas around the holidays. Also, depending on how much time you have, this can be broken down into several days of work. Day one: cook the meat. pour off juices and save, refrigerate meat and juices. Day two:reheat, shred and season cooked meat. re-refrigerate. Day three: prepare masa, reheat meat, assemble tamales, steam tamales, eat fresh tamales.
About 1/2 pound or 1 cup fat (manteca, salt pork, Crisco, wild pork belly)
Fat is an important part of the tamale-making process. Anyone who tells you otherwise….. don’t eat their tamales. Lard (manteca) is the traditional ingredient of choice. I had the wild pork belly, which I chopped into one-inch cubes and placed around the pan to distribute the flavor and fat.
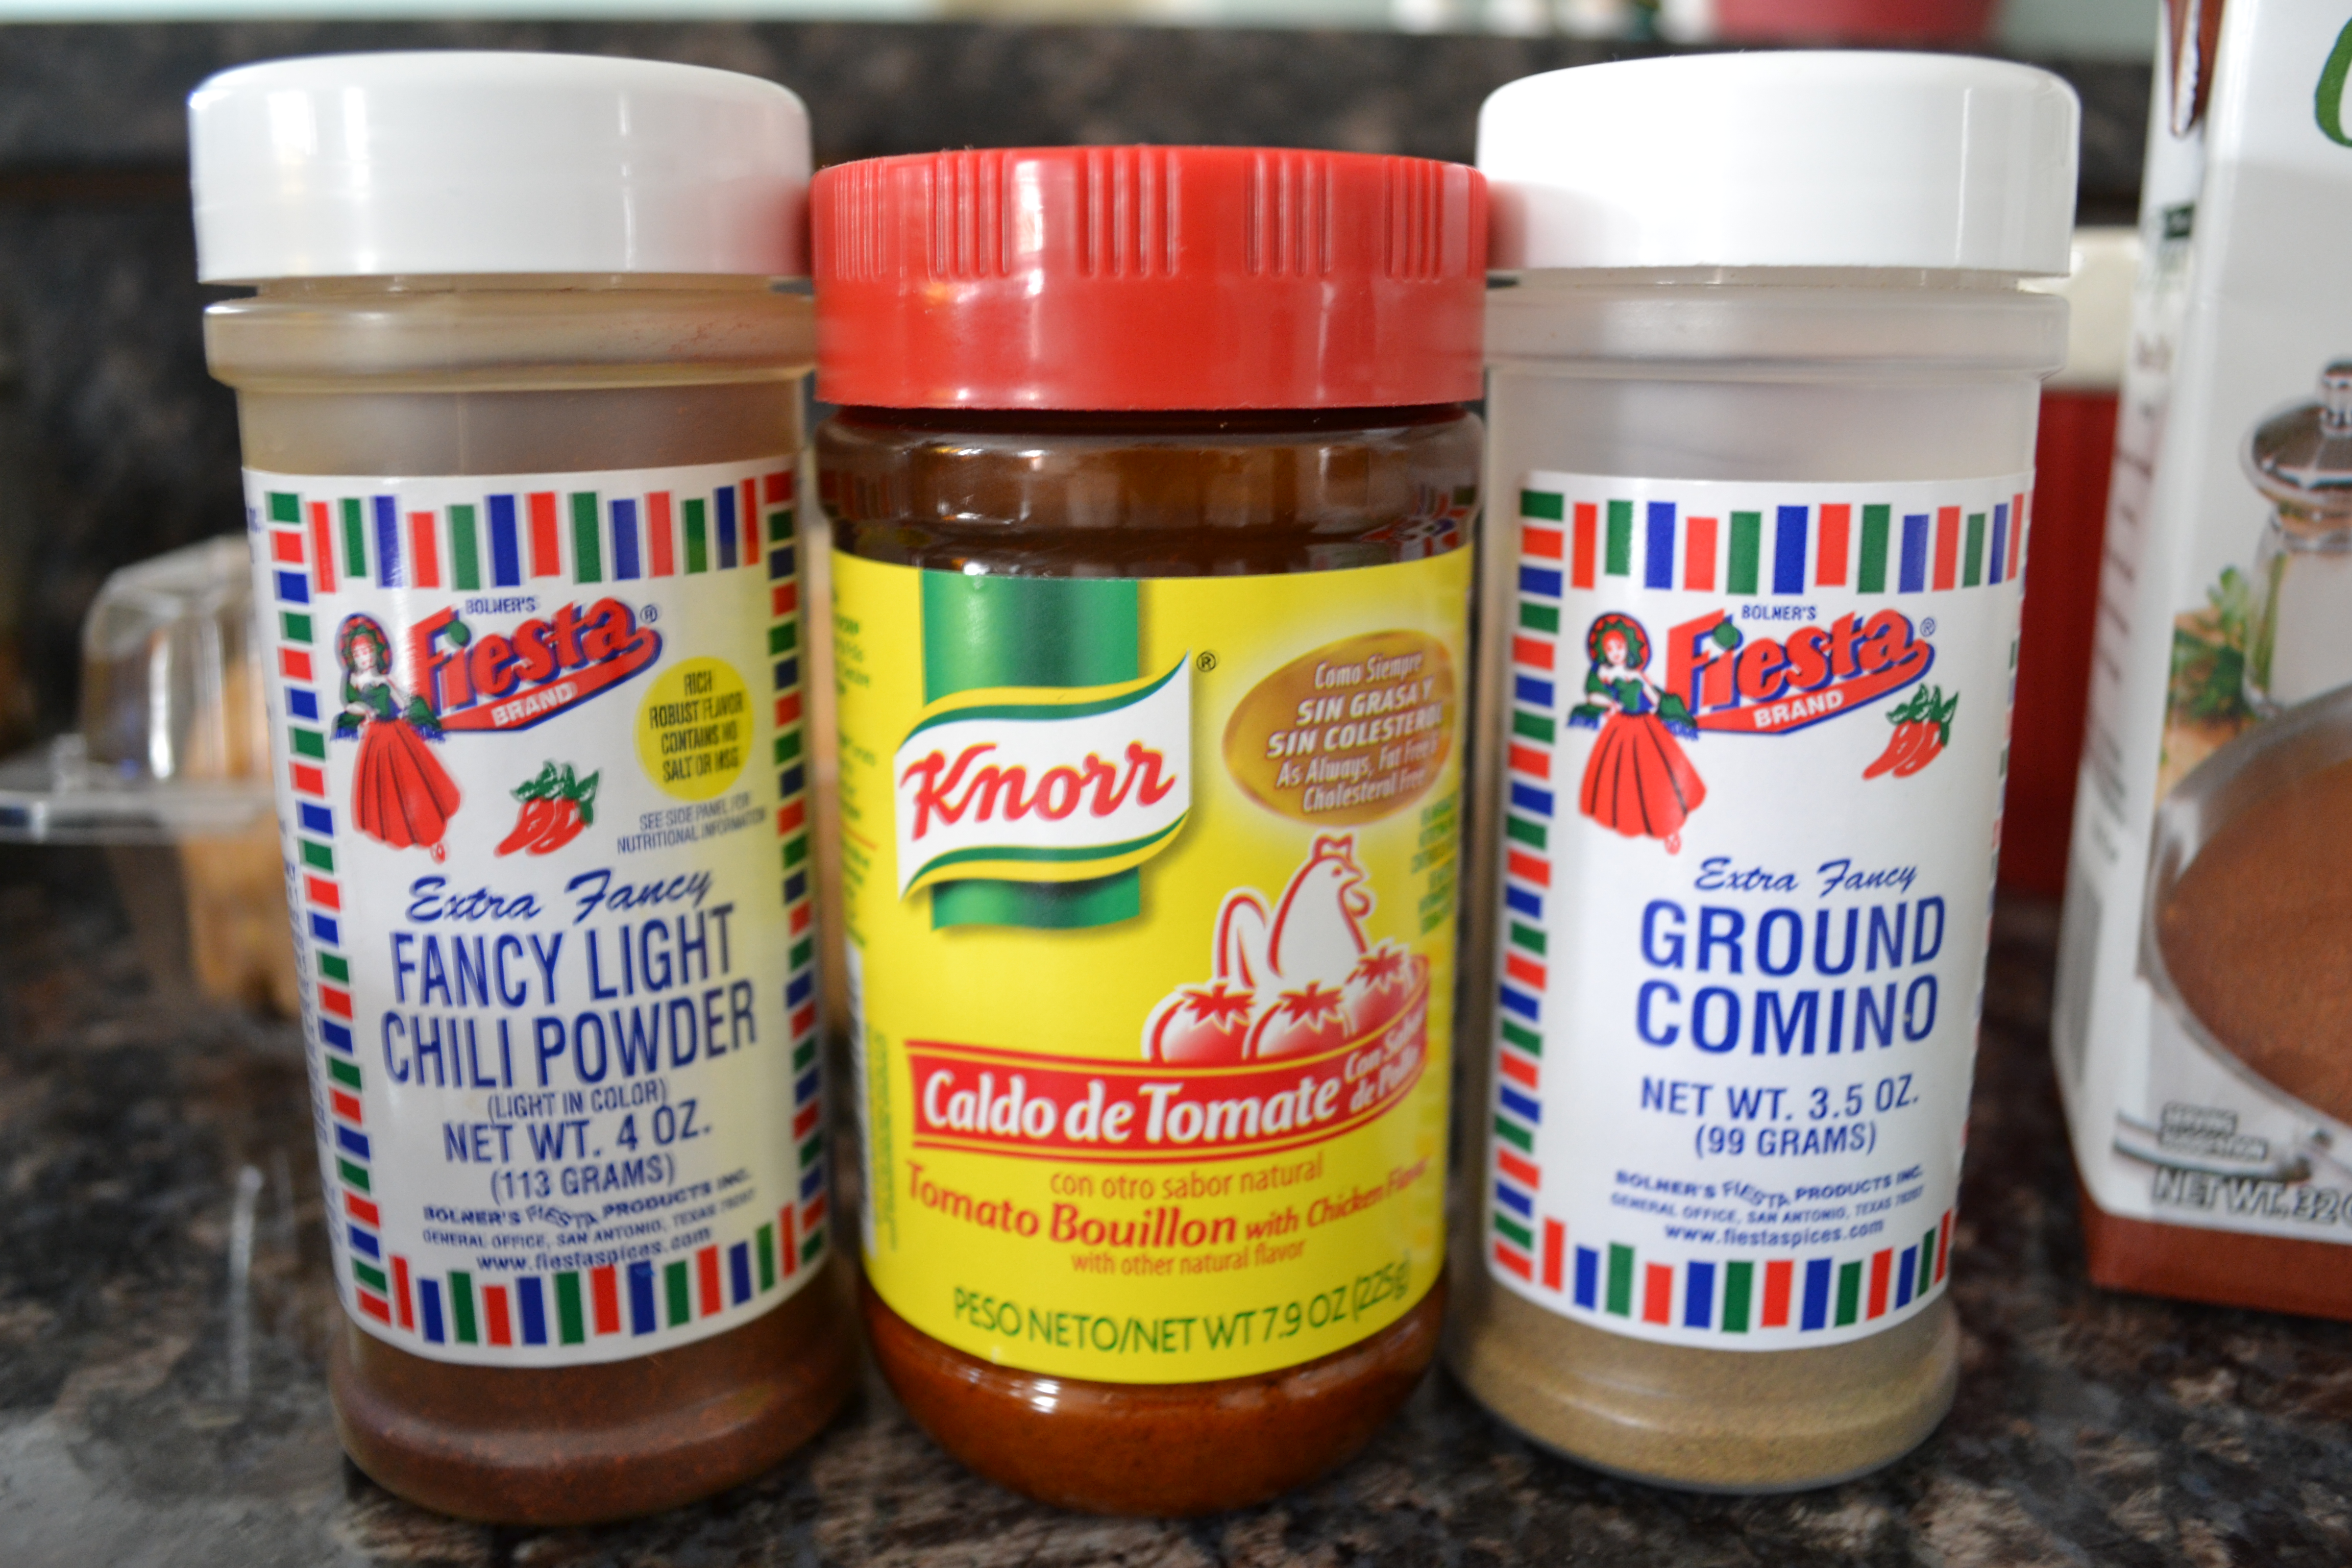
Approx. 1/4 cup salt/pepper/garlic powder mix
Approx. 1/4 cup any seasoning that includes chili powder and comino (I had the mix you see in the photo so I used it.)
While traditional tamales are made from a variety of meats, mine are made from venison, with wild pork belly added for fat and flavor.
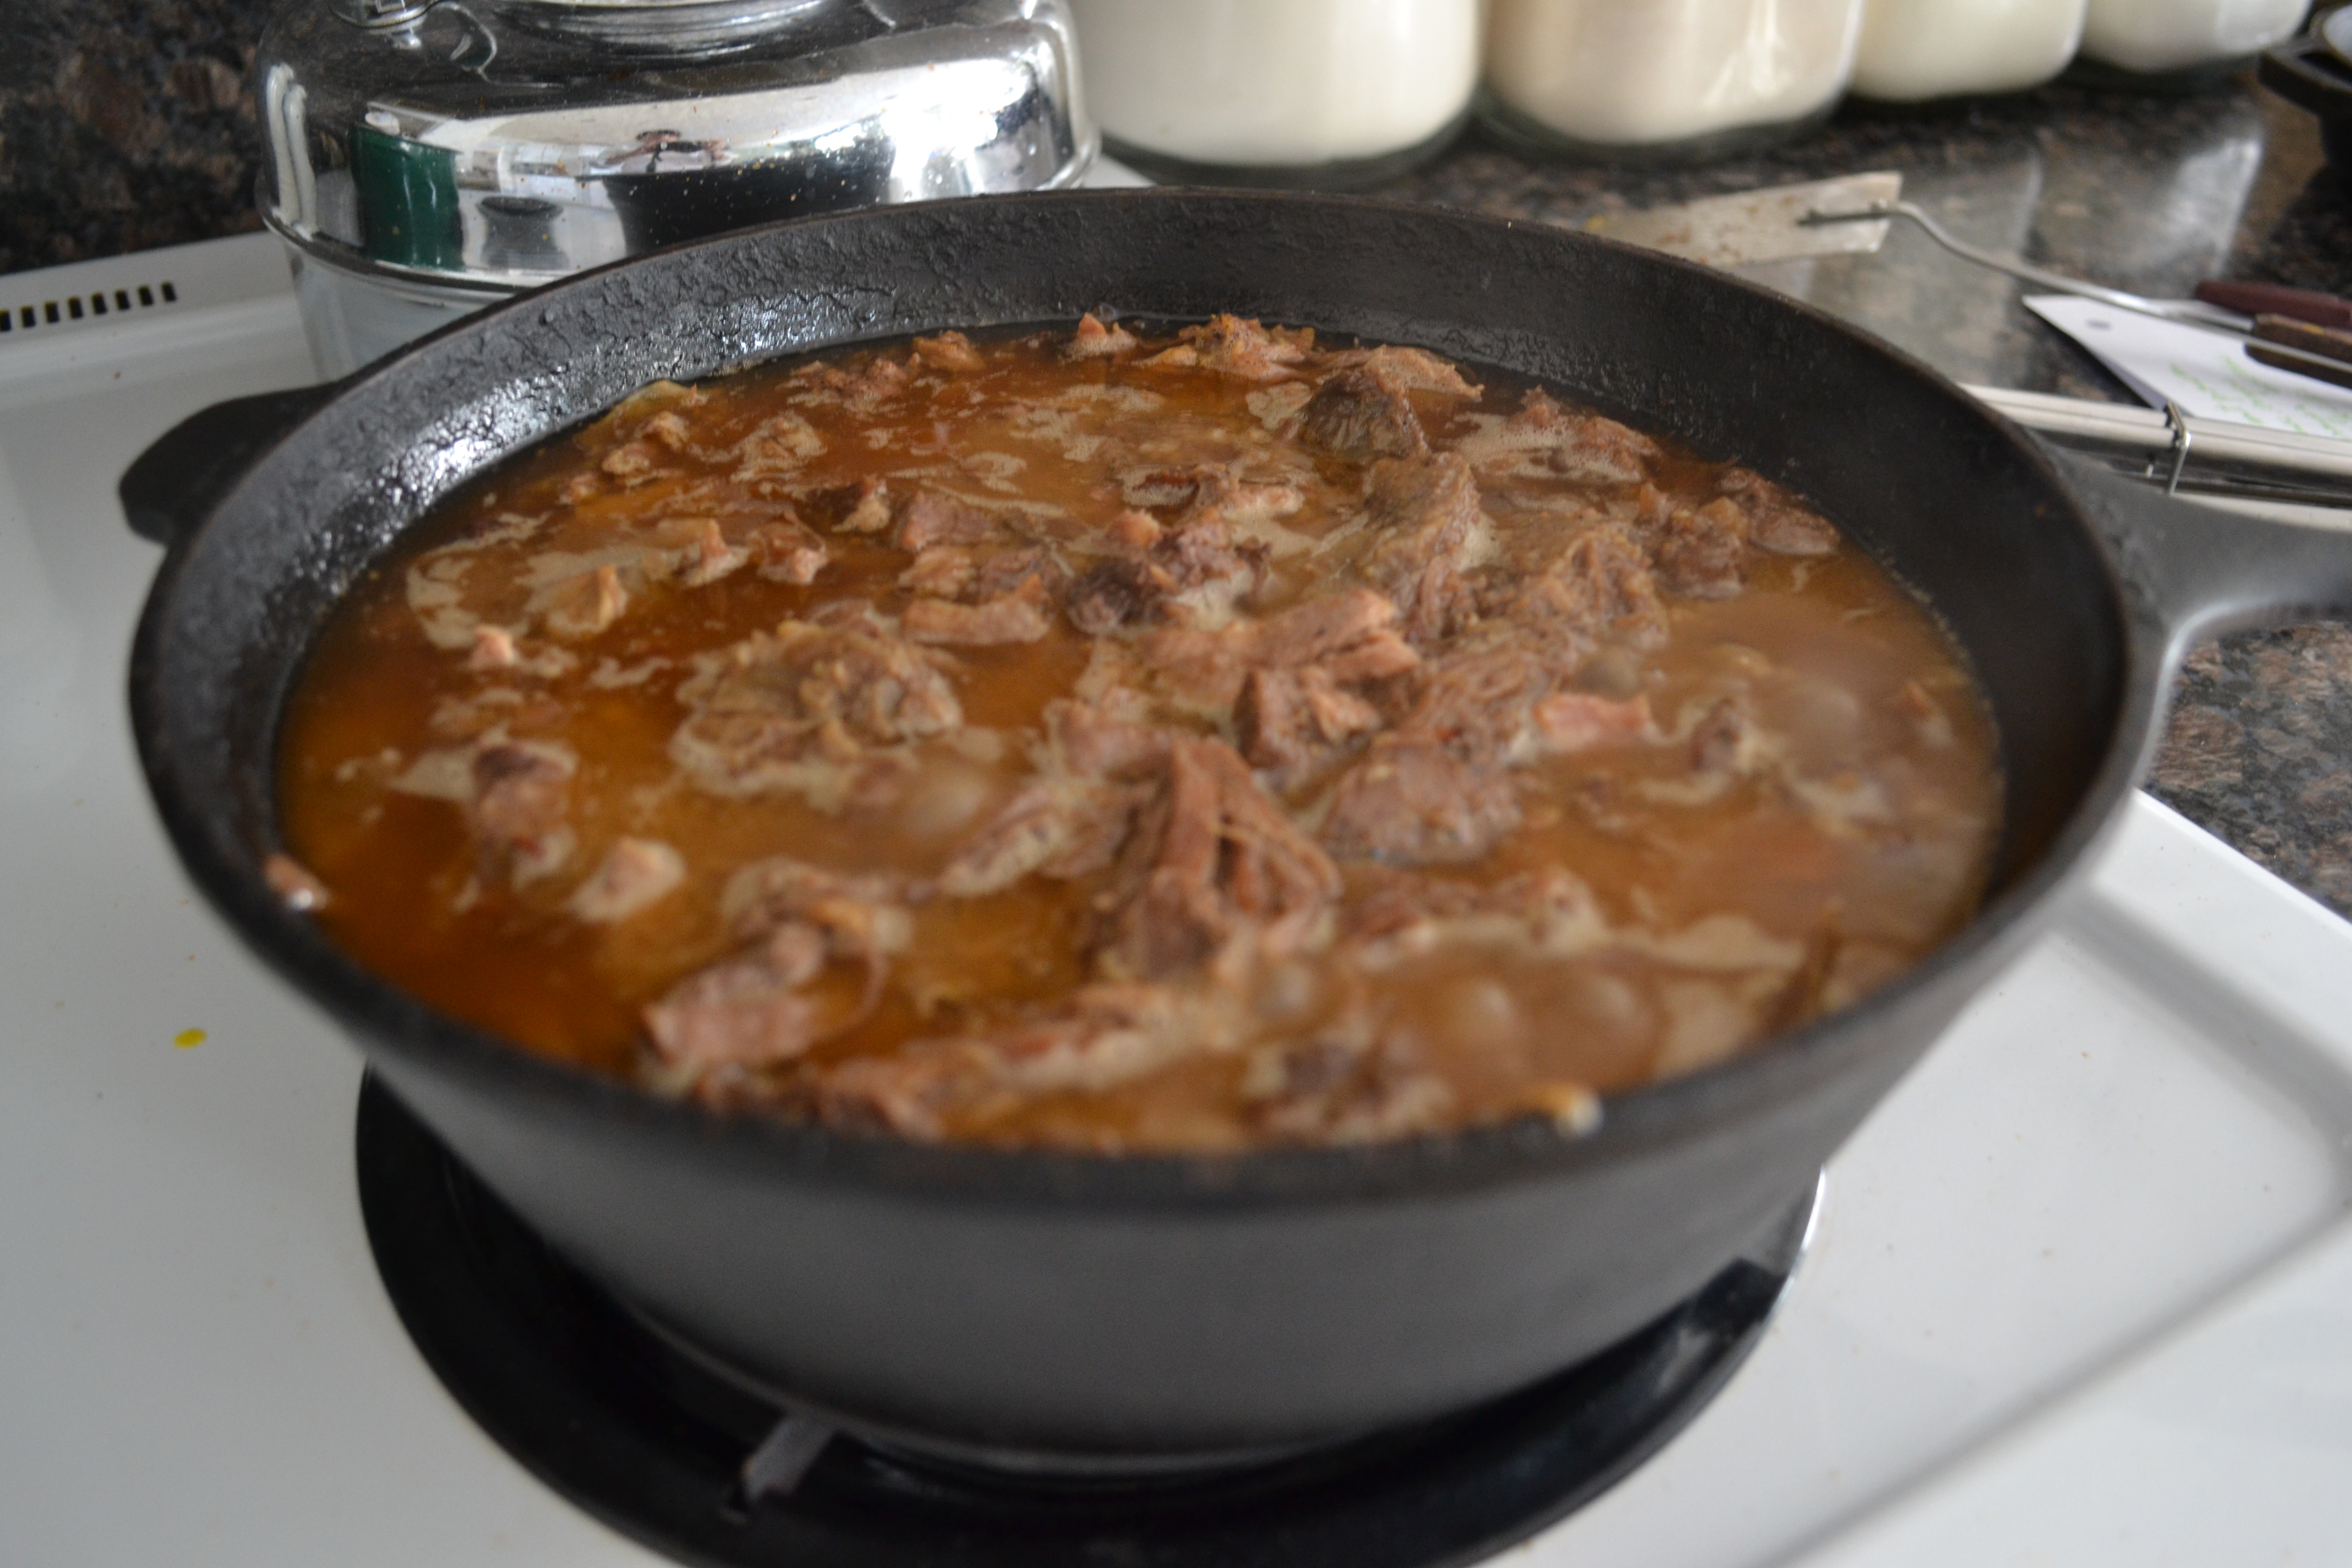
1. Prepare “cook-all-day” venison. Throw in some salt pork, wild pork belly, or some lard for extra fat. Tamales really need the fat to turn out the way they should. Season heavily with salt, pepper, and garlic powder. Not only will you be seasoning the meat, but also the juices that will be used later.
2. Add cooked meat to a deep-sided cast iron pan. Add enough reserved meat juices (with melted fat) to cover meat. (Set aside about a cup and a half of meat in case you feel that you’ve overseasoned it according to your taste.)
3. Simmer about 20-30 minutes until meat can easily be shredded with two forks. Season with additional 2 tbsp. comino, 2 heaping tbsp. chili powder, and 2 tsp. salt. Meat should be a beautiful mahogany color and the flavor should be strong. Don’t forget that some of the seasoning will help flavor the masa as well. Pour off most but not all of the meat juices. Reserve for use in the masa.
Preparation of the husks
Corn husks are purchased packaged like this and are usually found in the produce department, specialty/ethnic food department, or spice department of the grocer.
Corn husks are the vessels in which the tamales will be shaped and steamed. They must be rinsed thoroughly to remove any foreign matter from them.
The husks will need to be soaked for 30 minutes or so to make them pliable enough to roll. A secret that I learned from the Guadalupanas is that there is a subtle difference in the two surfaces of the husks. The smooth side of the husk is preferable for smearing the masa mixture.
The other side of the husk contains ridges that will cause the masa to adhere, thus making it difficult to unroll the tamale with any success.
Preparation of the Masa
Masa can be prepared from corn meal or purchased as a dough, which is available from most grocers who cater to a strong hispanic population. I’ve used both. While starting from dry corn meal certainly works, achieving the correct consistency is much easier when starting with dough. There are many good recipes out there for using dried corn meal. There is also a recipe on the bag,
Do not think that prepared masa is ready to use. The consistency is similar to clay and still needs quite a bit of doctoring up. This is 3 lbs. of masa.
3 lbs of prepared masa (set aside about a cup that can be added at the end if the texture you’ve achieved is too soft)
1/3 cup of Knorr’s Pollo y Tomate Caldo (chicken and tomato bouillon)
2 tbsp. comino (cumin)
1/3 cup chili powder
About 1/2 cup reserved meat juices (If meat juices were reserved from cooking, there will be a good amount of fat in the mixture. It can be separated, and added to masa.)
1 to 2 cups melted fat, either separated from meat juices, lard, or shortening
Slowly combine ingredients using a potato masher, dough hook on a mixer, or by hand until masa is the consistency of very creamy peanut butter.
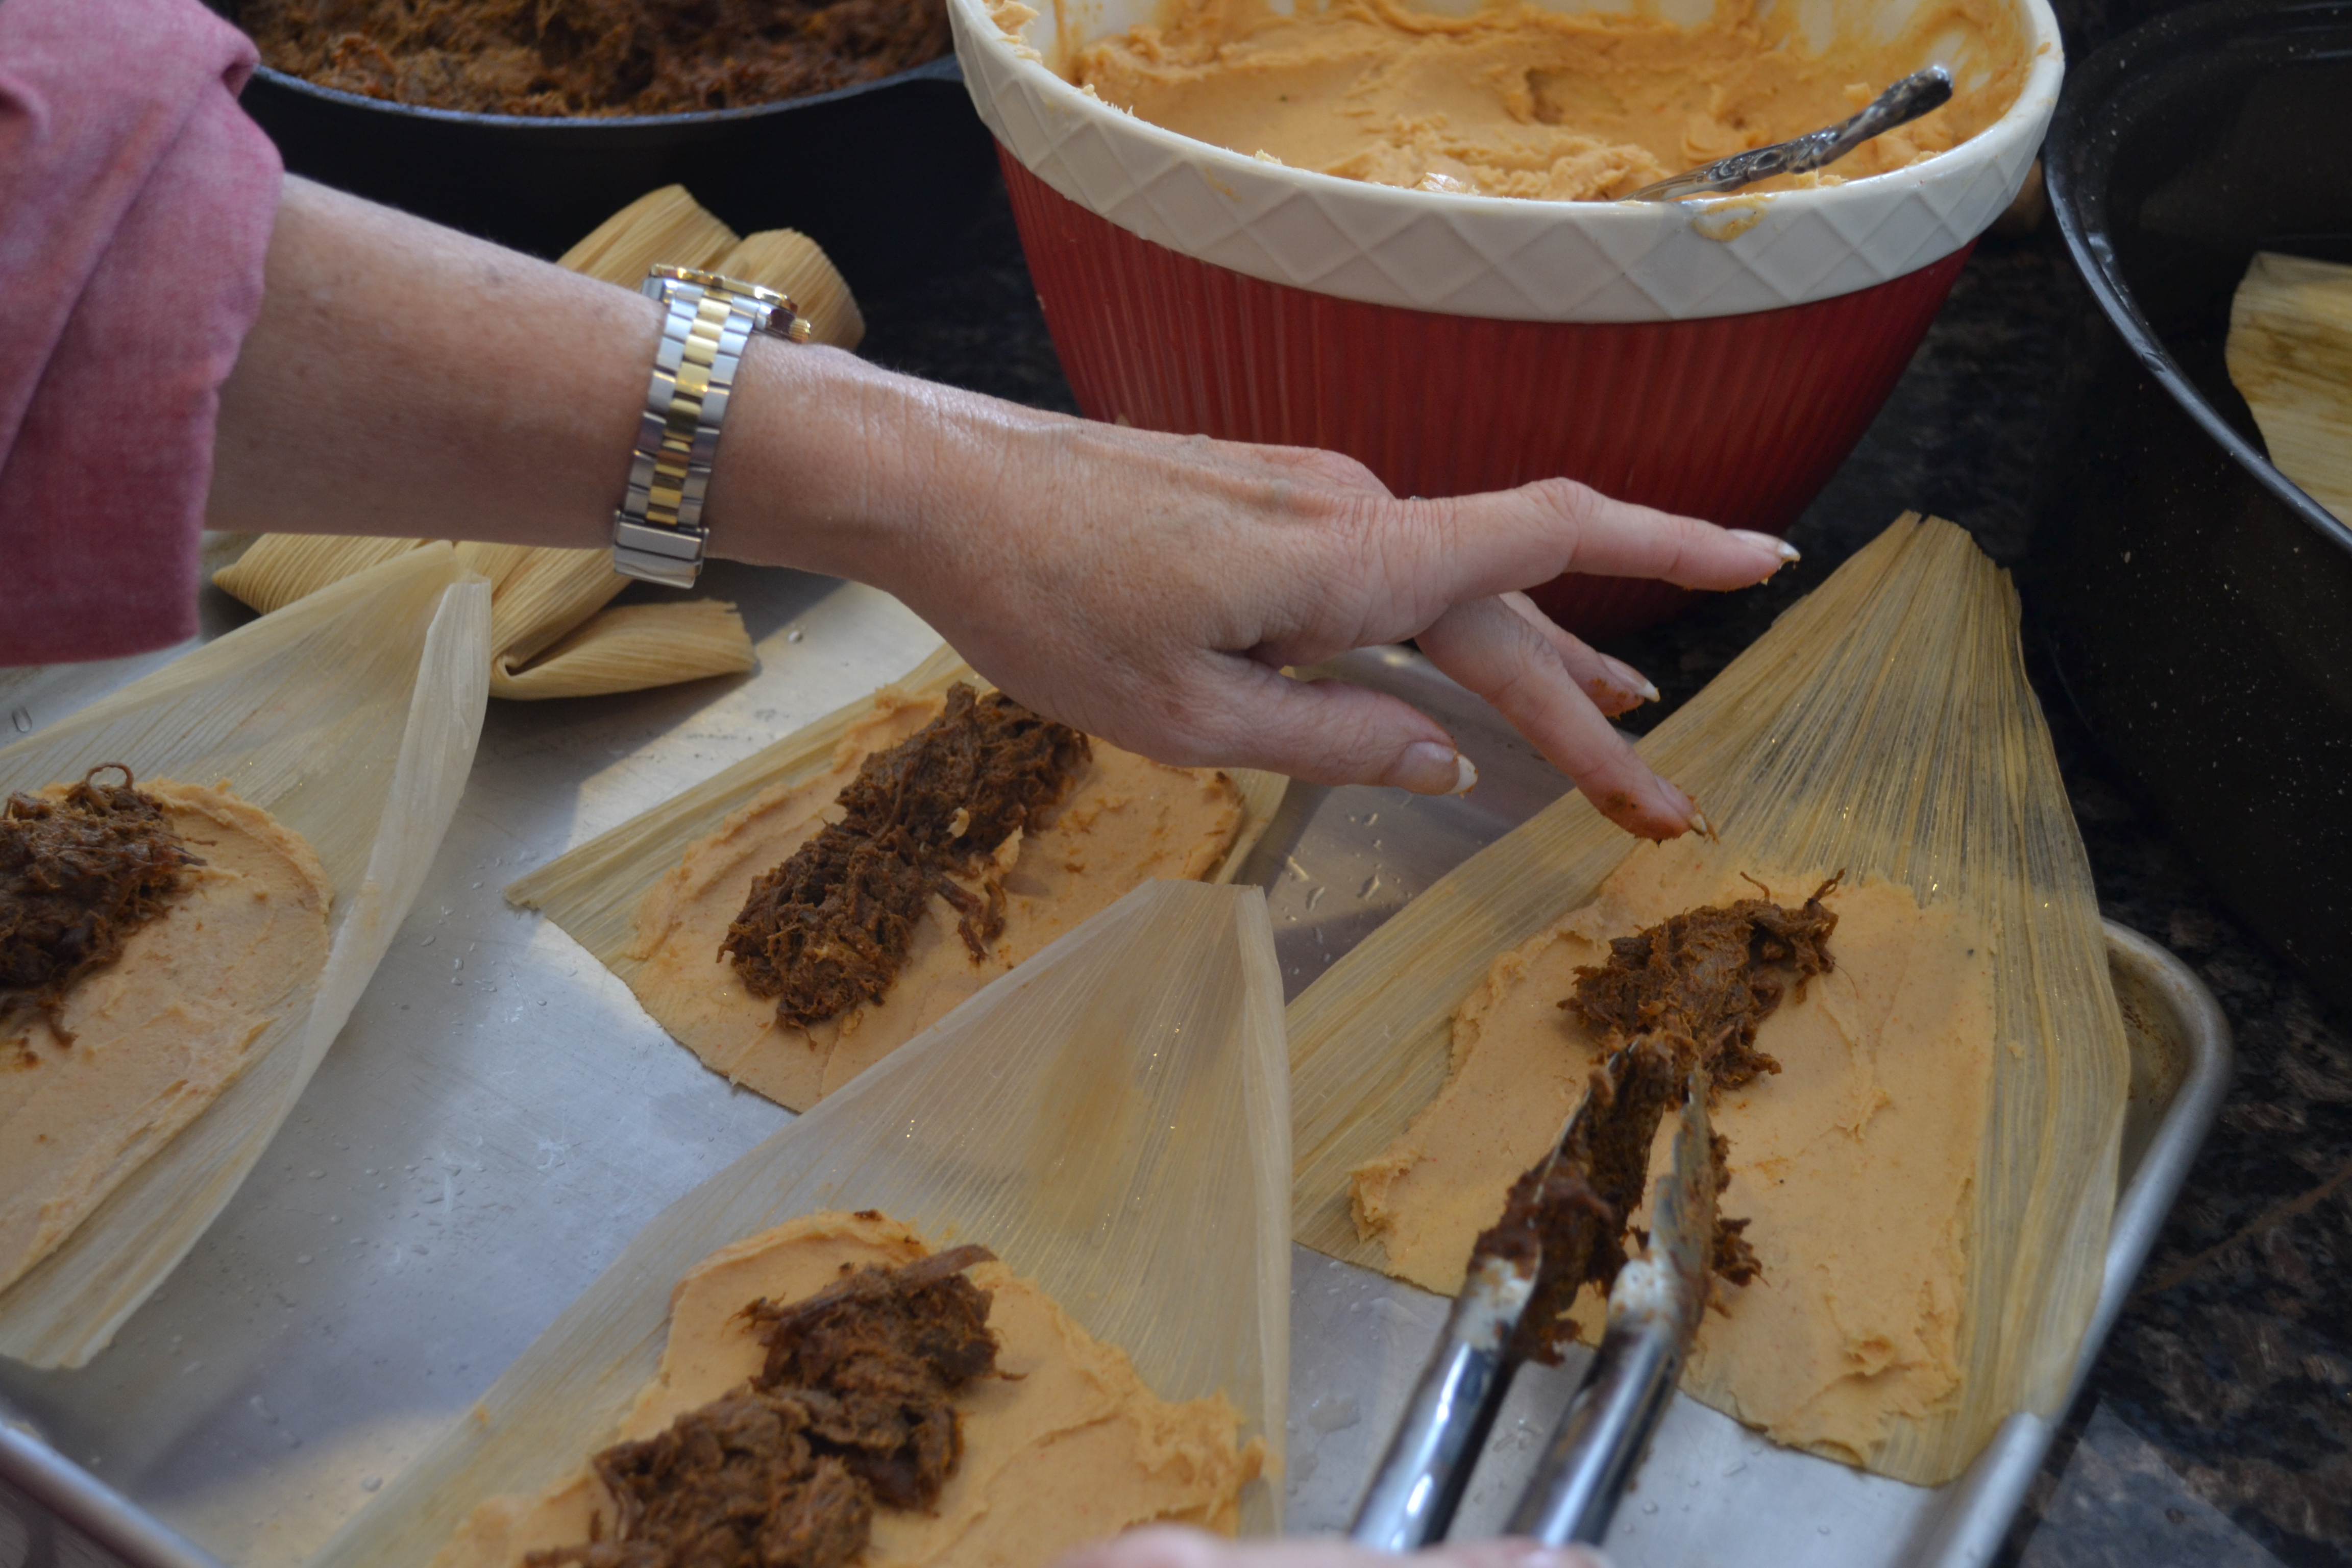
Assembling the tamales
Set up your station with meat & tongs, masa & wide spoon, soaked husks, and cookie sheet for assembling.
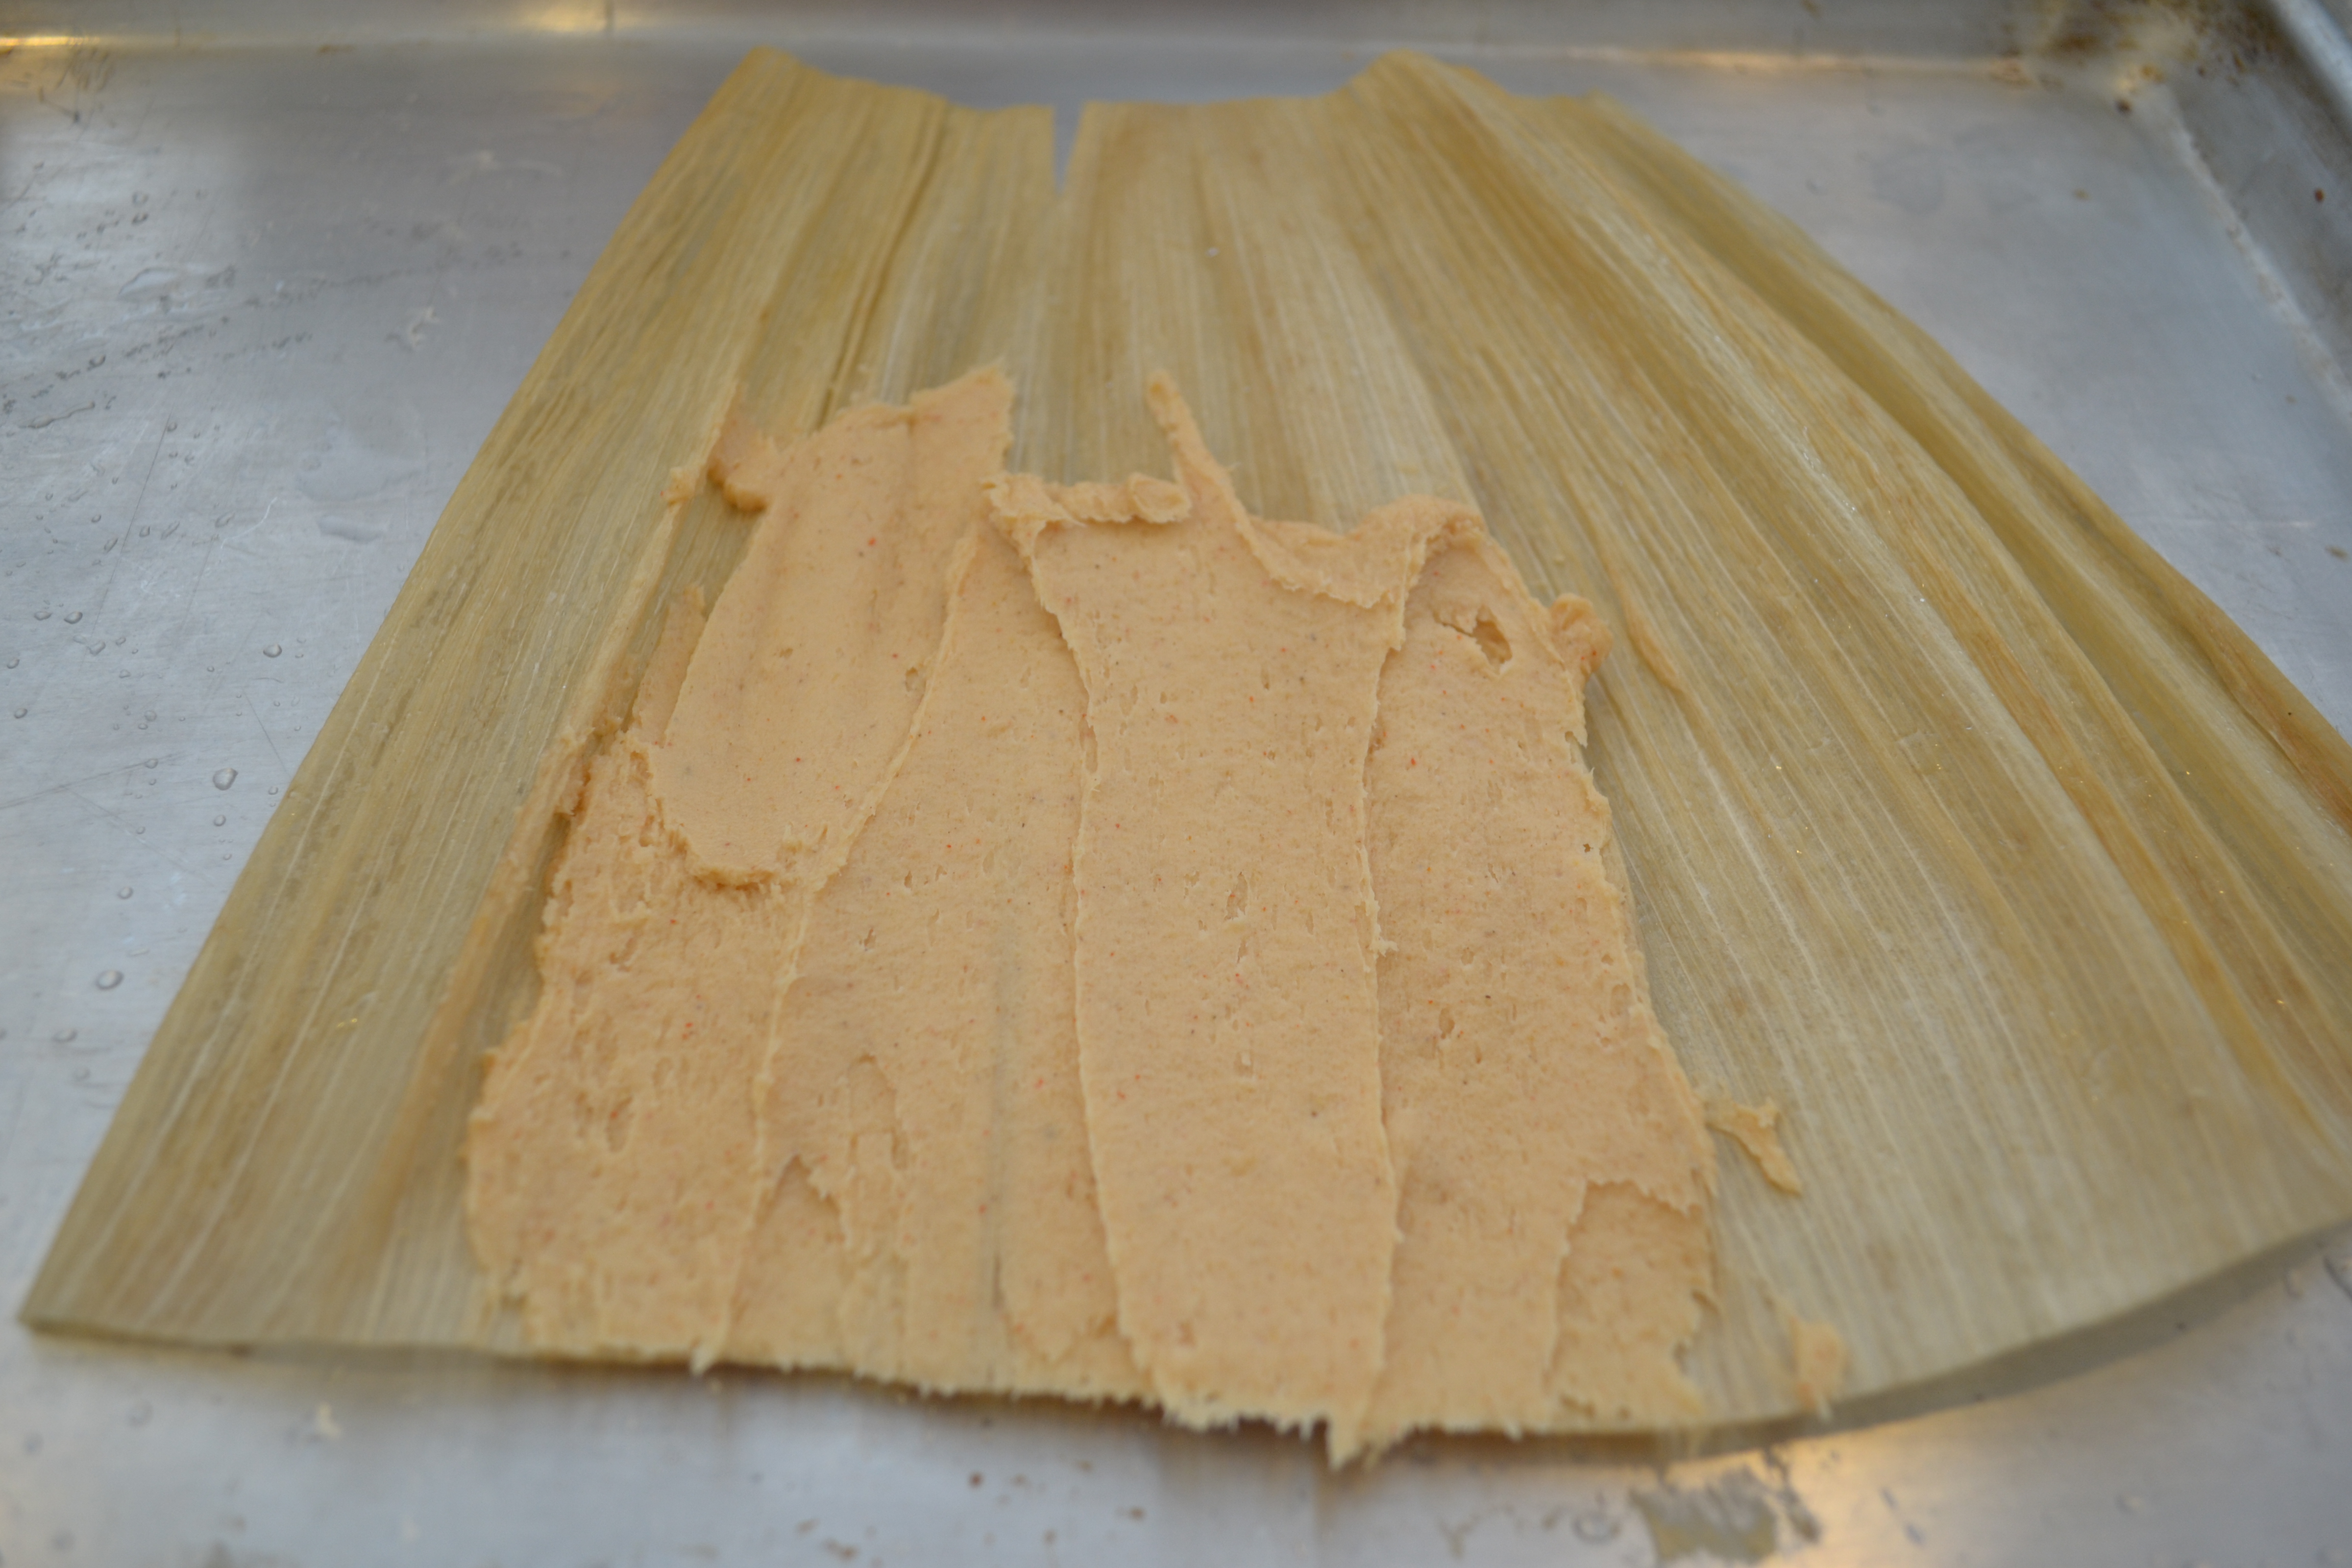
1. Select a corn husk and allow some water to drip off. Choose the smooth side. Spoon about 3 tbsp. of masa near the smooth, wide end of the husk.
Notice the texture and location of the masa on the husk.
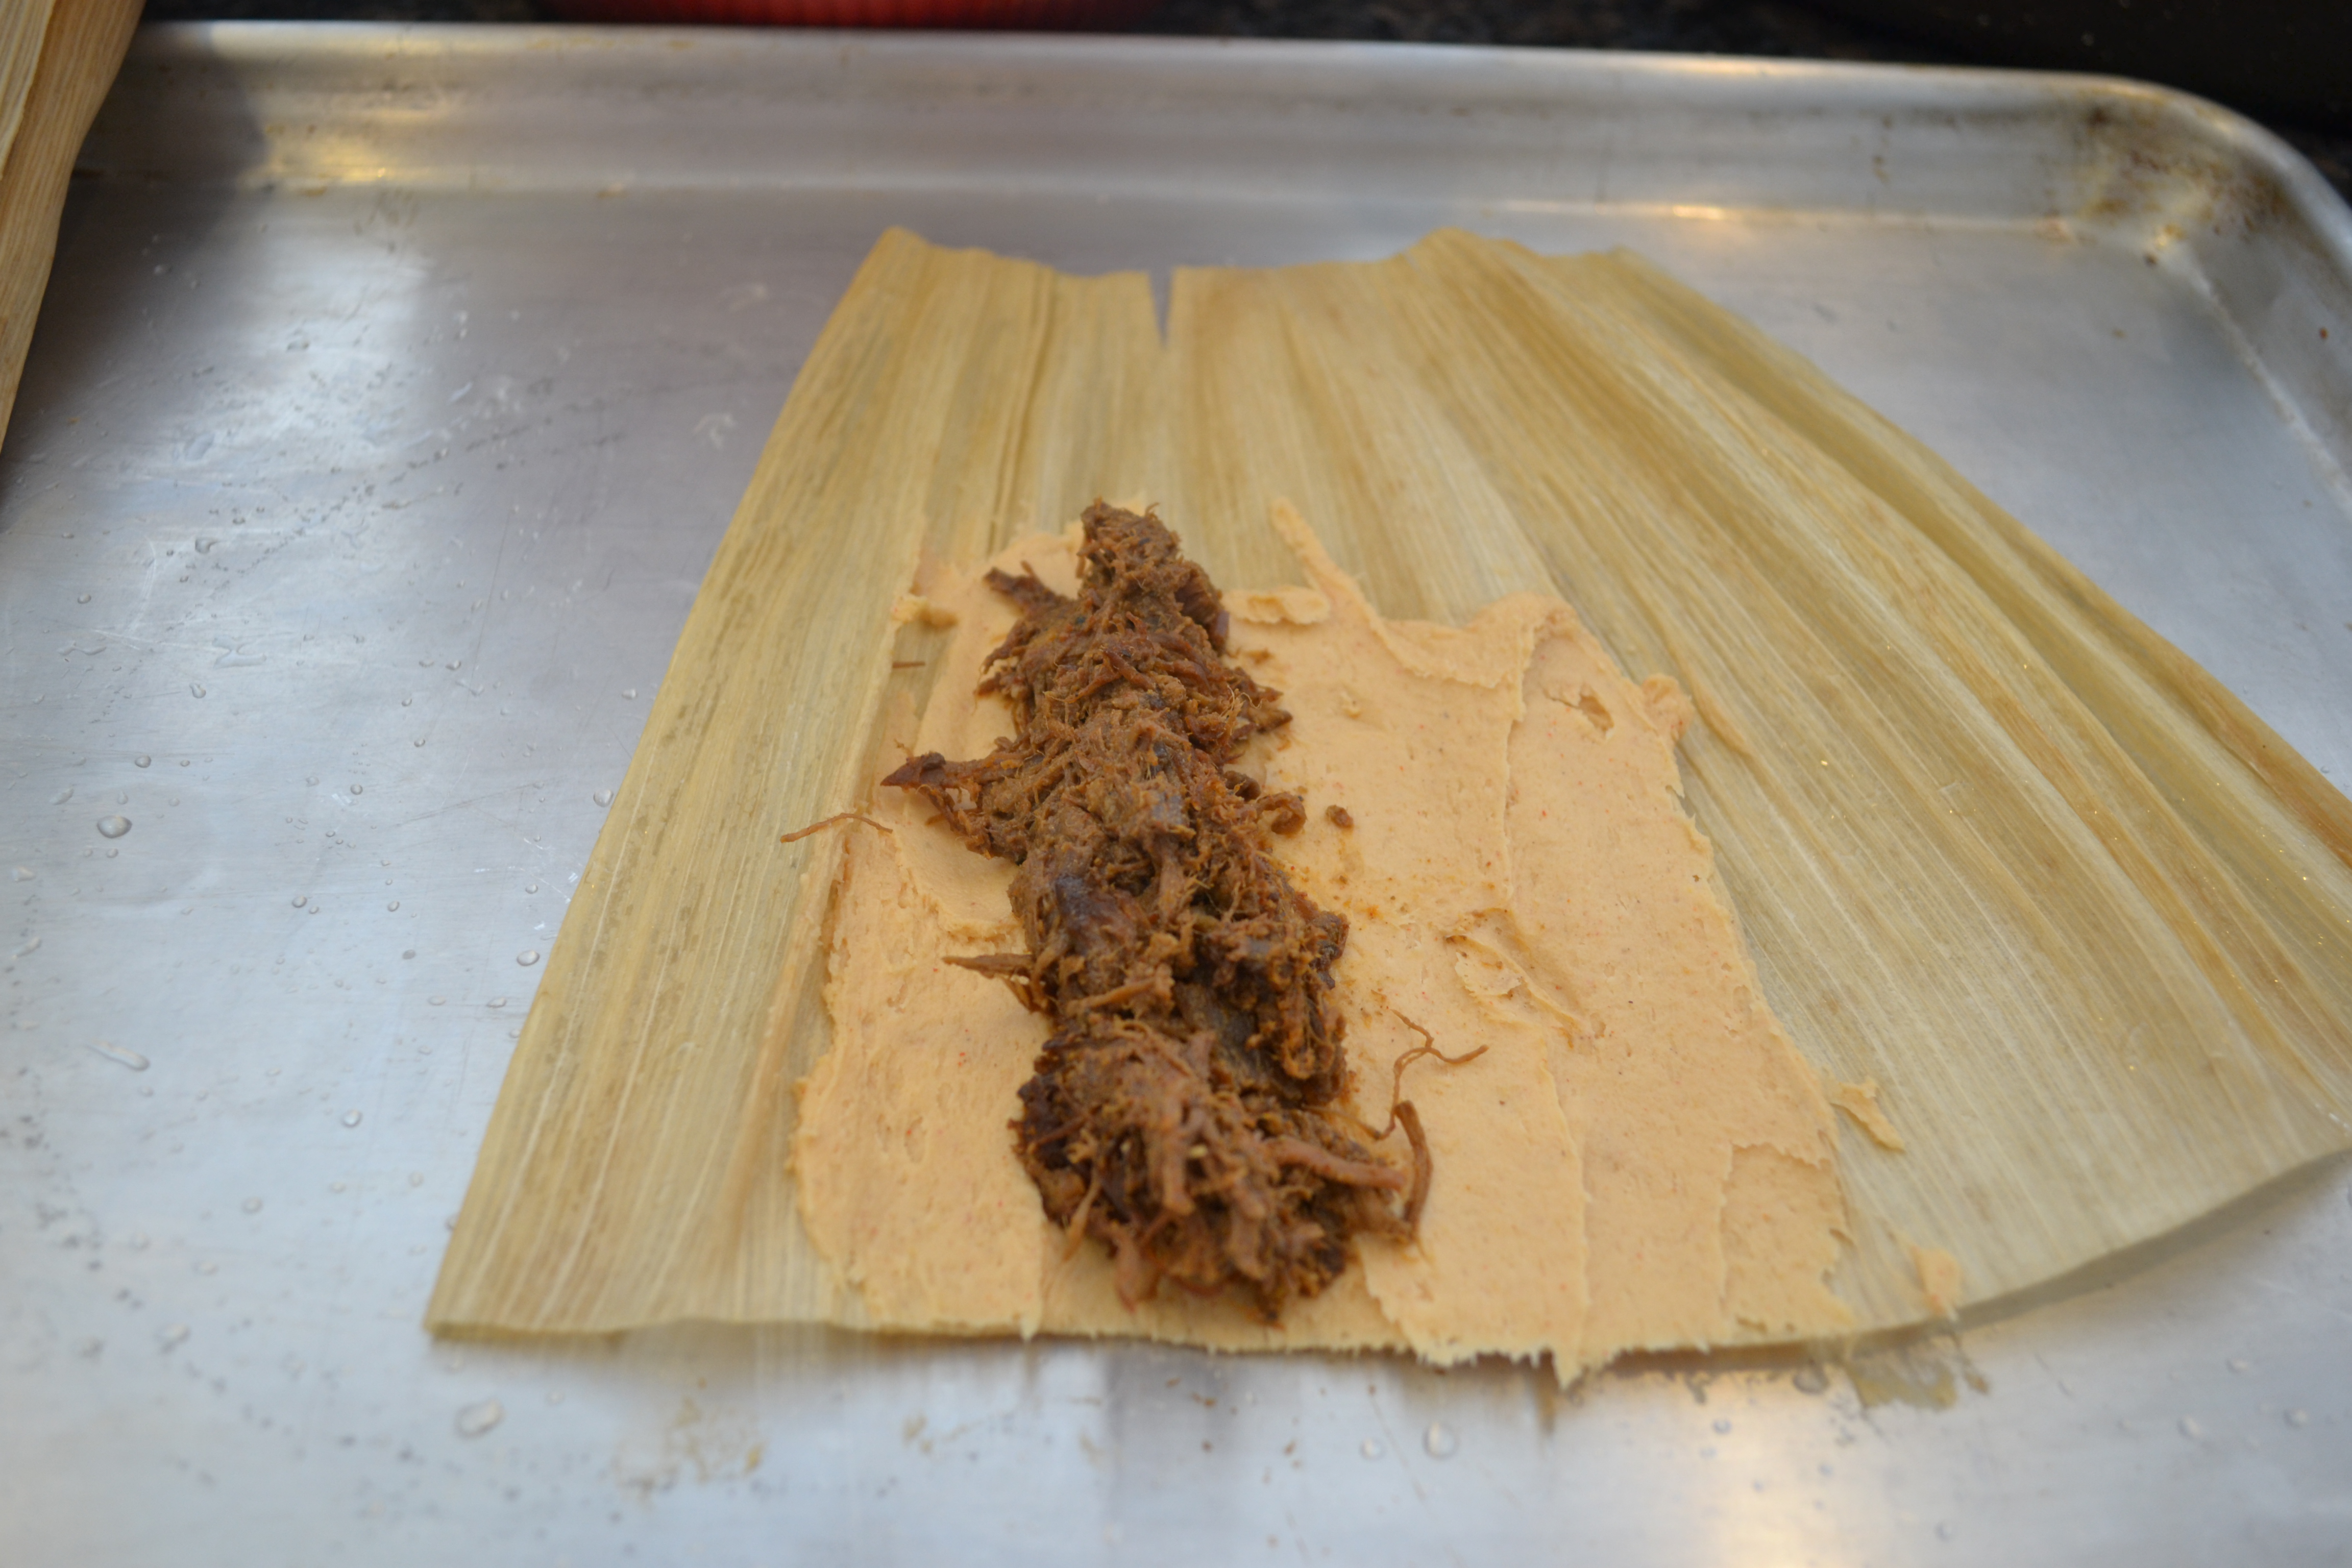
Add a line of meat to the masa.
…and roll it from left over toward the right, pulling the husk over the meat and enveloping it in the masa. Continue to roll the husk until completely wrapped. Fold the narrow end of the husk away from the seam and lay it on a cookie sheet.
While you may be getting pretty excited about your progress at this point, it’s time for one of the secrets that I learned from the Guadalupanas. Before you make dozens of tamales, only to discover that you don’t care for the seasoning, it’s possible to make a sample and fix what needs fixing. Sample your first tamale by wrapping it in a wet paper towel and popping it in the microwave for about 2 minutes. This will steam the tamale to the point that you can get an idea of the results. The texture will not be right but you can check the seasoning of the masa and meat. I mentioned earlier that a small amount of meat and masa should be set aside. This provides you the ability to add reserved meat in case it tastes too strong, or add more fat or reserved masa if necessary to adjust texture, Don’t get the idea that the microwave will produce results as good as long-term steaming! It truly doesn’t stack up.
Now that you’ve gotten your ingredients seasoned up just right, start an assembly line.
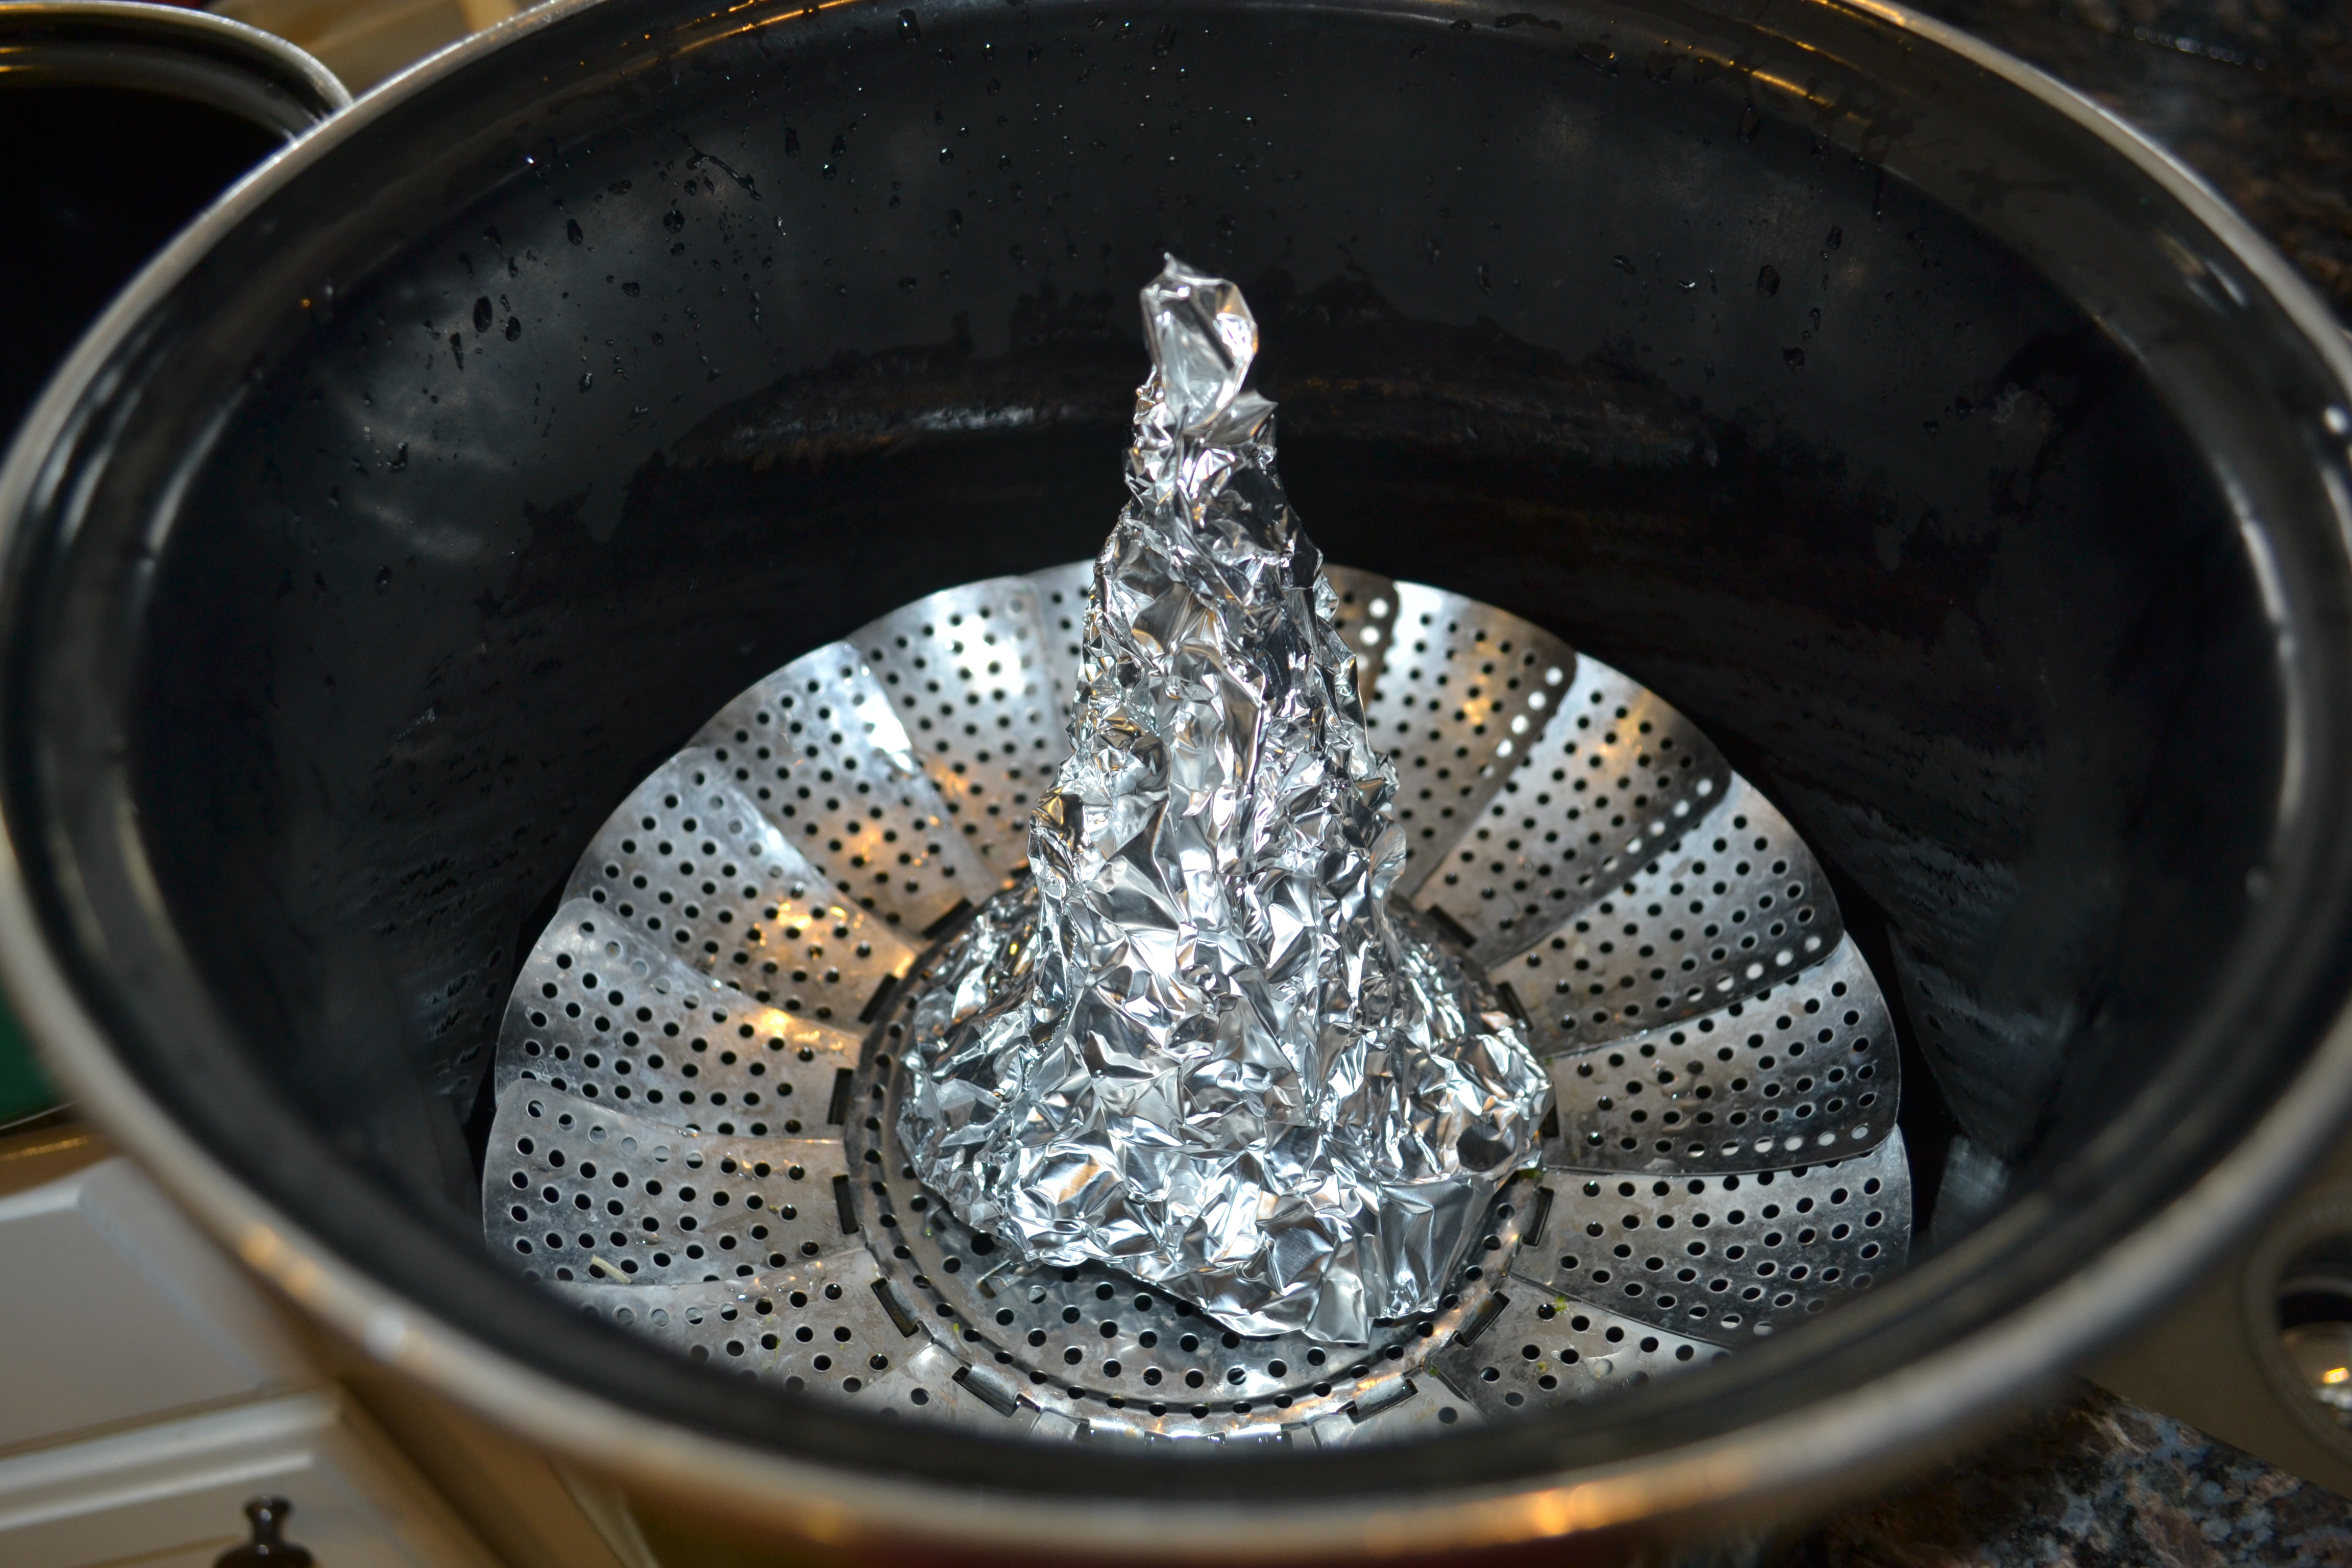
Once your tamales are made, it’s time to steam them. Find a pot deep enough to hold tamales while standing vertically, a steamer basket and a lid. Fill pot with about an inch or so of water so that it comes just lower than the level of the steamer basket. Another secret…. drop a penny into the water. As the water boils, you can hear the penny “tinkling” in the pot. When the “tinkling” stops, water needs to be added.
Another secret I learned from the experts is to form a pyramid shaped from foil that the tamales can rest against. The folded ends of the tamales should be placed toward the bottom.
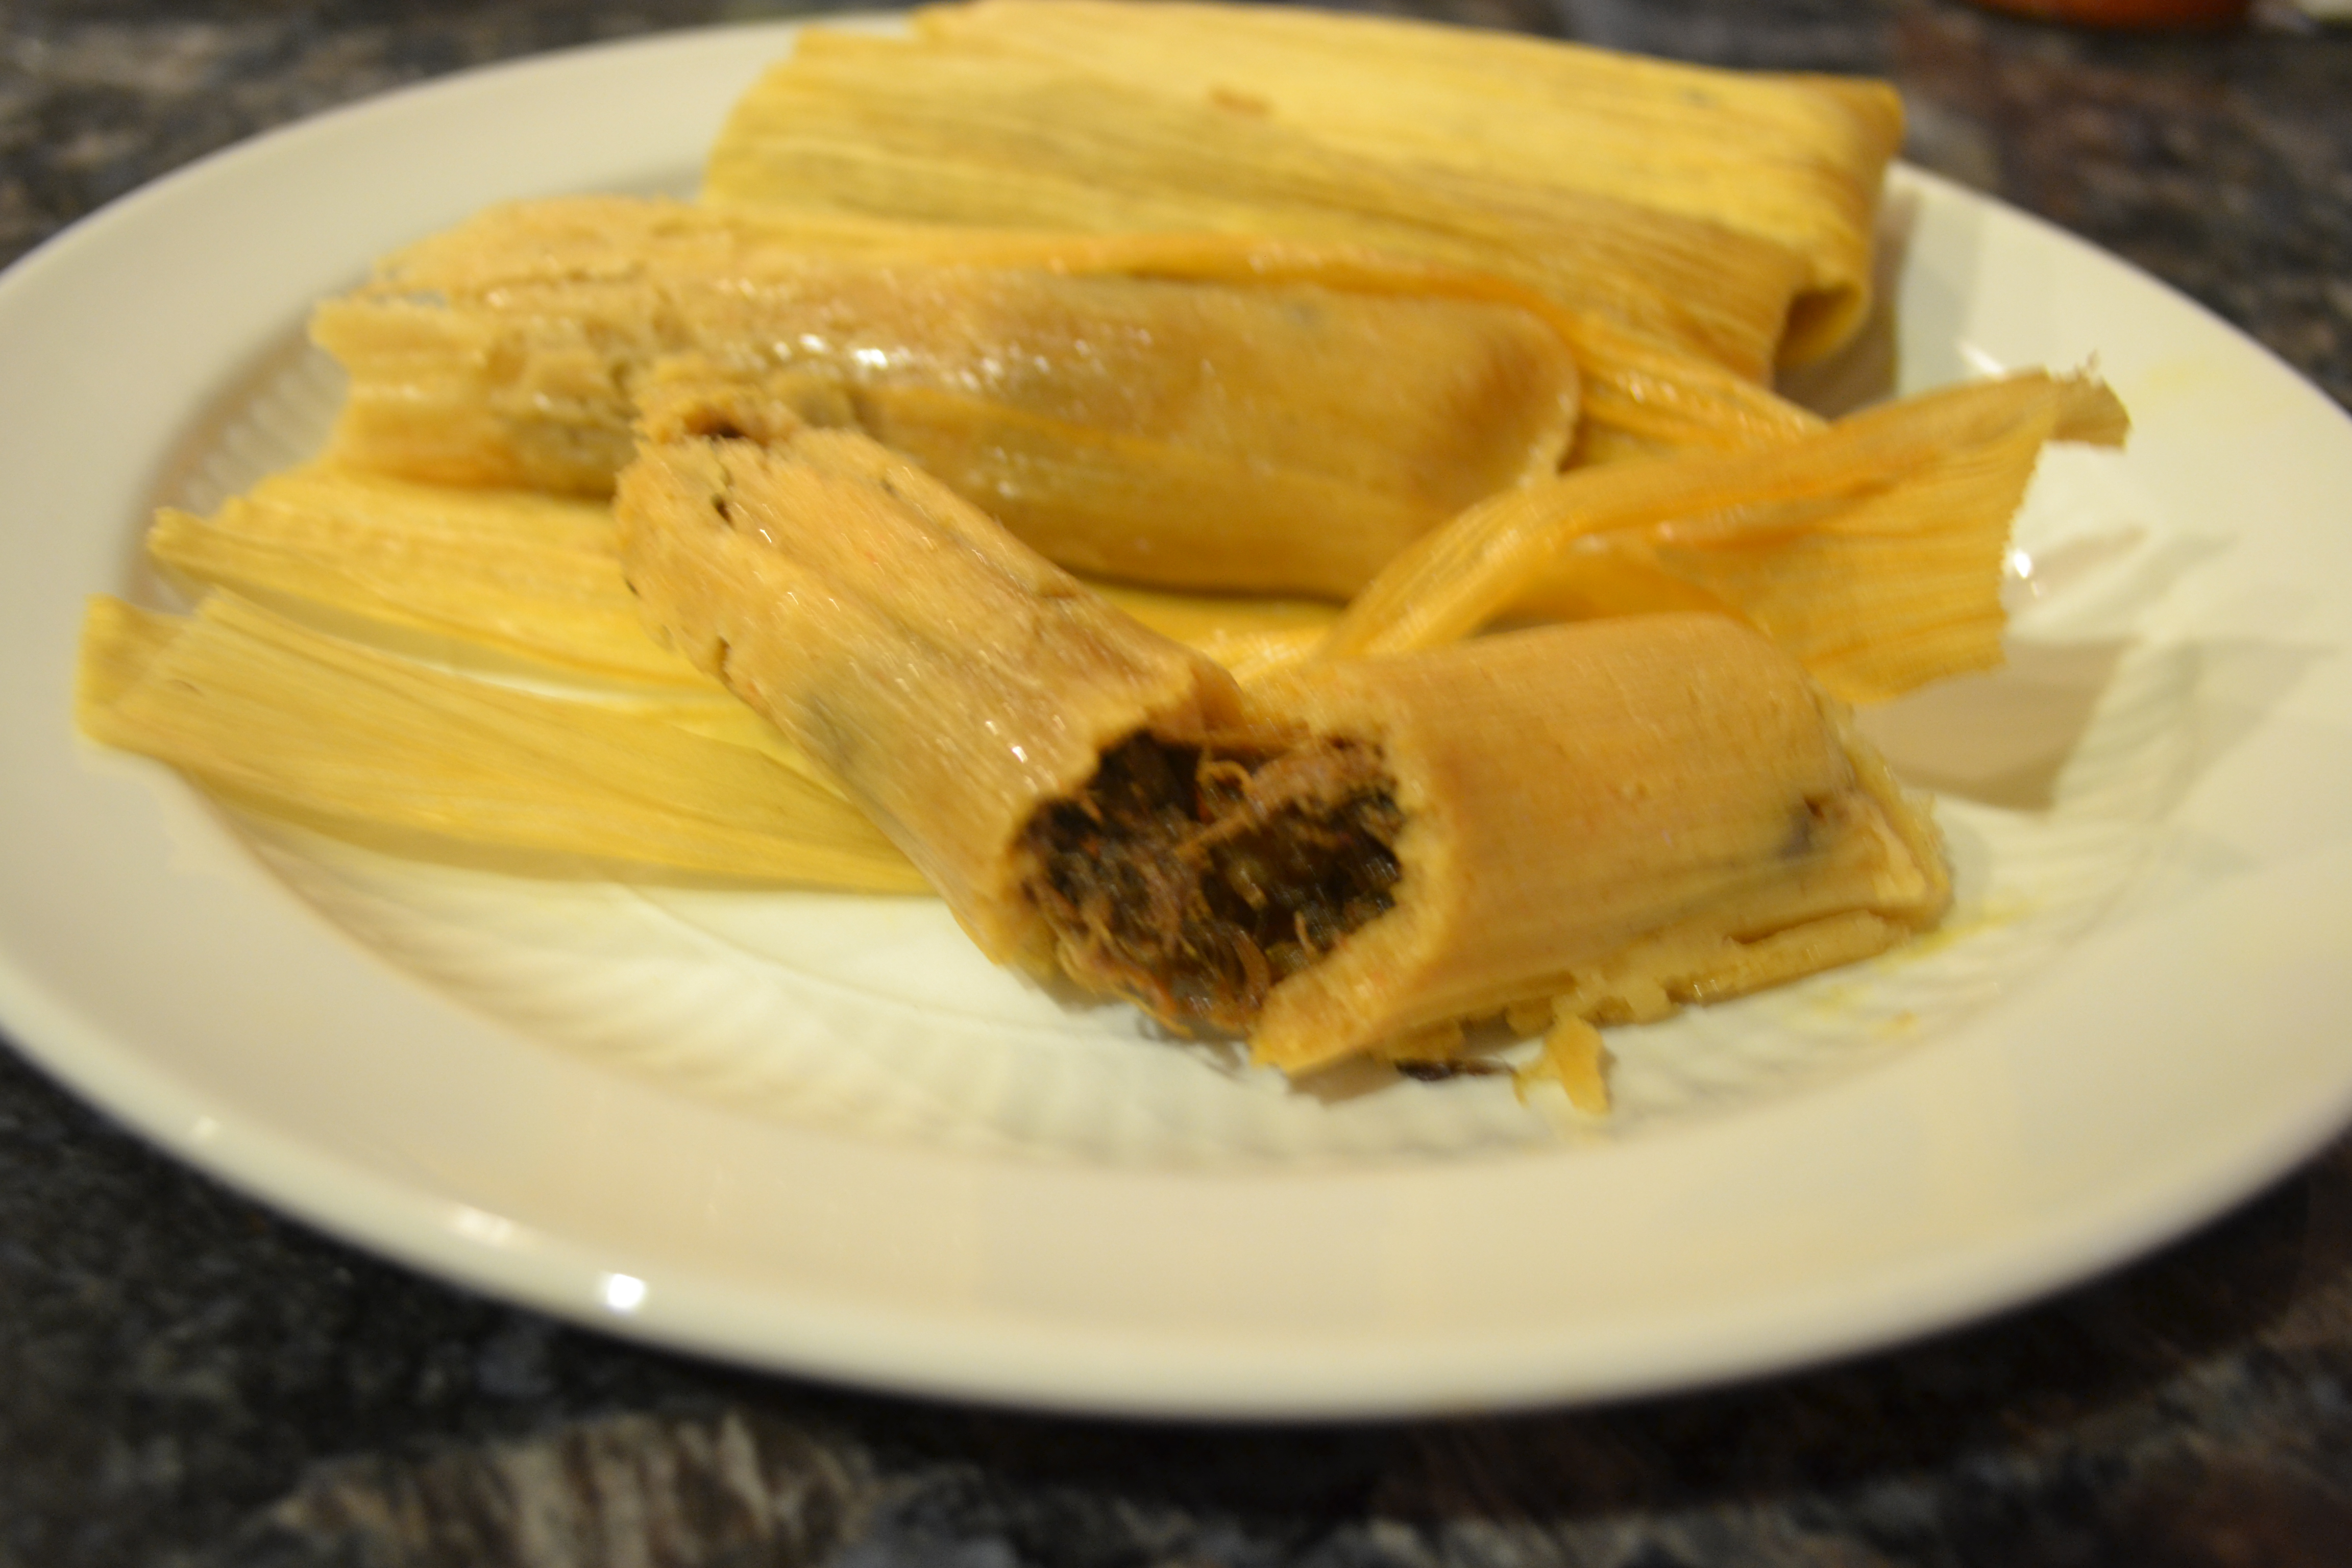
Place the lid on the pot and bring water to a boil. Reduce heat to medium low and steam for one to two hours. Tamales are best when freshly steamed.
Whew! You’ve just done something amazing. Bring out the beer, grab the tongs, and invite your nearest and dearest to sidle up to the pot and eat fresh wild game tamales!


 Valentine’s Day is upon us. Actually, it’s been lurking in the stores since Thanksgiving. Junior Deerslayer refers to it as “Singles Awareness Day”. Everyone in our family has decided that it would be a sneaky move for all of us to secretly decide to celebrate Valentine’s Day on February 16th instead. All the cards, flowers, and candy will be 1/2 off. The restaurants will have put away their “special occasion menus”… the ones that feature only a couple of entrees that cost about four times the regular price. There are 364 days a year that my dearly beloved can show me how much he loves me. He lavishes me with tokens of his affection every day. Okay, most days, pretty often, often enough. No need to run these things into the ground.


 The tamalada that I attended was hosted by the Guadalupanas, a group of faithful men and women who honor Our Lady of Guadalupe, the patroness of Mexico and many parts of North America. These men and women came together to make 300 dozen tamales for the festivities surrounding the feast day of Our Lady, on December 12th. What a wonderful, joyful, and educational experience it was. These people had so much to share with me. I wrote feverishly. I let them know that I had looked up directions on the internet. While I don’t speak much Spanish, I did hear the word “internet” come up in some of their conversations and some good-natured chuckles. I smiled apologetically and continued working and taking notes.