The Deerslayer's Wife
Embracing the Hunting Lifestyle
When the World Gives You Venison Liver…

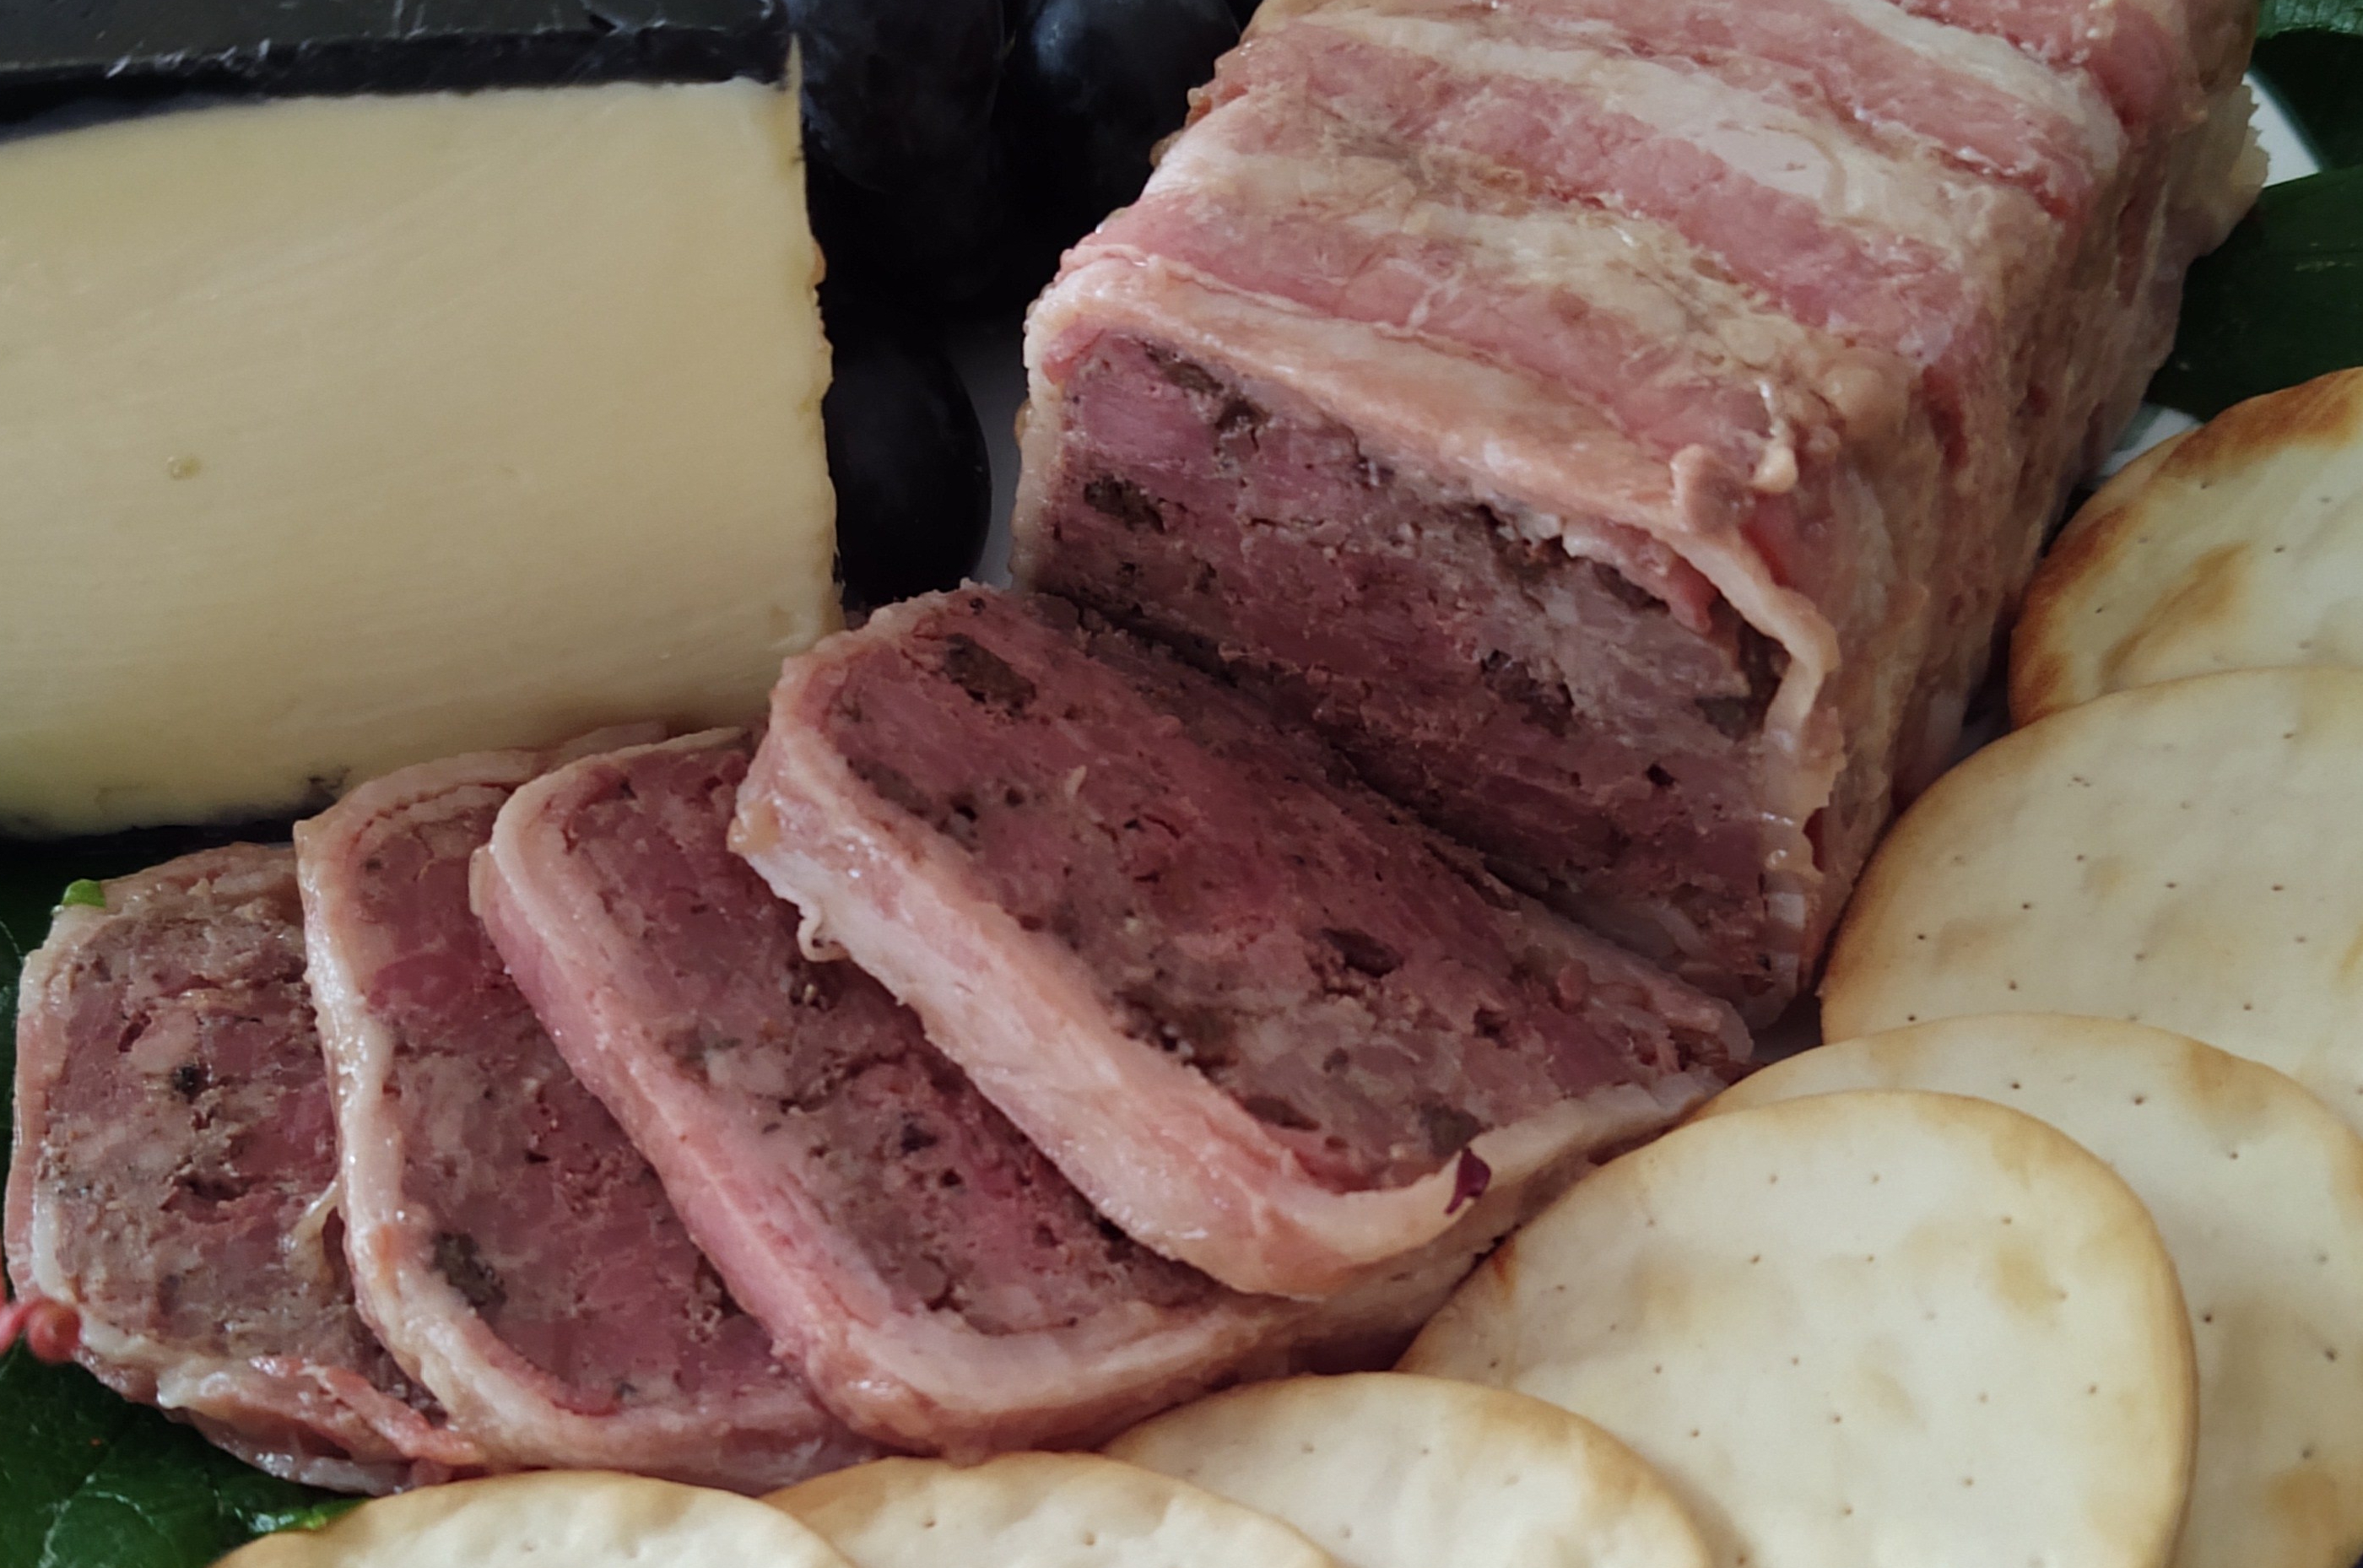
…make something impressive, even elegant like the country pate’ (terrine) I found from ChefSteps! So many times, we scour the internet (or cookbooks for those who like to go “old school”) for new ways to serve up our harvested wild game meat. For years, when I wanted recipes for the meat that filled my freezer, I looked for “venison”, or “wild hog”, etc. Not so many years ago, pickins’ were pretty slim when it came to wild game-specific recipes. As internet cooking sites became more common, so did the choices for recipes that featured wild game. To broaden the spectrum even further, being able to make ingredient substitutions and improvise methods and utensils can do exactly that. It was with that mindset that I sought my recipe for Venison Liver Pate’.
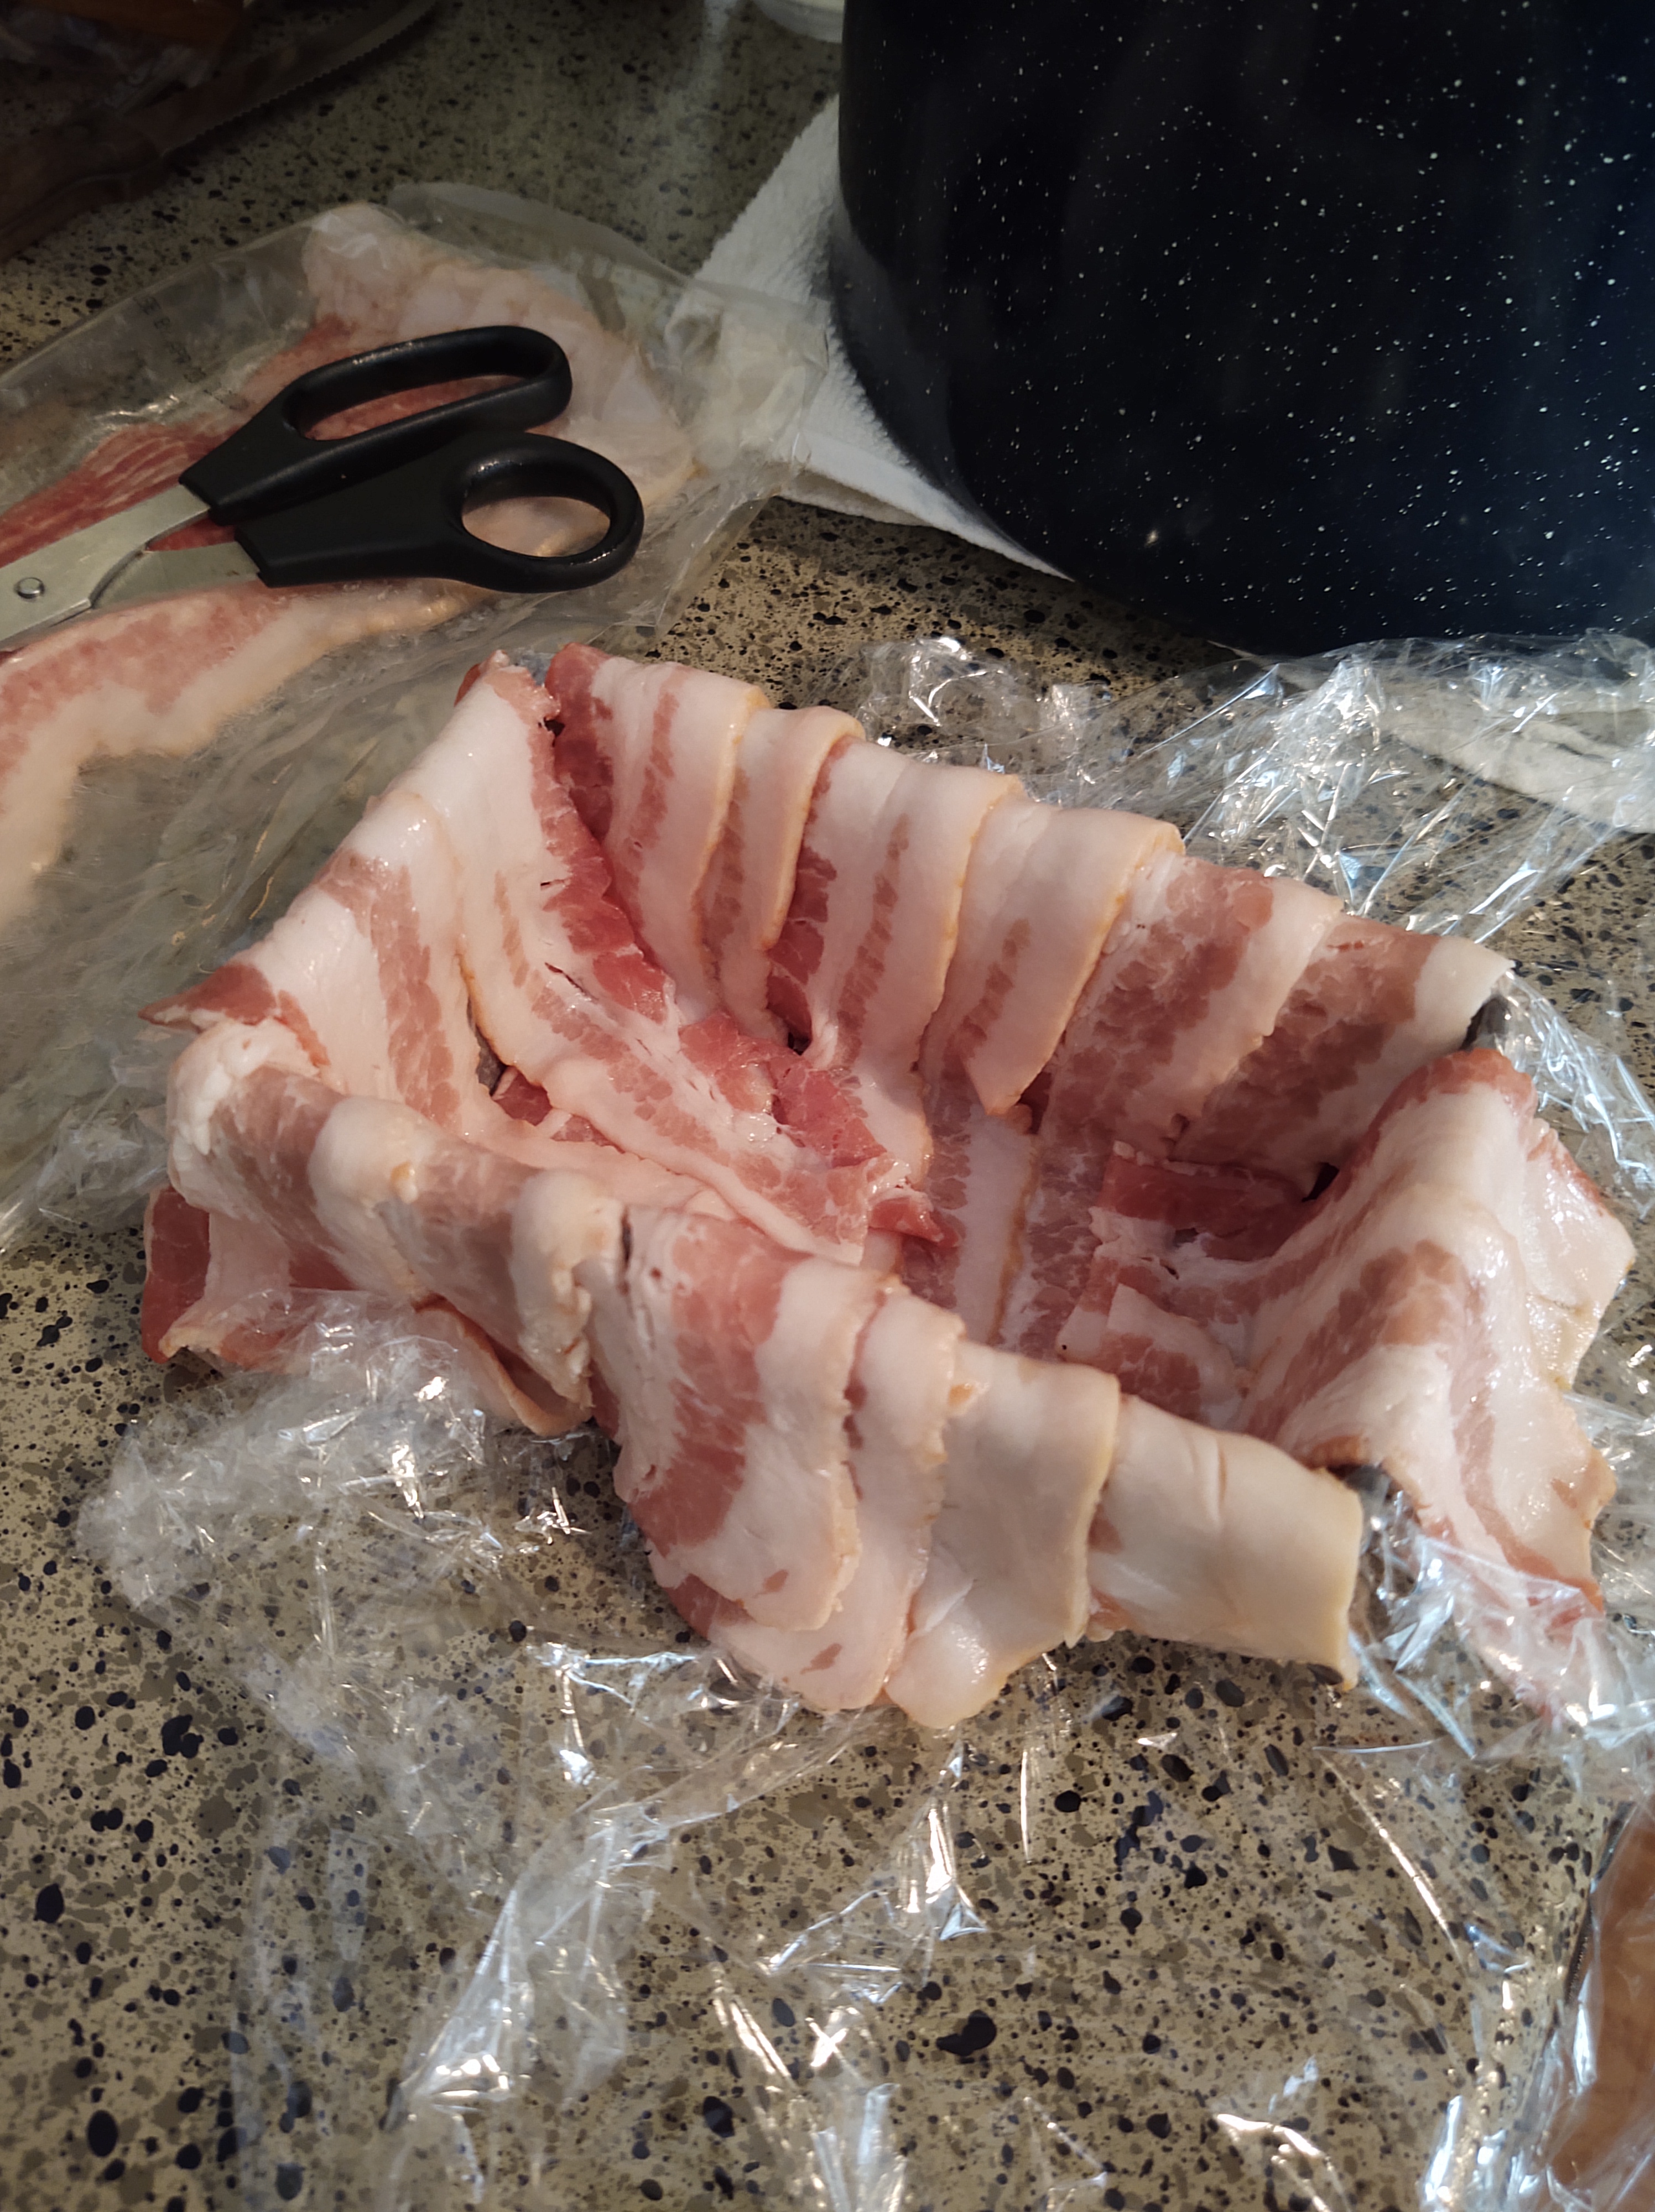
I first came across venison liver terrine at St. George’s Market in Belfast, on a trip to Northern Ireland a couple of years ago. It was made from divine, sumptuous game meats coarsely ground, mixed with delicate spices that complement the flavors, and a touch of sweetness from dried fruits, all neatly wrapped in a blanket of bacon.
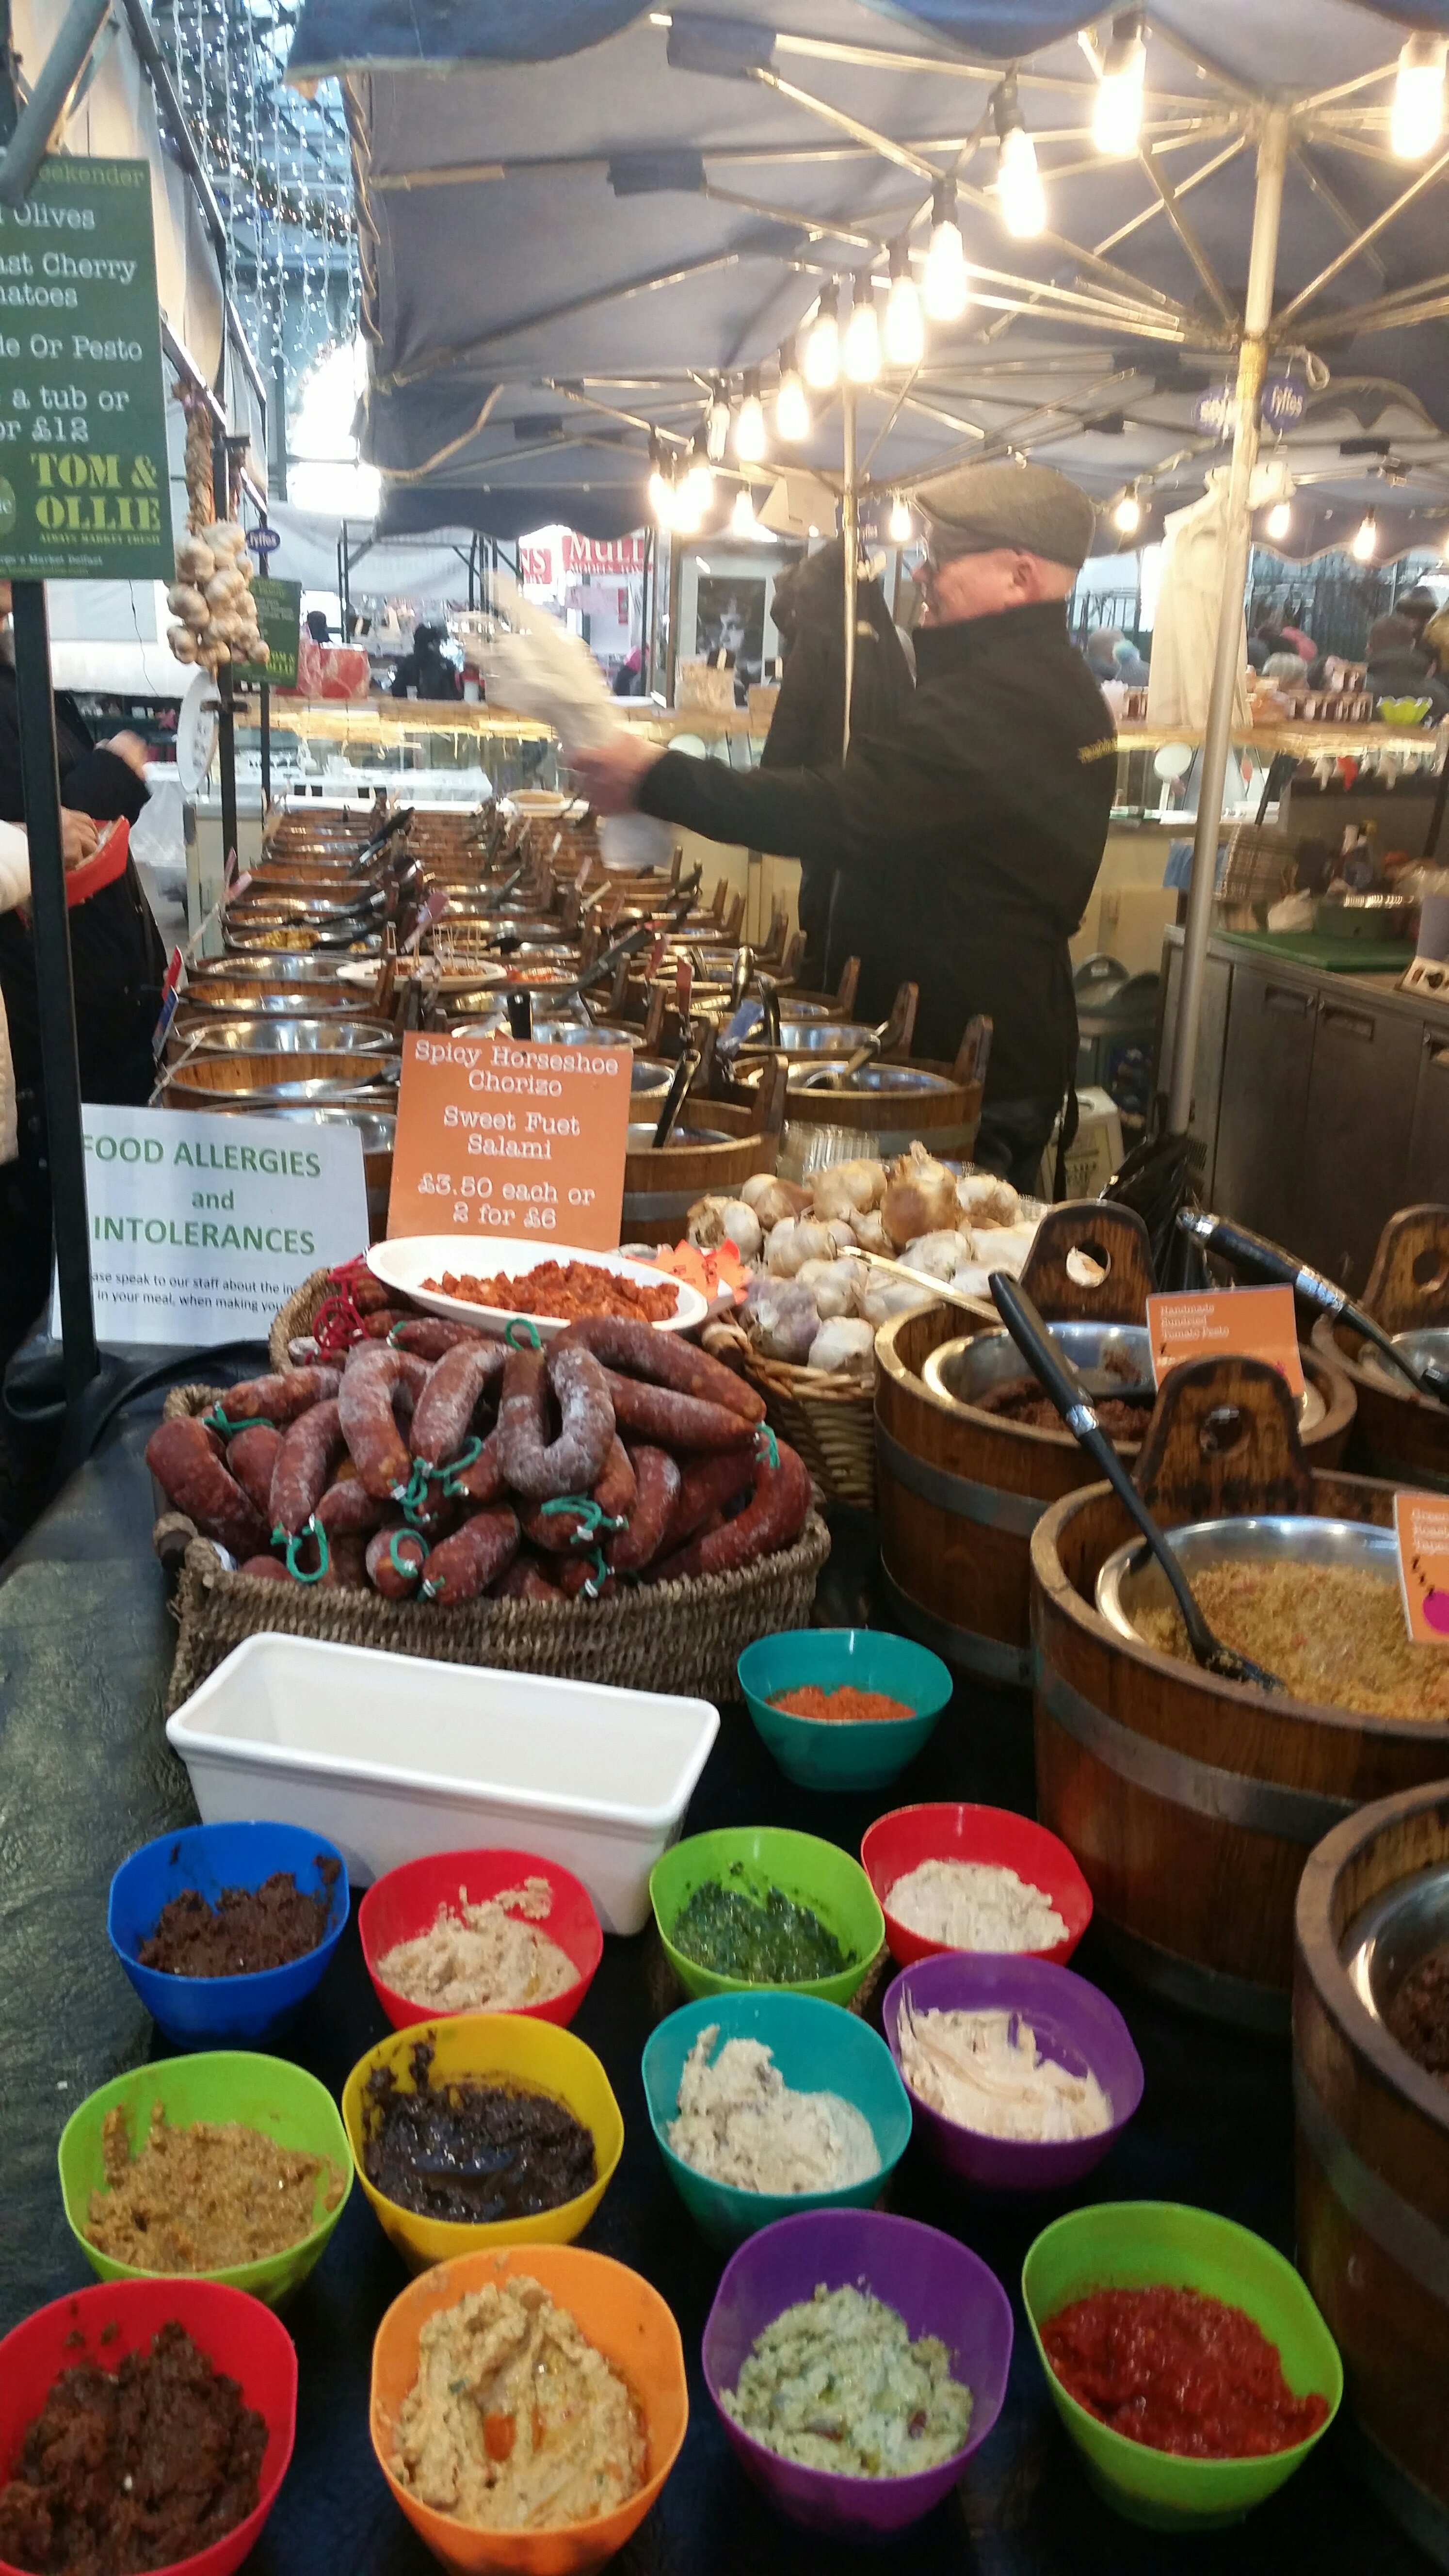
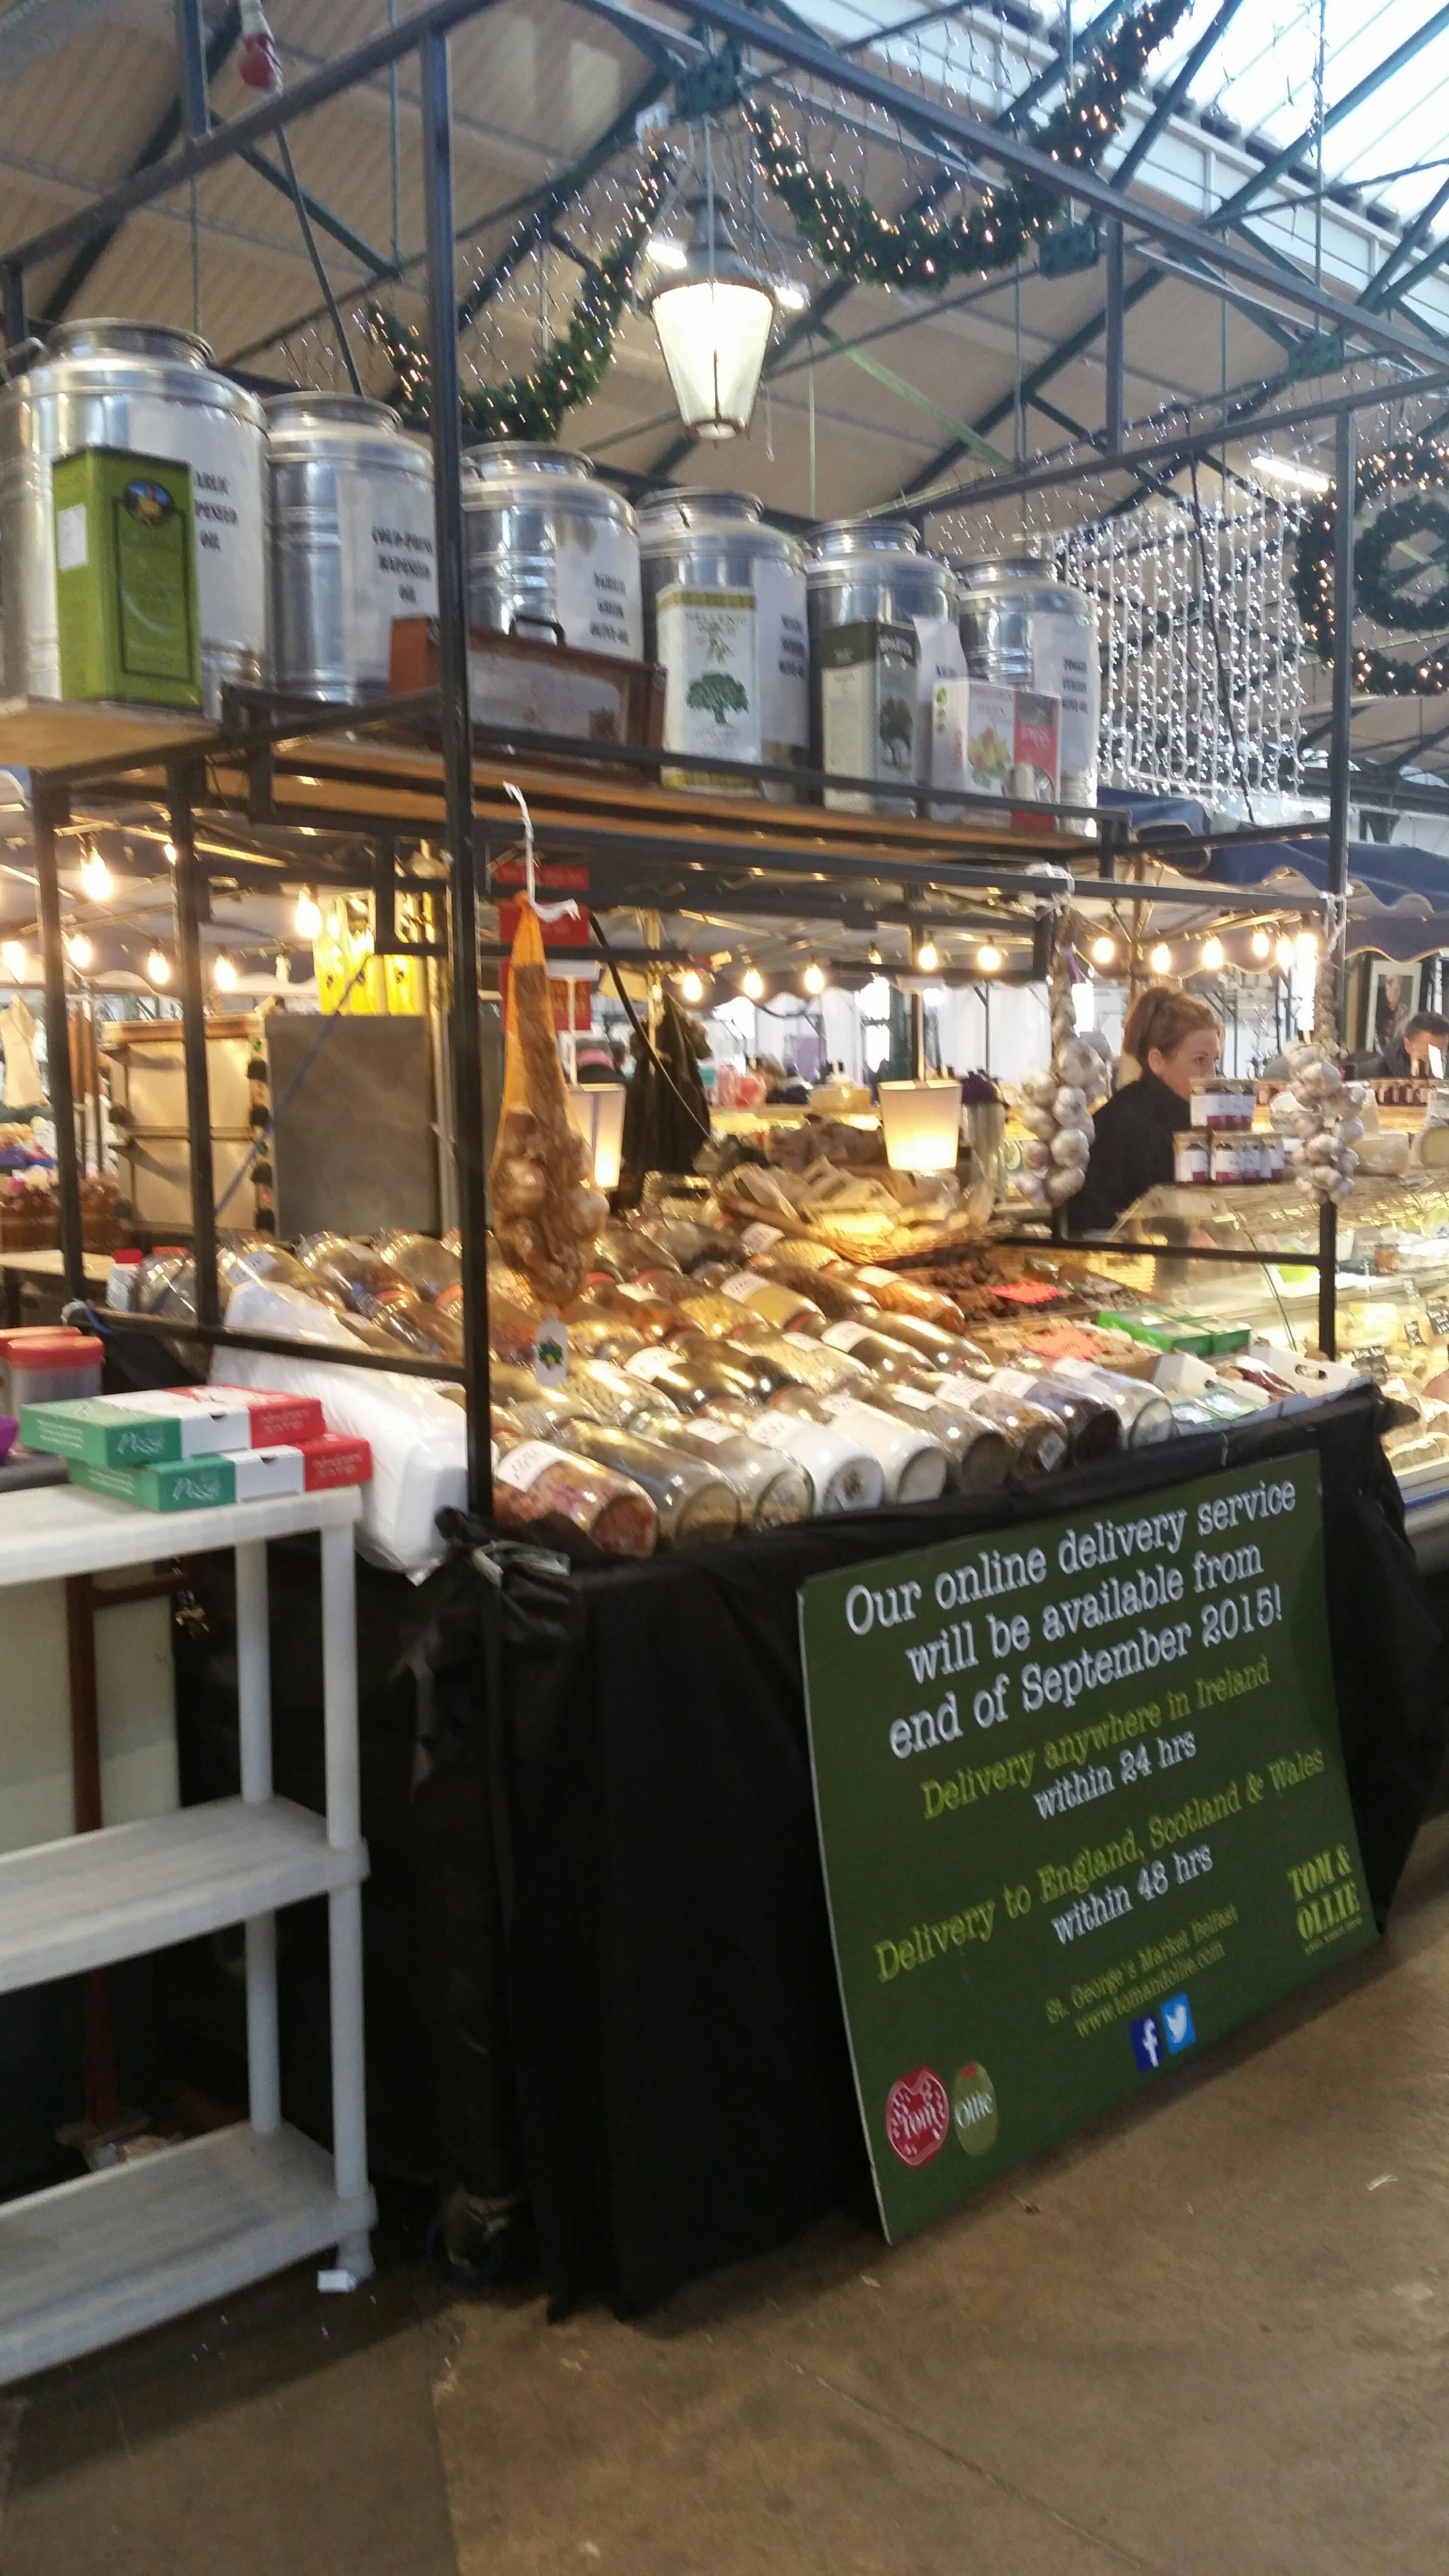


Terrine is a dish to be savored, sliced thinly, served with crackers, or alone, with a complement of mustard, cheese, or fruit. Basically, it elevates and celebrates venison liver. And I HAD a vension liver!
When I returned from my trip, I scoured the internet for country pate’ recipes that could be easily adapted to my needs, ingredients I had on hand, and utensils that I already owned.
I was thrilled when I came across a recipe from Chefsteps here that checked all the boxes. There was even a video! The ingredients seemed similar to those I’d encountered on my trip. It piqued my interest because, not only did it very closely resemble the terrine I’d had during my trip, it used a sous vide water bath as the cooking method. I absolutely love using mine and was eager to try it on the venison liver I had in the freezer. However, I had to make a few adjustments.
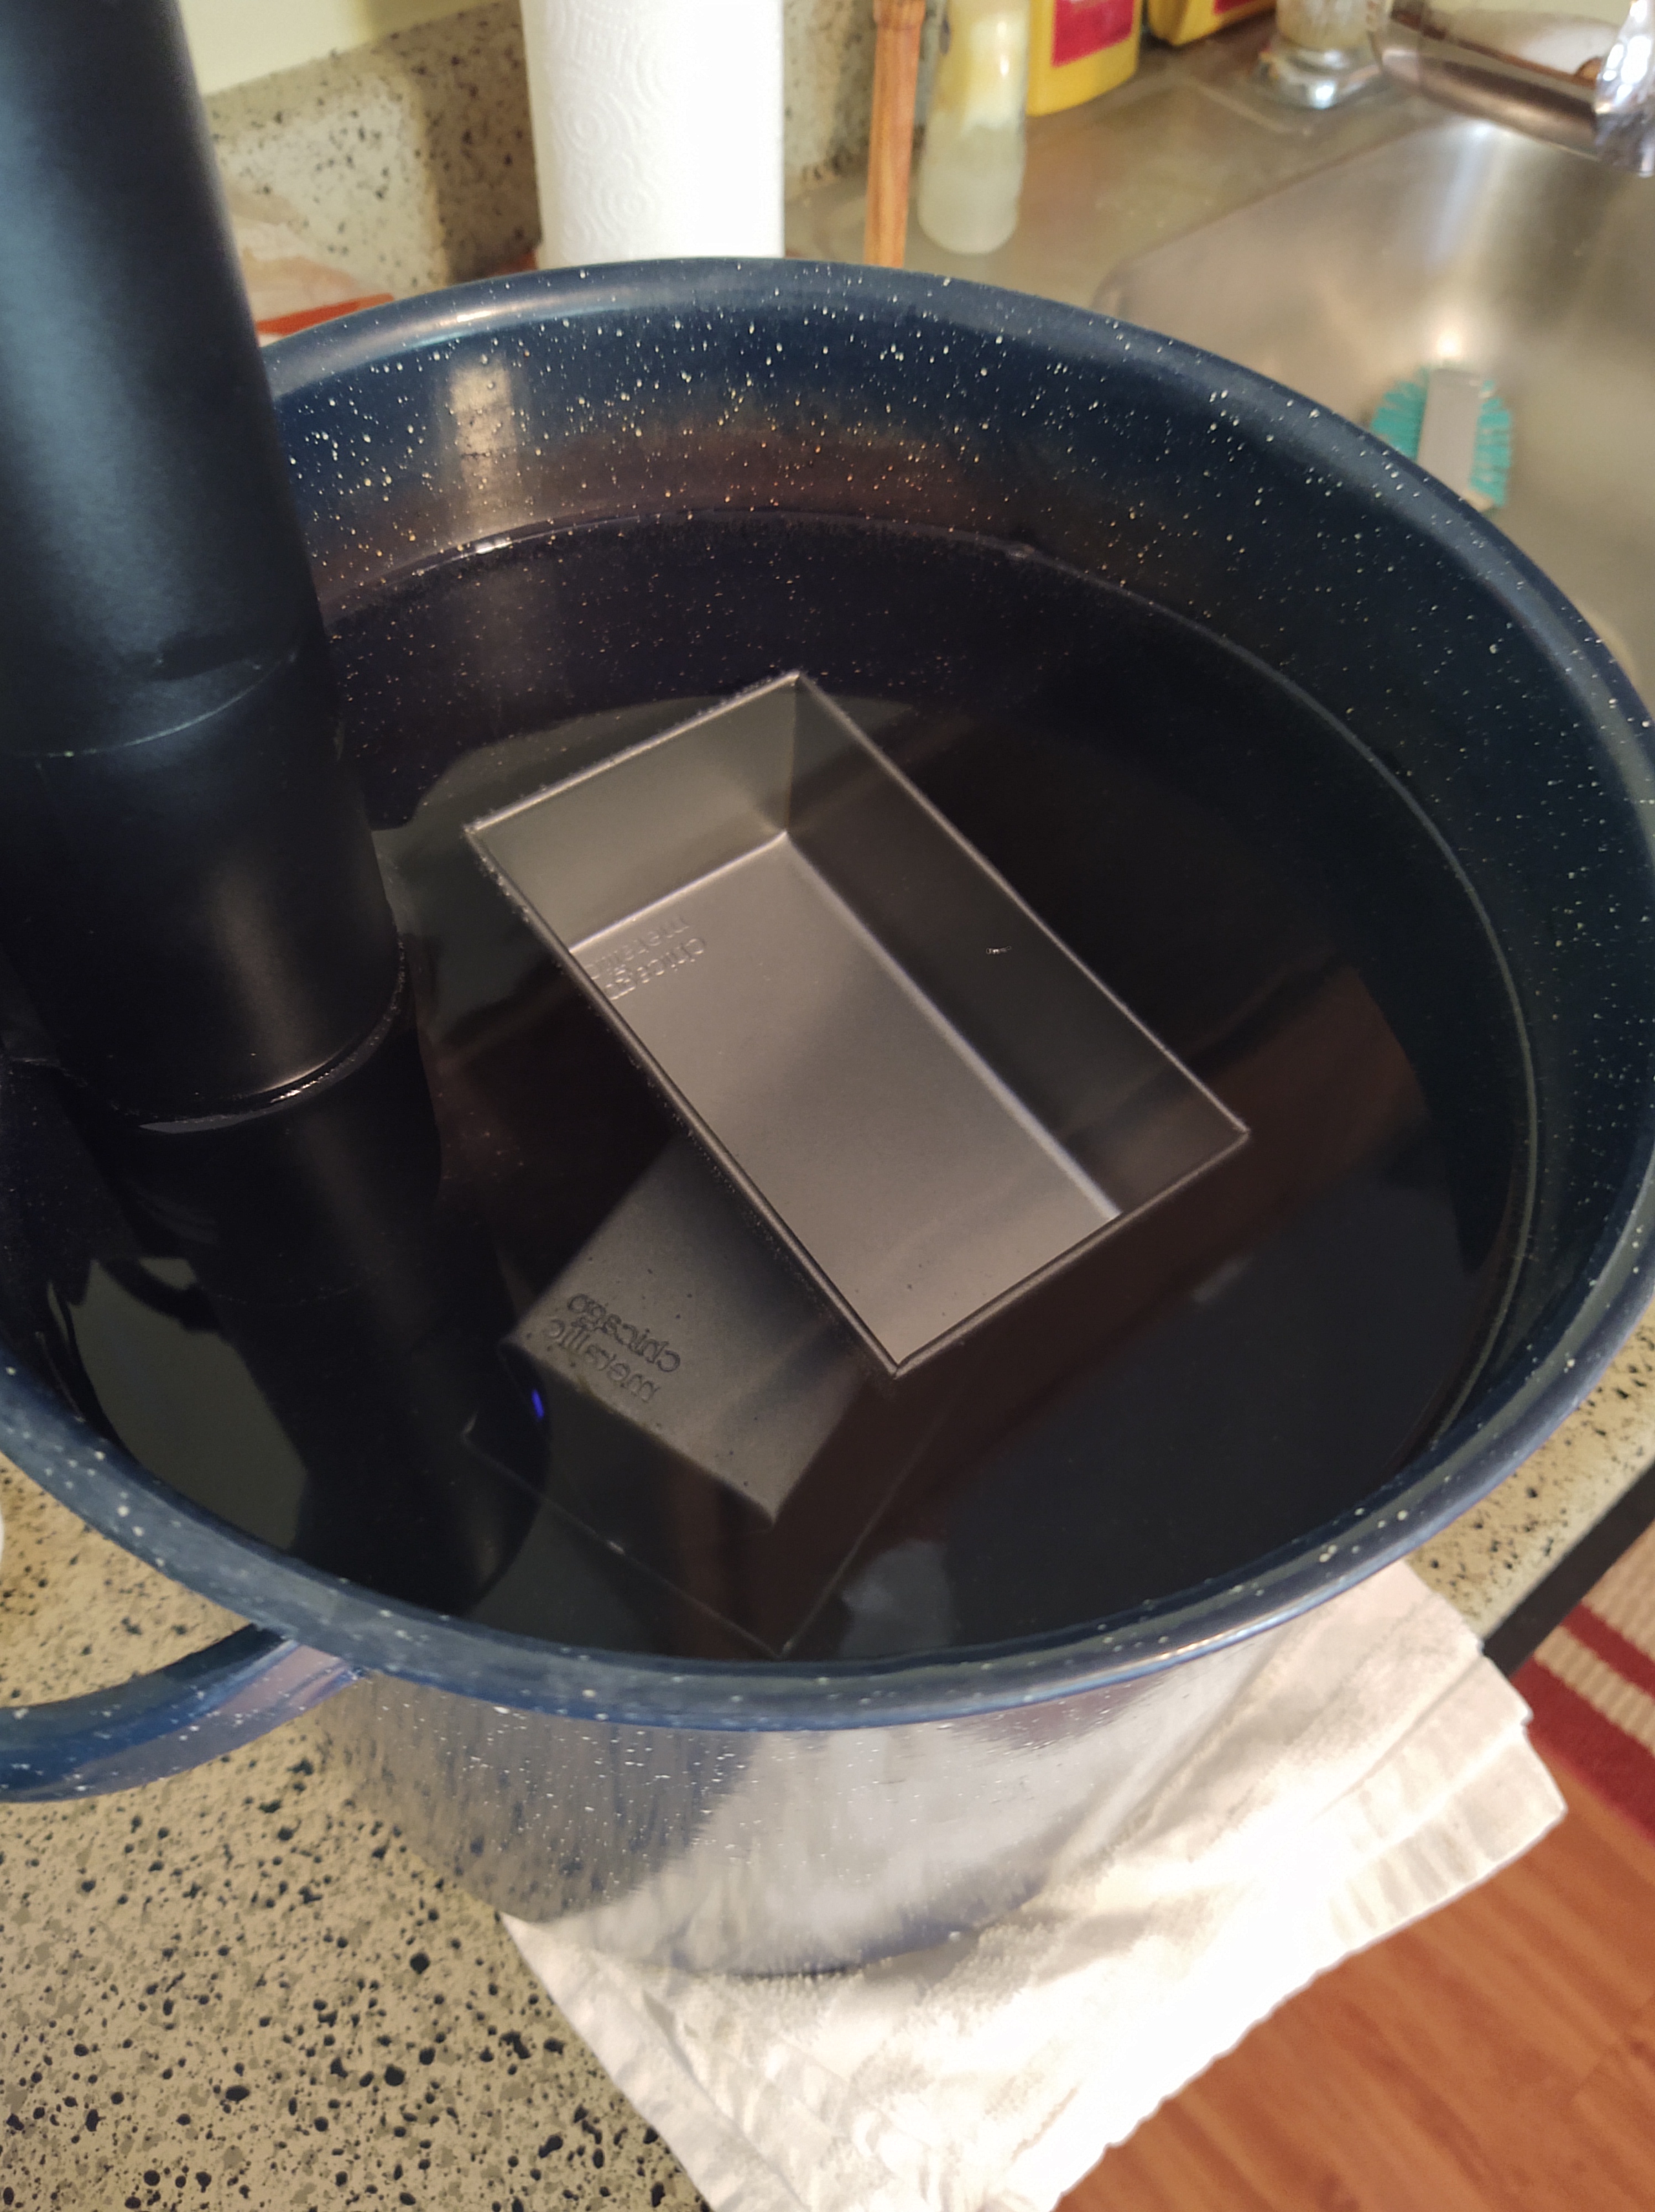
I don’t own a terrine mold and the sous vide immersion water circulator used in the recipe (Joule) worked a little differently from the one I own. My Anova requires deeper water than was best suited for this recipe and two mini loaf pans would surely work as a substitution for the terrine pan.
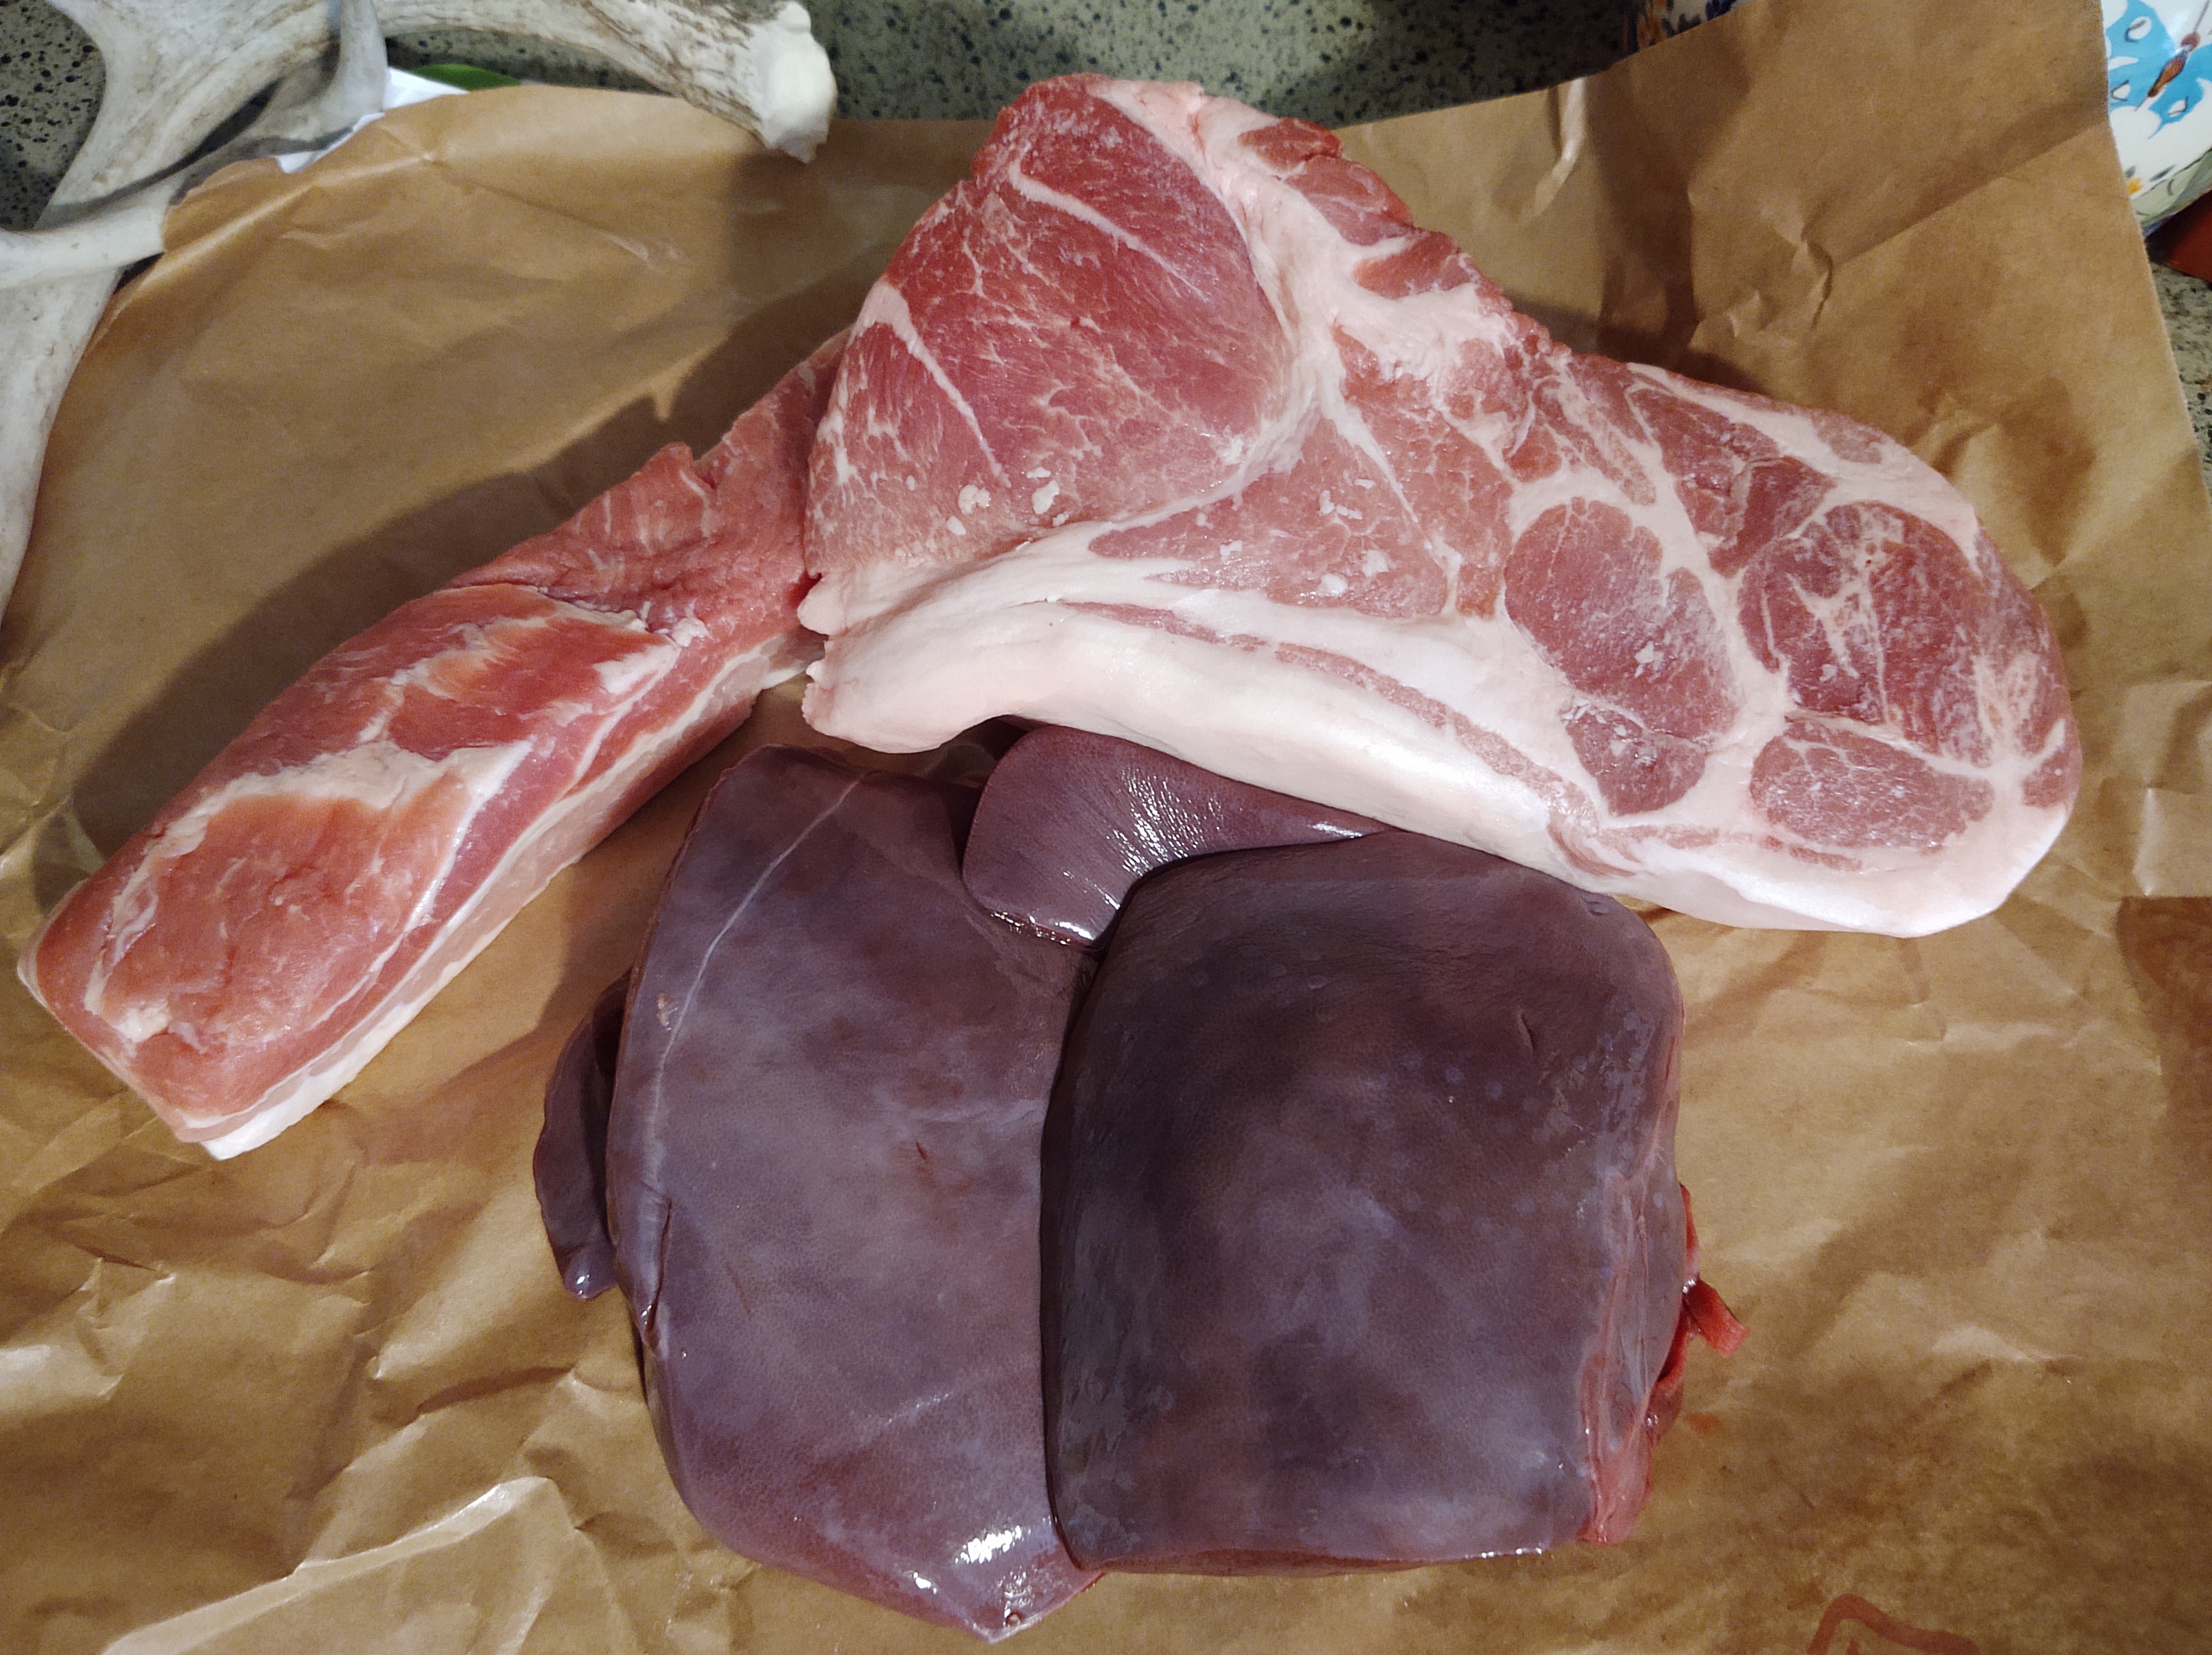
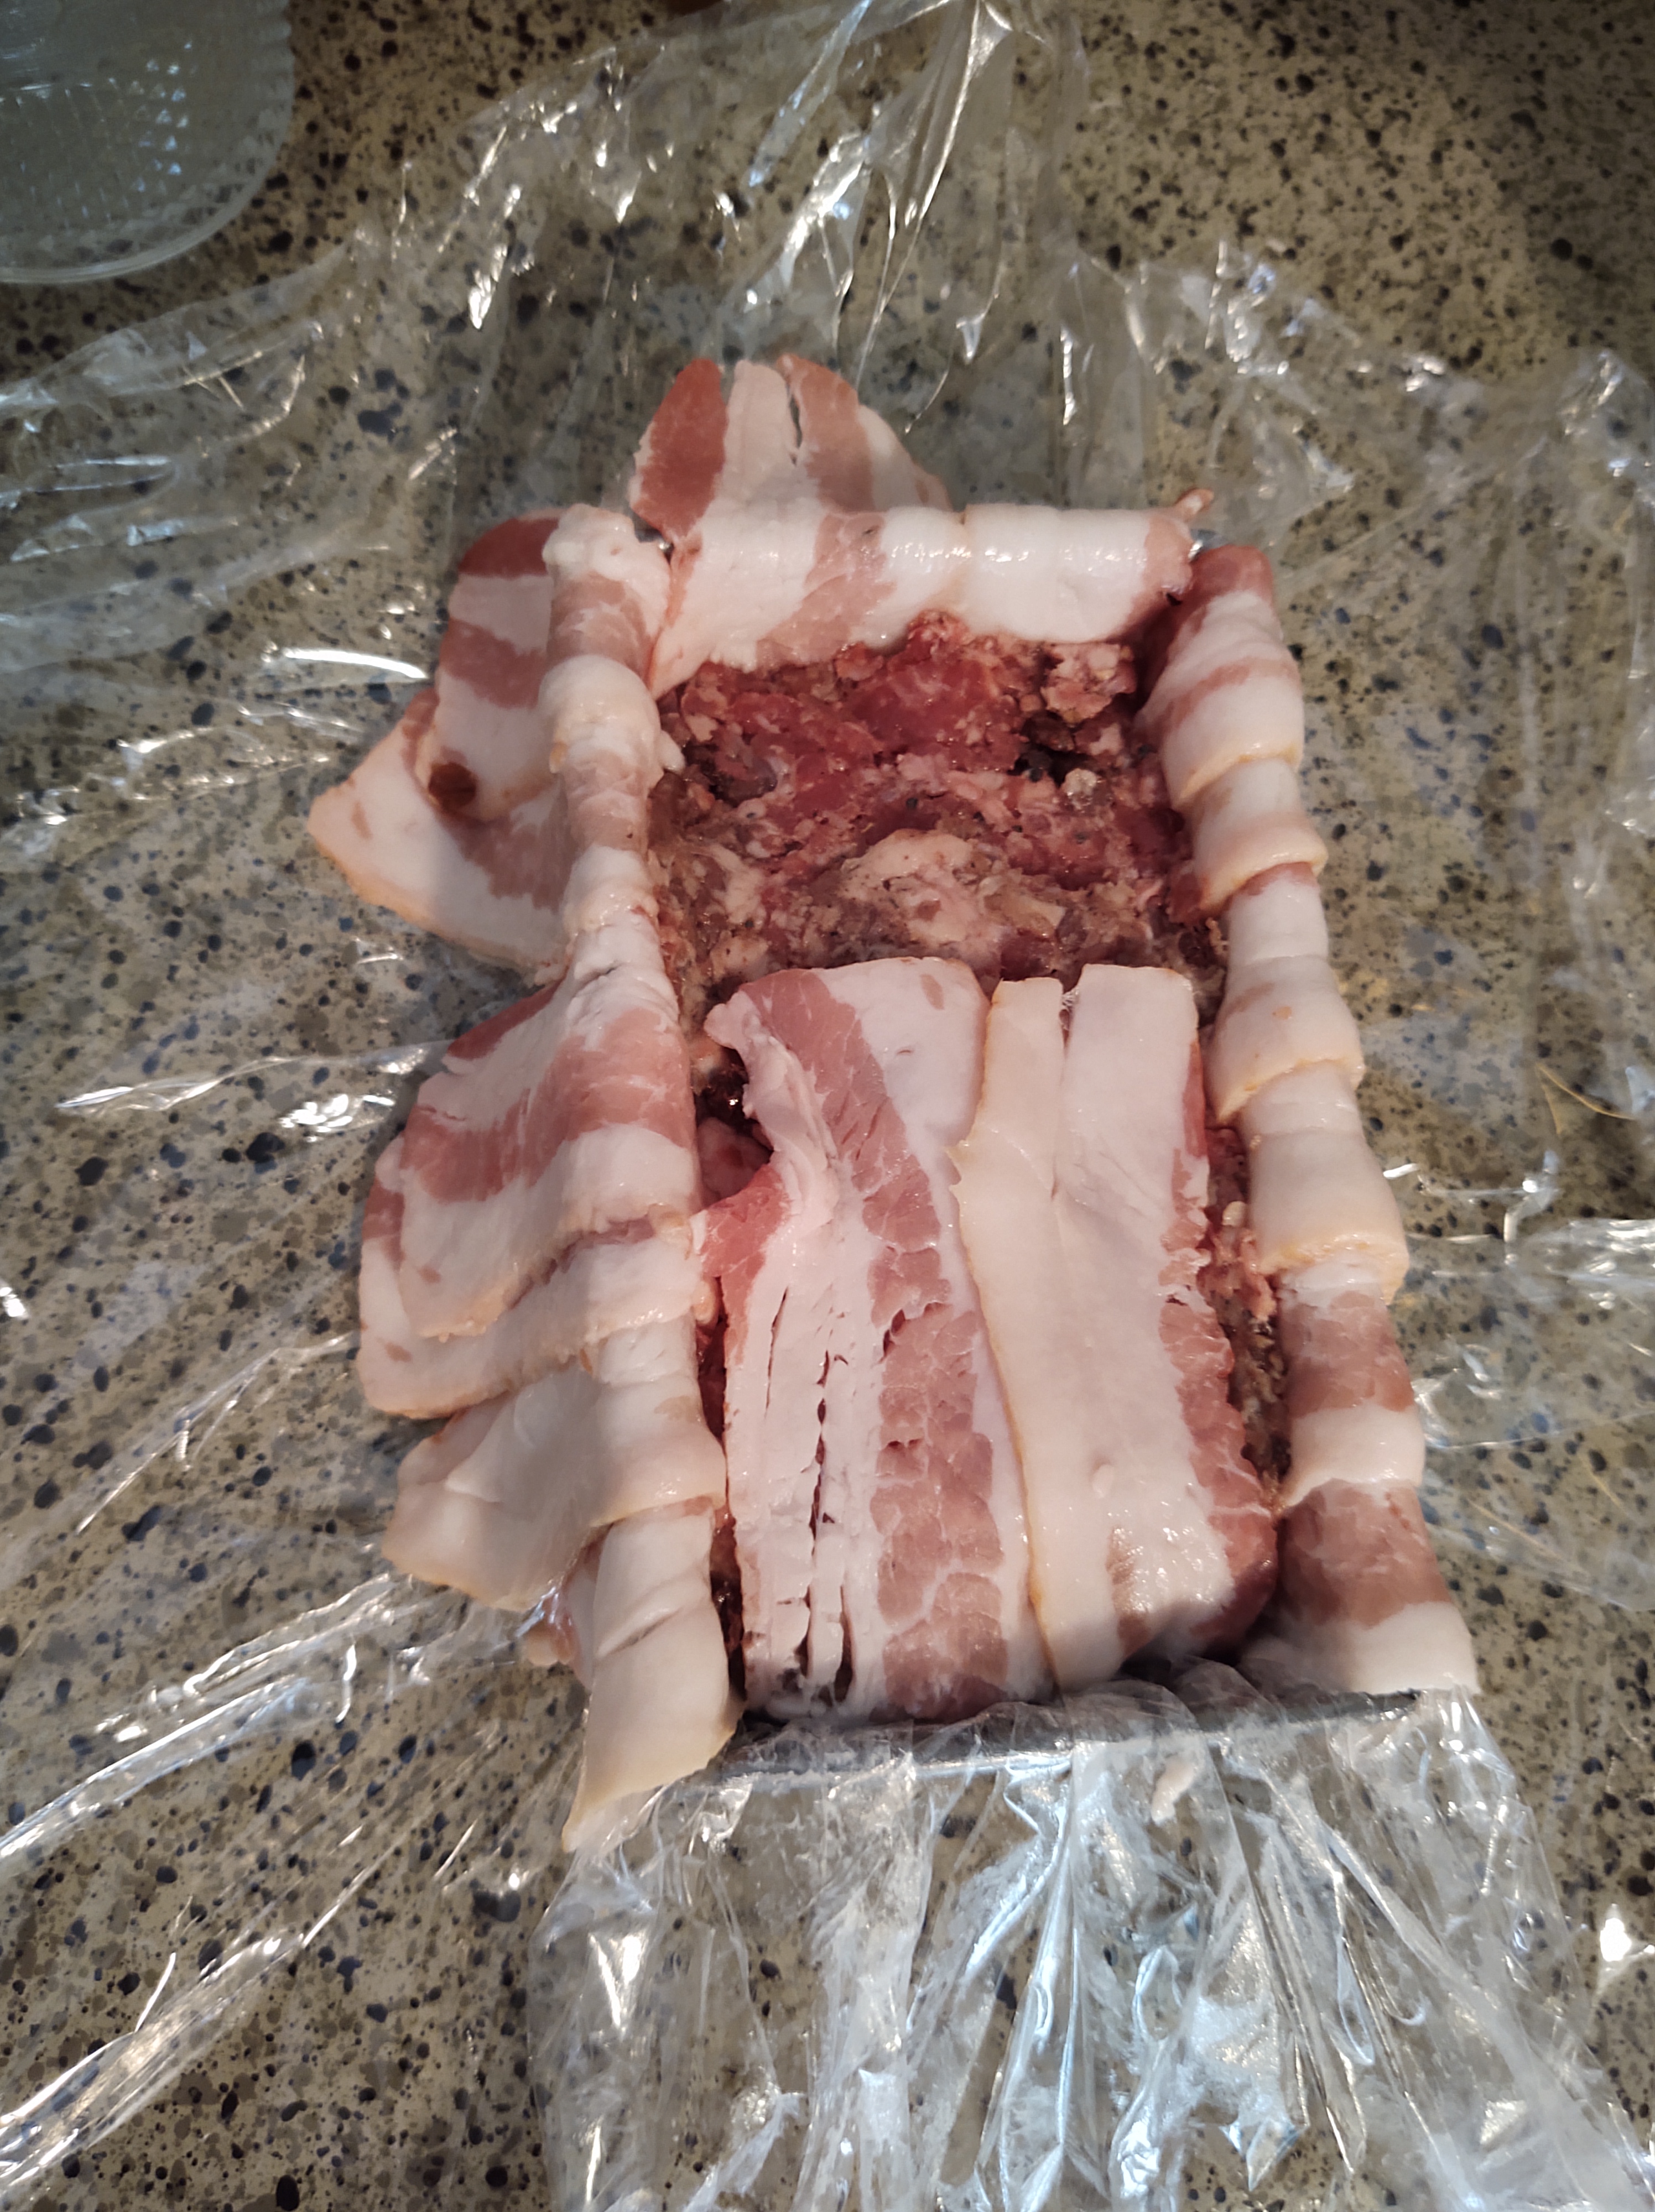
Undaunted, I decided to go ahead and give this recipe a try. I adjusted the ingredients according to my personal preferences. I switched out the pork liver for venison, used currants instead of dried cherries, and replaced the Sauternes with cognac because that’s what I had (and I like cognac). Even though my sous vide didn’t circulate water in the same way as the one in the video, and I didn’t have a terrine pan, I was now on a mission and would concoct something that would work!
Let me say at this point that the purpose of this post is not to share the recipe. It is clearly and beautifully explained and photographed by ChefSteps. It is, however, to share my thought process regarding adjusting, improvising, and substituting in order to utilize recipes that might be otherwise overlooked.
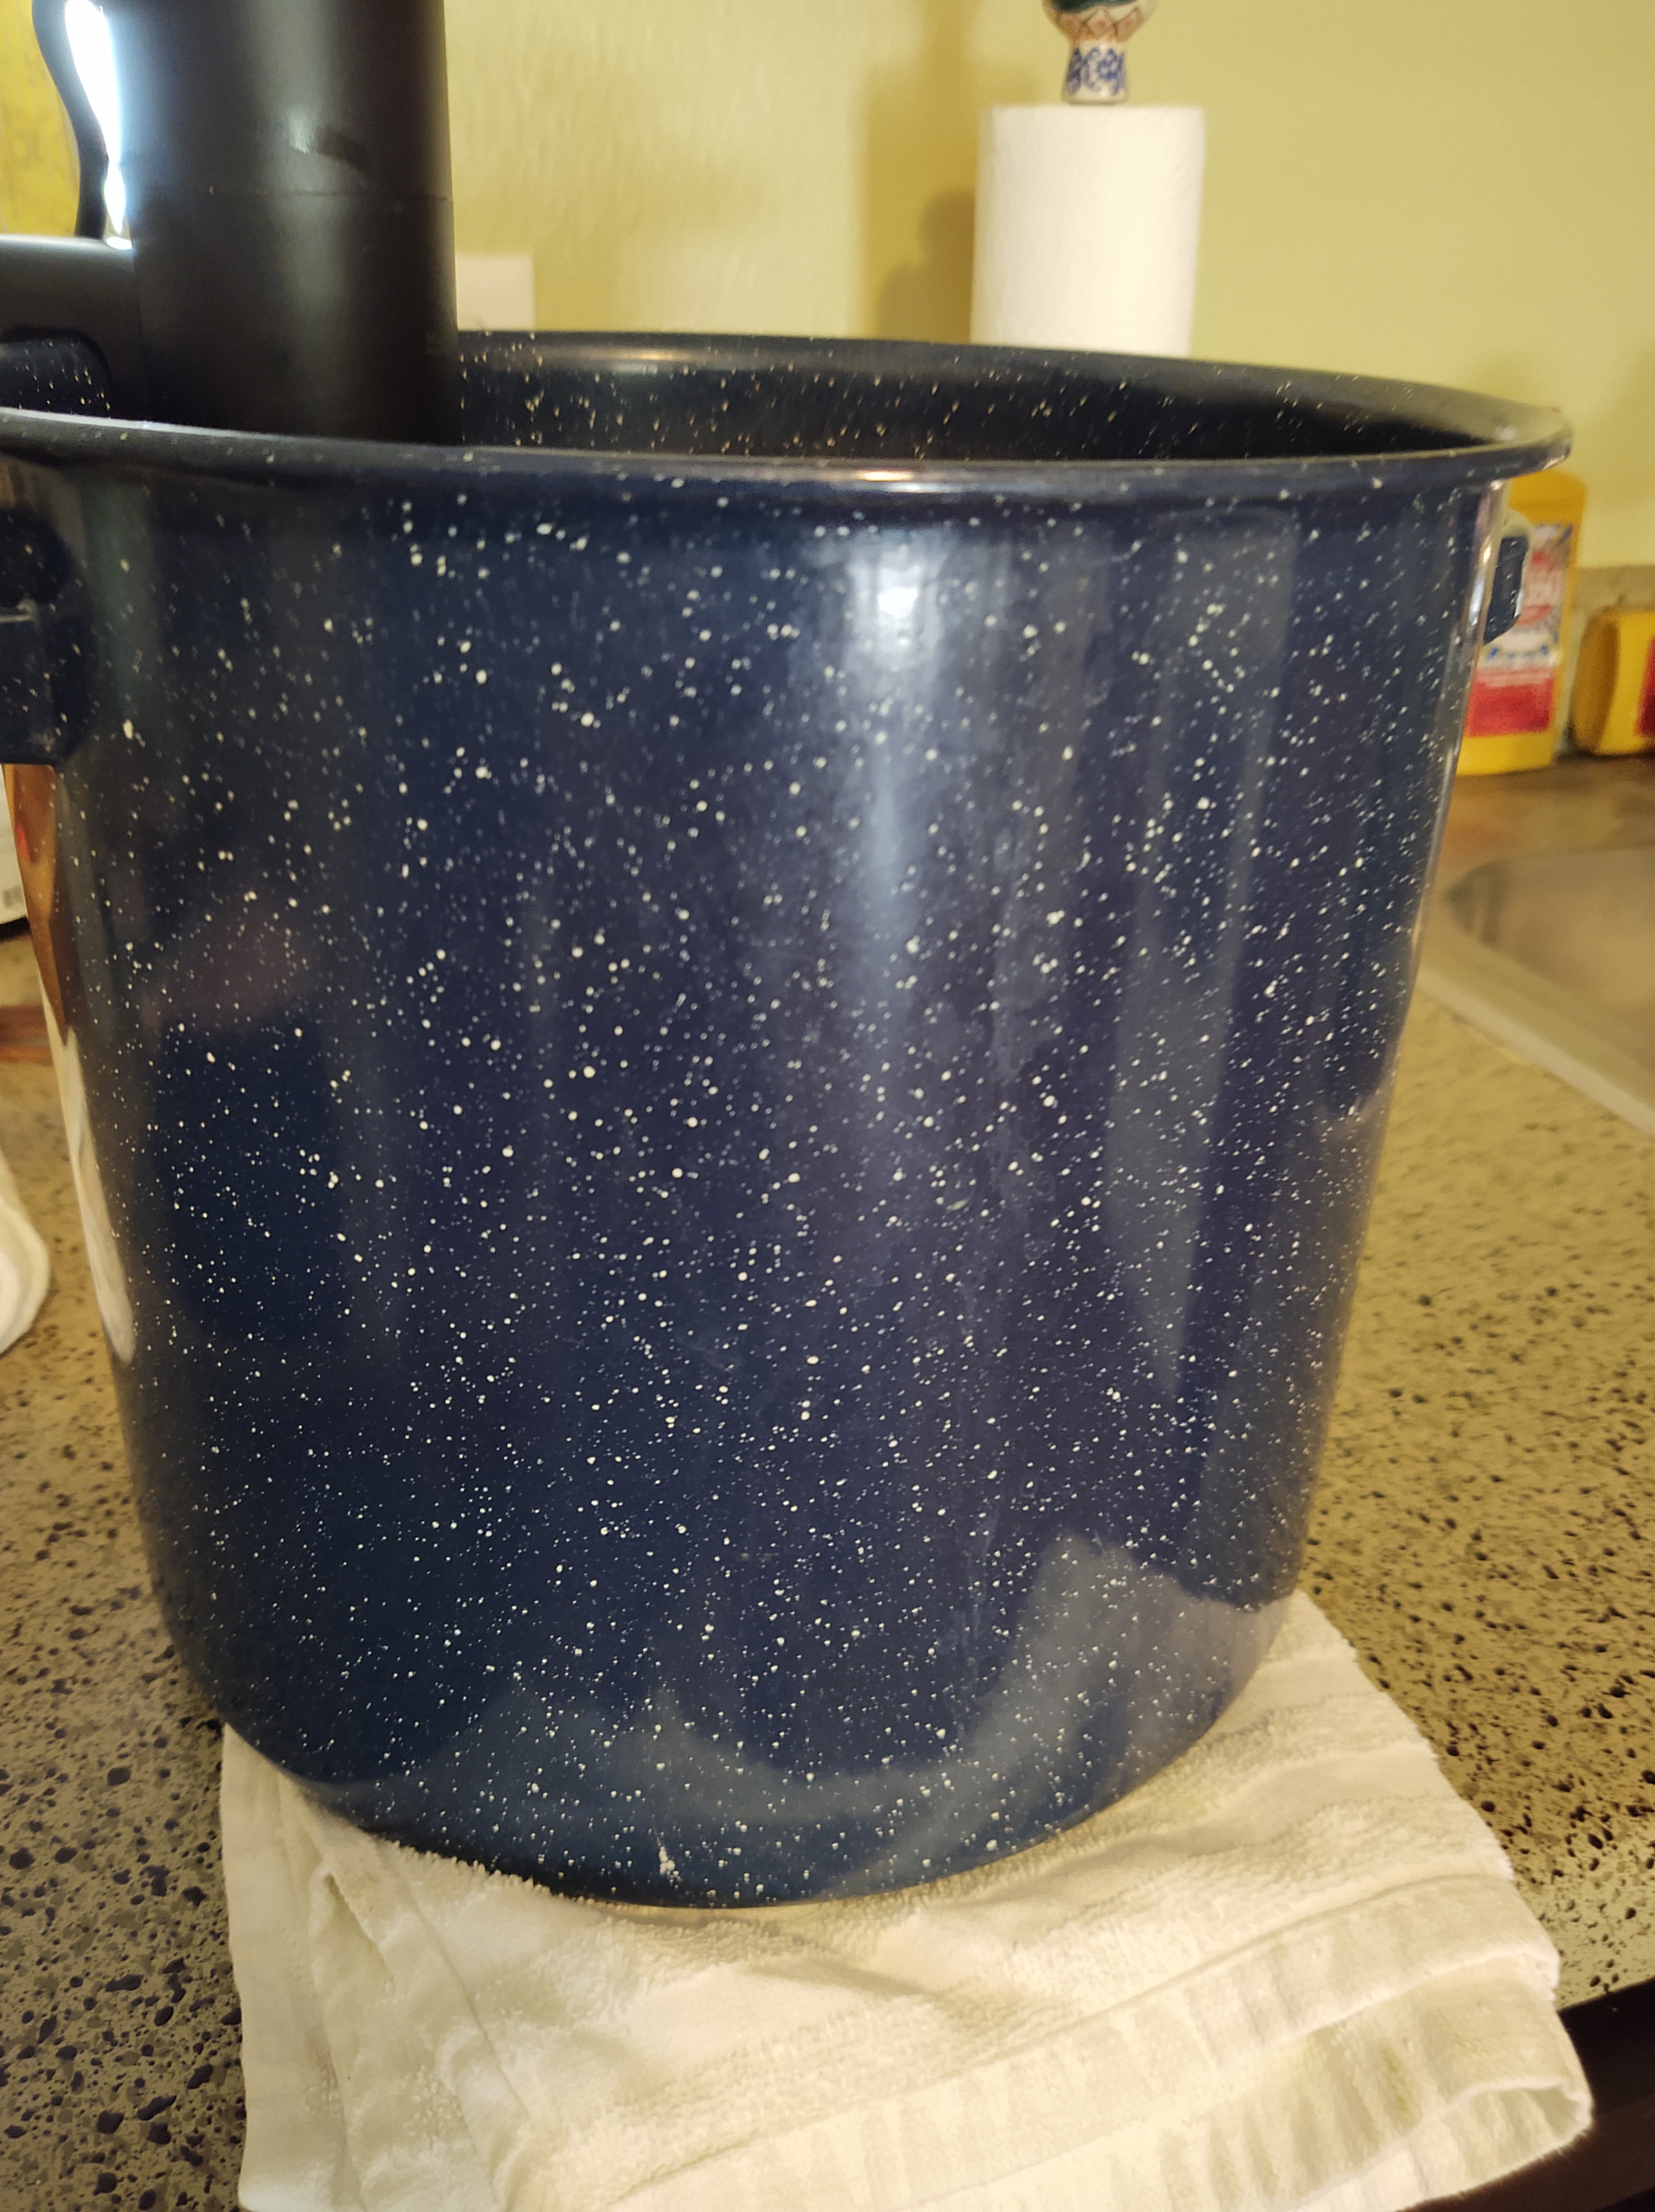
I assembled my improvised equipment (which included my designated sous vide pot with two mini loaf pans stacks to create the height I needed to balance the additional two that would hold my terrine):


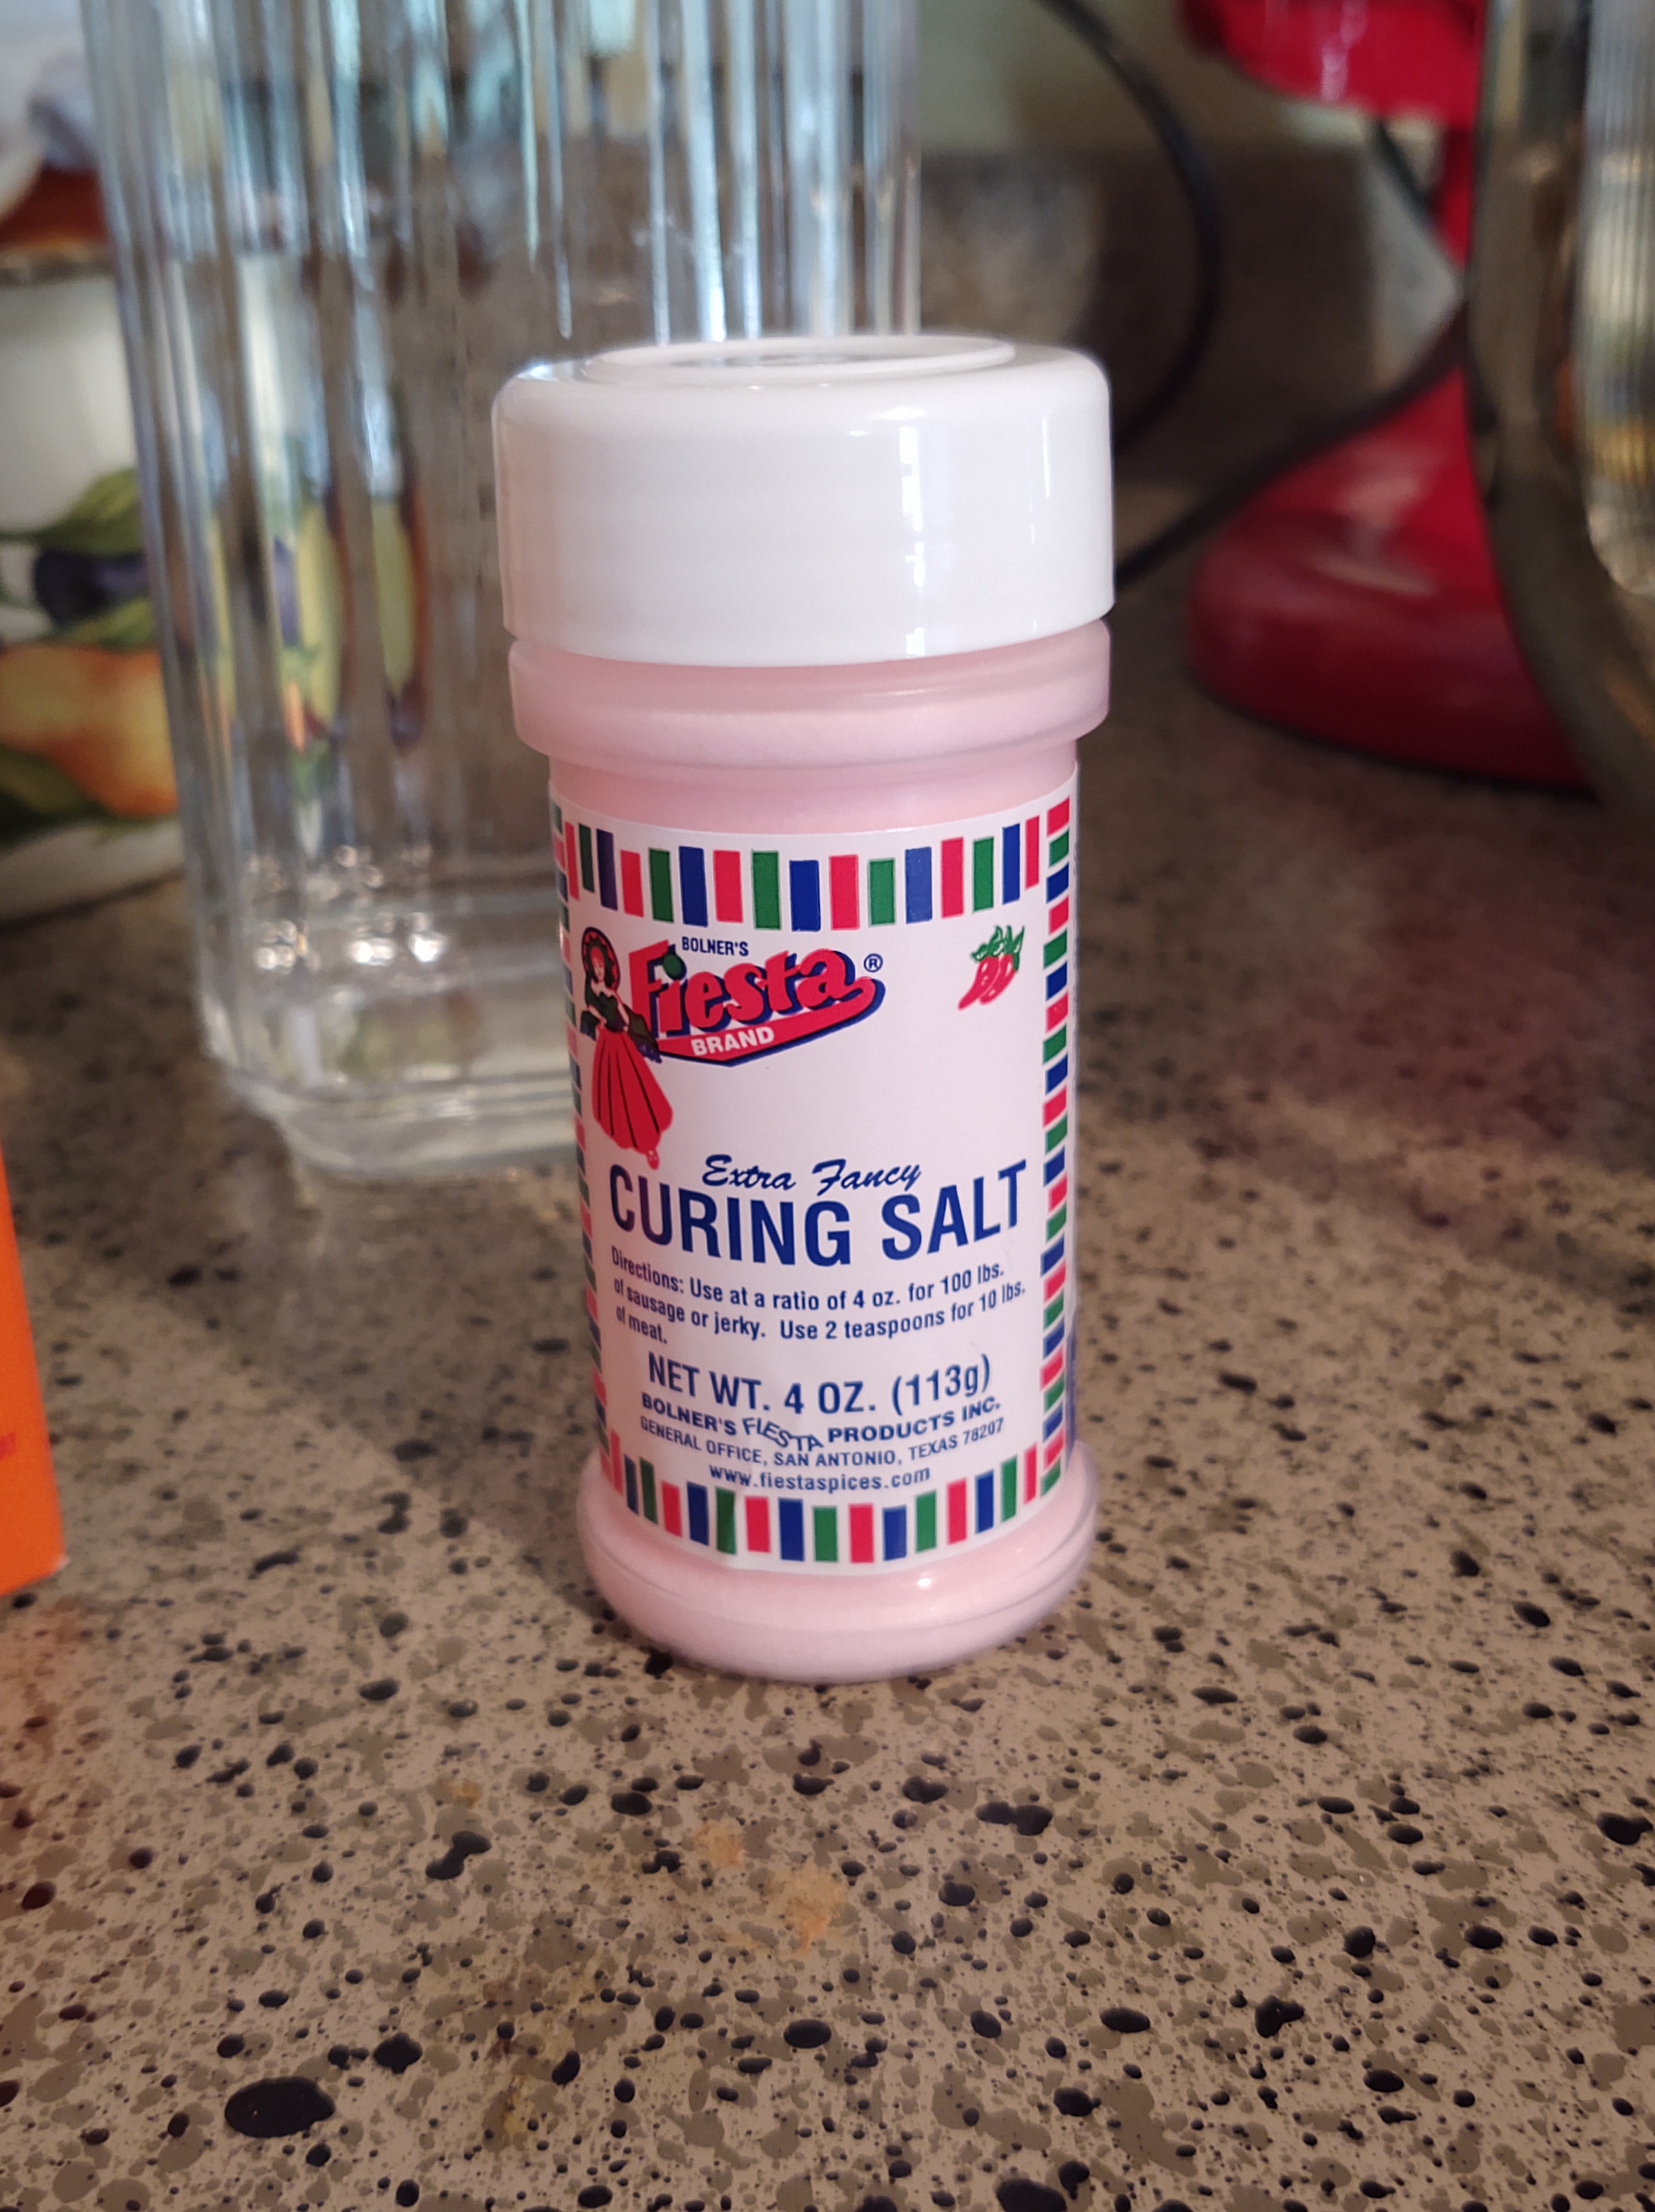
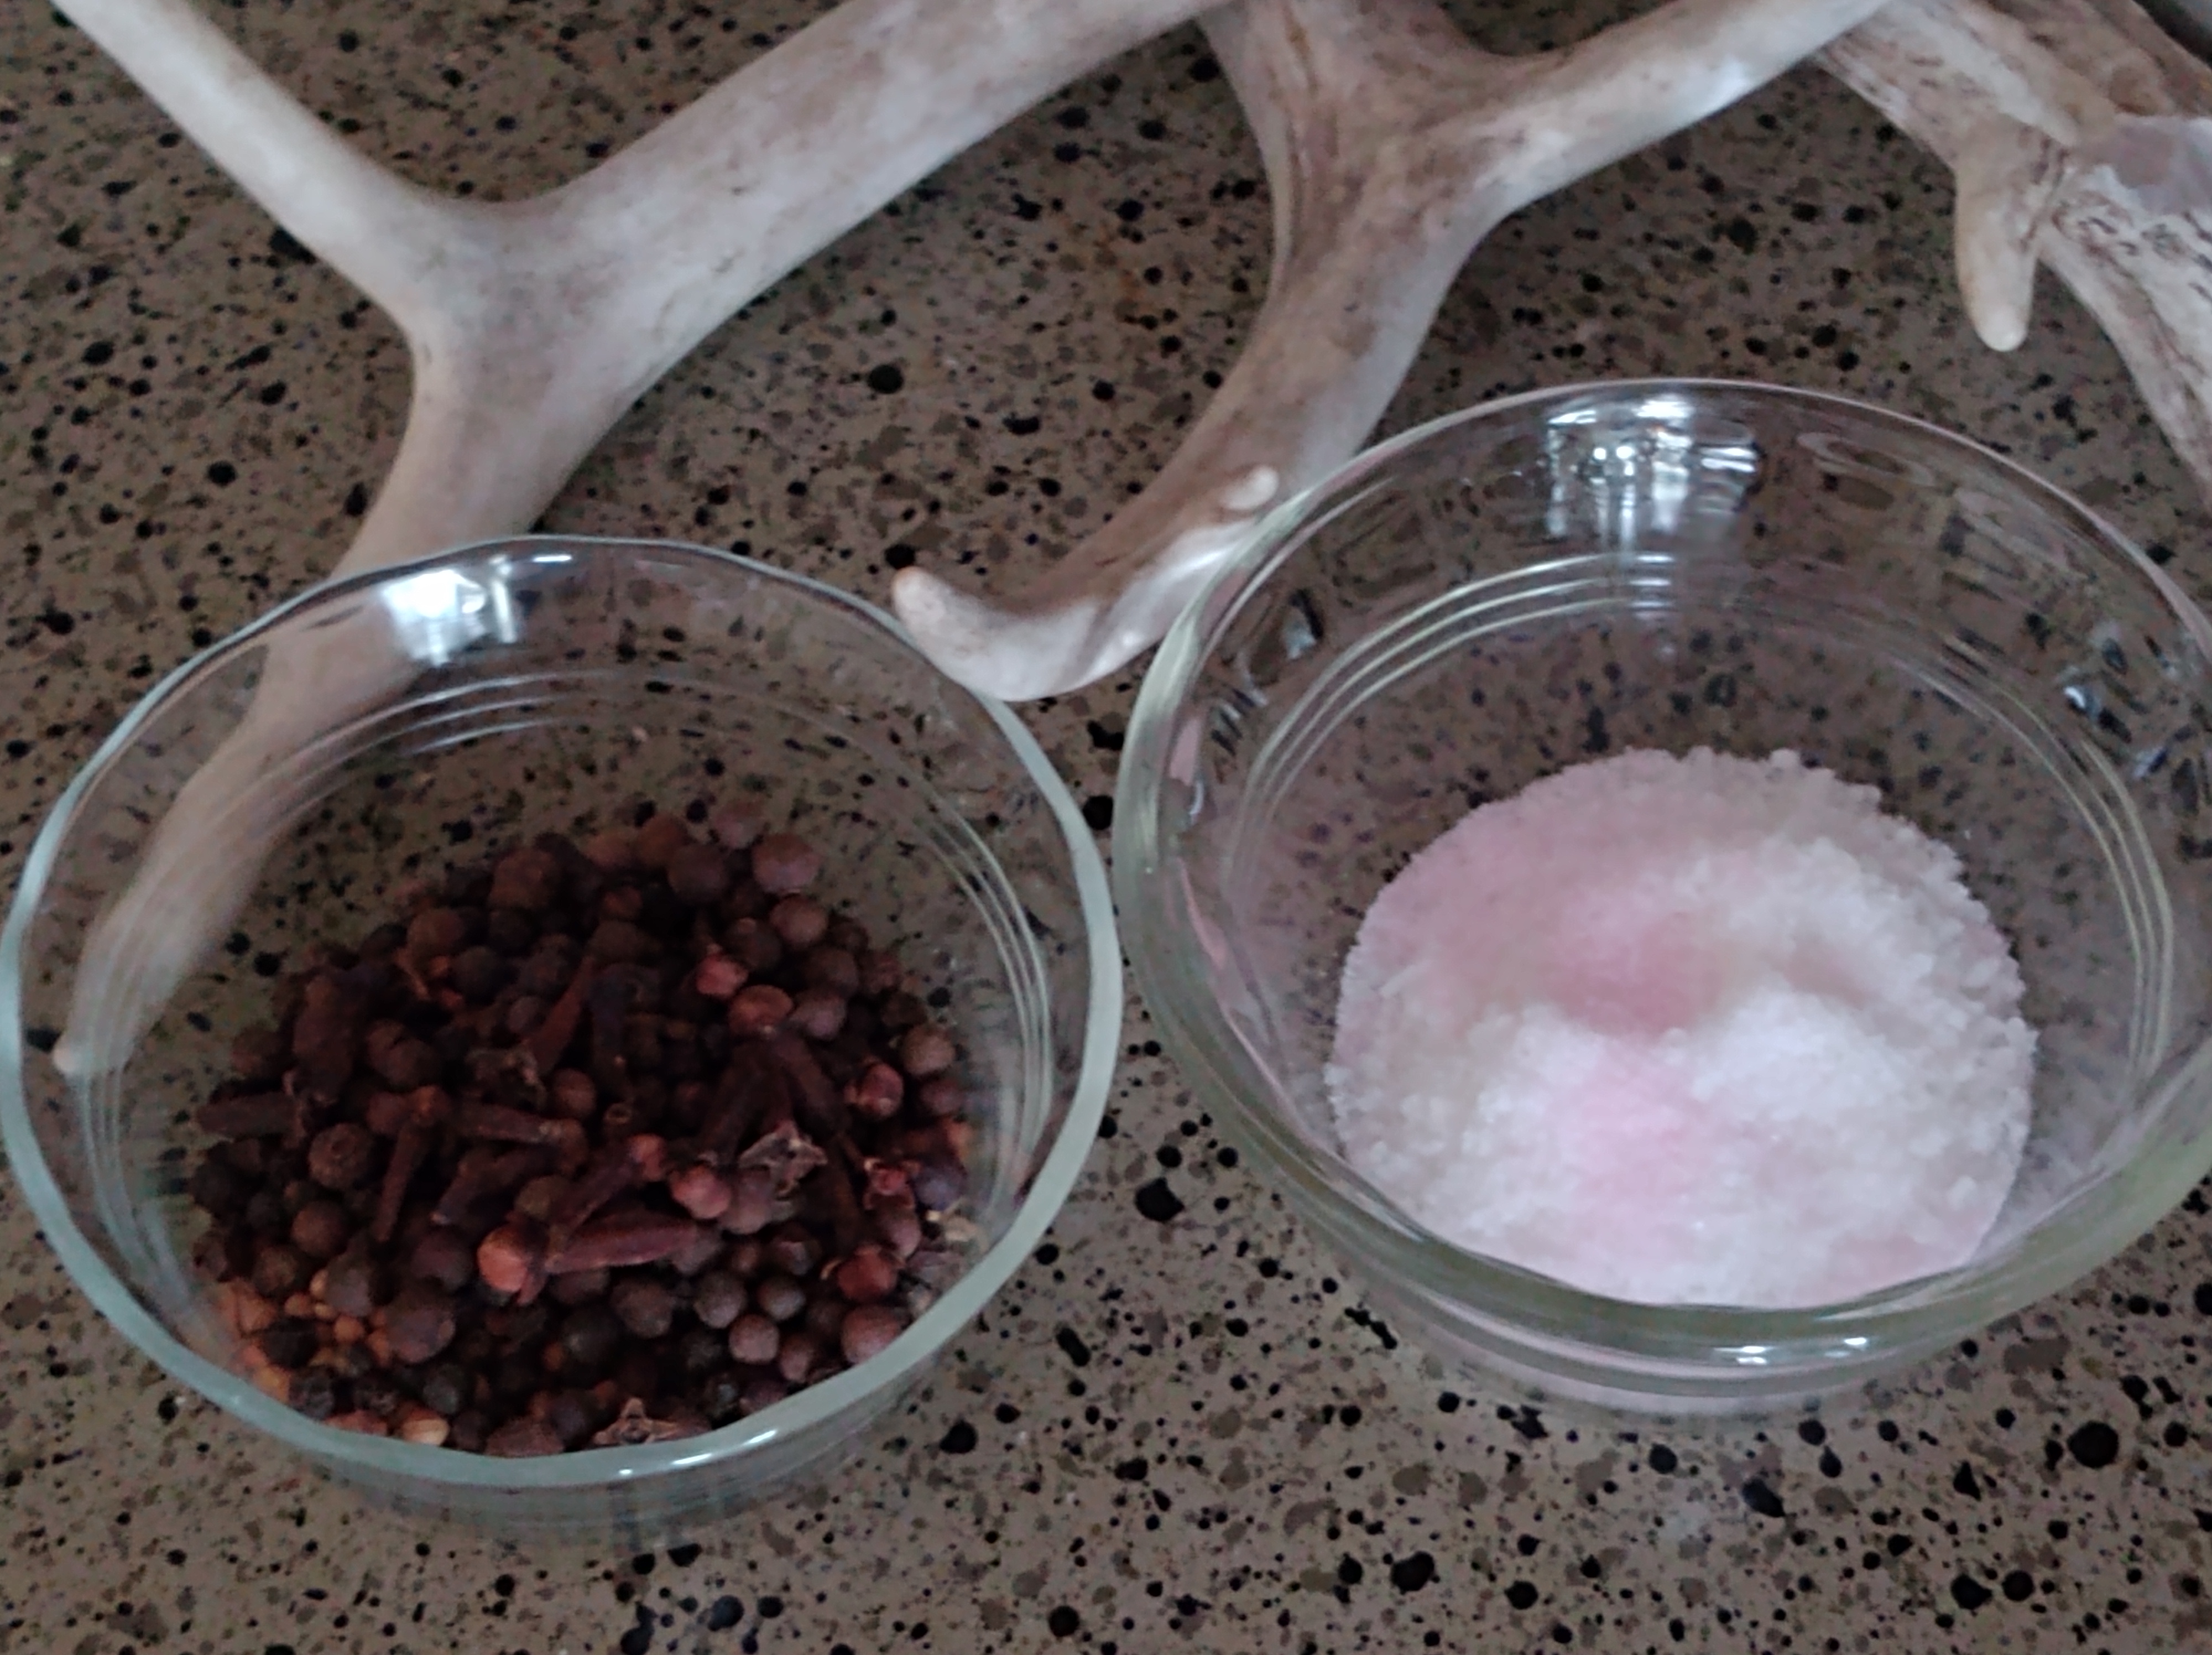
and my ingredients (which include the curing salt which is the same as Prague Powder #1 and a mortar and pestle that are a substitution for the spice grinder):

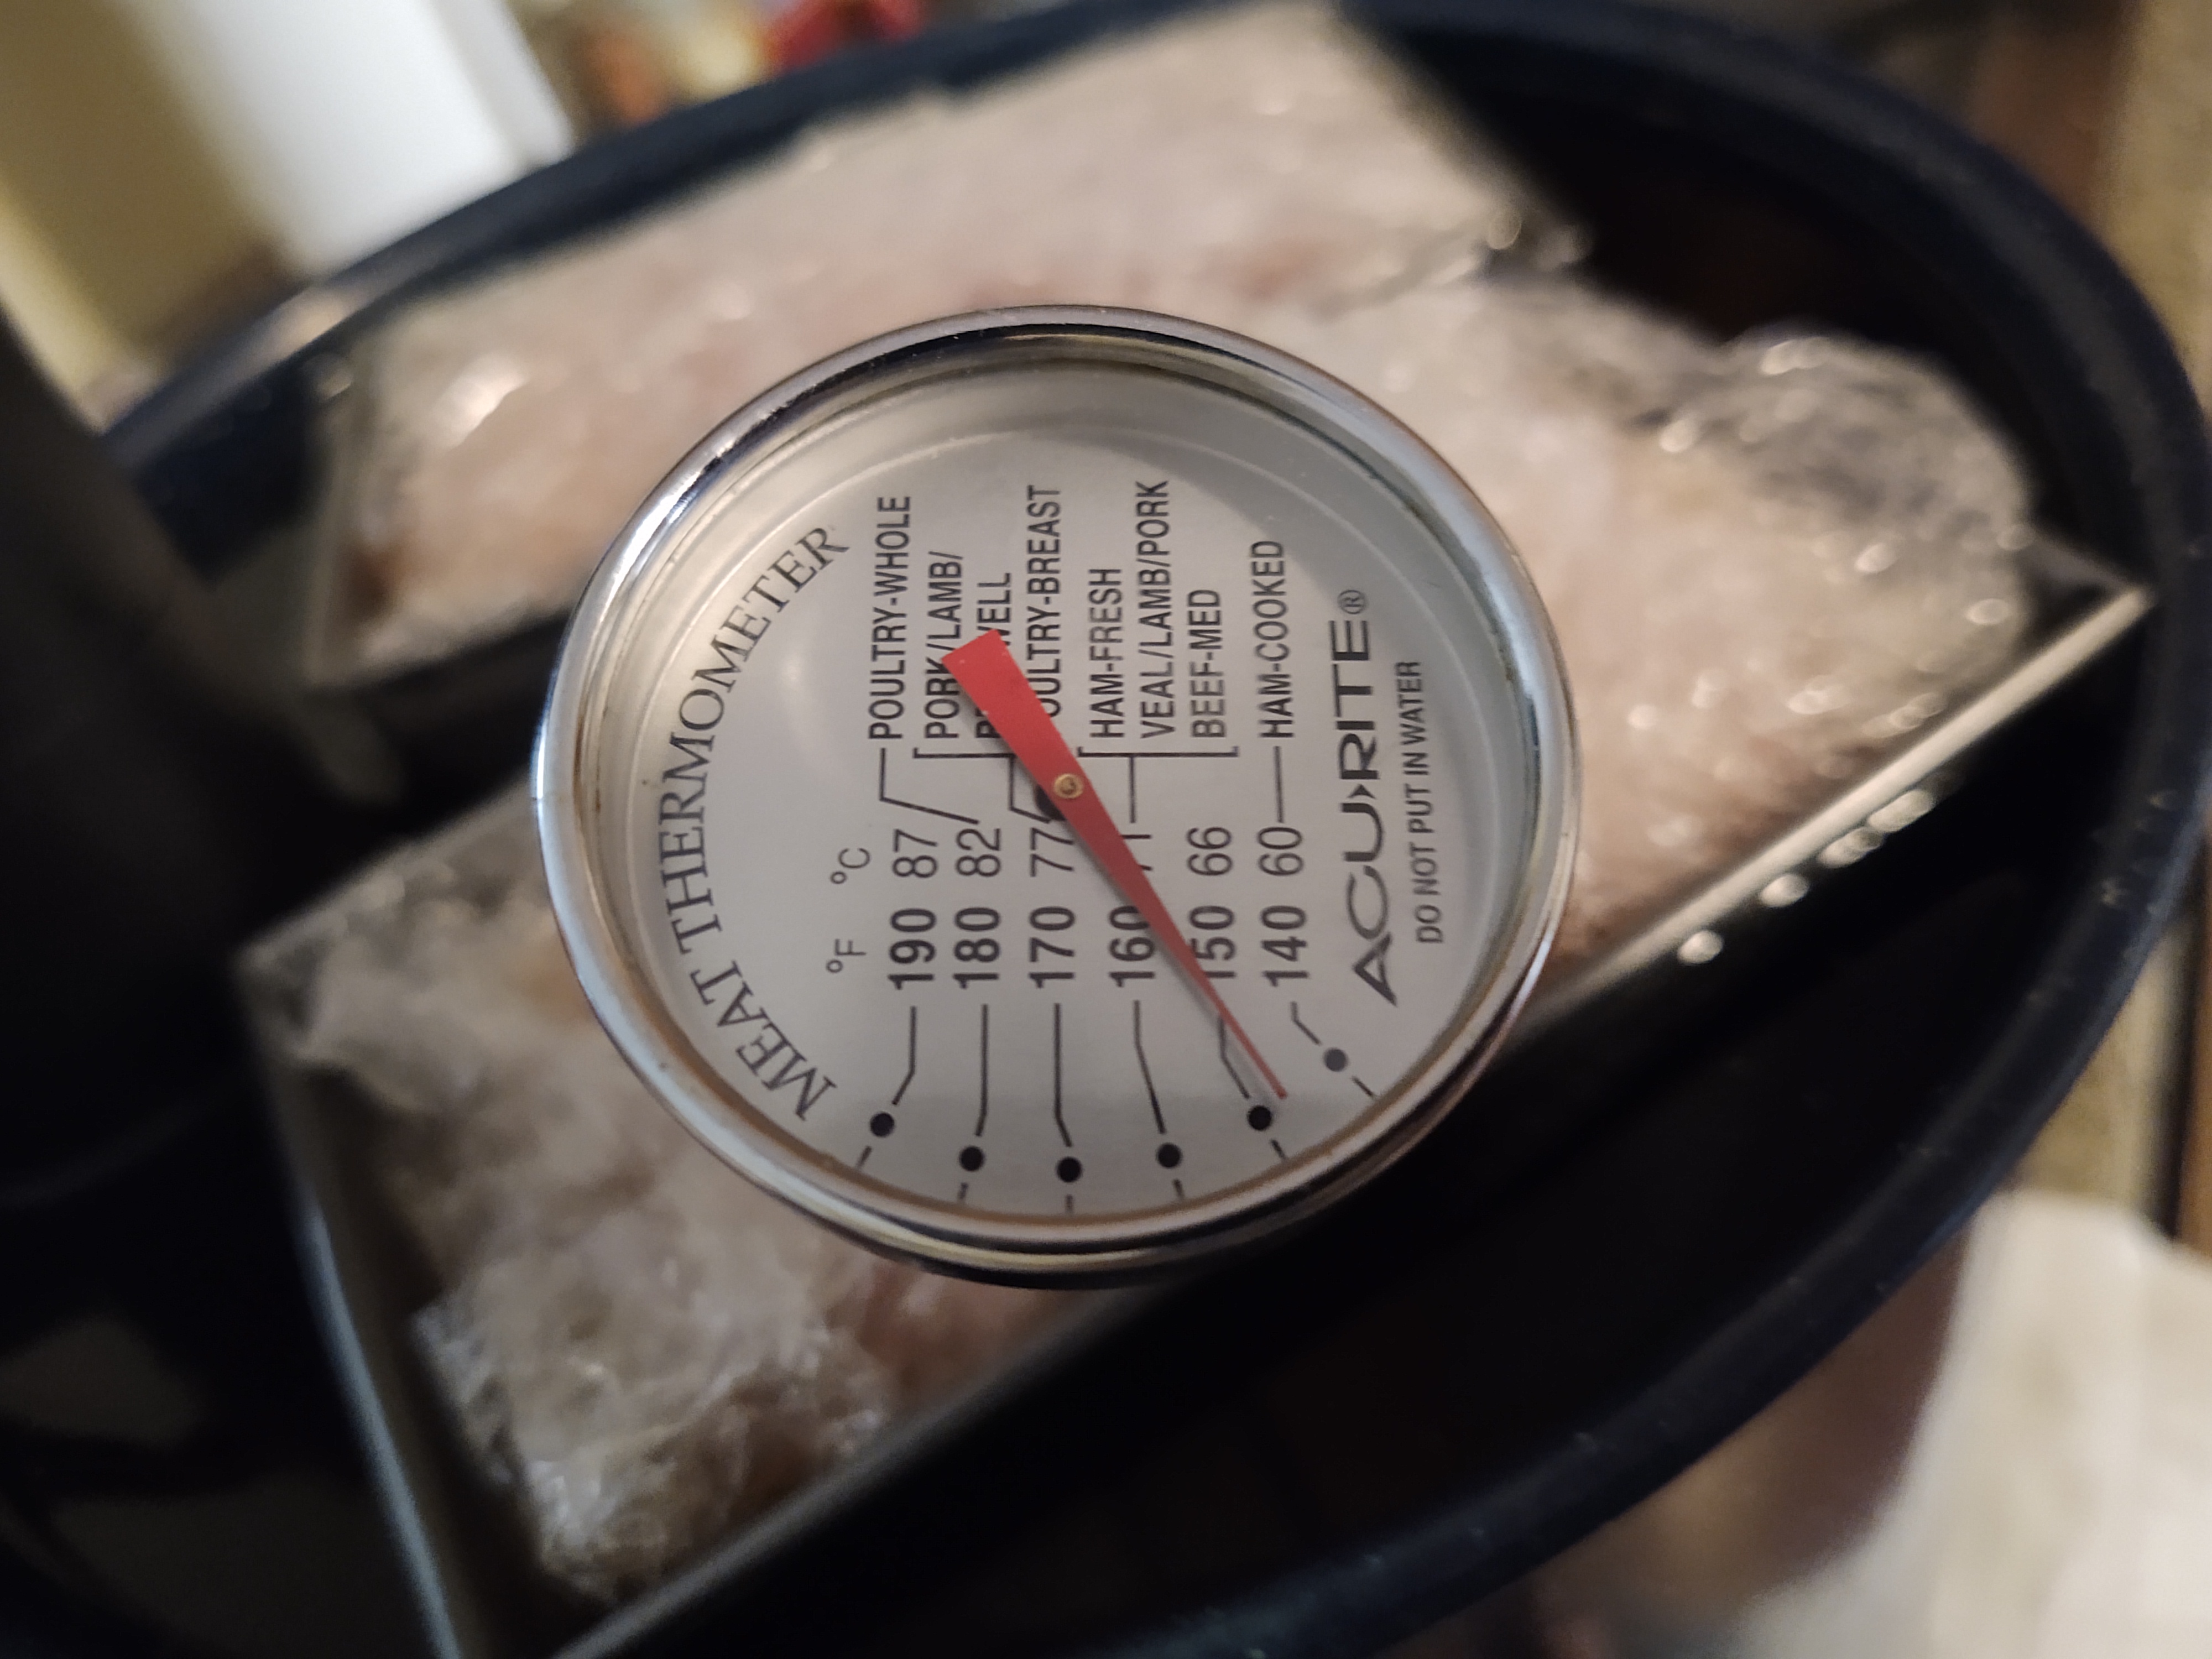
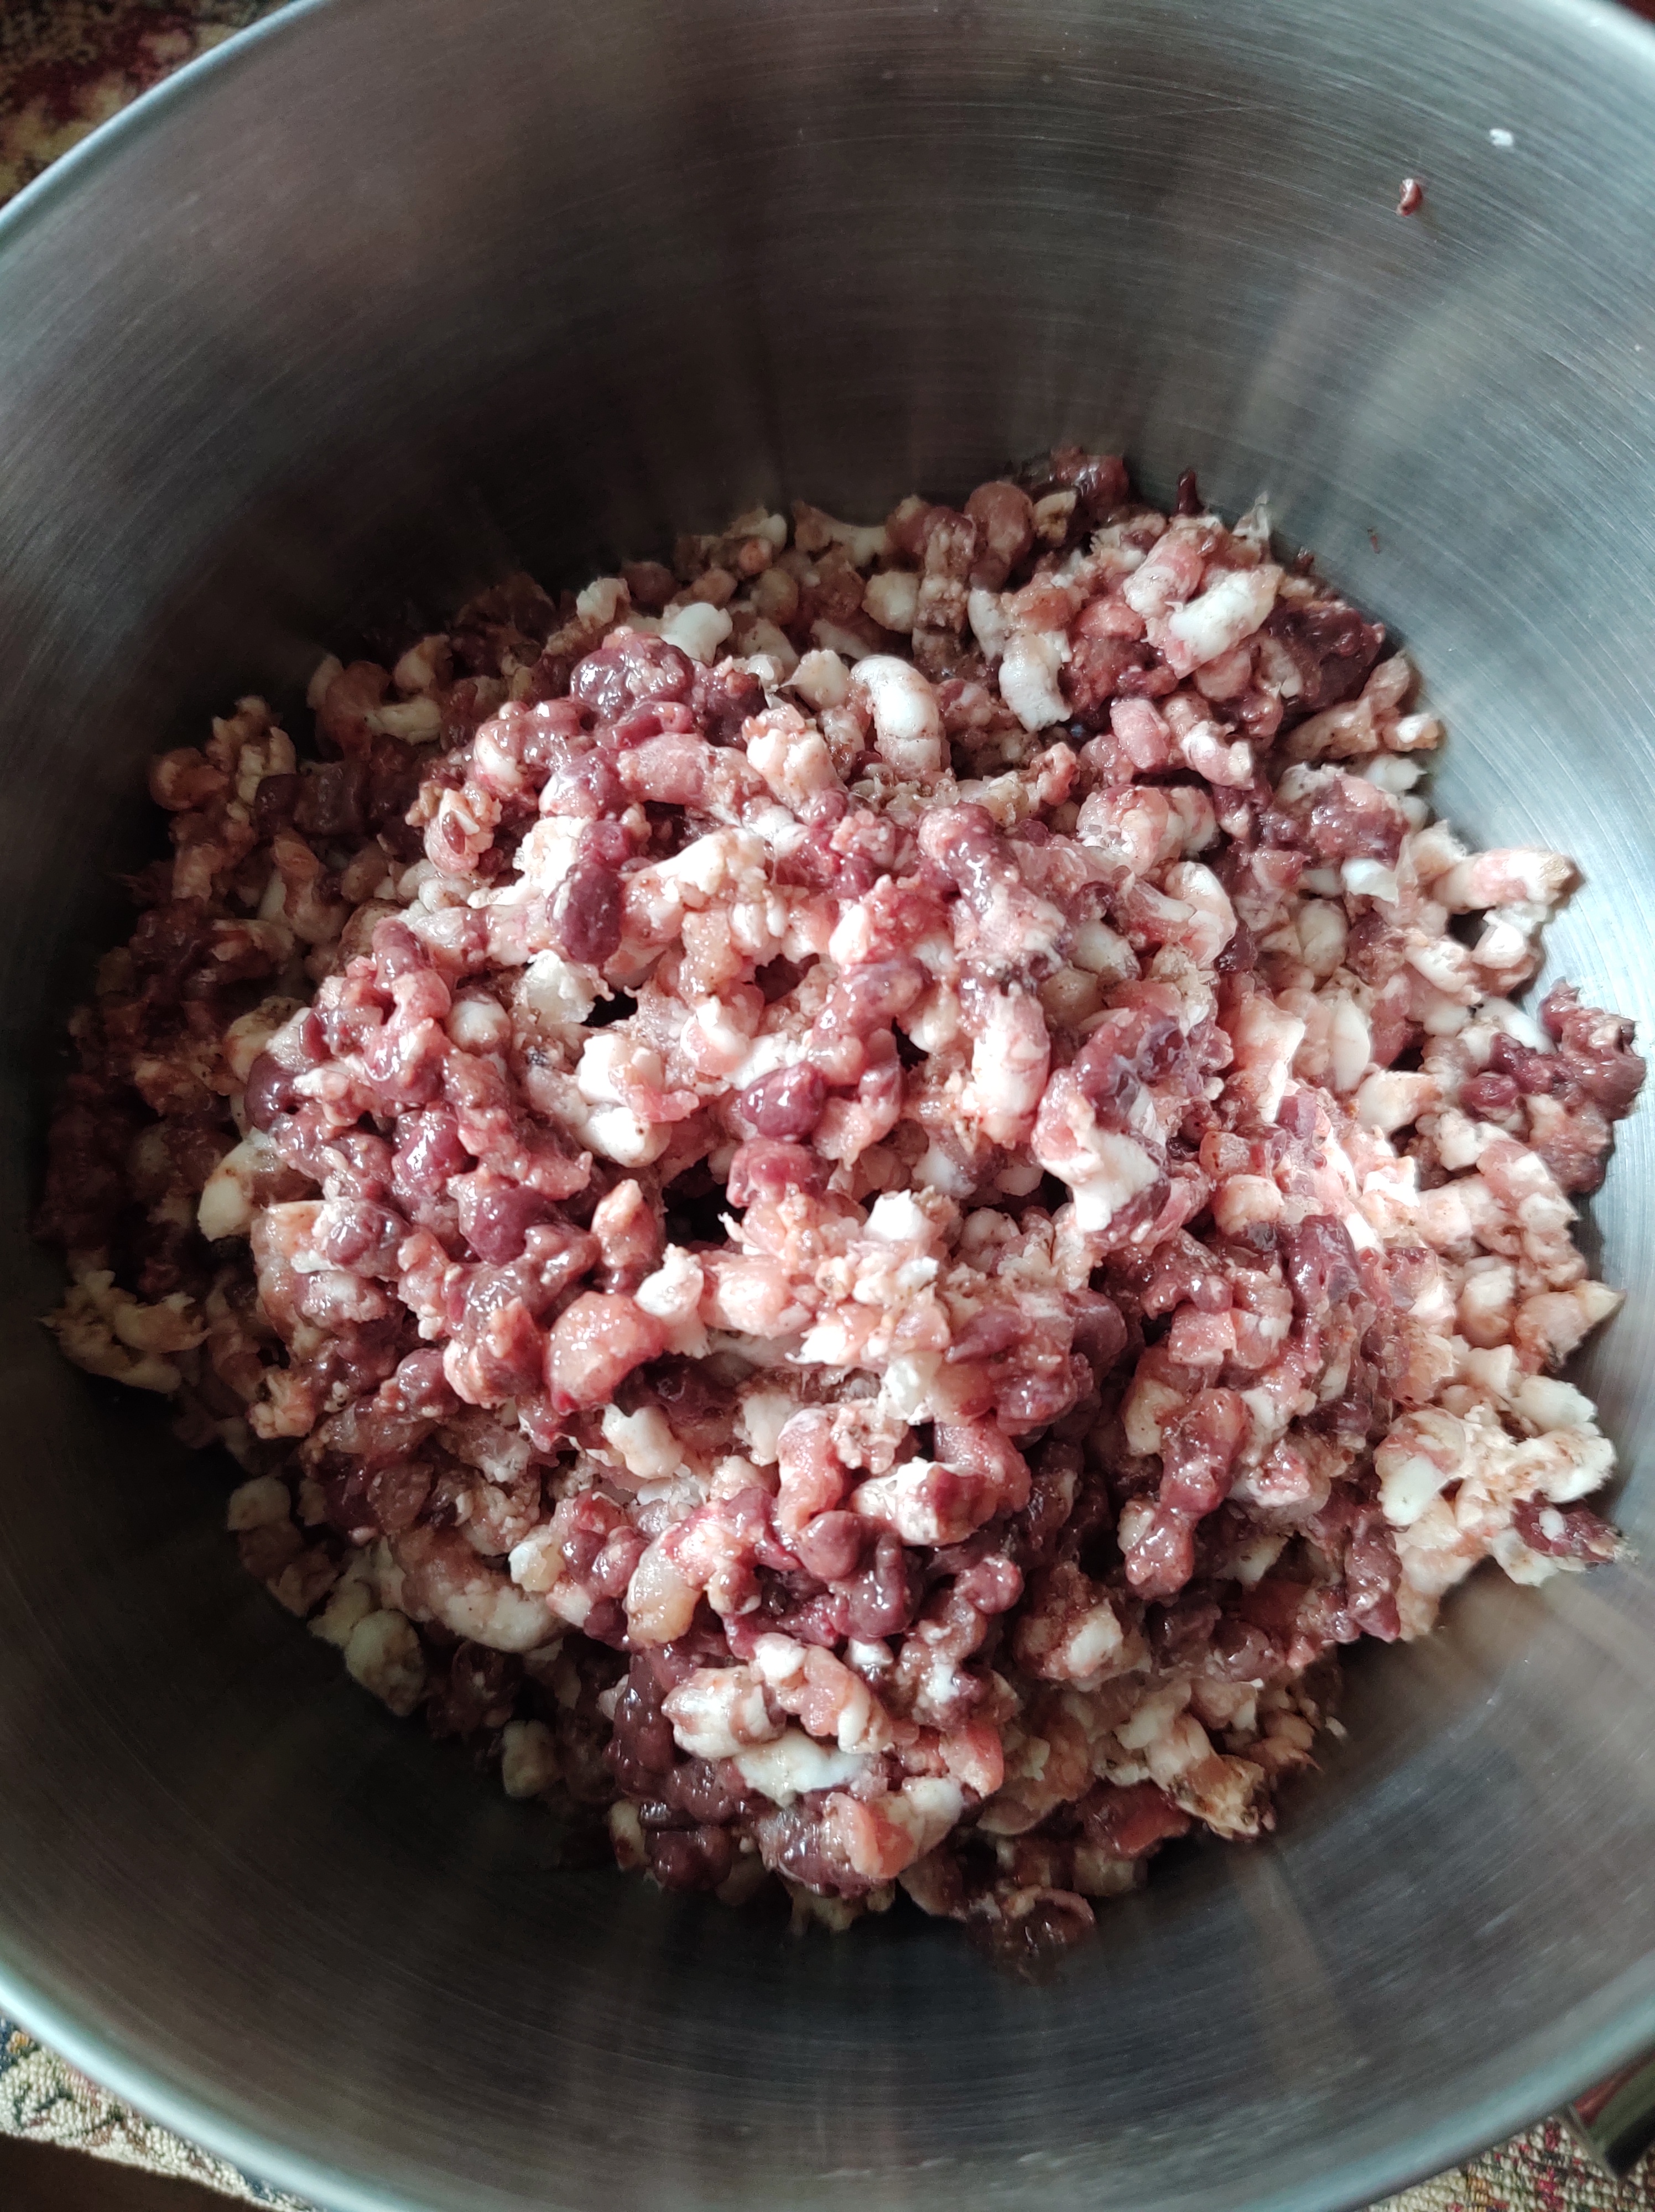
and began the work according to the very thorough and easy-to-understand instructions:


The directions were very straight-forward and clarified any questions that I had. Be sure to watch the video and read the step-by step.
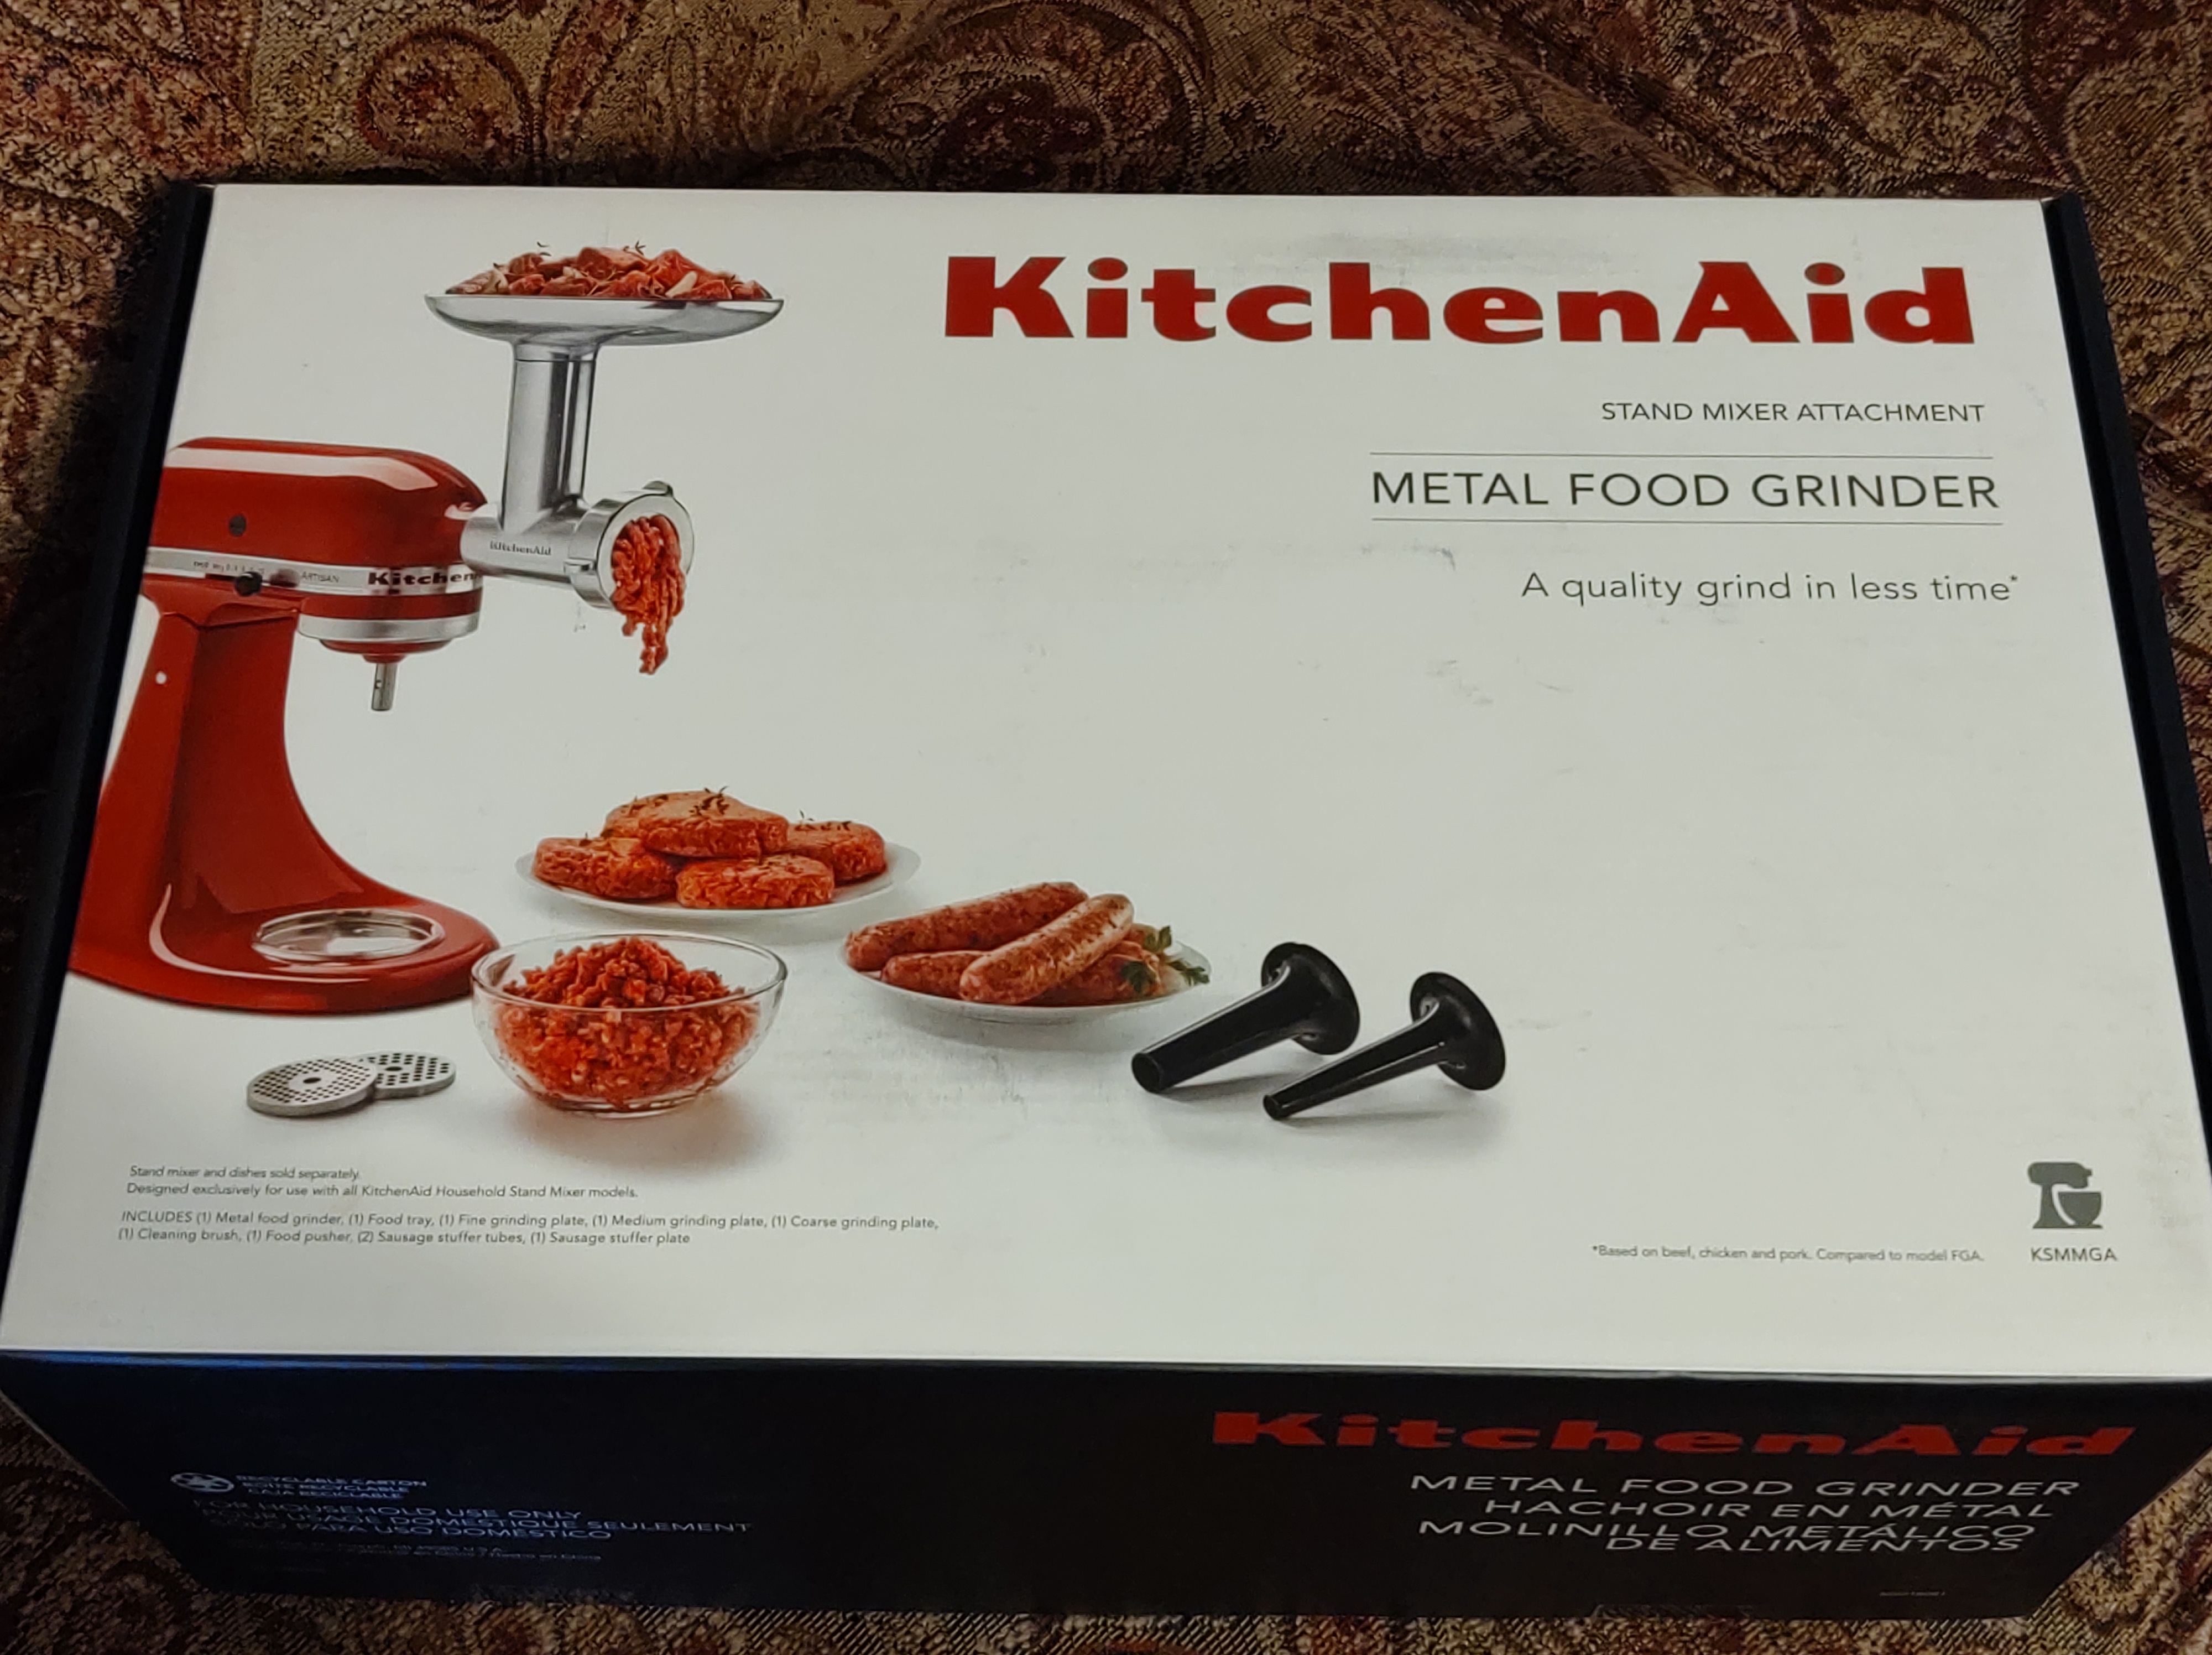
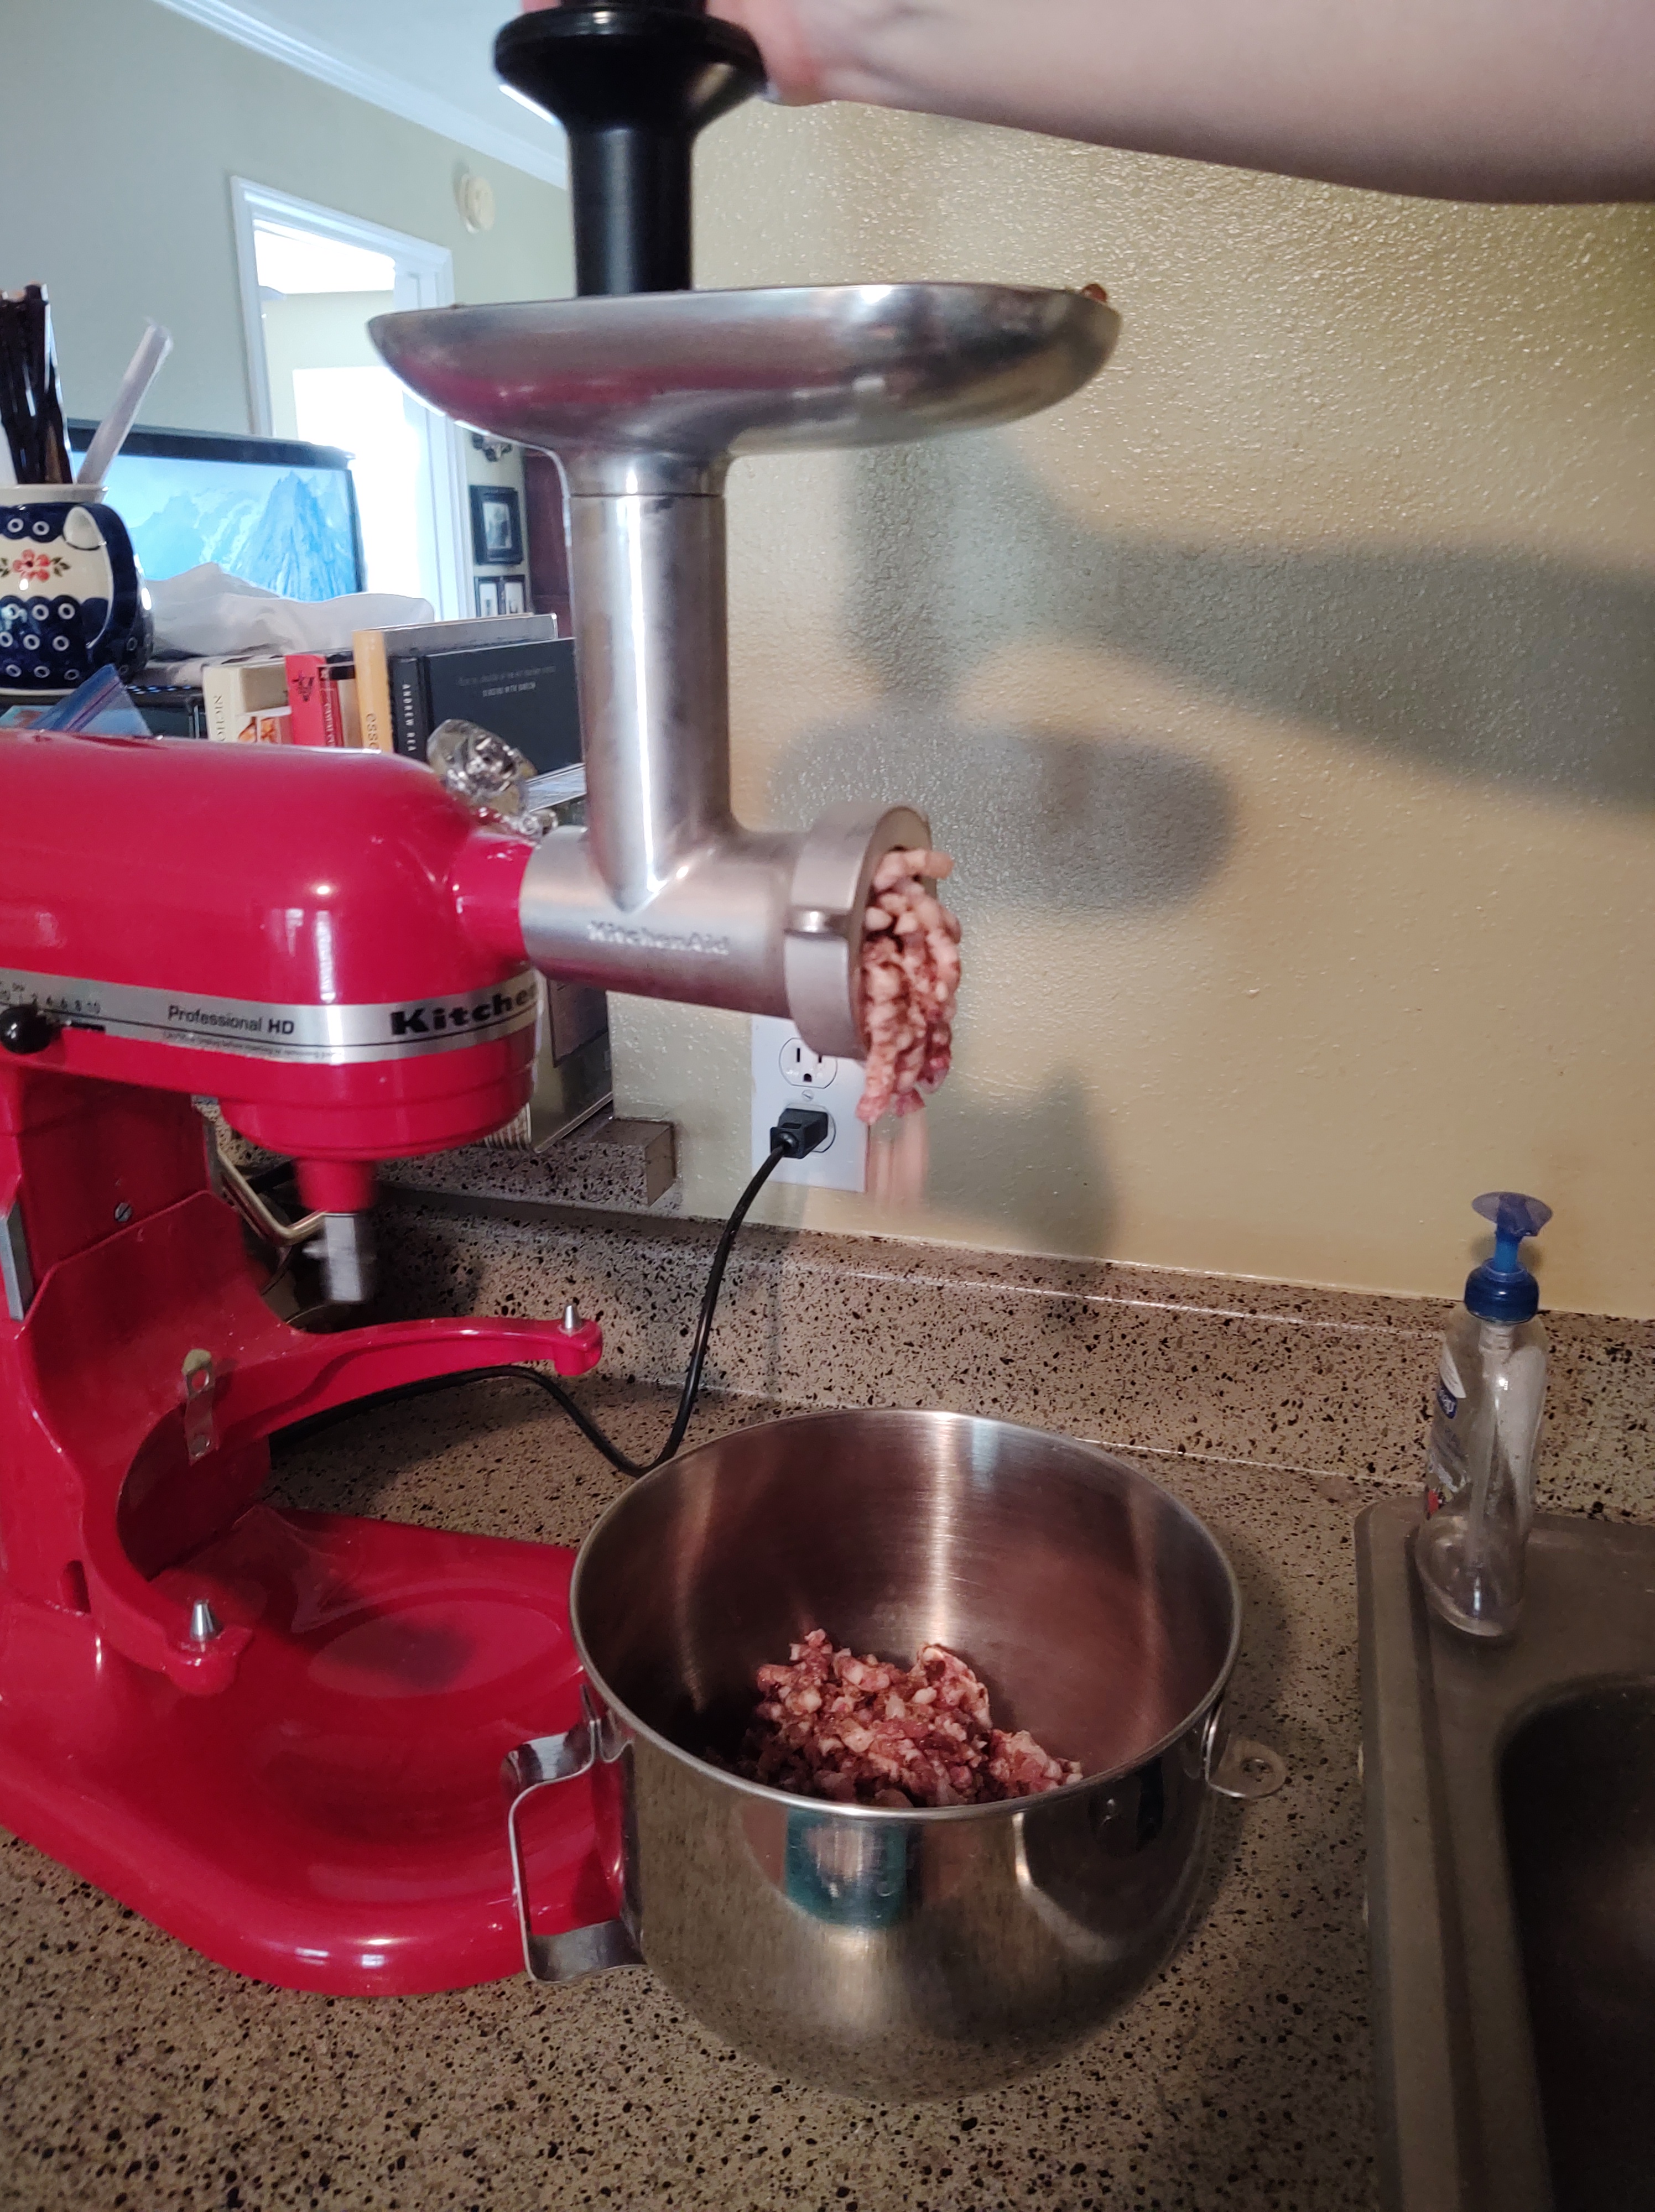
Junior Deerslayer and I worked on this project in her kitchen with the Kitchenaid grinder that she got from Mom. 😉 The grinder was mentioned as part of the recommended equipment. I have to say that it worked flawlessly and that we both agreed wholeheartedly that it’s absolutely worth spending the extra money for the metal rather than plastic grinder attachment.
Once again, the point here is that there are so many amazing recipes for preparing your wild game. Don’t be put off by not having all the equipment or exactly the same ingredients (within reason, of course). Don’t be afraid to substitute or improvise. That’s really part of the fun!
I’d love to know your thoughts or questions you have. Please share experiences you’ve had!
Happy New Year? Living off the grid for four days

It’s important to learn from one’s experiences so I thought I’d share a few tips from a trip that we took over the New Year’s Weekend when Deerslayer and I decided to head up to the ranch to “see the snow”. Little did I know that it would turn out to be a lesson in preparing for the Zombie Apocalypse.
Keep in mind that we’re from deep South Texas so the prospect of snow was worth the seven hour drive. As we neared the northern part of the Hill Country (and yes, we capitalize “Hill Country”) it became clear that the chance for snow had turned into a “major ice event”. Along the highway, hundreds of ancient oaks lost branches under the weight of the ice that now coated them. A few of the branches lay across the country roads, but more disturbingly, many had taken out power lines.

Once we got to the ranch, our worst fears were realized. The downed power lines that we had seen a few miles back were the very same ones that provided electricity to our property. That left us with the bleak realization that we would have no heat, no lights, and no water from our well! In addition to that, the cell phone tower nearest to us had been compromised. I was pretty sure I was going to die that night.
As I whimpered in a corner, clutching my lifeless phone, Deerslayer flew into action, gathering all the flashlights and fully charged batteries that we keep around the small cabin.

Tip number 1: Keep extra flashlights with CHARGED rechargeable batteries around. We have several of the Ryobi 18-Volt ONE+ Cordless LED Workbench Lights. They are an extremely bright variety with a fold-over double led light that can illuminate an area 360 degrees with several lighting and positioning possibilities. Of course, use your flashlights sparingly since you don’t know when you will be able to recharge the batteries…. unless you own an in-vehicle battery charger which Ryobi carries.
We discovered that our propane stove still worked, but the electric ignition obviously wouldn’t light the burners. Like all good hunters, though, we always keep several disposable butane lighters around… just because. Deerslayer was able to use one to turn on the stove just long enough to warm up our space. (It’s not a good idea to use stove burners as a heat source) It was a relief to know that we would be able to heat water and food.
Tip number 2: Keep several fully functional disposable butane lighters around. How often have we tried one, then another, then another trying to find a lighter that works?
After that, we headed outside once again, this time to the shipping container that we use for mouse-proof storage. It held some valuable items that Deerslayer knew we were going to need. Unfortunately, the shipping container was also completely iced over. The whole thing was covered in a thick layer of ice. Without blinking an eye, Deerslayer retrieved from the cabin a small, one-pound propane canister with a torch attachment that he was able to use to melt the ice from the lock and hinges, enabling him to access the contents. He also grabbed a ladder that he needed to reach the
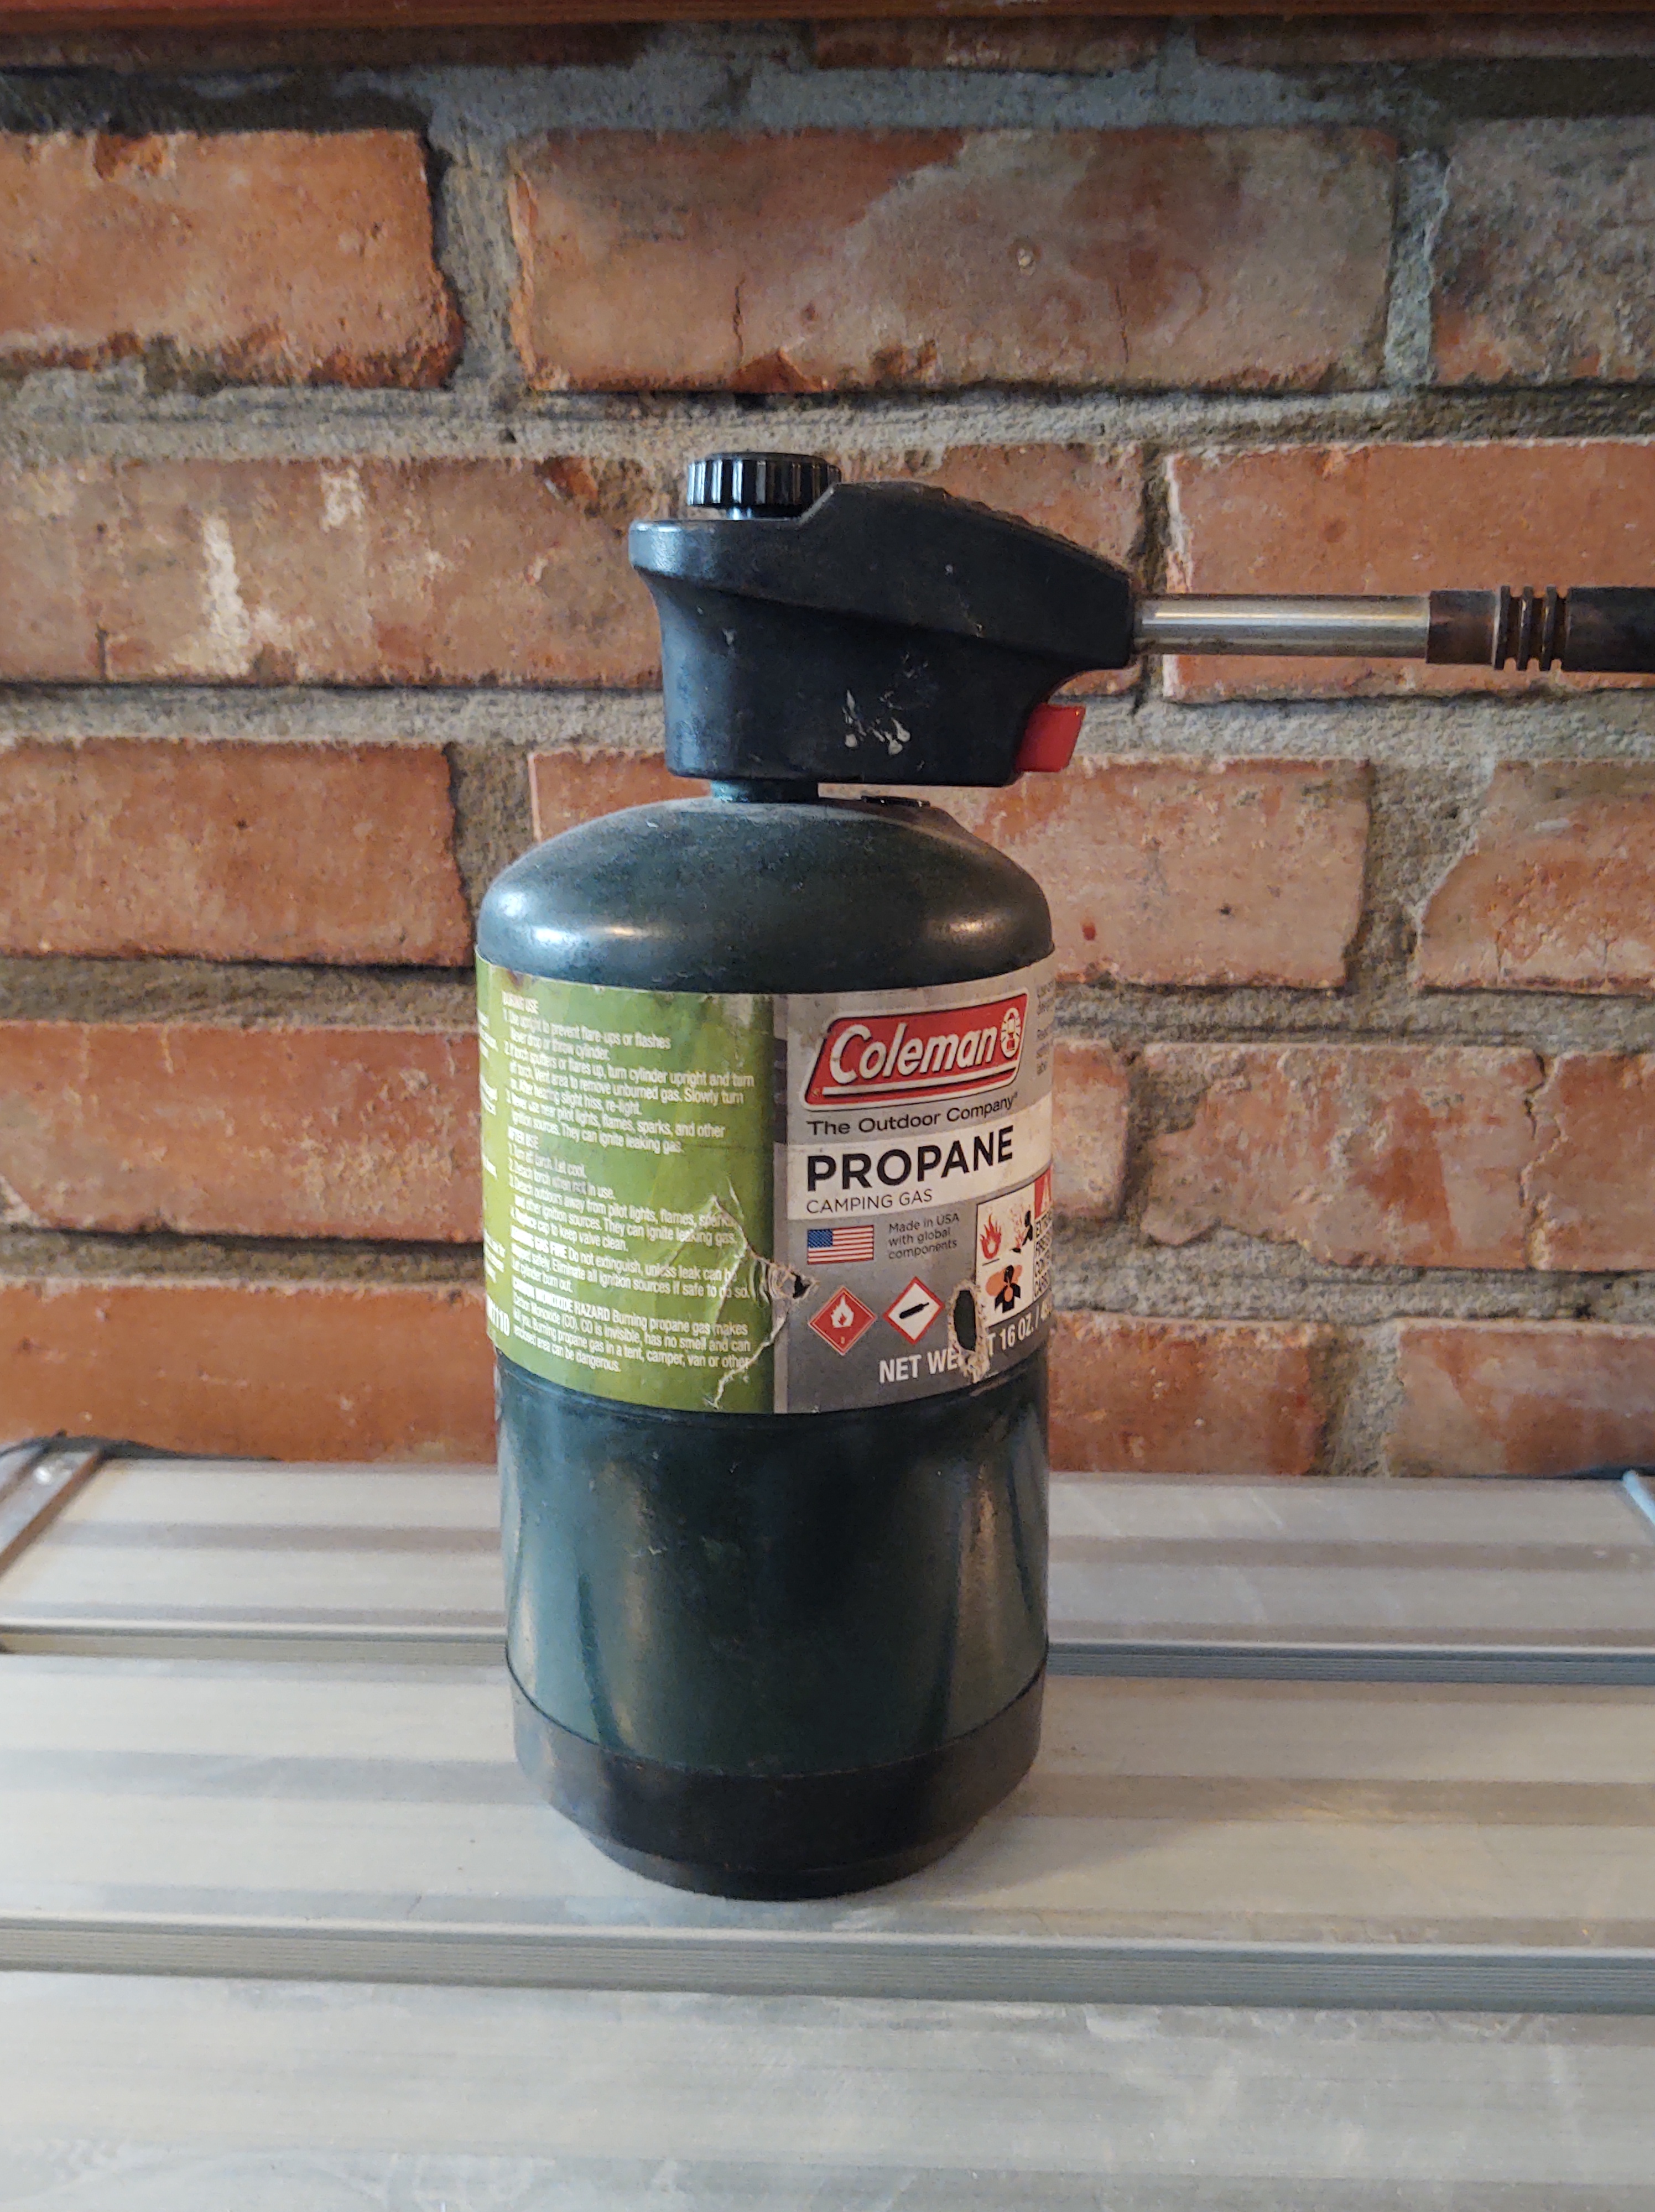
Tip number 3: This propane torch was a Godsend! It attaches directly onto a 1 lb. propane canister, provides a concentrated, high intensity, adjustable flame, and has a push-button starter. I found similar ones available at Home Depot, Lowe’s, Tractor Supply, and Harbor Freight for around $20. It’s also a more powerful alternative to the disposable butane lighters. Not only does it melt ice like nobody’s business, it also caramelizes sugar for a mean creme brulee!
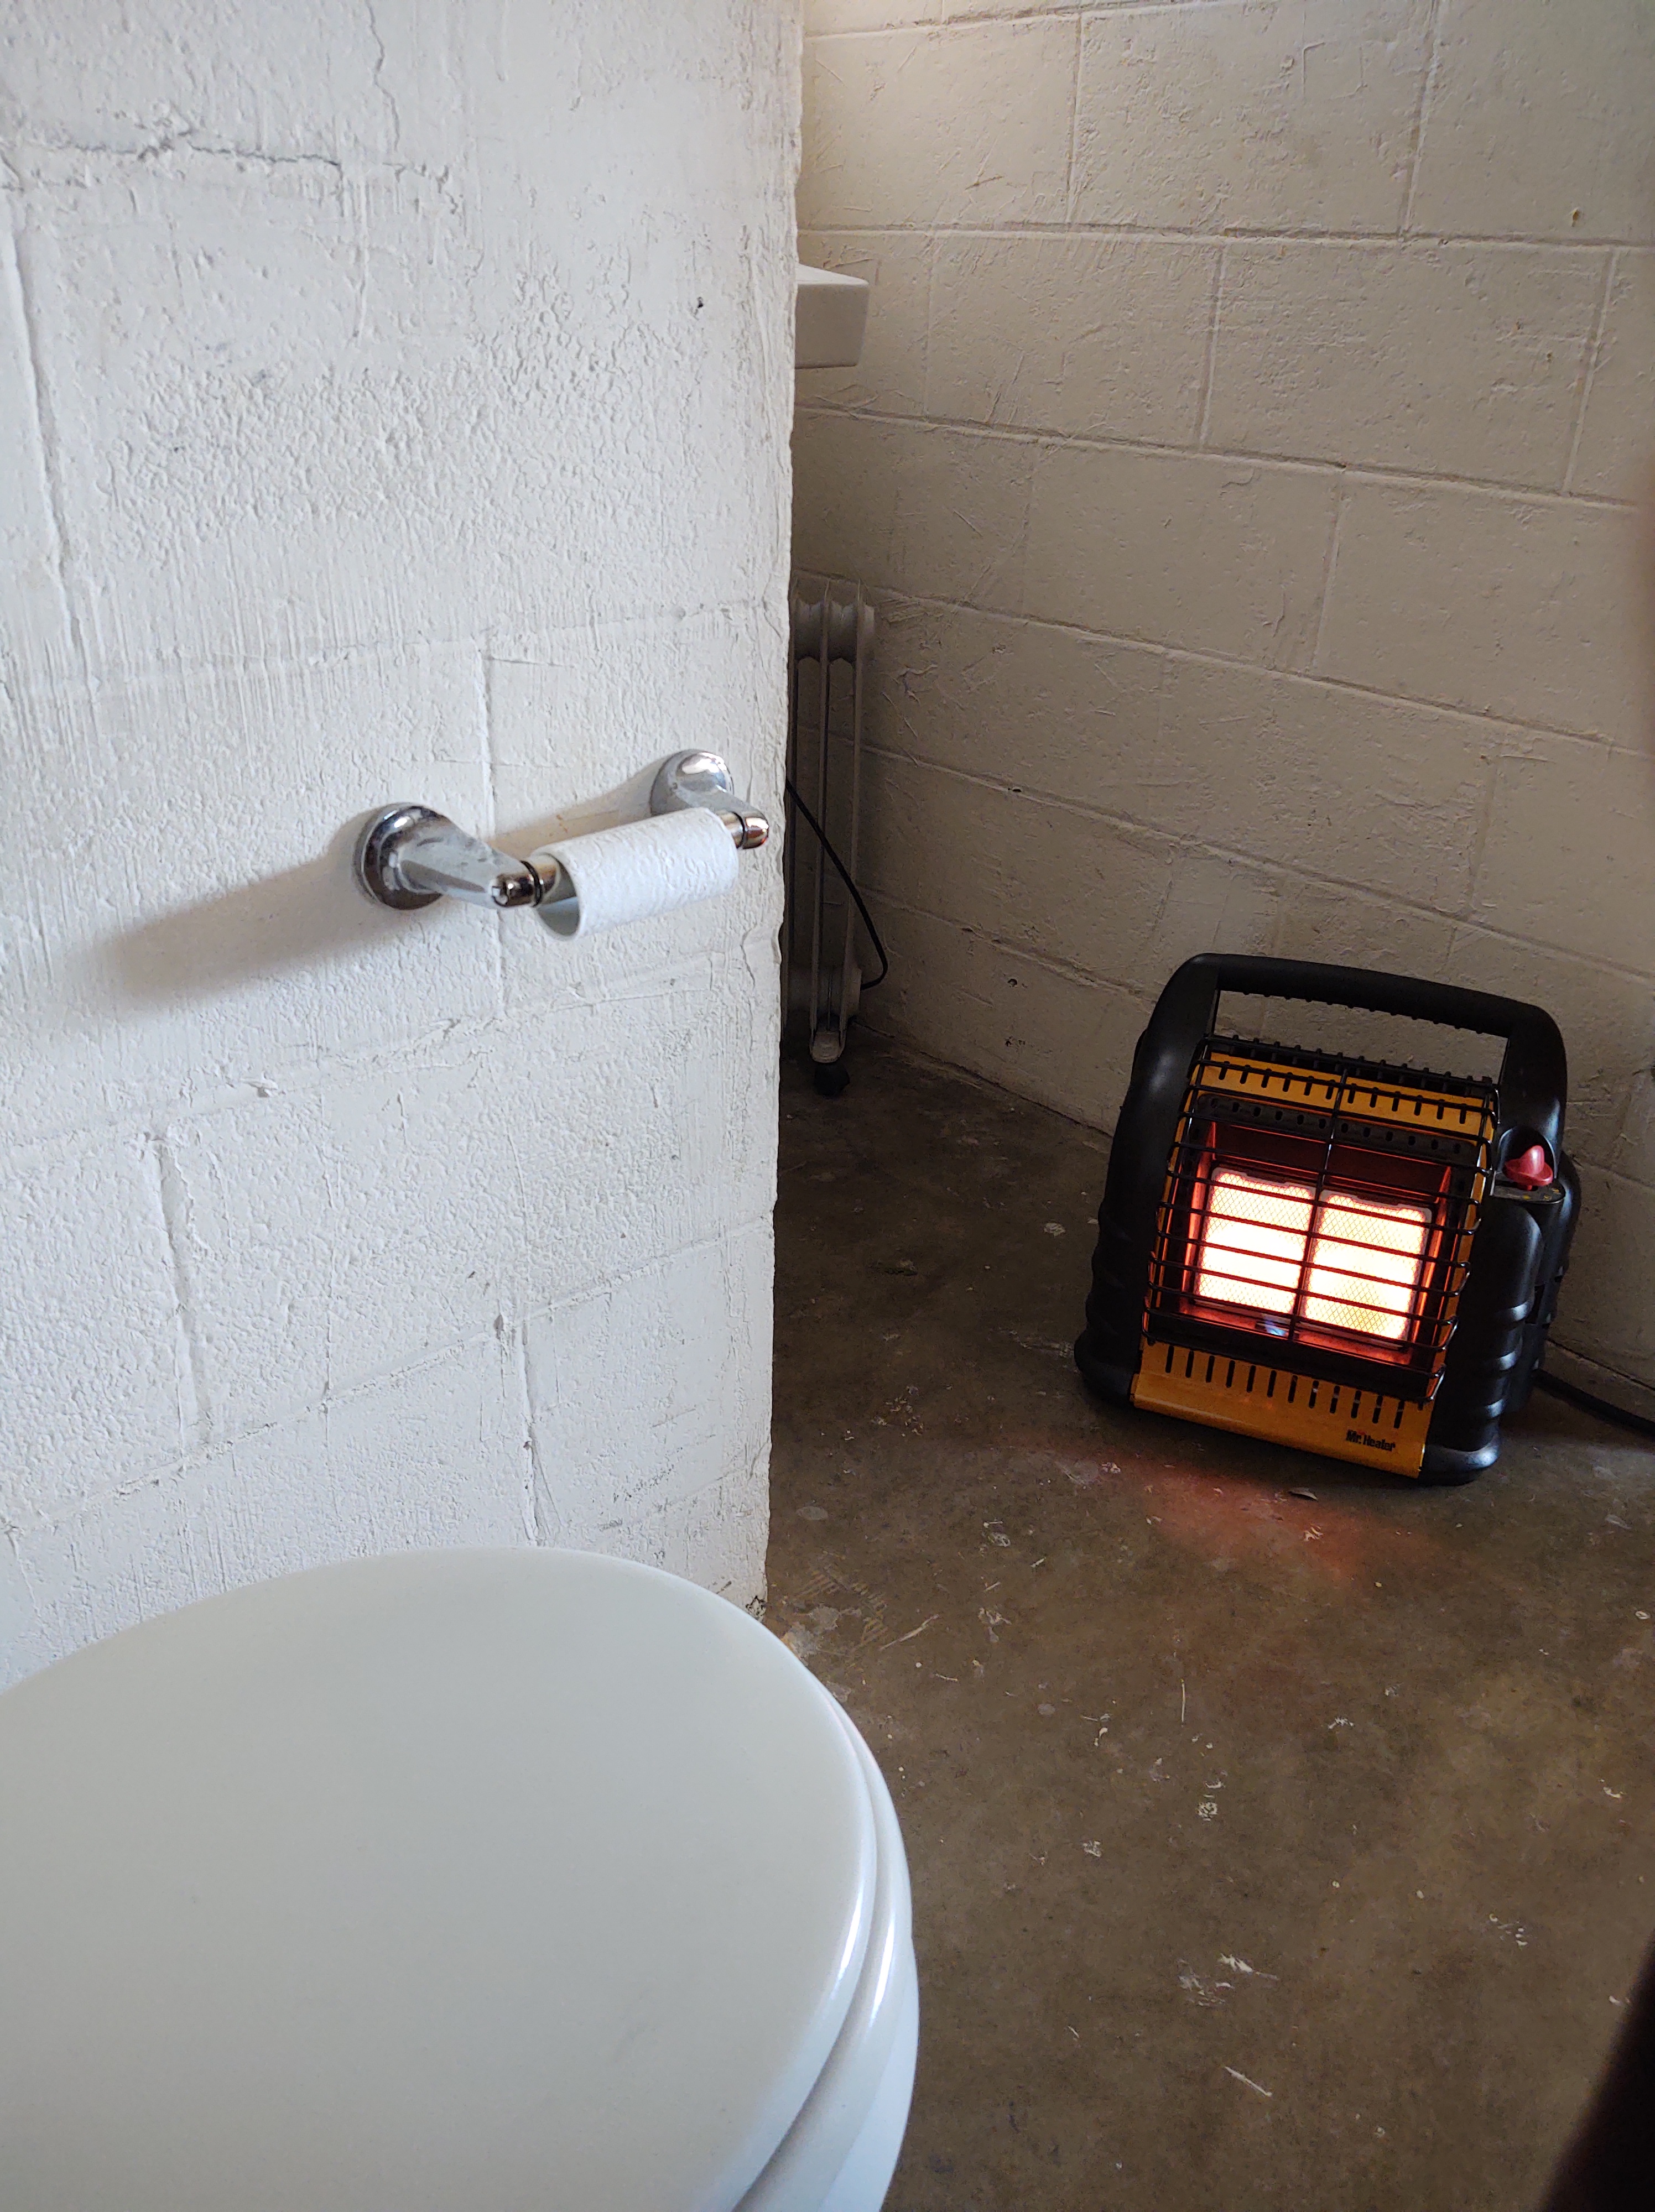
From the shipping container, Deerslayer fetched a Big Buddy portable propane heater! It can be used inside the cabin with two one-pound propane canisters. Deerslayer had purchased the optional hose attachment that allows it to be used with a twenty-pound propane tank (which we had in our shed near the cabin). It produced plenty of heat to get us through the four nights that we were without power. The cabin is not quite 600 sq. ft. I particularly like that it has an automatic low oxygen shut off system.
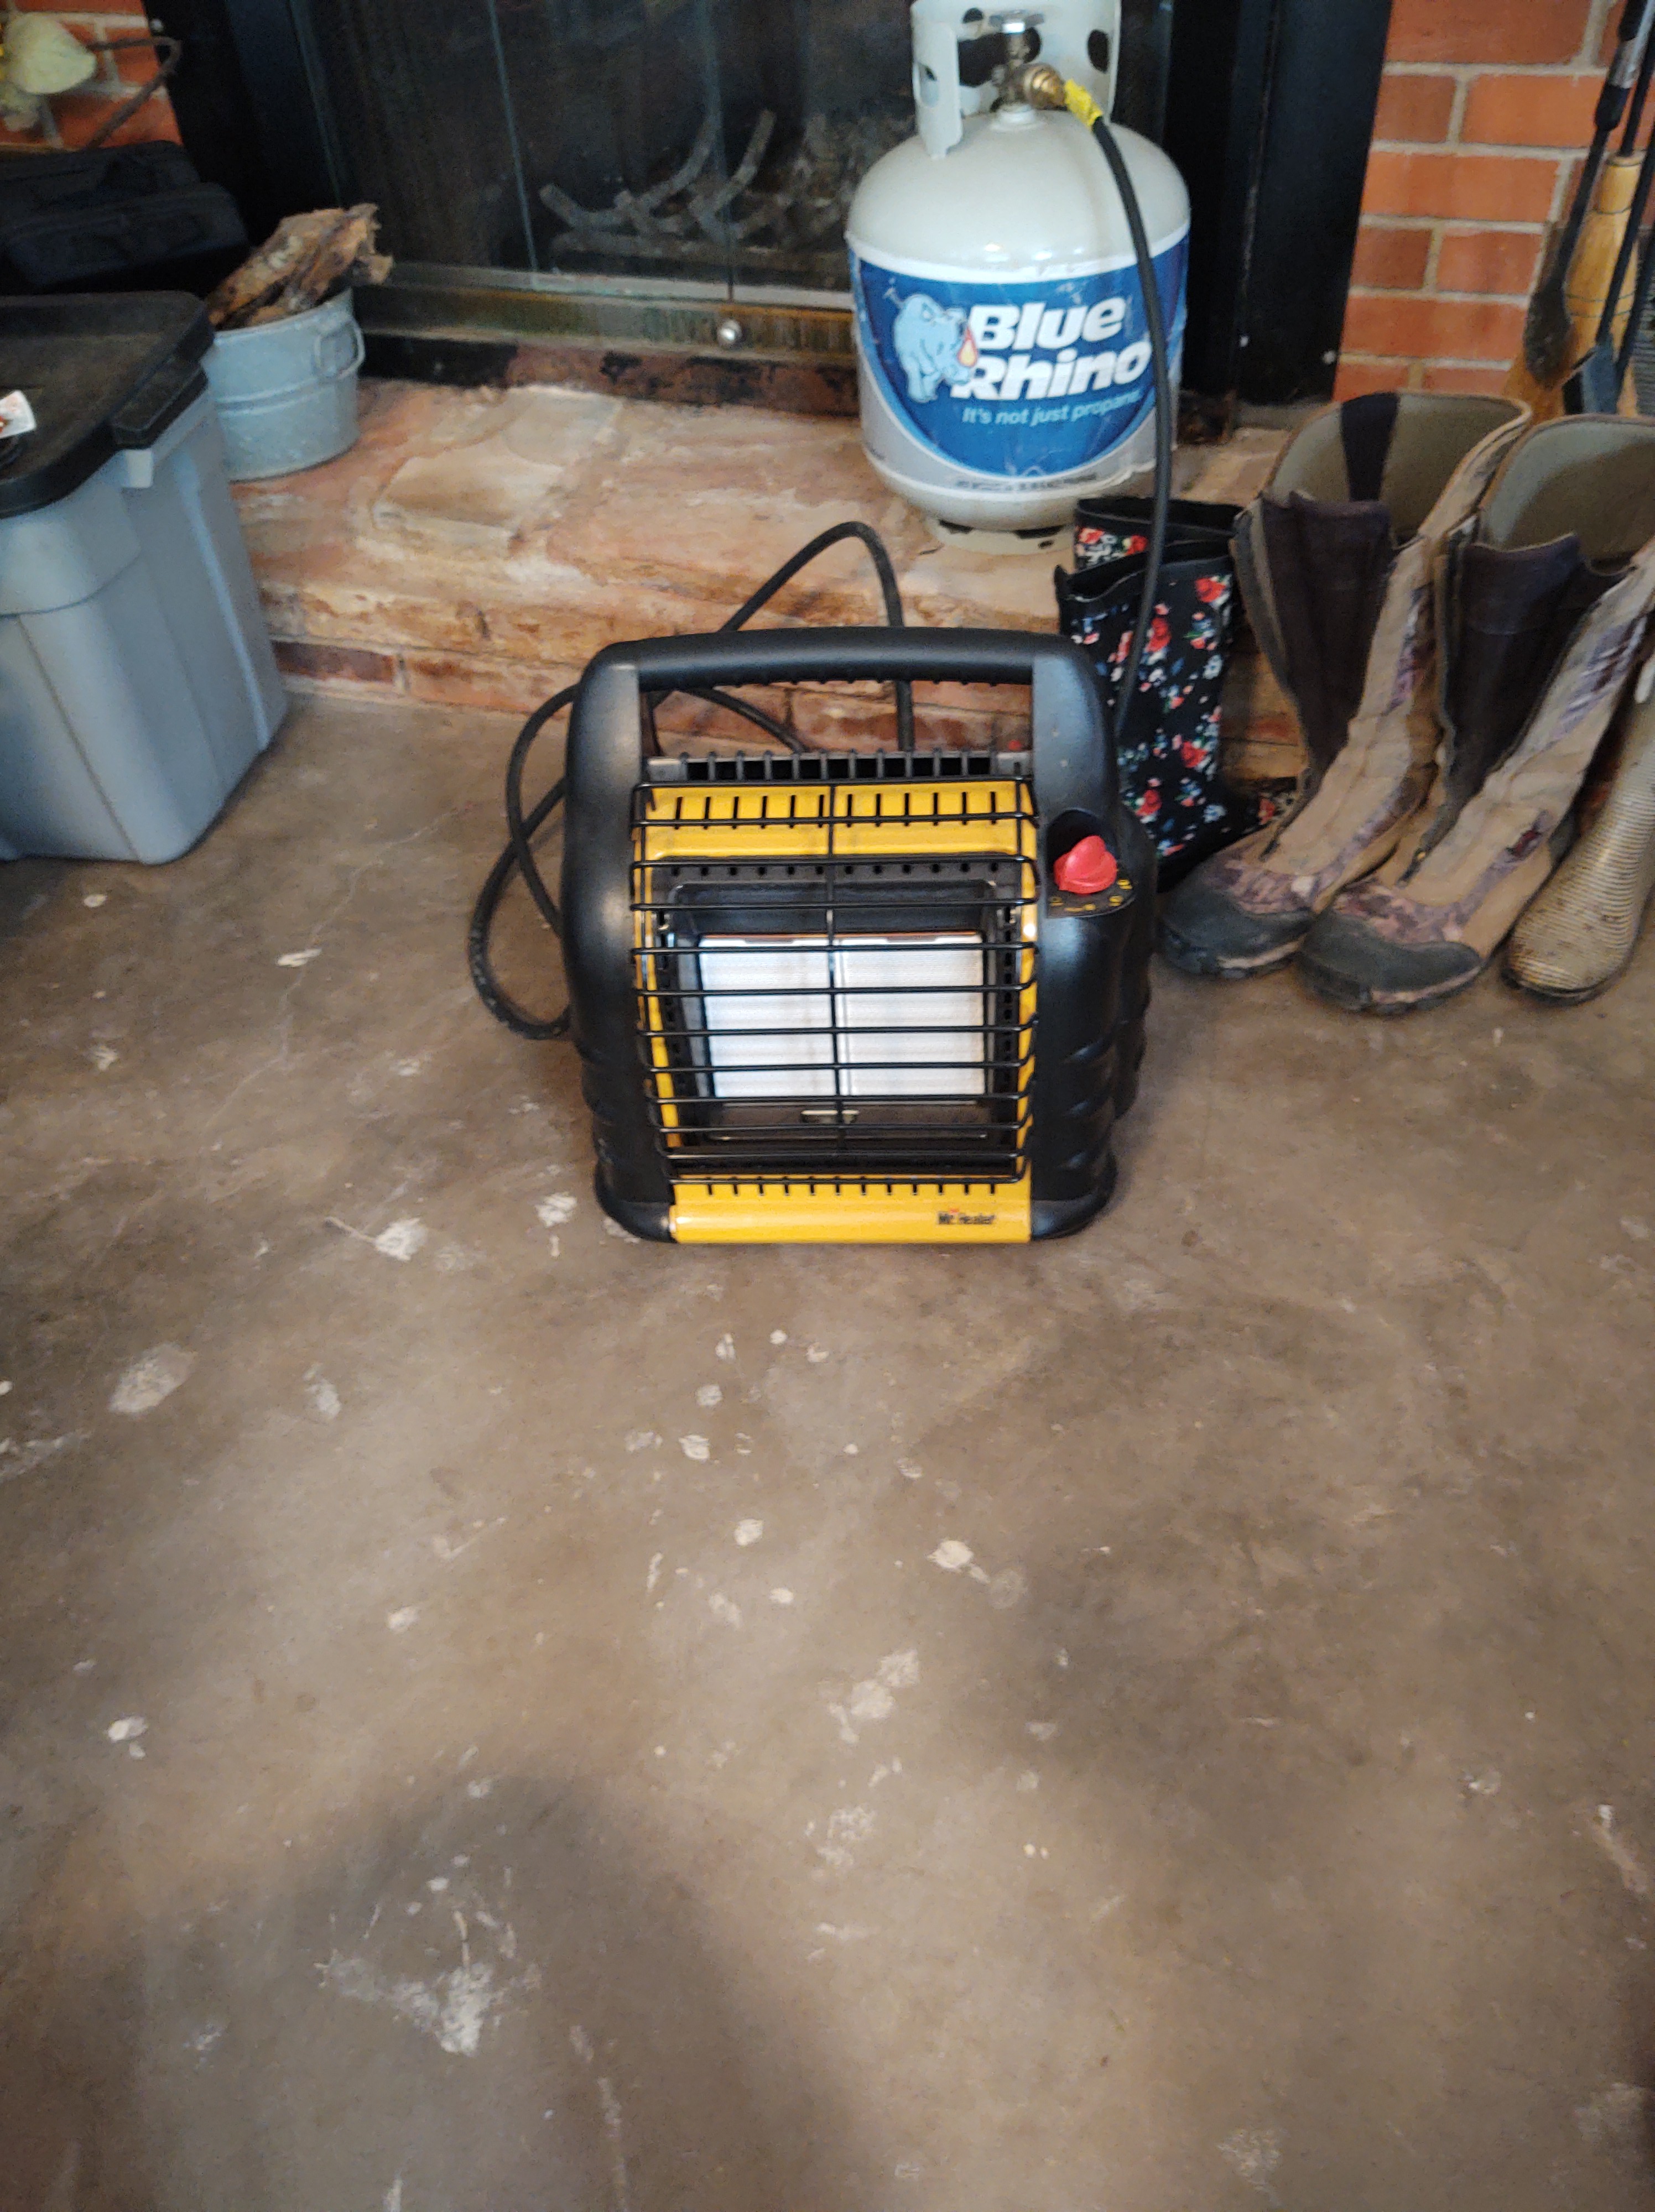
Tip number 4: If you ever find yourself at your hunting camp during the winter months (or home, or just about anyplace where there might be the danger of a power outage), the Big Buddy portable propane heater is a wise investment. It would also be a good idea to have a bunch of the one-pound propane canisters within easy reach to get you through a few nights. Consider whether the optional hose attachment for the 20 pound propane tank would be helpful…. and the 20 pound tank of propane, of course. And once again, have everything where you can find what you need with just a flashlight in case of a power outage. For important information about storing propane tanks, check here.
Tip number 5: Take your heater out of the box after you buy it and familiarize yourself with how it works. Crank it up so you’ll know how. You don’t want to be reading the directions by the light of just a flashlight.
Tip number 6: Have some shelf-stable pantry foods on hand that can be eaten cold if necessary. Canned chicken, canned veggies, canned Ranch Style Beans, crackers, bread go a long way toward weathering the storm. Don’t forget to have a working can opener on hand!
Because we were able to use the stove, AND had plenty of food in the pantry, AND had a working can opener, we didn’t have to worry about starving.
The next little bit of info I found particularly helpful and just did my heart good. Several weeks earlier, just to be festive for the holidays, I’d set out some of the battery-operated candles that I’m sure you might’ve seen for sale in sets before Christmas.

Because they didn’t have a flame, they were a safer alternative for the cabin than real candles. As it turned out, they were perfect for providing a little bit of light after the sun went down so that we could extend the battery life of our flashlights. The set had seven “candles” which we were able to set around to provide just a bit of light. They had an optional automatic shut-off after six-hours. They really came in handy (and looked nice, too)!
Before it was time for bed I pulled out two down comforters that we keep in plastic storage containers for cold nights. We used them both.
The second day on the ranch brought more snow and temperatures stayed below freezing. Perishable foods that we brought with us would be safe. But with daylight, we were able to find our Honda generator in the depths of the shipping container. We ran it for a few hours to charge batteries and phones (just in case we got signal. We did not.) We also plugged in the fridge for a while.
The next day, the temperatures rose and the roads cleared. We were able to drive several miles to a hill where we were able to call loved ones to let them know that we were safe…..and that Deerslayer was a superhero!
Looking back on it, I am so comforted to know that, because of my husband’s careful planning and constant preparedness, we were able to survive what could’ve been a dangerous situation. We lived “off the grid”, if only for a few days. He is my superhero!
I’d love for you to share any tips that you have for surviving a “what could go wrong?” experience.
Stay safe!
Waste Not!

I have to admit that I’ve sometimes imagined what it would be like to have my own cooking show. I doubt that it would be on the Food Network since I don’t have that kind of “presence”. But then, where? Food Network is just not my style nor am I theirs. My niche is pretty small. I just happen to be very happily married to a hunter, a deer hunter to be exact (and a duck, dove, pheasant, wild pig, elk, and nilgai hunter). Obviously, my show would be on a hunting or outdoor network. They seem to be a bit more forgiving if you don’t have a professional-grade kitchen and/or a dazzling smile. I have neither. I wear a grungy red denim “cooking shirt” that catches all the splashes and splatters!
I usually snap out of it when I remind myself that, while cooking in my own modest kitchen with a stove that doesn’t work worth a damn, I spend too much time scraping every last bit of batter out of a bowl so as not to waste any. Or cutting the tiniest scraps of meat away from the silverskin because, you guessed it, I don’t want any to go to waste. Never in my vast experience of watching countless hours of culinary shows have I seen the sparkling banter seize while the last teaspoon of gravy is carefully rescued from the pot. It’s in my blood to save what can be saved, use what can be used, and serve what can be served. I’m guessing that if you have embraced the “hunt to eat” lifestyle, then you, too, want to use every possible bit.
I feel like this is where I can help. This is my niche. I know that you don’t want to waste any of the valuable meat that you harvested yourself …. which seems all the more important these days!

There’s nothing more disappointing that finding a great wild game recipe that calls for an odd bit of meat that you disposed of or ground into hamburger. That’s why I’m here. Now. This is the time, before deer hunting season is in full swing, to know that you should save the shanks, heart, liver, and any tough or sinewy bits that many hunters leave behind.
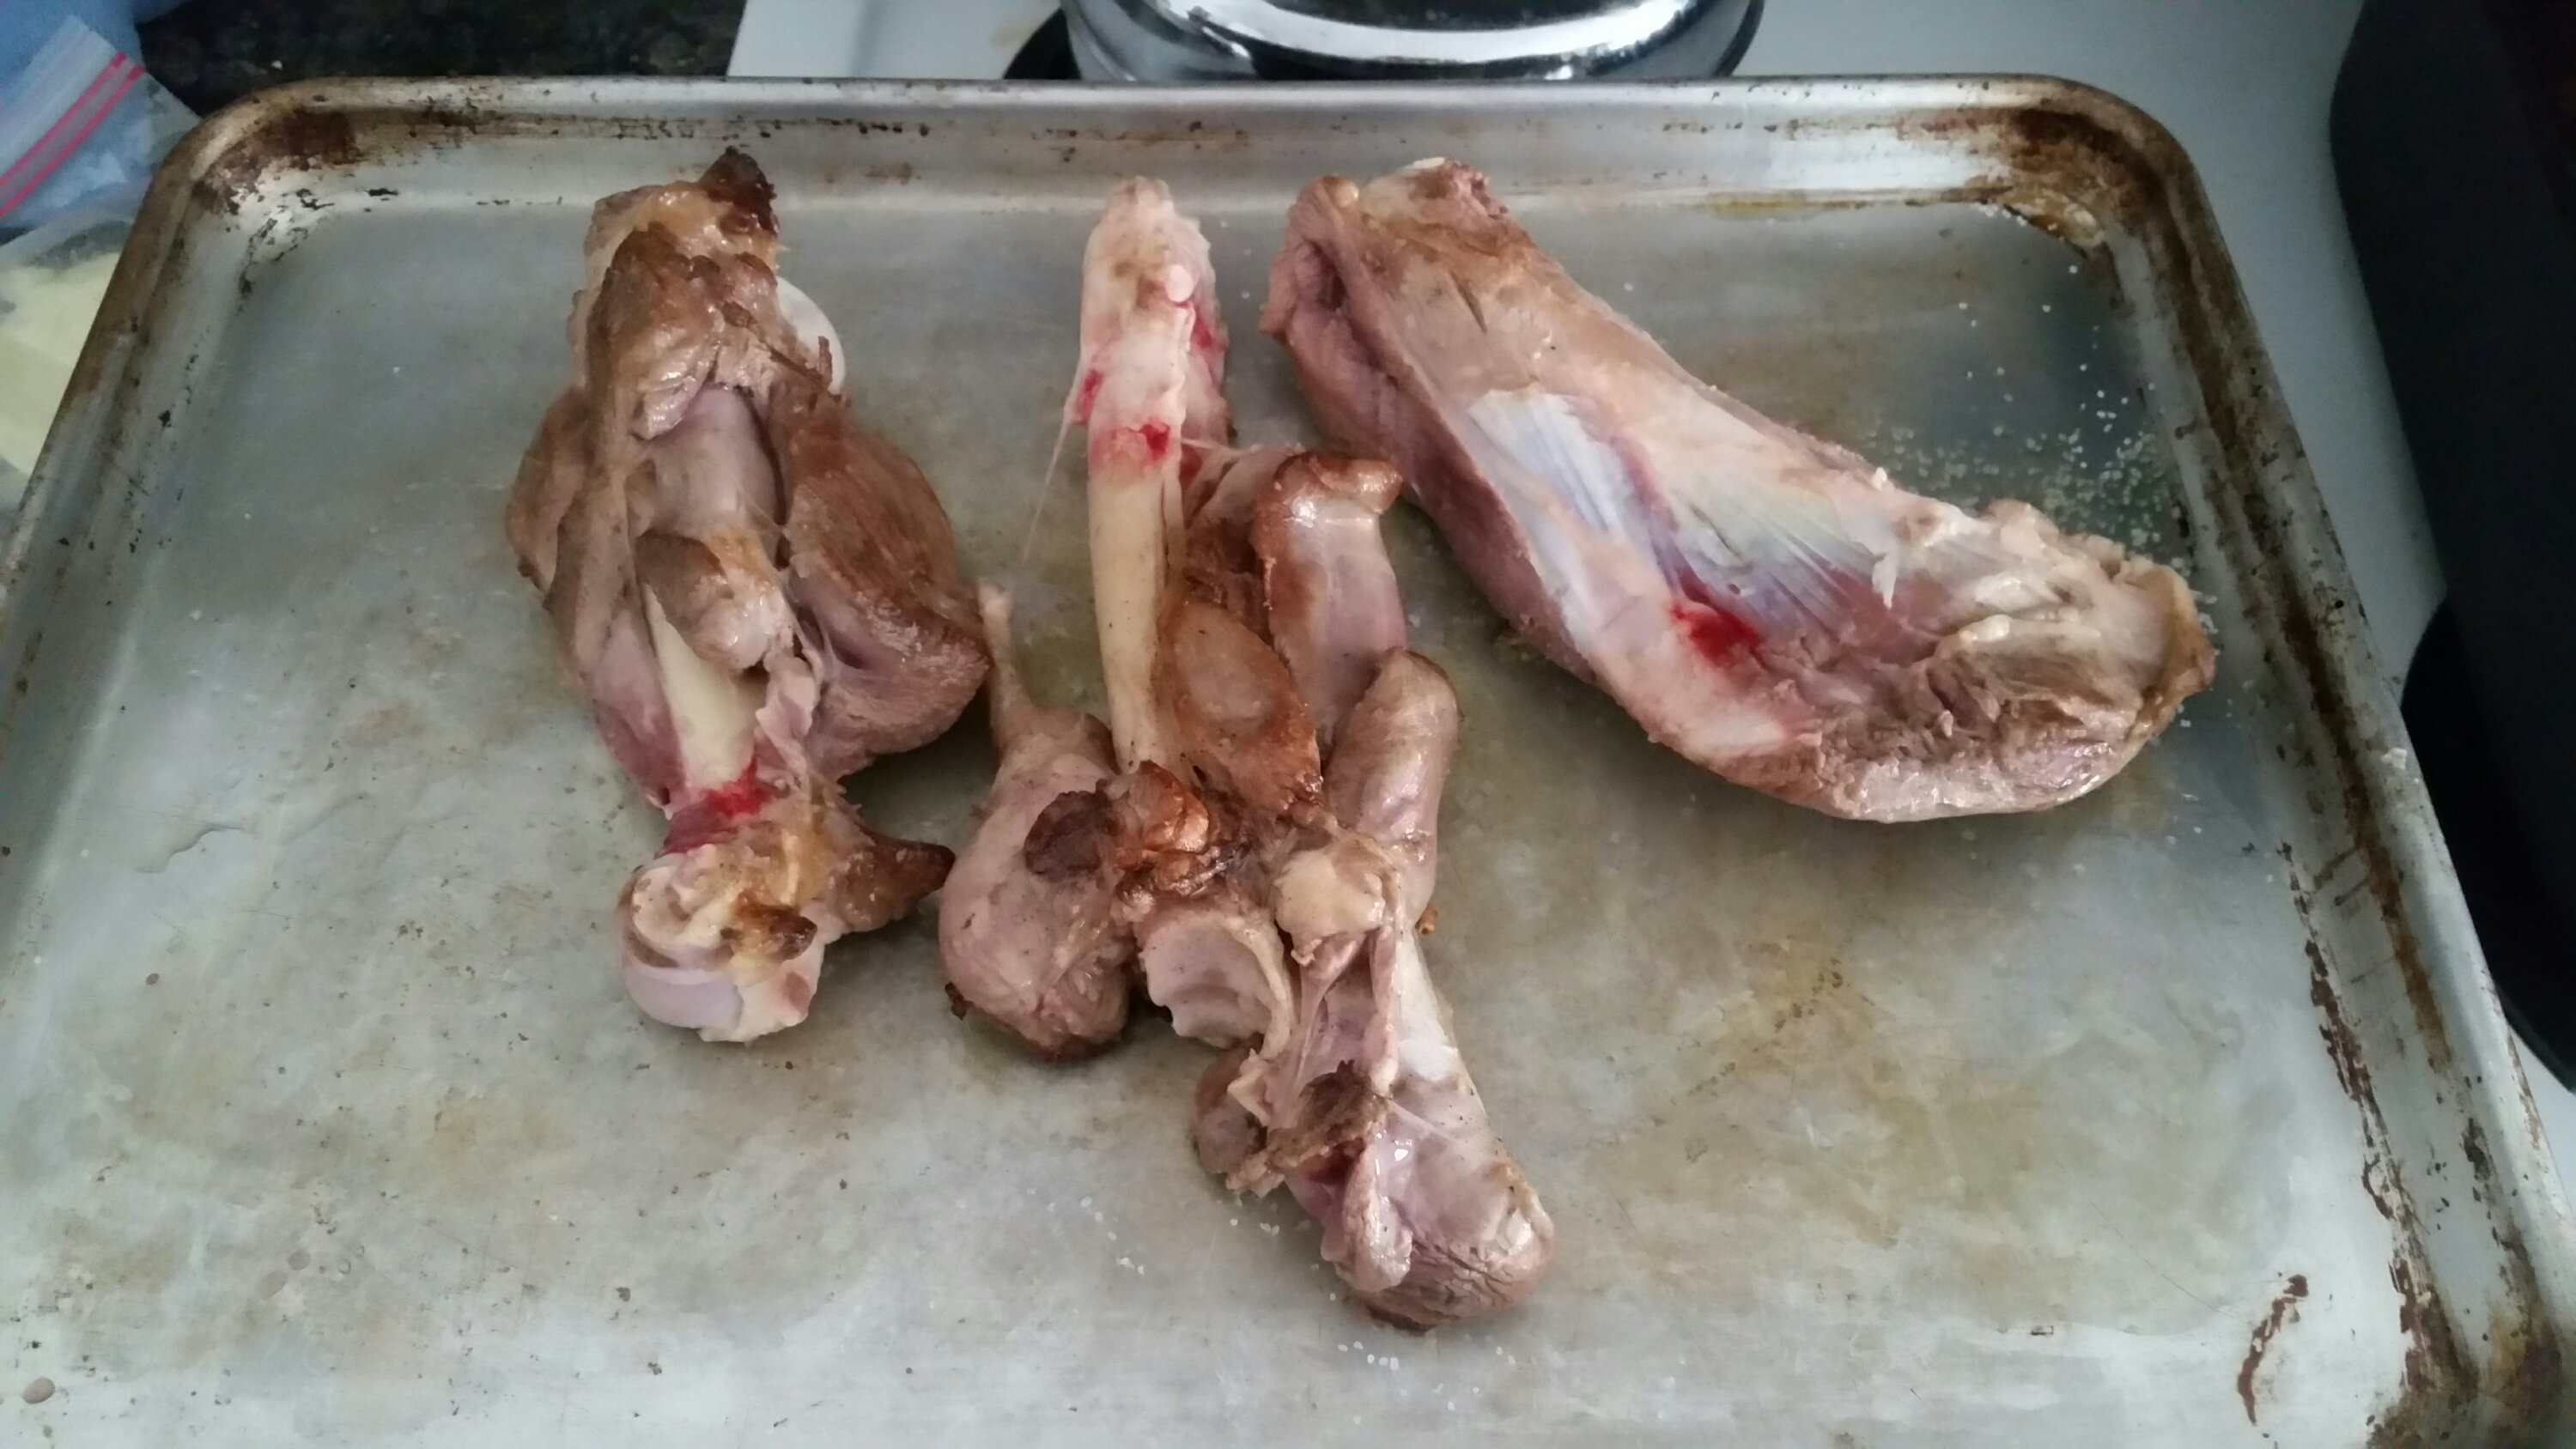


The shanks and shoulders, can be used to prepare Hank Shaw’s amazing Braised Venison Shanks with Garlic that is so tender that it falls off the bone. Truly! I prepared the recipe and added photos and comments here. These same cuts of meat can also be used for Faux-so Buco, another dish that is nice enough to serve to company.

Hearts and livers are both wonderful when breaded, fried and served with onions and cream gravy. They can also be used in the cajun specialty, boudin (recipe to come soon). Or an elegant country terrine (also on the way).
Save all these bits! Toss them in Ziplock bags, remove all the air, label and date them, and stick them in the freezer. When you do find a great recipe that calls for one of the less mainstream deer parts, you will be ready!
My point is this. Before deer season is over, you’ll have all sorts of cool bits of venison in your freezer which will add diversity and excitement to your meal planning. So when you grab your morning cup of coffee and find some fabulous recipes from the likes of pros like Hank Shaw, Conor Bofin, and Steven Rinella or just a friend like the Deerslayer’s Wife you’ll have everything you need to try something new.
Labor Day Whitewing Hunt! What Do I Do With These Birds?

Well, it’s Labor Day weekend in the Rio Grande Valley of Texas. That means that the Deerslayer (Doveslayer) family has come from far and wide to hunt whitewing doves. It’s an annual event that has taken place for as many years as I’ve been a part of the family. As you all know, the gathering of family is as important as the actual hunt. The younger generation that, as kids, used to play around, gut and pluck birds, and get some lessons in shooting, have become the next generation of hunters and are adults now. It’s hard to believe. I have pictures that show tiny little hands plucking and gutting birds back in the day.

This year it looked like the Labor Day hunt would be washed out. It’s not unusual to get heavy rain around this time of year and inches of rain that had already fallen with more on the way could’ve made it impossible for the hunters to walk through the fields. Strong winds might’ve sent the birds out of the area all together.
Patience paid off, however. Even though it was a muddy mess, the hunt took place. There would be birds to put in the freezer.
Processing the birds takes some care but is definitely worth the effort. First, it’s worth plucking the birds rather than peeling off the skin. In the moment, after a hard and muddy day of hunting, peeling seems like the easiest way to go. The skin, however, provides a protective layer that prevents freezer burn and results in moister meat when cooked. You won’t regret it.
This is purely optional but we absolutely love the giblets (hearts, livers, and gizzards) and always set them aside to save in a plastic zipper top bag. They are always thrown into a batch of Special Occasion Whitewing with Gravy as a special treat.
Packaging and Freezing Birds
After many years of packaging and freezing birds, Deerslayer (doveslayer) and I have come up with a method that not only protects the birds from freezer burn, but also allows them to be stored and stacked in the freezer to make the best use of space.
Rubbermaid makes a 6×10 container that will hold 12 birds and giblets. I like this size because it fits nicely in the freezer and because 2-3 birds per person is just about right for our family. The plastic bag of giblets is rolled and nestled along one side, among the birds. The next larger size of container, 9×13, will hold about 18 birds.
First, place the birds in the container and freeze for several hours. Then, add enough water to fill the container up about an inch. The reason for this is that the birds will float if too much water is added at once. Return the container to the freezer. After water has frozen, top off with enough water to cover birds and return to freezer.

After the birds are covered with ice, place lid on them, label the package with the number of birds and the date. The containers can then be stacked.

When you’re ready to cook up a batch of birds, either Special Occasion Whitewing Doves with Gravy, or Dove Breast Crostini, or Dove Ravioli in Browned Butter, or whatever your favorite recipe is, simply allow the container of birds to thaw in the sink until all the ice is completely melted, pouring off water as it melts. Pat the birds dry before browning.
Be pleased knowing that your priceless whitewing will be preserved for your special occasions.
Find What Brings You Comfort… Especially Now
Things are pretty crazy these days. It’s becoming increasingly difficult to stay sane during this pandemic. It’s so easy to dwell on the negative, focusing on the apocalyptic statistics, waiting for the next dismal news report. I’m pretty sure we’ve all succumbed to it. I know I have.
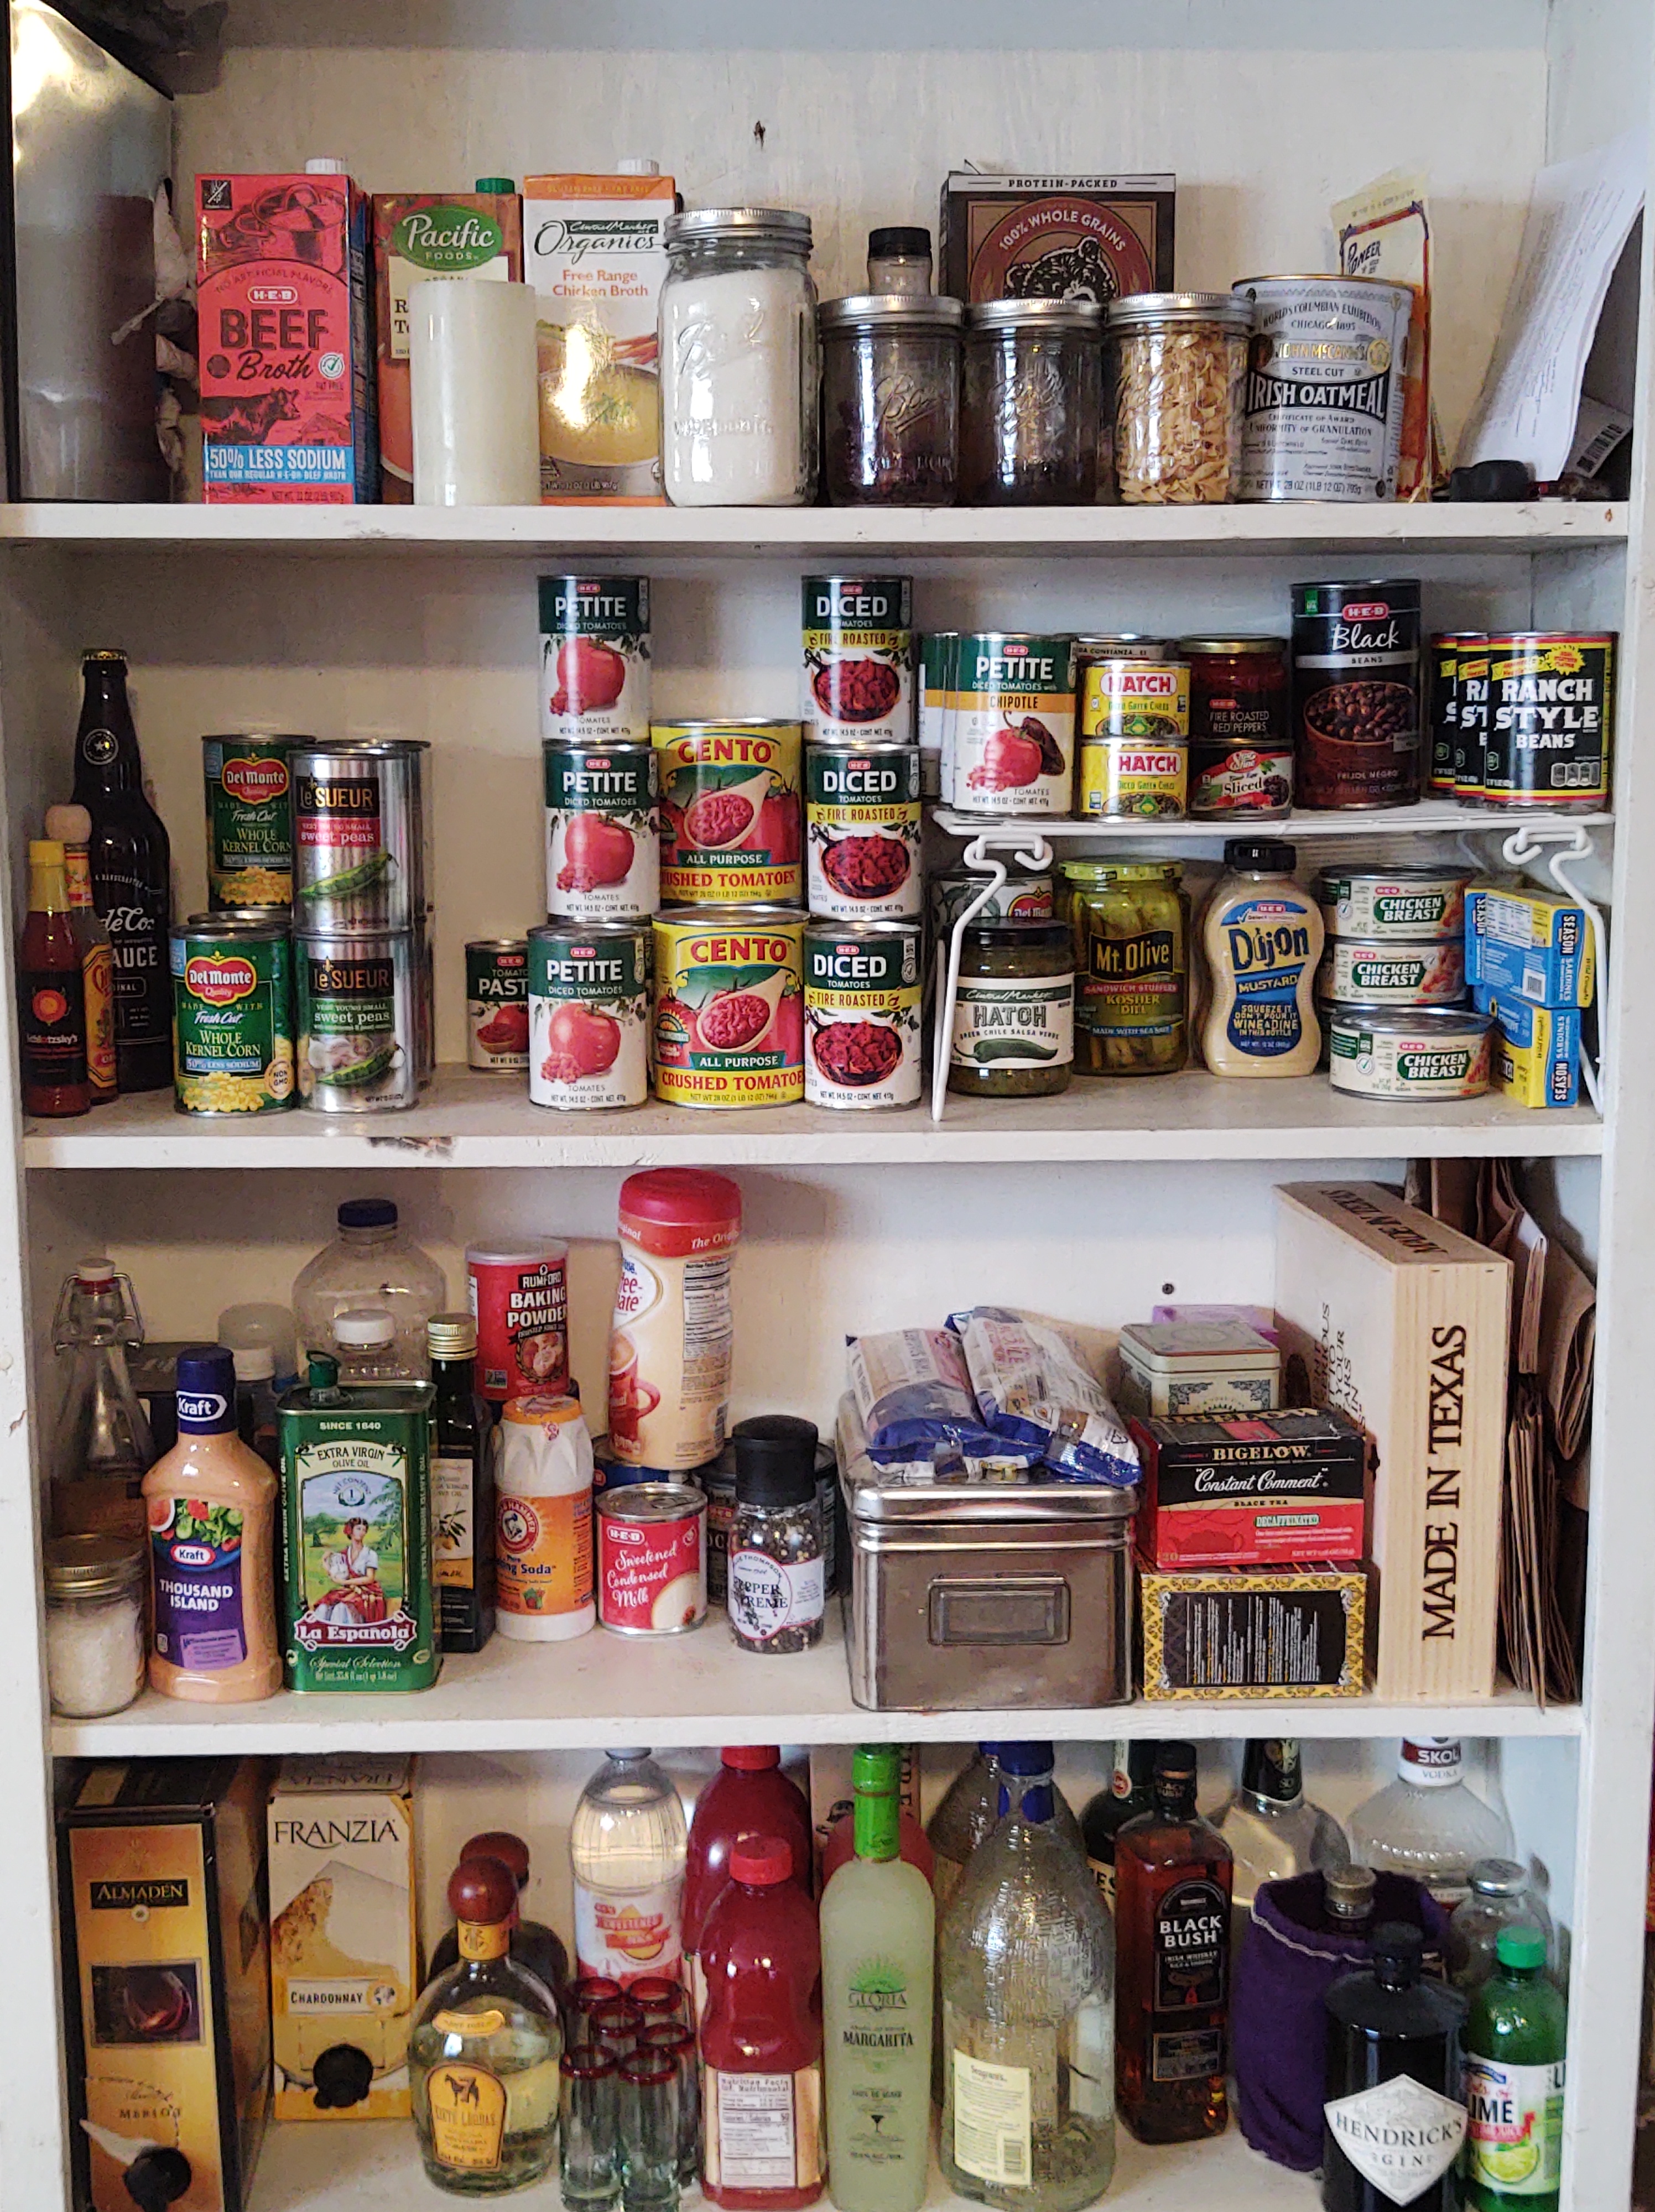
As we hunker down at the ranch, miles from anyone else, I know how blessed we are to have a place to hang out, to isolate. I guess it’s lucky for me that I find comfort in organizing. It drives my family crazy but making lists, planning menus, organizing my pantry and shelves brings me comfort. It is a necessity when the nearest grocery store is miles away. In the current circumstances, it also helps me feel like I’m just a little bit better prepared for whatever gets thrown my way.
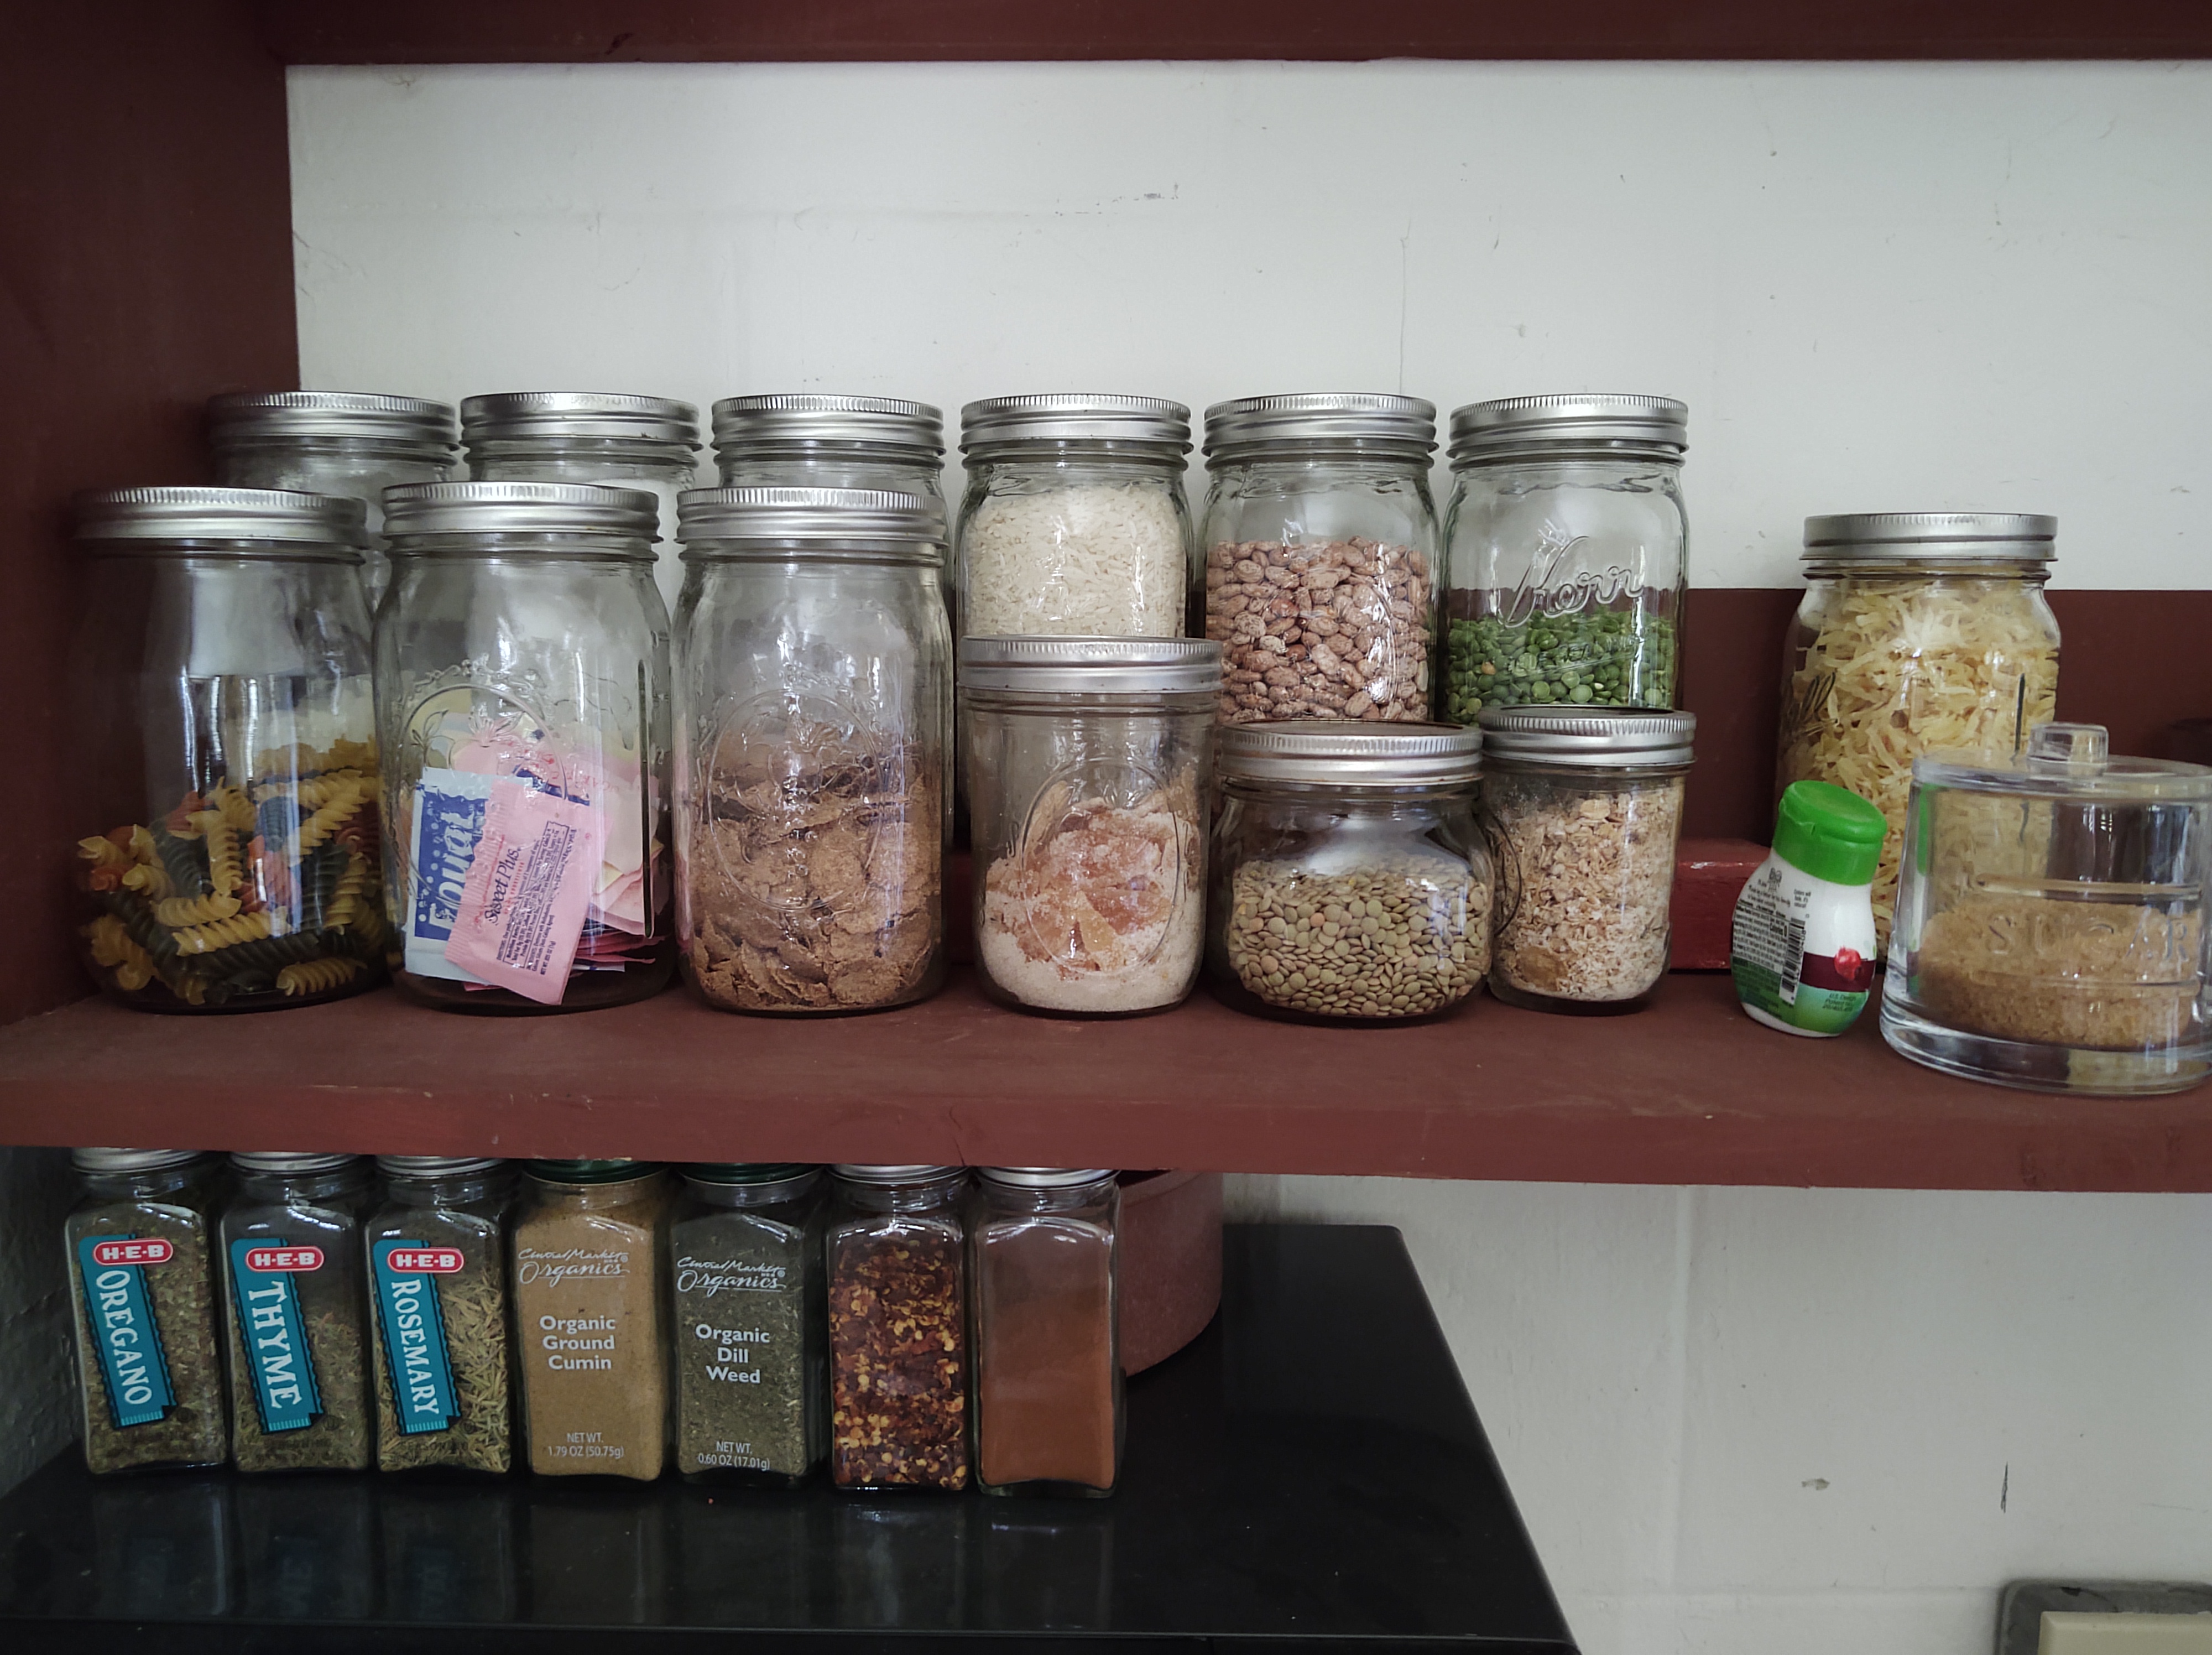
Mason jars are perfect for organizing and storing my shelf-stable pantry foods so that they are protected from mice and other pests.My small shelf above holds (clockwise from back left) flour, sugar, cornmeal, rice, beans, dried split peas, dehydrated hash browns, raw sugar, flavor drops for water, cereal crumbs for cranberry rubbish muffins, lentils, crystalized ginger for cooking and soothing upset stomach , cereal, artificial sweeteners, rotini pasta. (not pictured, a mix of dehydrated carrot, celery, and onion to be used in bean soup and others) Some of my spices are under that: oregano, thyme, rosemary, ground cumin, dill, red pepper flakes, cinnamon.

As it turns out, having these items readily available and safely organized has served us well as we shelter in place. I’ve been able to make bean soup using venison stock and veggies that we brought with us. Rice always rounds out a bowl of beans to create a hearty meal that will also provide leftovers that can be frozen and reheated at a later date.
In the freezer there’s venison, fish, soups I’ve prepared ahead, breakfast and other kinds of sausage, red and poblano peppers, cheese enchiladas, chicken enchiladas, various kinds of veggies, a couple gallons of milk, several loaves of bread, and ready-to-cook flour tortillas.
I will continue to plan and organize…. and cook…. and find beauty in unexpected places.
and pray. It brings me comfort.
Do what brings you comfort… especially now.
Wild Turkey Thanksgiving and the Zombie Apocalypse

Among those of us who have embraced the hunting lifestyle, there seem to be two different camps or schools of thought regarding how to bring to the table the meat that has been harvested. There are those who rely solely on their tried-and-true, time-tested recipes often handed down through generations. The problem with this way of thinking is that, as great as these dishes are, they lose their appeal when prepared too often. It’s tragic when a family rolls their eyes and says, “Not again” when presented a beautiful platter of chicken fried venison backstrap, for example.
The other camp, in which I like to consider myself, likes to think outside the box, be more creative when deciding how to prepare wild game for the family. The pioneers (and my heroes) in this field include the likes of Hank Shaw, Steven Rinella, and Conor Bofin. While a willingness to experiment opens up a world of culinary possibilities, it comes with its dangers, too.
And so my cautionary tale begins….
One year the Deerslayer household was gifted with a wild turkey that was going to be the centerpiece of our Thanksgiving table. It was going to be a meal like no other, spectacular. It would be talked about for years to come. You see, I had an idea! I would use the tenderizing qualities of fresh pineapple in a brine that would result in a flavorful, moist and tender bird since wild turkey can be tricky to prepare. Those of you who know much more than I about the qualities of pineapple are seeing where this is going, but bear with me here.


I was soooo sure of my plan that I photographed each and every step so that I could share this brilliant vision with everyone.

Unfortunately, I didn’t realize that the pineapple would dissolve the skin of the turkey! What I pulled out of the oven resembled some kind of zombie creature almost too hideous to cast eyes upon. Yet stare, I did. Thanksgiving would be ruined! Luckily, we had green beans, mashed potatoes, and cranberry sauce. Strangely enough, the beast smelled amazing. It wasn’t yet cooked all the way through when I discovered the catastrophe.
 This is the part in the story where Deerslayer saved the day like a superhero donning a camo cape. Before I knew what was happening, he had removed the legs, thighs, and wings from the carcass, poured the fat from the roasting pan into a skillet and proceeded to confit those bits, cooking them in their own fat so that the result was delicious meat that we were able to serve with all the fixings to our small gathering.
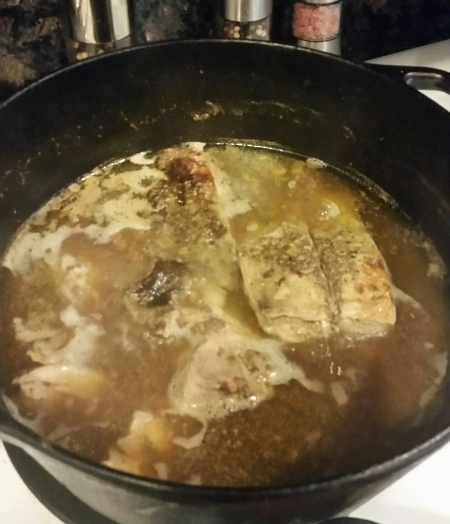
Before we sat down, the two breast halves were cut from the bone, placed in two sous vide bags with some of the juices from the roasting pan, and set to cook in a water bath of 150° fahrenheit for about an hour and a half. This meat would be ready for sandwiches and pot pie for the next couple of days.
.
Later that evening, the carcass was placed in a pot large enough to hold it with frozen veggies saved for stock and enough water to cover it. We put it on to simmer after we finished the dishes.
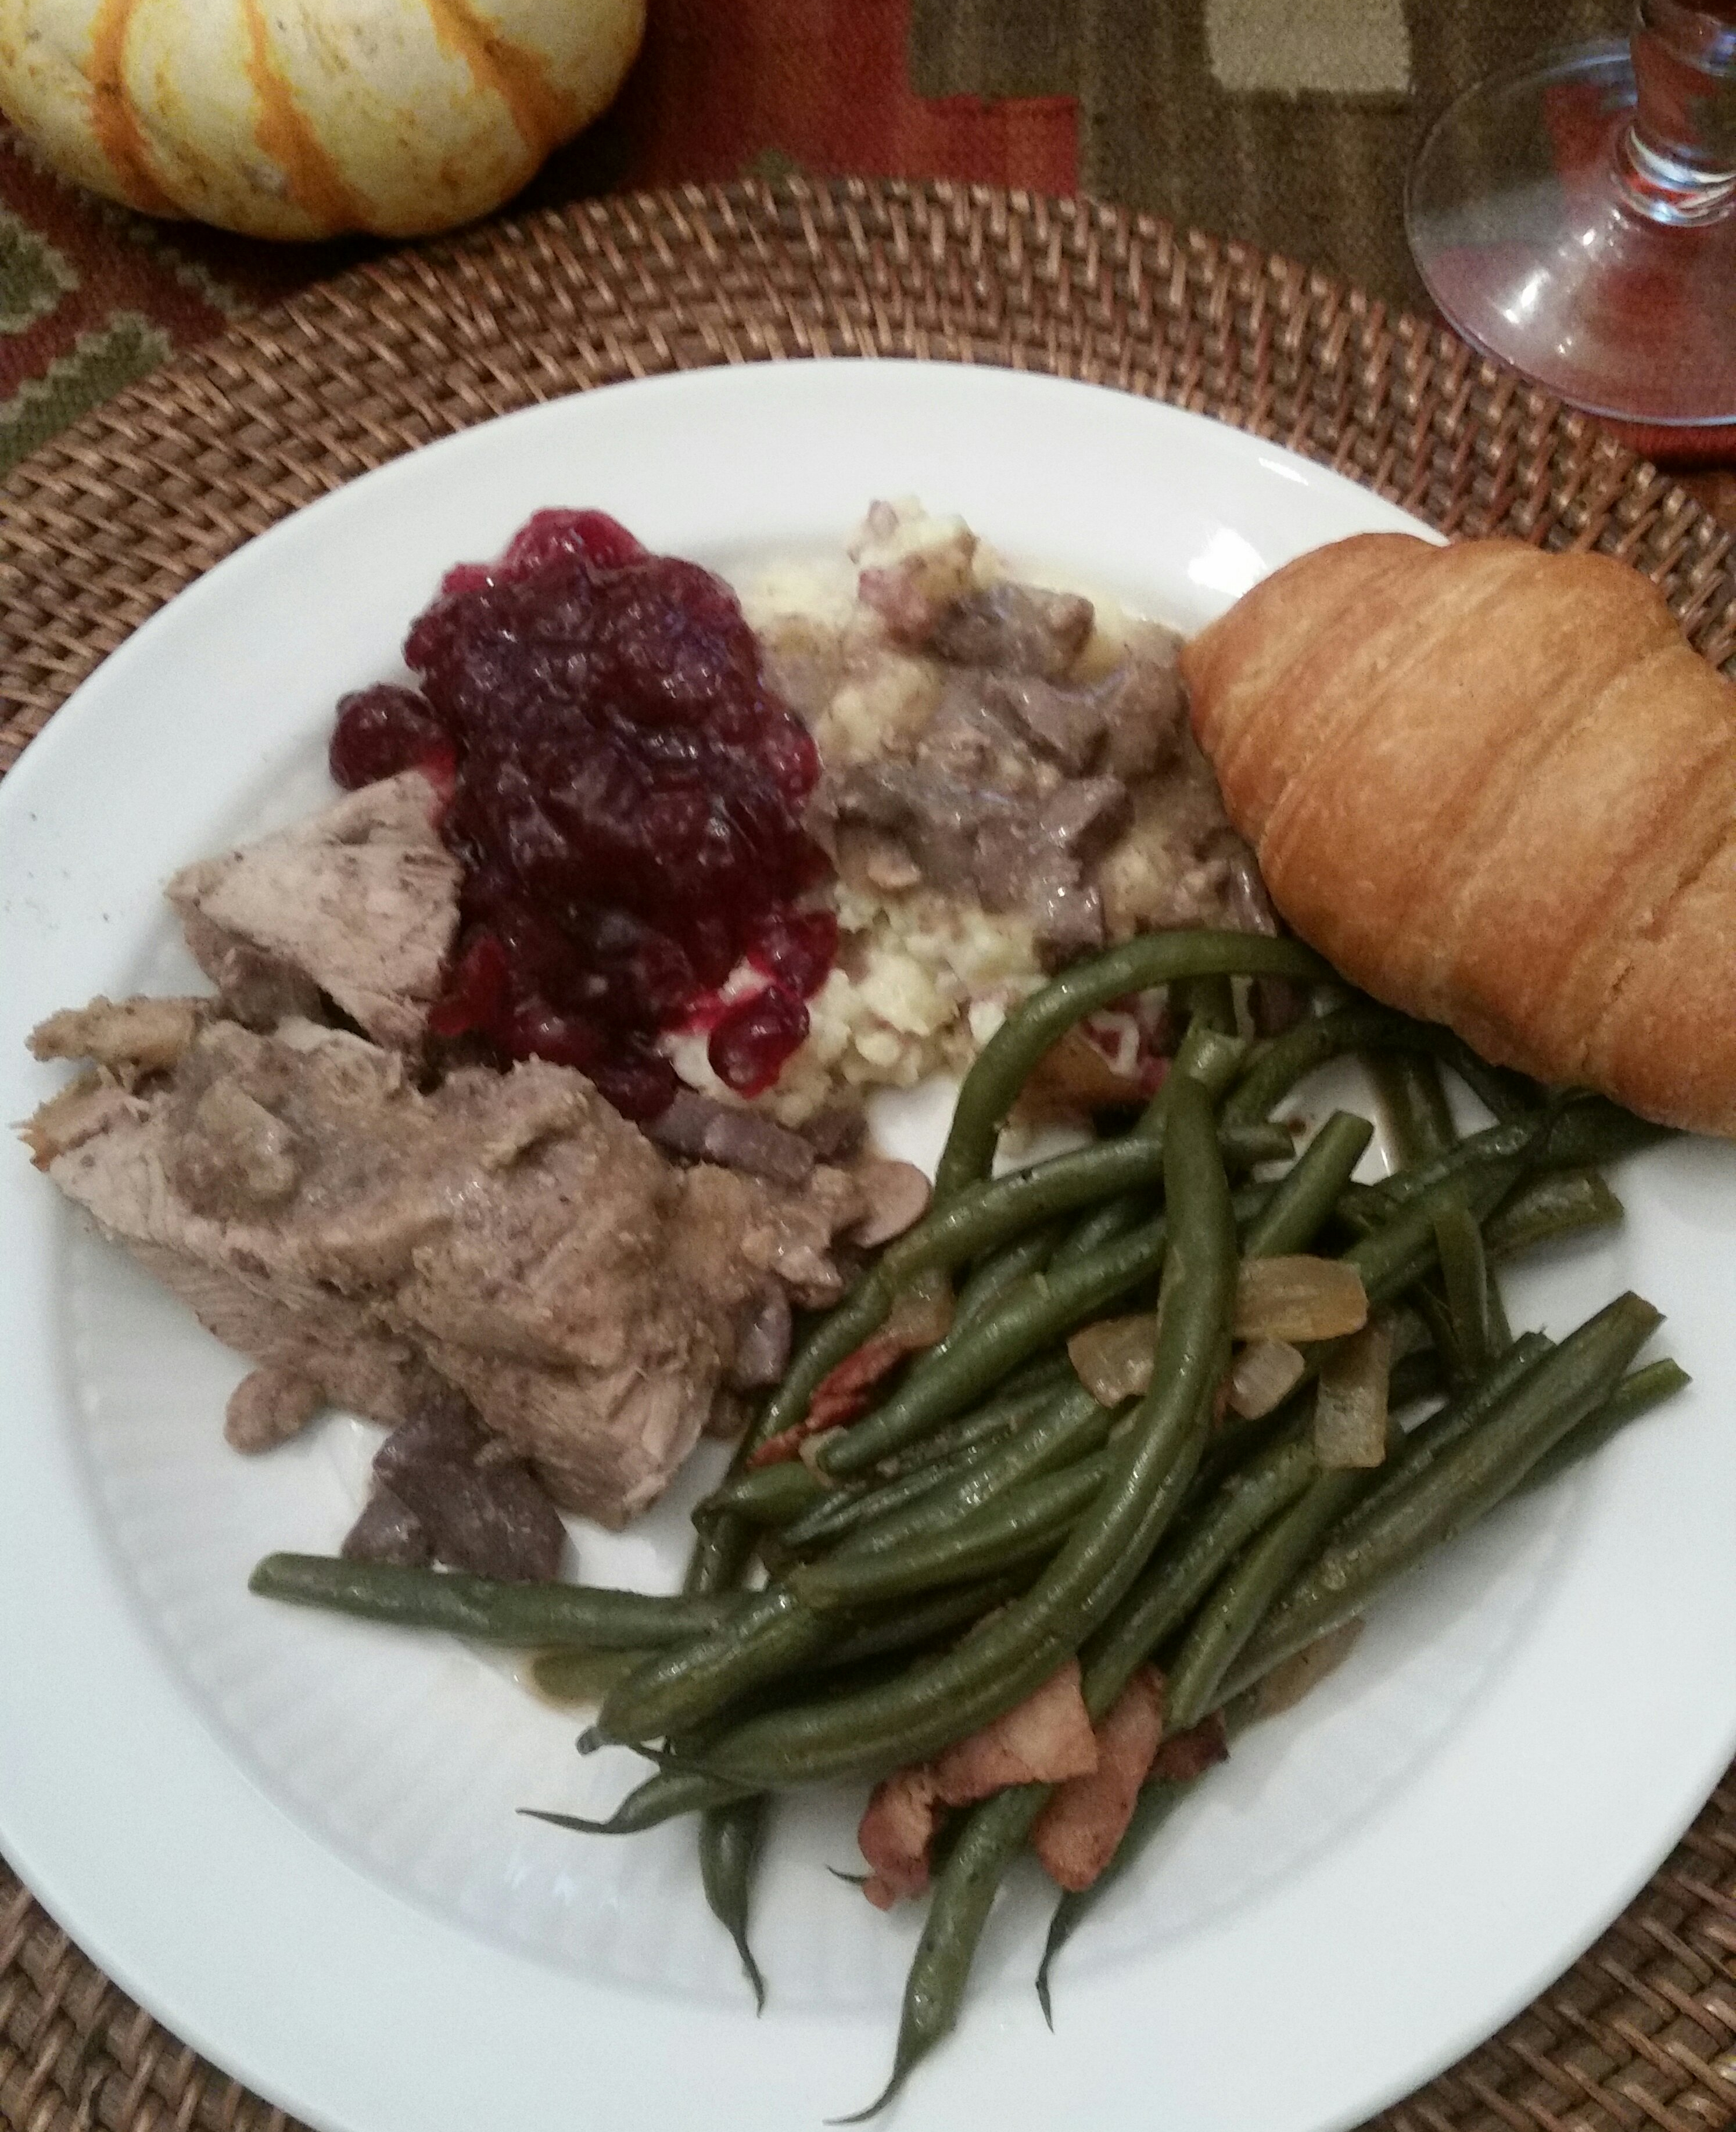
We finished our miraculously delicious meal. What was destined to be a failed Thanksgiving ended up as one of the best ever because the disaster was averted and we looked forward to delectable sandwiches and pot pie during the coming days. In the end, it WAS a meal like no other and we HAVE talked about it in awe since then. And probably will for years to come
What’s the take-away from this narrative? The willingness to be creative and to try new things is what makes life fun. But be prepared to have a plan B or at least a sense of humor about the whole thing. And maybe not for a Thanksgiving dinner.
P.S. I am thankful for my wonderful husband who is quick on the draw in an emergency and for my two amazing daughters who have a sense of humor.
Elegant Pumpkin Soup… It’s Time!
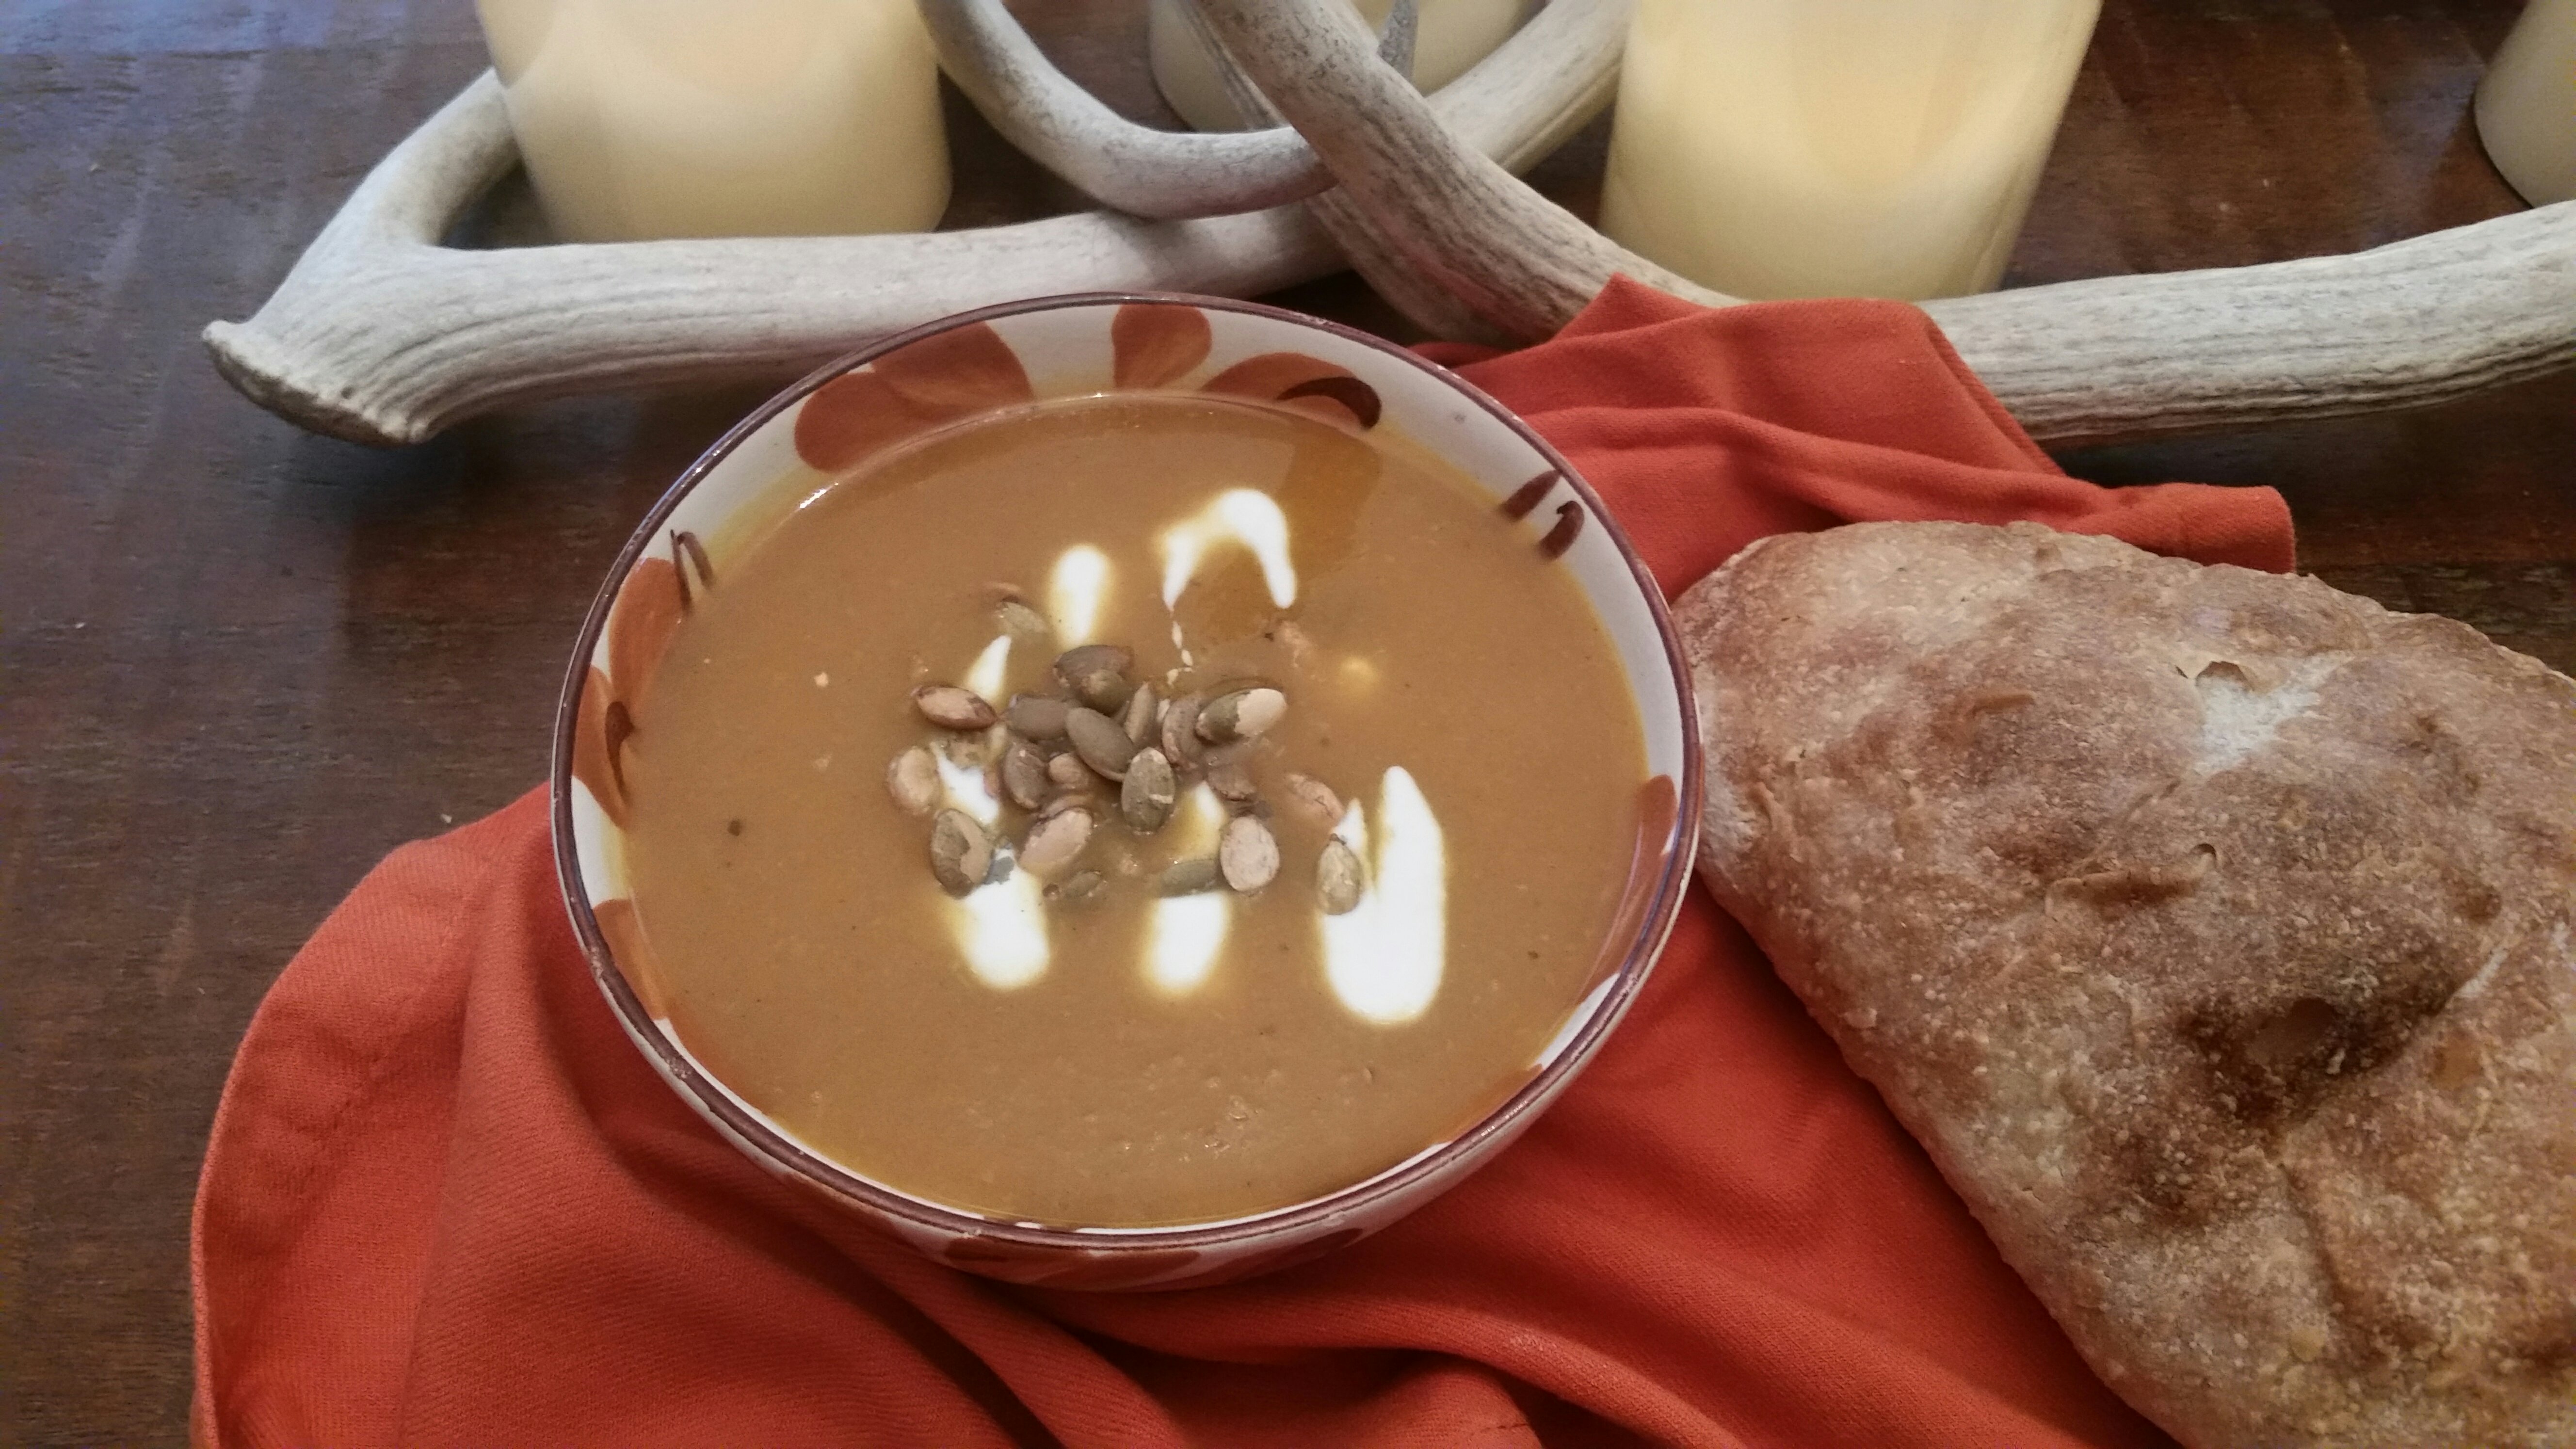
Halloween is over and Thanksgiving is almost here. I know I’m not the only person around who still has several decorative pumpkins artistically placed around my home and, yes, even at the hunting ranch. I do this every year. They represent my favorite time of year, autumn. And they seem to last FOREVER!
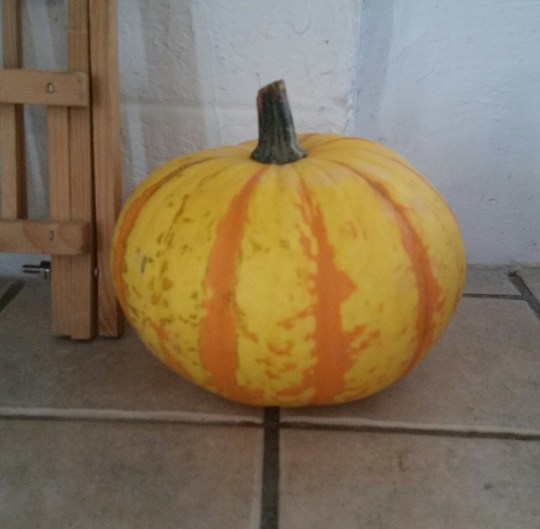
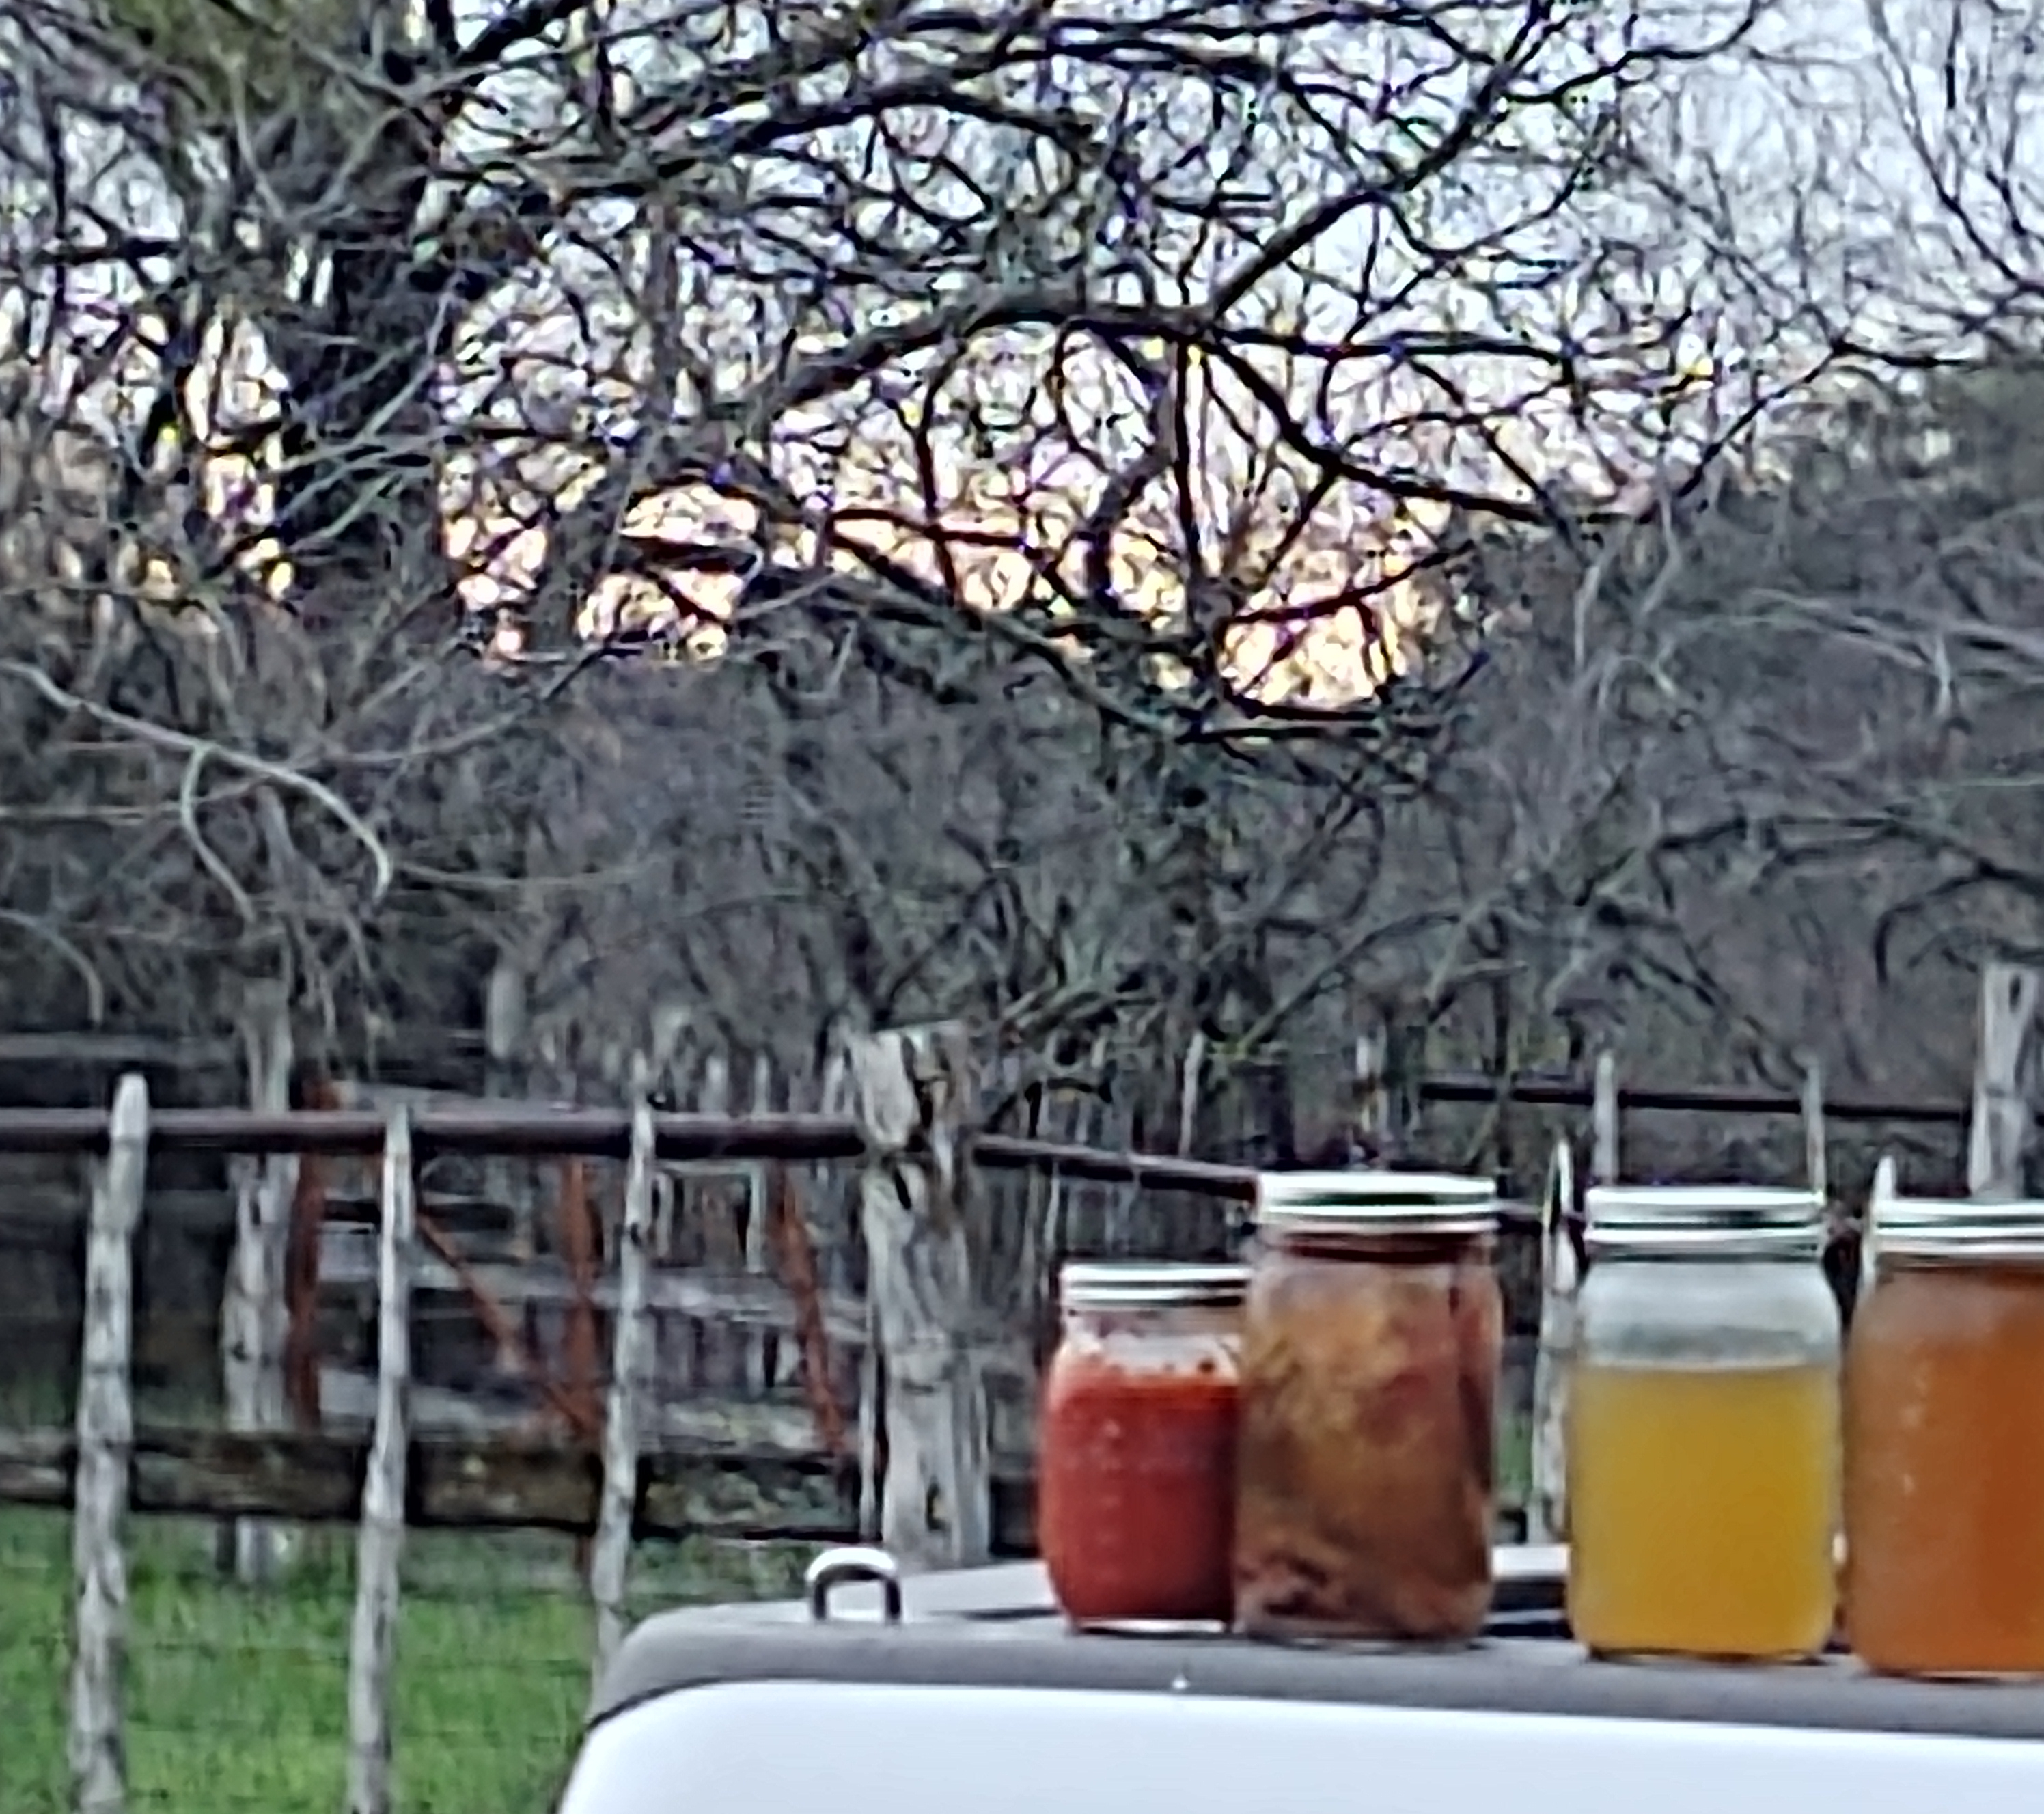
After they have served their aesthetic purpose, I roast the flesh, package it up, and freeze it to use in my best loved pumpkin recipes. This gorgeous soup is one of my favorites. It is elegant, rich and hearty without being heavy, and EASY . I have made up batches, poured them into mason jars for transport, and taken them to the hunting camp. It would also just as easily be an elegant first course for any Thanksgiving dinner.
Elegant Pumpkin Soup
1/2 onion, chopped 1/8 tsp. ground ginger
2 carrots, chopped 2 tsp. brown sugar
2 stalks celery, chopped 1 1/2 tsp. salt
olive oil 1/4 tsp. black pepper
32 oz. chicken stock 1/8 tsp. cayenne pepper
2 cups cooked pumpkin 1/2 cup whipping cream (optional)
1/2 tsp. cinnamon dollop of sour cream or greek yogurt salted roasted pepitas*
*pepitas are shelled pumpkin seeds
In a large soup pot, saute onion, carrots, celery in olive oil until tender. Add chicken stock and bring to a boil. Simmer for about 15 minutes until veggies are tender. Add pumpkin and spices. Puree with immersion blender. Continue to simmer for a few minutes. Add whipping cream if you want extra richness. Stir in. Complement with stirred sour cream or greek yogurt thinned with a bit of milk so that it can be drizzled artistically (and stirred in more smoothly). Sprinkle with salted pepitas.
Serves 6-8
Faux-so Buco

I’m always looking for new wild game recipes and methods for cooking the meat that fills my freezers, particularly at this time of year when I’m trying to finish up last year’s harvest. Sometimes I stumble upon a fabulous recipe that’s just exactly what I’m looking for, just what the doctor ordered, so to speak. More often than not, though, I have to adapt a promising recipe to fit my needs, skill set, grocery list, and/or level of motivation and/or stamina. I’m guessing that most of you do the same thing. That’s why you’re reading this post.
Most recently, I’ve been enamored of the sous vide cooking method because of the way it can be used for preparing all cuts of venison, elk, and nilgai from tender pieces that require a precise 131 degrees fahrenheit for a perfectly medium rare presentation to tougher cuts that must be cooked for a long time to allow the tough sinew to break down into tender, gelatinous, USABLE meat.
I came across a number of recipes for tougher cuts that required 24-48 hour cooking times using the immersion method (sous vide) but I was reluctant to try them. I have to admit that I was skeptical. Would the longer cooking time actually be a time saver if I had to check in on it periodically? Would it produce the “fall off the bone” result that I was looking for?
I relied on David Draper’s Venison Osso Buco for guidance regarding the 24 hour sous vide cook time, adapted it to suit my level of expertise (none) and difficulty. The recipe called for shanks, cross-cut into one-inch sections (the picture looked like 2-3 inch chunks, but never mind that). I had lots of shanks in the freezer. However, I wanted a recipe that allowed me to use whole shanks without having to cut them into rounds. So, technically, what I intended to make wasn’t osso buco since “osso buco” translates to “bone with a hole” or marrow bone which is acquired by the cross-cut shank. In an attempt to make the recipe a bit easier to put together, I wanted to see if it would work with whole shanks. A single shank with sauce on a bed of pasta would serve at least two people. While an authentic osso buco with cross-cut shanks creates a stunning presentation, ease of preparation certainly has its place in the wild game culinary realm.
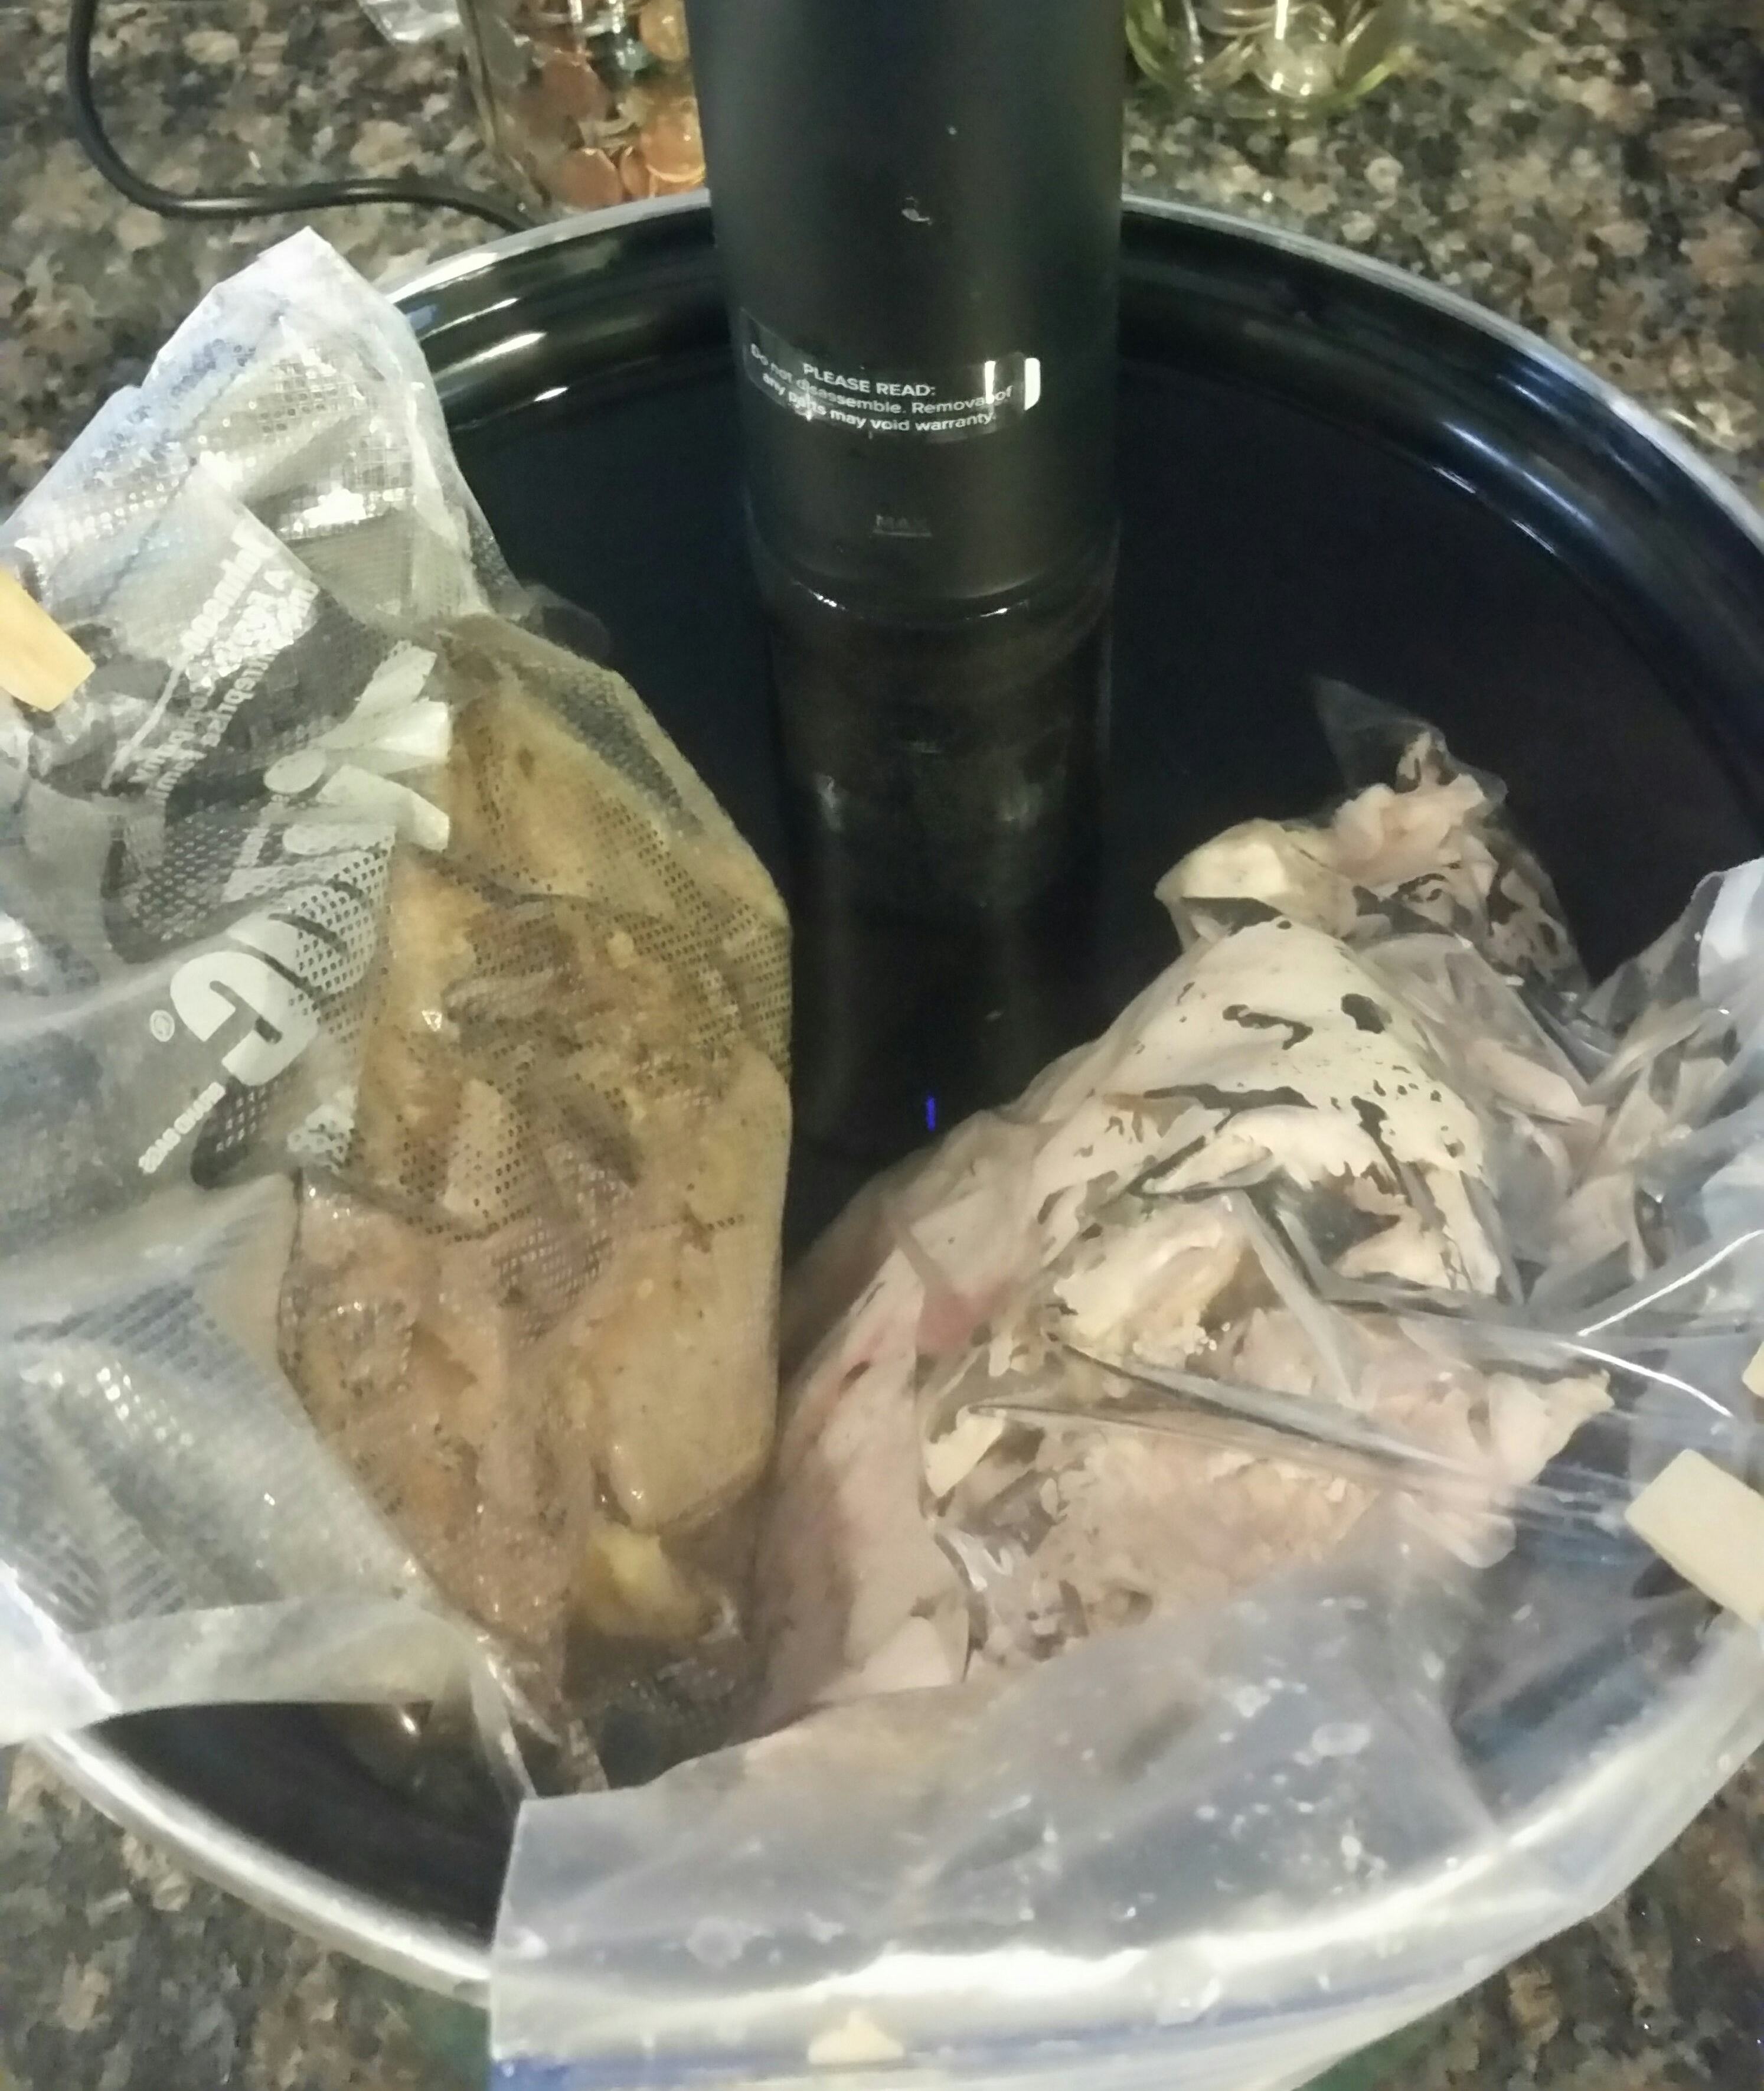
I followed Mr. Draper’s recipe for the sauce, adding a bit of oregano, thyme, and salt to taste. I prepared the recipe twice, the first time with two smaller shanks and the second with one larger one, tweaking my method along the way. The smaller shanks and sauce were divided and fit easily into 1 gallon zip bags which I attached to the side of the pot with clothespins after the water had reached 176 degrees fahrenheit. My second attempt used a larger shank was too long for a one gallon zip bag. I had to use a vacuum bag custom-cut to the length I needed for my shank plus the sauce. Rather than heat-sealing the vacuum bag, I pushed most of the air out of it, folded over the end, and taped it closed using packing tape. I attached the bag to the side of the pot with plastic clips, once again after the water had reached 176 degrees fahrenheit.


Using the immersion method for such a long period of time presented a problem with evaporation. During my first attempt, the water level dropped several times, causing the machine to turn off. Luckily I caught it before the water temperature had dropped so much that cooking stopped. I tried to balance the lid atop the pot, using a potholder to tip the lid so that collected water was redirected back into the pot. I still needed to check the water level and add water two times. For my second try, foil was placed over the pot with the center of the foil slightly punched down to redirect condensation back into the pot. I still had to add water a couple of times.
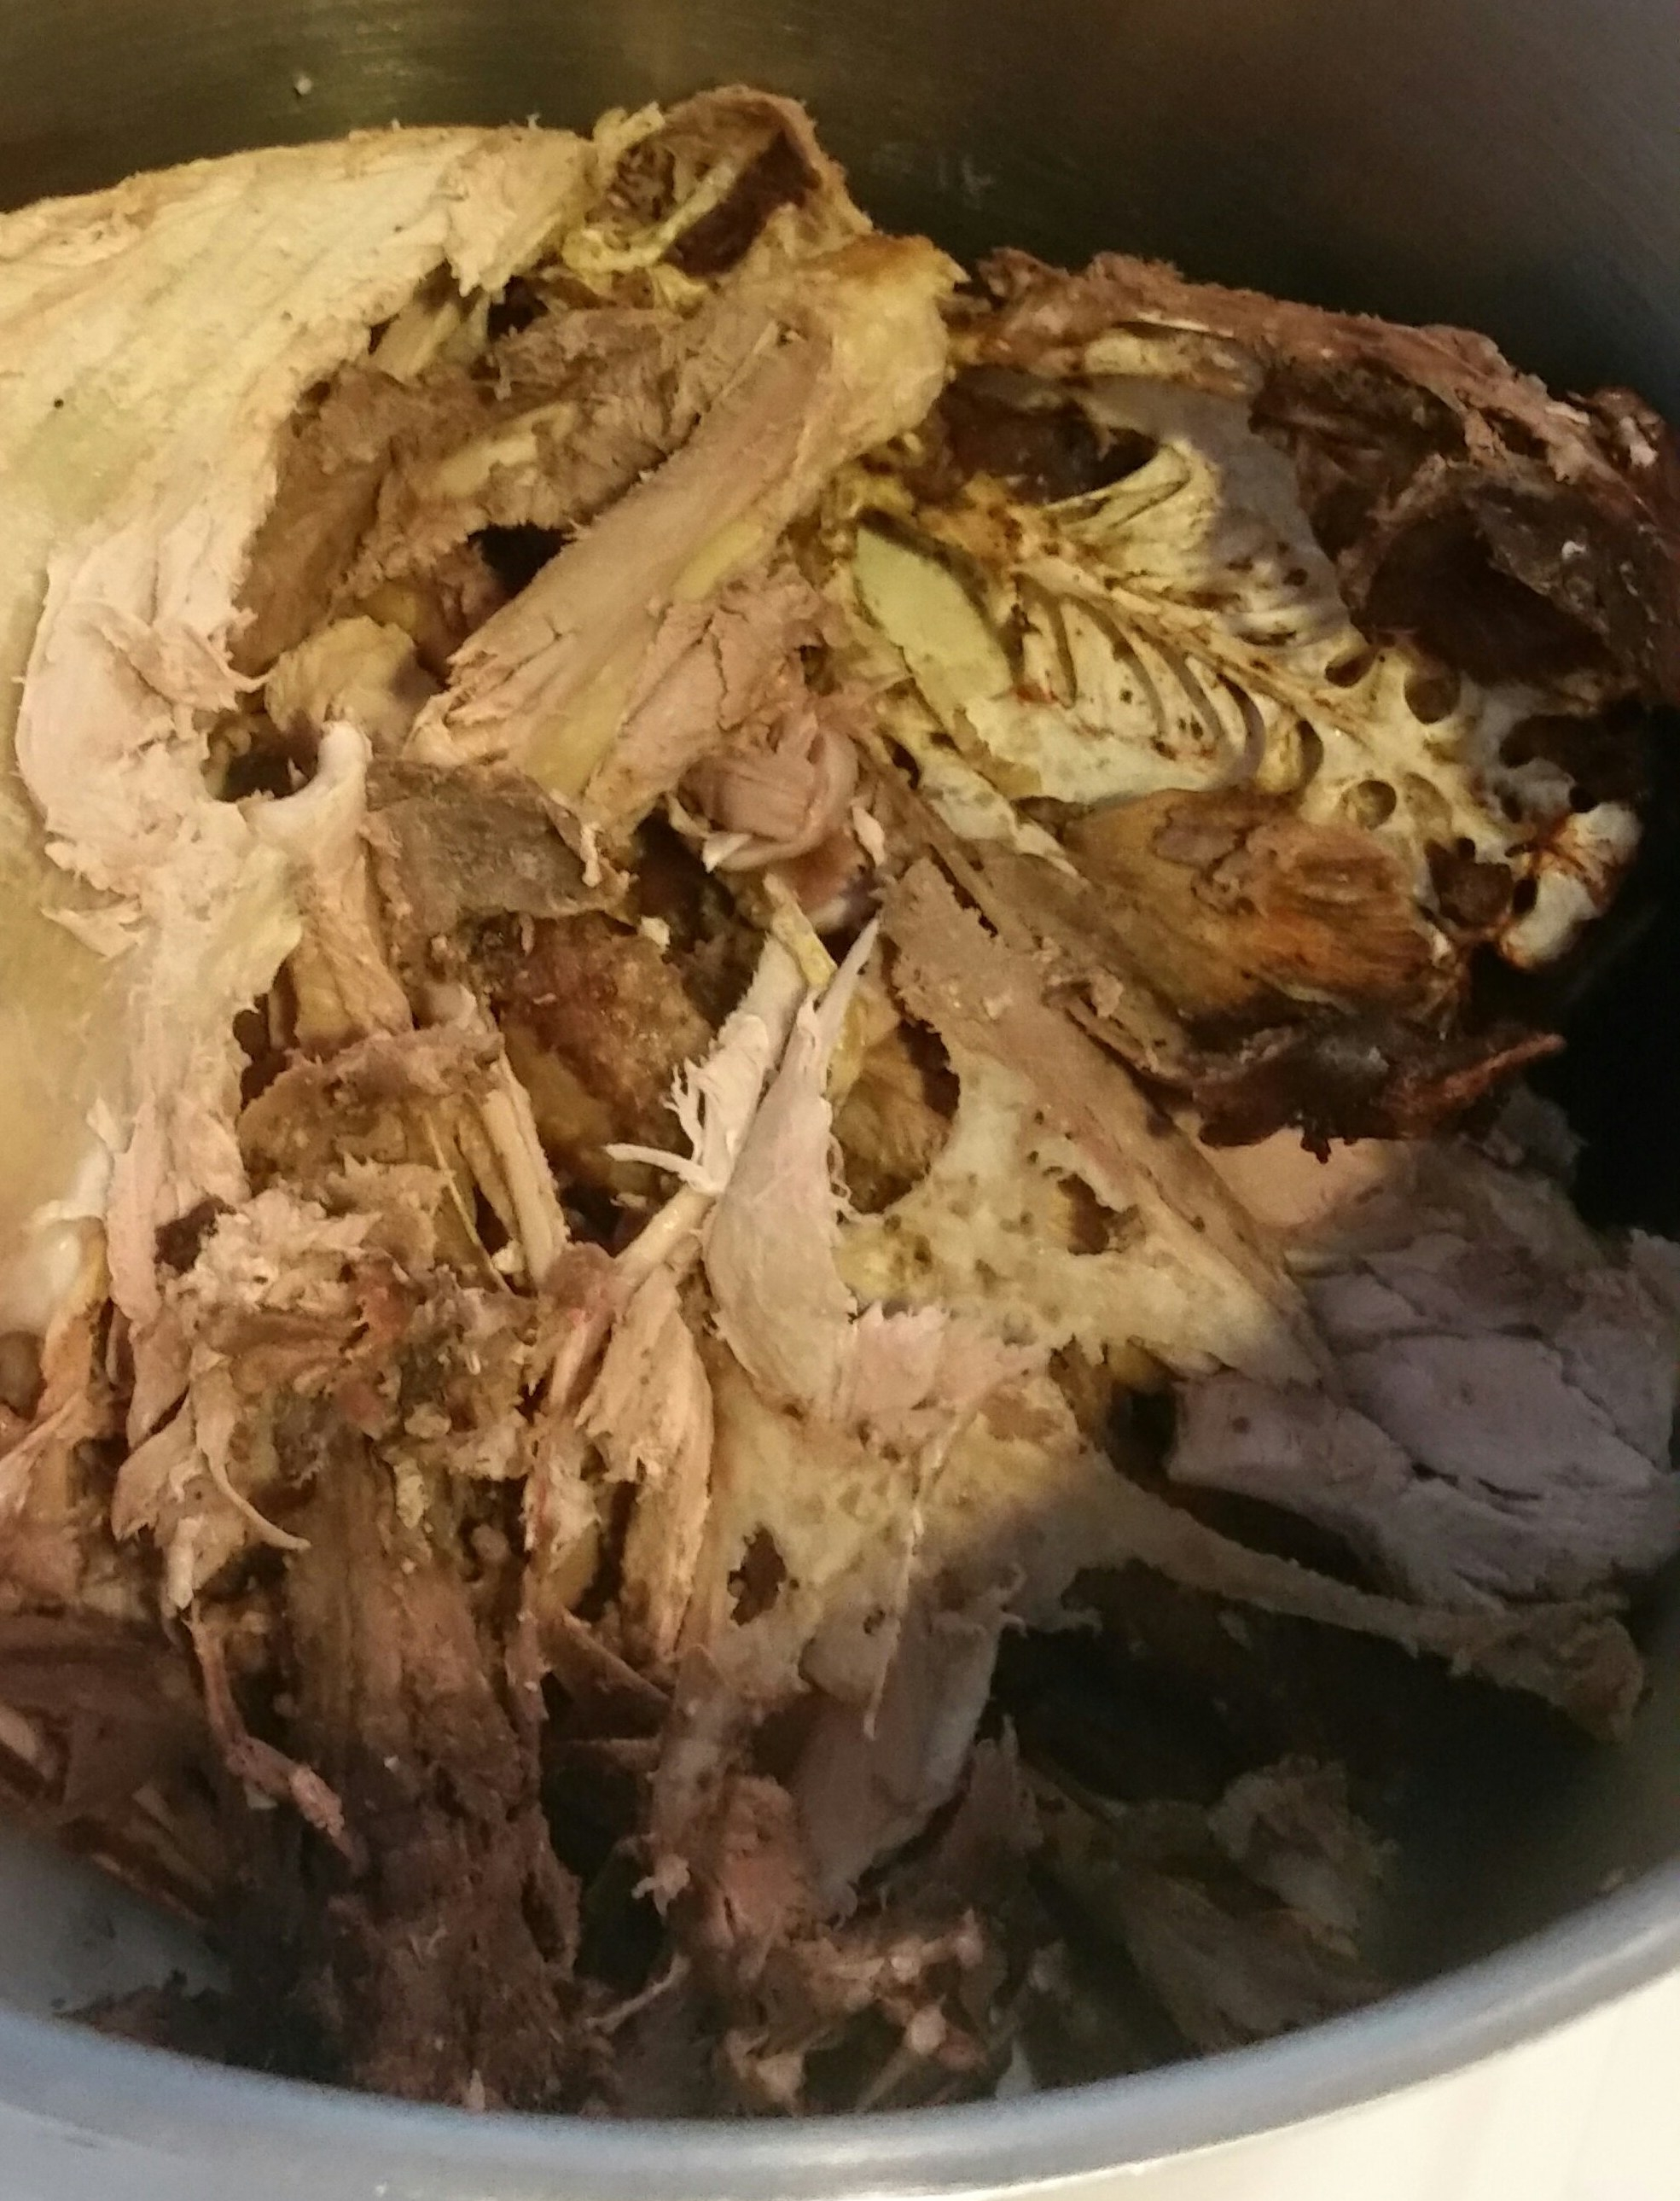
A great thing about using the sous vide method is that it’s incredibly forgiving. I knew that the meat wouldn’t be overcooked, dry, or tasteless. The long cook times for tougher cuts to fall off the bone are approximate, even within a few hours. I began the shanks the evening before I was to serve them. Because I was new to the long overnight cook time, I was apprehensive so the “ease of preparation” aspect didn’t pan out. I think I will become more comfortable with practice. The result was wonderful, though. The meat fell off the bone!

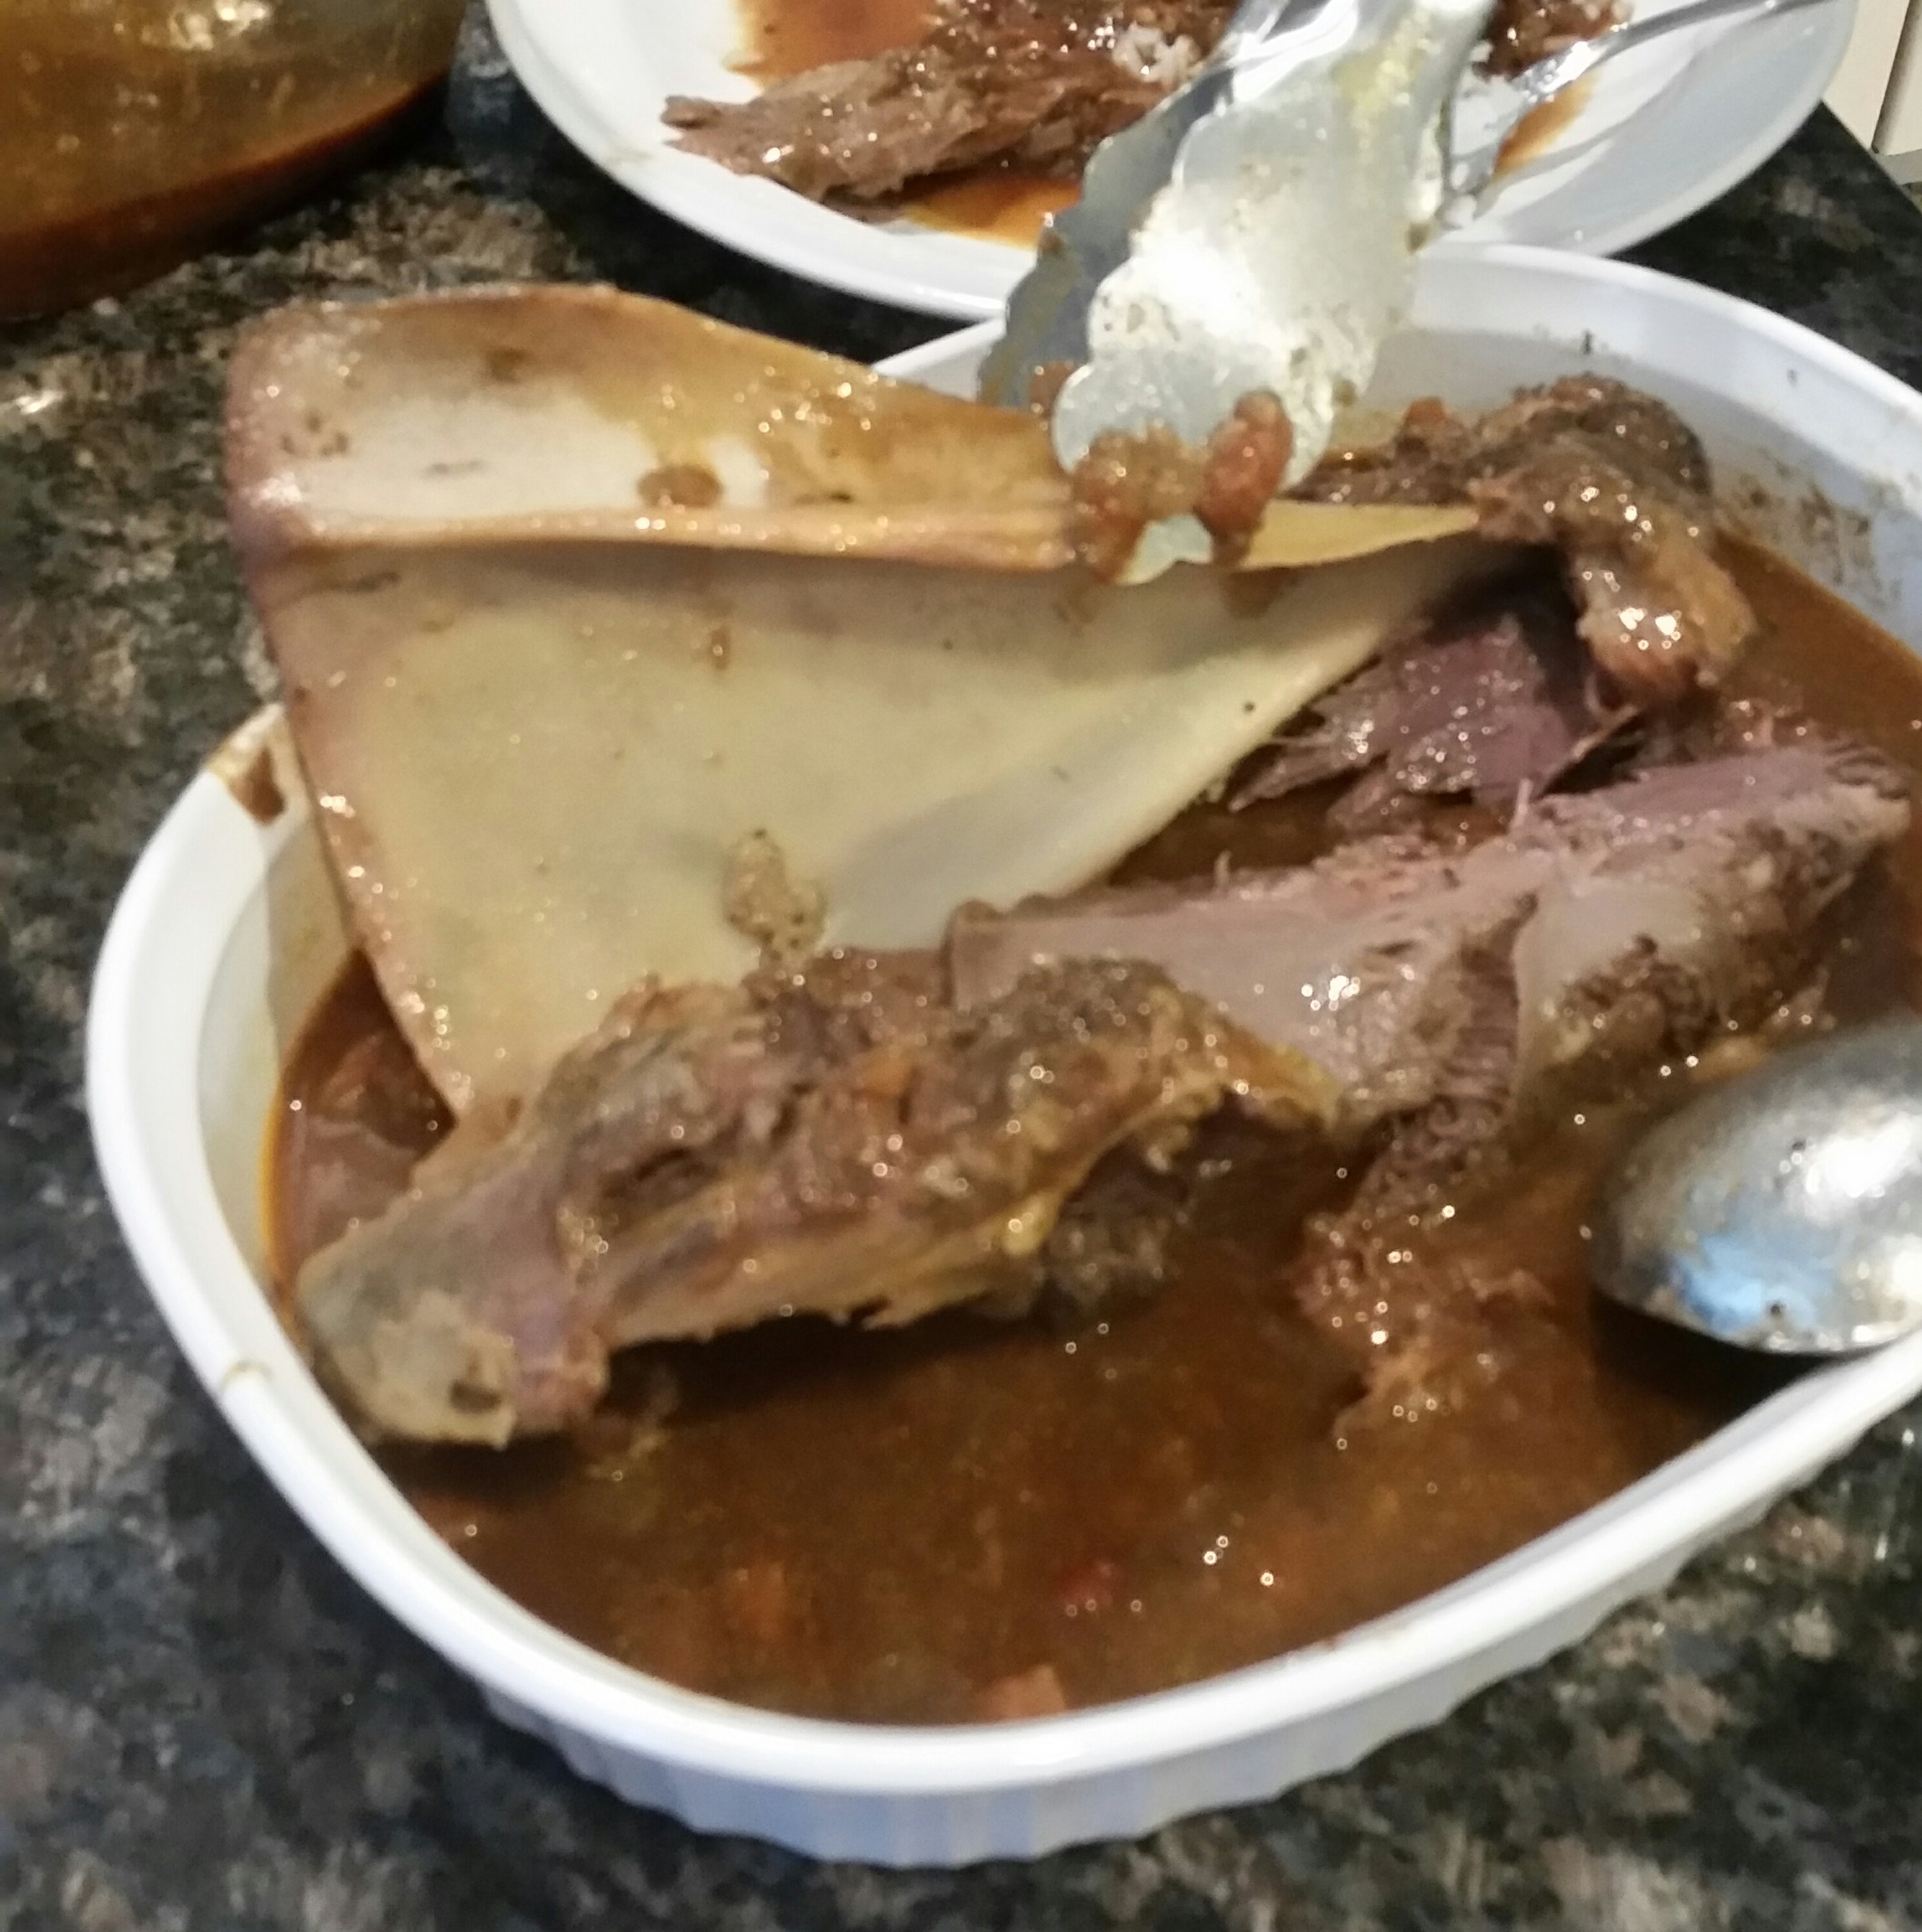
Honestly, I felt the the whole shank, bone-in, made an impressive presentation in and of itself. 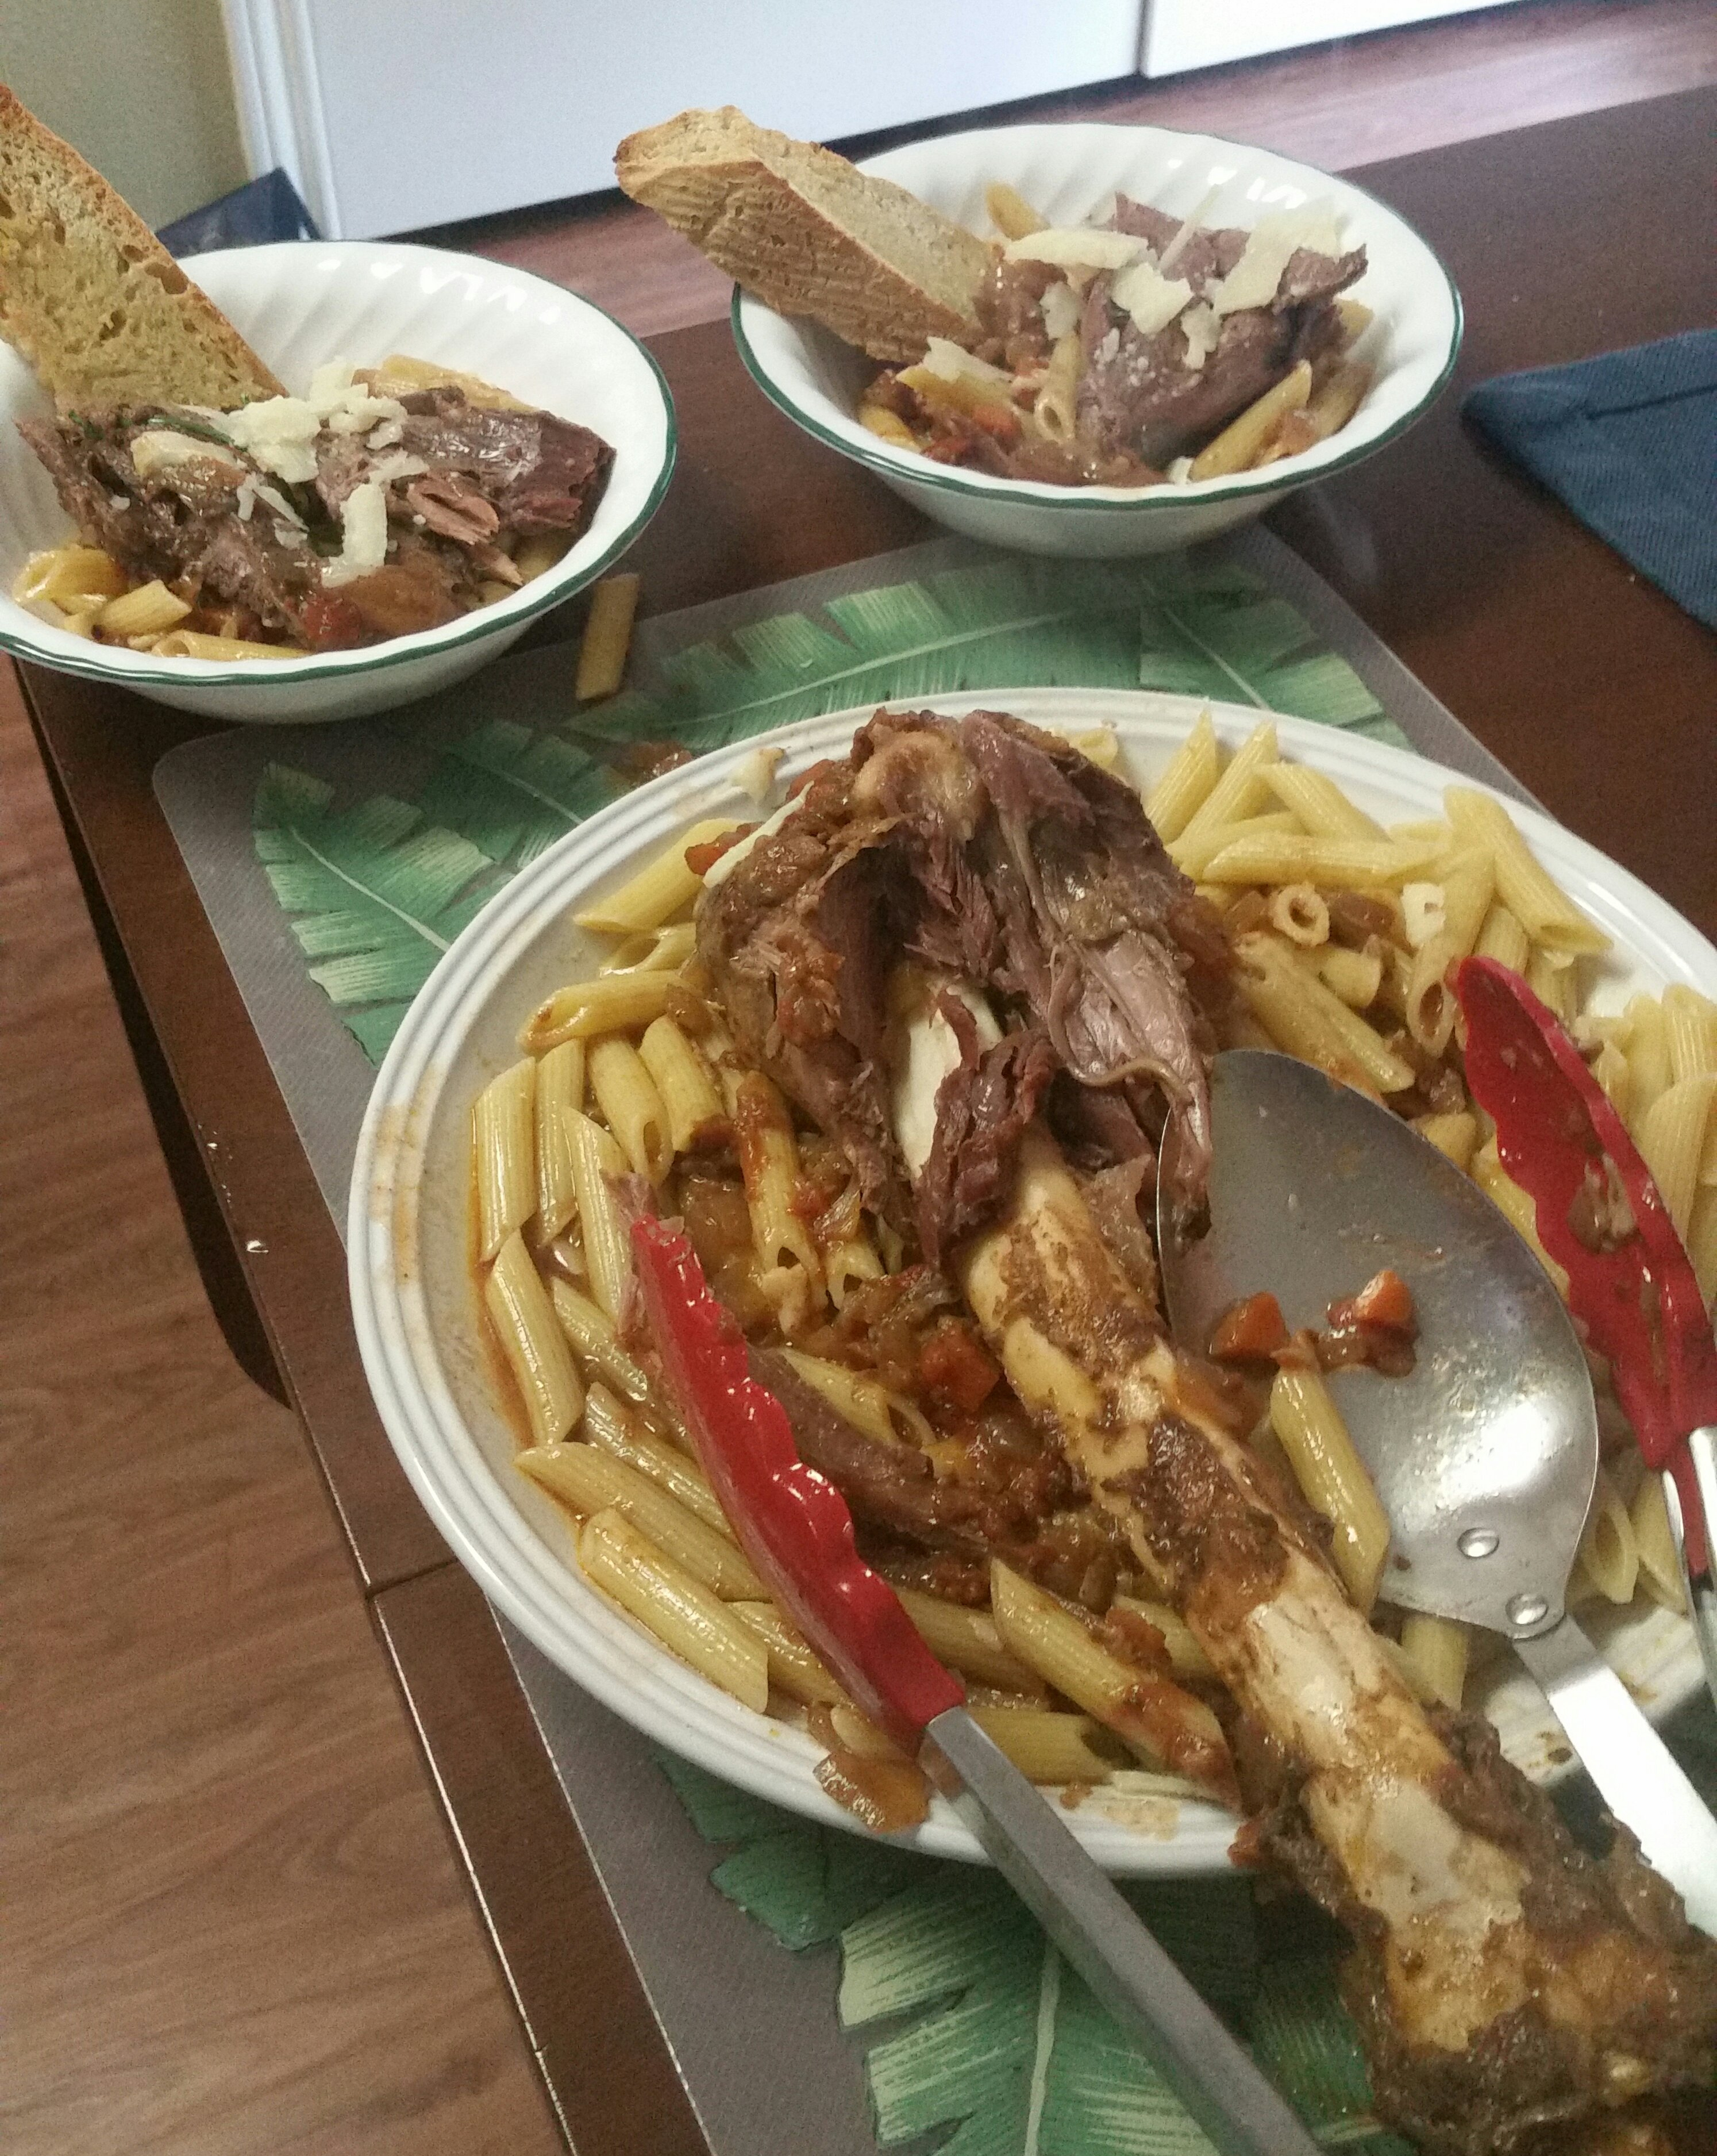
Over all, I would recommend the sous vide for shank and other cook-all-day cuts of venison, elk, nilgai, etc. There are specially made sous vide containers on the market that have lids that fit around the device preventing evaporation. They are available online and at restaurant supply stores. I will probably be picking one up. This method enabled me to prepare a recipe that I would otherwise have overlooked until much cooler weather had I required a long cook time in the oven.
Go for it. Save those shanks this season. Let me know how it goes.
How to Do a Birthday Cake at the Hunting Camp

The Deerslayer family recently converged at the ranch to celebrate two birthdays, Deerslayer’s and one daughter’s who drove in from college. Don’t forget that it’s been hotter than stink in Texas and the thought of heating up the cabin by baking a cake didn’t appeal to me one bit. I love my family dearly but no one wanted birthday cake if it meant that our one room camphouse/sleeping quarters would become too warm to, well, sleep in.
I solved the problem by baking my cake at home before we headed up to the hunting camp. I cooled the two layers of the chocolate cake, wrapped them in cling wrap, and froze them.

I packed the ingredients that I needed to assemble the cake on location: blackberry filling (aka blackberry jam), prepared (store-bought!) dark chocolate icing, sliced almonds (not shown above) and a cake carrier to be used to cart the left-over cake back to college with my Junior Deerslayer.

The frozen layers of cake were packed in our Yeti 65 cooler with the other foods that I cooked ahead of time and froze for the trip to cut back on on-site cooking time. Because everything that went into the cooler was already frozen, it was easier to keep everything that way for the 8 hour trip. I chose the Yeti 65 because it’s just the right size to hold frozen evening meals for 4 people for several days. The frozen foods plus frozen cake leave just enough room for a 10 lb. bag of ice.
Good meals, good cake, cool camp house. Priceless!
If you have any tips on transporting yummy desserts for hungry hunters, please share.
How to Keep it Cool When It’s Sooo Damned Hot!

It’s already been established in my last post that it’s hot as hell in the Texas Hill Country (as usual)! It doesn’t change the fact that there’s plenty of work that’s got to be done to get ready for the upcoming hunting seasons. Staying cool when there’s so much to do is a top priority. I don’t need to tell any of you that you need to stay hydrated, wear light colors, and use plenty of sunscreen. We take our Yeti Roadster cooler in the truck to carry cold drinks and some chilled fruit when we’re working on feeder pens and hunting blinds.
Of course, everyone will also need to eat and they will want to eat well after all the hard work they’ve done. Nobody, however, wants the stove or oven to heat up the camper, cabin, or ranch house no matter how delectable the meal. That’s why the meals should be carefully planned so that the indoors stay as cool as possible. Using the stove heats up the quarters less than using the oven. If you must use the stove, be sure to take hot skillets or pots outside after they’ve been used so they don’t continue to radiate heat. An even better alternative is to set up an outdoor propane stove, like the Camp Chef, Browning, or Coleman, so that all the heat stays outside.

When planning for breakfast, always make arrangements to have the accoutrements for coffee! There are several ways to prepare coffee for the hunting camp. See them here. Milk or cream, raw or white sugar, and artificial sweeteners. Recently, since it’s just Deerslayer and myself heading out to work, we’ve been going pretty light for the morning meal; cereal, fruit, breakfast muffins, and of course milk, juice, and coffee. A heavy meal in the morning before working in the hot sun can lower one’s productivity.
Everyone is usually ready to come in for lunch early because of the heat and I’ve been serving sandwiches (BLTs, ruebens, sliced turkey or venison), cold watermelon, and some chips or soup. I will usually cook up bacon ahead of time and bring it with me. Reheating it for sandwiches requires much less time at the stove than cooking it as needed. Don’t forget to take the skillet or griddle outside as soon as you’re finished with it if your aren’t cooking outside!
For dinner, I’ve come to rely on my sous vide cooker pretty heavily. Check here for more info about how it works. I can actually set it up before we head out to work in the afternoon. I use it for chicken and venison, preparing more than we need for our meal. The leftovers can be used the next day for tacos, tostadas (sometimes called chalupas), or hearty sandwiches. My next post will include instructions for using the sous vide to get several meals with leftovers.

The key is in the planning. I plan my menus out before we get to the ranch. That enables me to have what I need for my recipes (which are pretty simple) and make a grocery list.
Like most hunting ranches, ours is out in the middle of nowhere. A trip to the grocer would be more than an hour. Nothing is worse than planning and looking forward to wonderful Bacon, Lettuce, and Tomato sandwiches (BLTs) only to discover that there’s NO “L”!
As all the deer slayers and their wives know, this time of year can be brutal. But the reward will be great. Stay tuned for some recipes and prep tips.
Please share any tips of your own and your thoughts.
