The Deerslayer's Wife
Embracing the Hunting Lifestyle
Cranberry-Rubbish Muffins

One of my favorite movies is Sabrina, with Audrey Hepburn and Humphrey Bogart. Audrey has always been one of my idols. Stunningly beautiful, graceful, the definition of class, and she can make a souffle out of cracker crumbs and tomato juice! There was that scene in the movie where Sabrina, during a visit to Linus’ office, discovers some crackers, an egg, and some tomato juice in the kitchenette. (He has a pretty large office.) She takes the few ingredients and decides to make a souffle. Gotta love it. She never actually makes the souffle (probably much to the relief of Linus) but the fact that she knew she could was inspiring. That is the epitome of awesomeness. That ability to create a dish out of practically nothing is a gift that is particularly valuable today in these troubled times. I like to think that, if I had an 18 inch waist and a designer gown and some killer pumps, that I, too, could create something tasty from practically nothing.
I don’t think that anyone out there isn’t concerned about spending too much, saving for a rainy day, or wasting our resources, at least anyone who is reading this blog. These things are always in the back of my mind, which is why I recycle, eat exclusively wild game, rarely eat out, and buy groceries in bulk to save money. I hate to throw away food. I carefully plan meals for the week so that nothing is wasted.
At this point, I’d like to share just how cheap, thrifty, and un-Audrey-like I really am. This is the point where many followers may just step back, shaking their heads and walk sadly away. But difficult times call for creative measures. I’m sure that each of us has a story about reusing a coffee filter (or using a small square of t-shirt as a coffee filter, Jr. Deerslayer!) or squeezing a second or third cup of tea from a single sad teabag. This is the same kind of thing.
For many years, I’ve kept most of my kitchen staples in glass jars to keep them fresh, keep them close at hand, and keep bugs out (We lived in east Texas for a while) . If you look closely at most of my photos, you’ll see the jars in the background. I’ve always kept our cereal in the jars as well, Shredded Wheat and Fiber One. No more, no less, no frivolous sugary cereals! I discovered that, upon finishing up the cereal, there were always cereal crumbs left in the bottom of the jars. While I couldn’t convince my family to eat the cereal dust, even with starving children in India I couldn’t condemn the cereal debris to the rubbish bin either. I began collecting the crumbs to use in muffins. High fiber and all. I have a recipe that I have adapted for use with cereal debris. No need to crush perfectly good cereal for muffins. Every couple of weeks we end up with enough crumbs to make a batch. I collect the crumbs in a plastic container until I have enough. Everyone is happy… and regular!
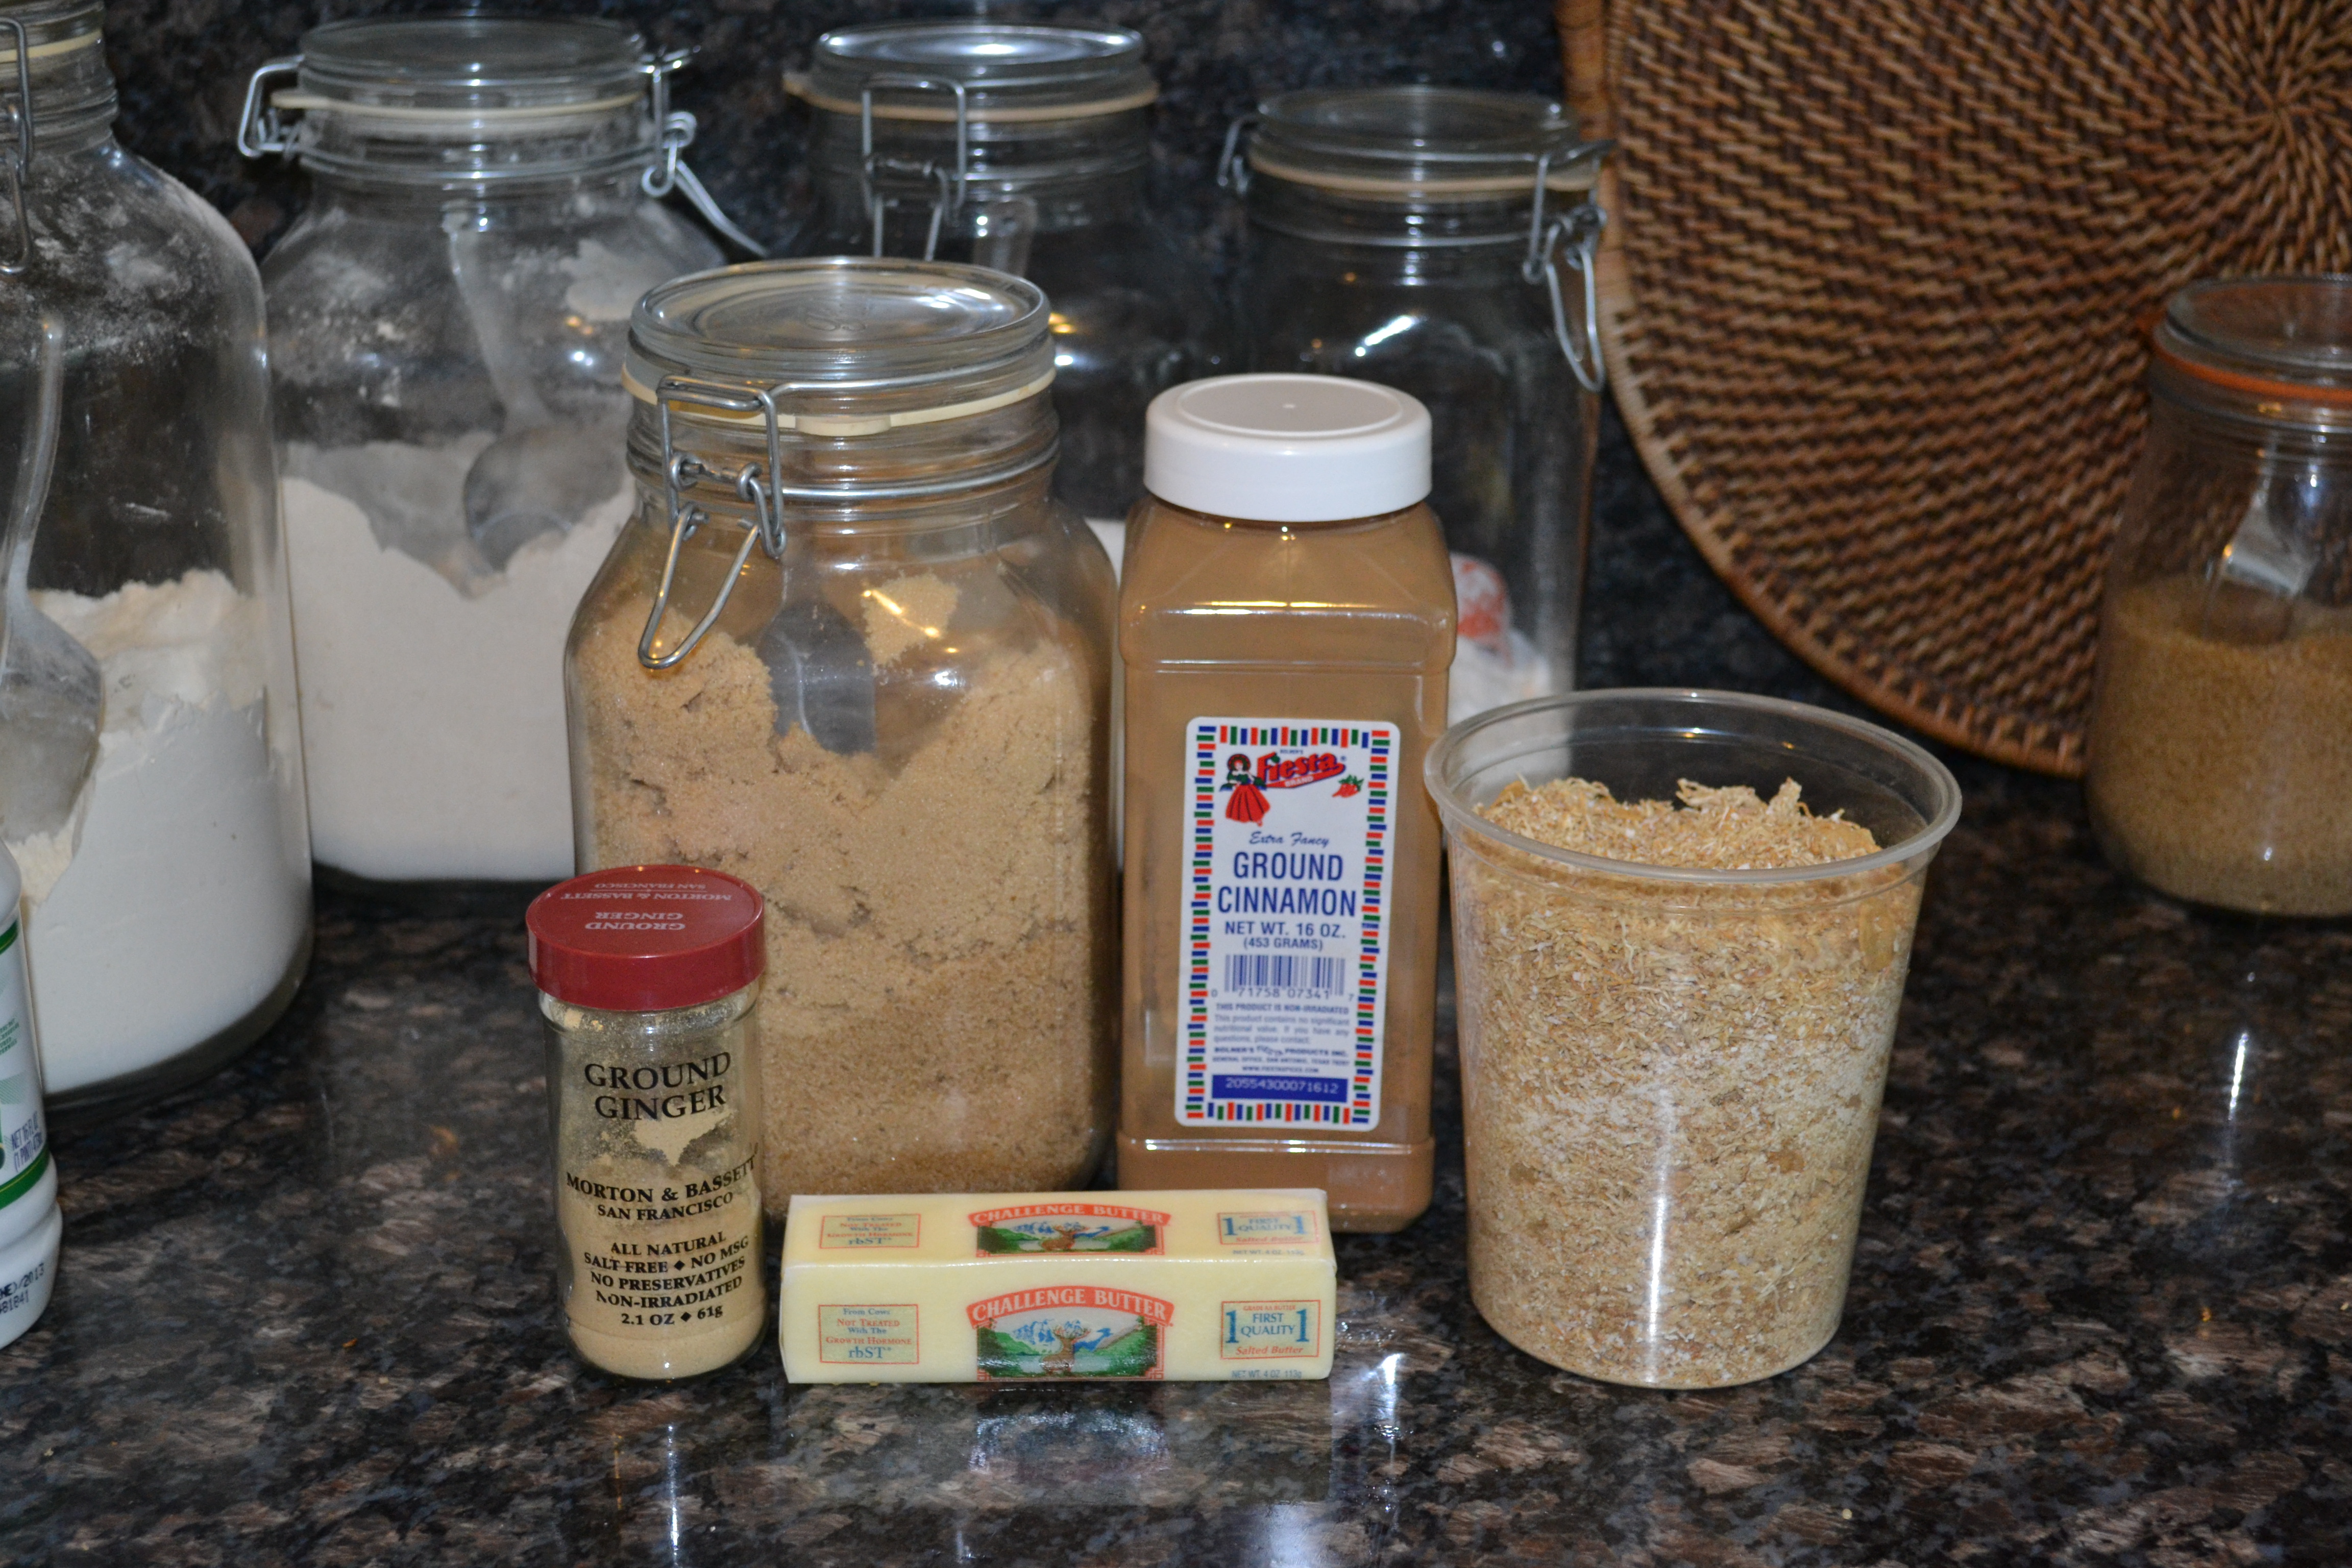
Crumb Topping
3 tbs. packed brown sugar
1 cup cereal crumbs
2 tbsp. flour
1/4 cup butter, melted
2 tsp. cinnamon
1/4 tsp. ground ginger

Muffins
1 1/4 cups flour
3/4 cup cereal crumbs
1/2 cup dried cranberries (or raisins or dried cherries)
1/3 cup brown sugar
2 tsp. baking powder
1 tsp. cinnamon
1 cup buttermilk
1 egg, slightly beaten
1/4 cup vegetable oil
To prepare topping:
Combine brown sugar, cereal crumbs, flour, melted butter, cinnamon, and ginger in a bowl. Set aside.
To prepare muffins:
Preheat oven to 400°F. Spray muffin pan with cooking spray w/ flour. Combine flour, cereal, cranberries, brown sugar, cinnamon and baking powder in a large bowl. Combine buttermilk, egg, vegetable oil in a separate bowl. Add to cereal mixture all at once, stirring just until moistened. Divide batter among muffin pans.

Top each muffin with about a tbsp. of crumb topping.


Bake for 20-25 minutes or until beautifully browned. Makes 12 muffins.
These muffins are perfect for taking on a hunting/camping trip. They’re also great to take out to the hunting blind!
Venison and Wild Pork Lasagna
I must say that I, like countless others, cannot imagine life without pasta. It simply wouldn’t be worth living. Bread, too. And anything with gluten. That said, I questioned whether or not I should even bother providing this recipe. Surely, everyone has a recipe for lasagna! Perhaps you do. Not the frozen kind in a box! Not even the kind with cottage cheese! The real deal. With real ingredients. Why not include meat that you have harvested yourself!
I have discovered in talking to other deerslayers and their wives that they simply haven’t broadened their scope of wild game recipes to include pasta dishes… yet! Everyone chicken-fries backstrap and a few grill some tenderloin. Many send their meat to a processor and bring home some summer sausage and some packaged steaks.
I’ve said from the start that it’s been my goal to broaden the culinary horizons of deerslayers and their families. Venison and wild pork are wonderful in so many recipes. I mentioned before that this year we mixed all of our ground venison with pork, 50/50, mainly because we ended up with less venison than pork. The wild pork is still pretty lean but adds a nice complexity of flavor that I really like. In addition we ground plenty of 100% pork because I love breakfast pan sausage. Packaged in one-pound zip bags, labeled, pressed flat for easy storage, and frozen, these become an easy go-to for countless meals. Meatloaf, hamburgers, spaghetti, lasagna, meatballs, or anything that you would use ground meat for.
Venison and Wild Pork Lasagna

1 lb. ground venison/wild pork mix (or beef)
Tommy’s salt & pepper mix
9 lasagna noodles
olive oil, a few glugs
6 cloves garlic, chopped
2 tsp. dried thyme approx.
28 oz. crushed tomatoes (2 cans)red wine, a splash
red pepper flakes
32 oz. ricotta cheese
2 eggs
salt & pepper to taste
2 tsp. Italian herb mix
16 oz. fresh mozzarella, torn
fresh basil
1. In a hot cast iron skillet, saute garlic and dried thyme in olive oil. Add crushed tomatoes, red pepper flakes, red wine, salt and pepper. Simmer for about 30 minutes on low heat.
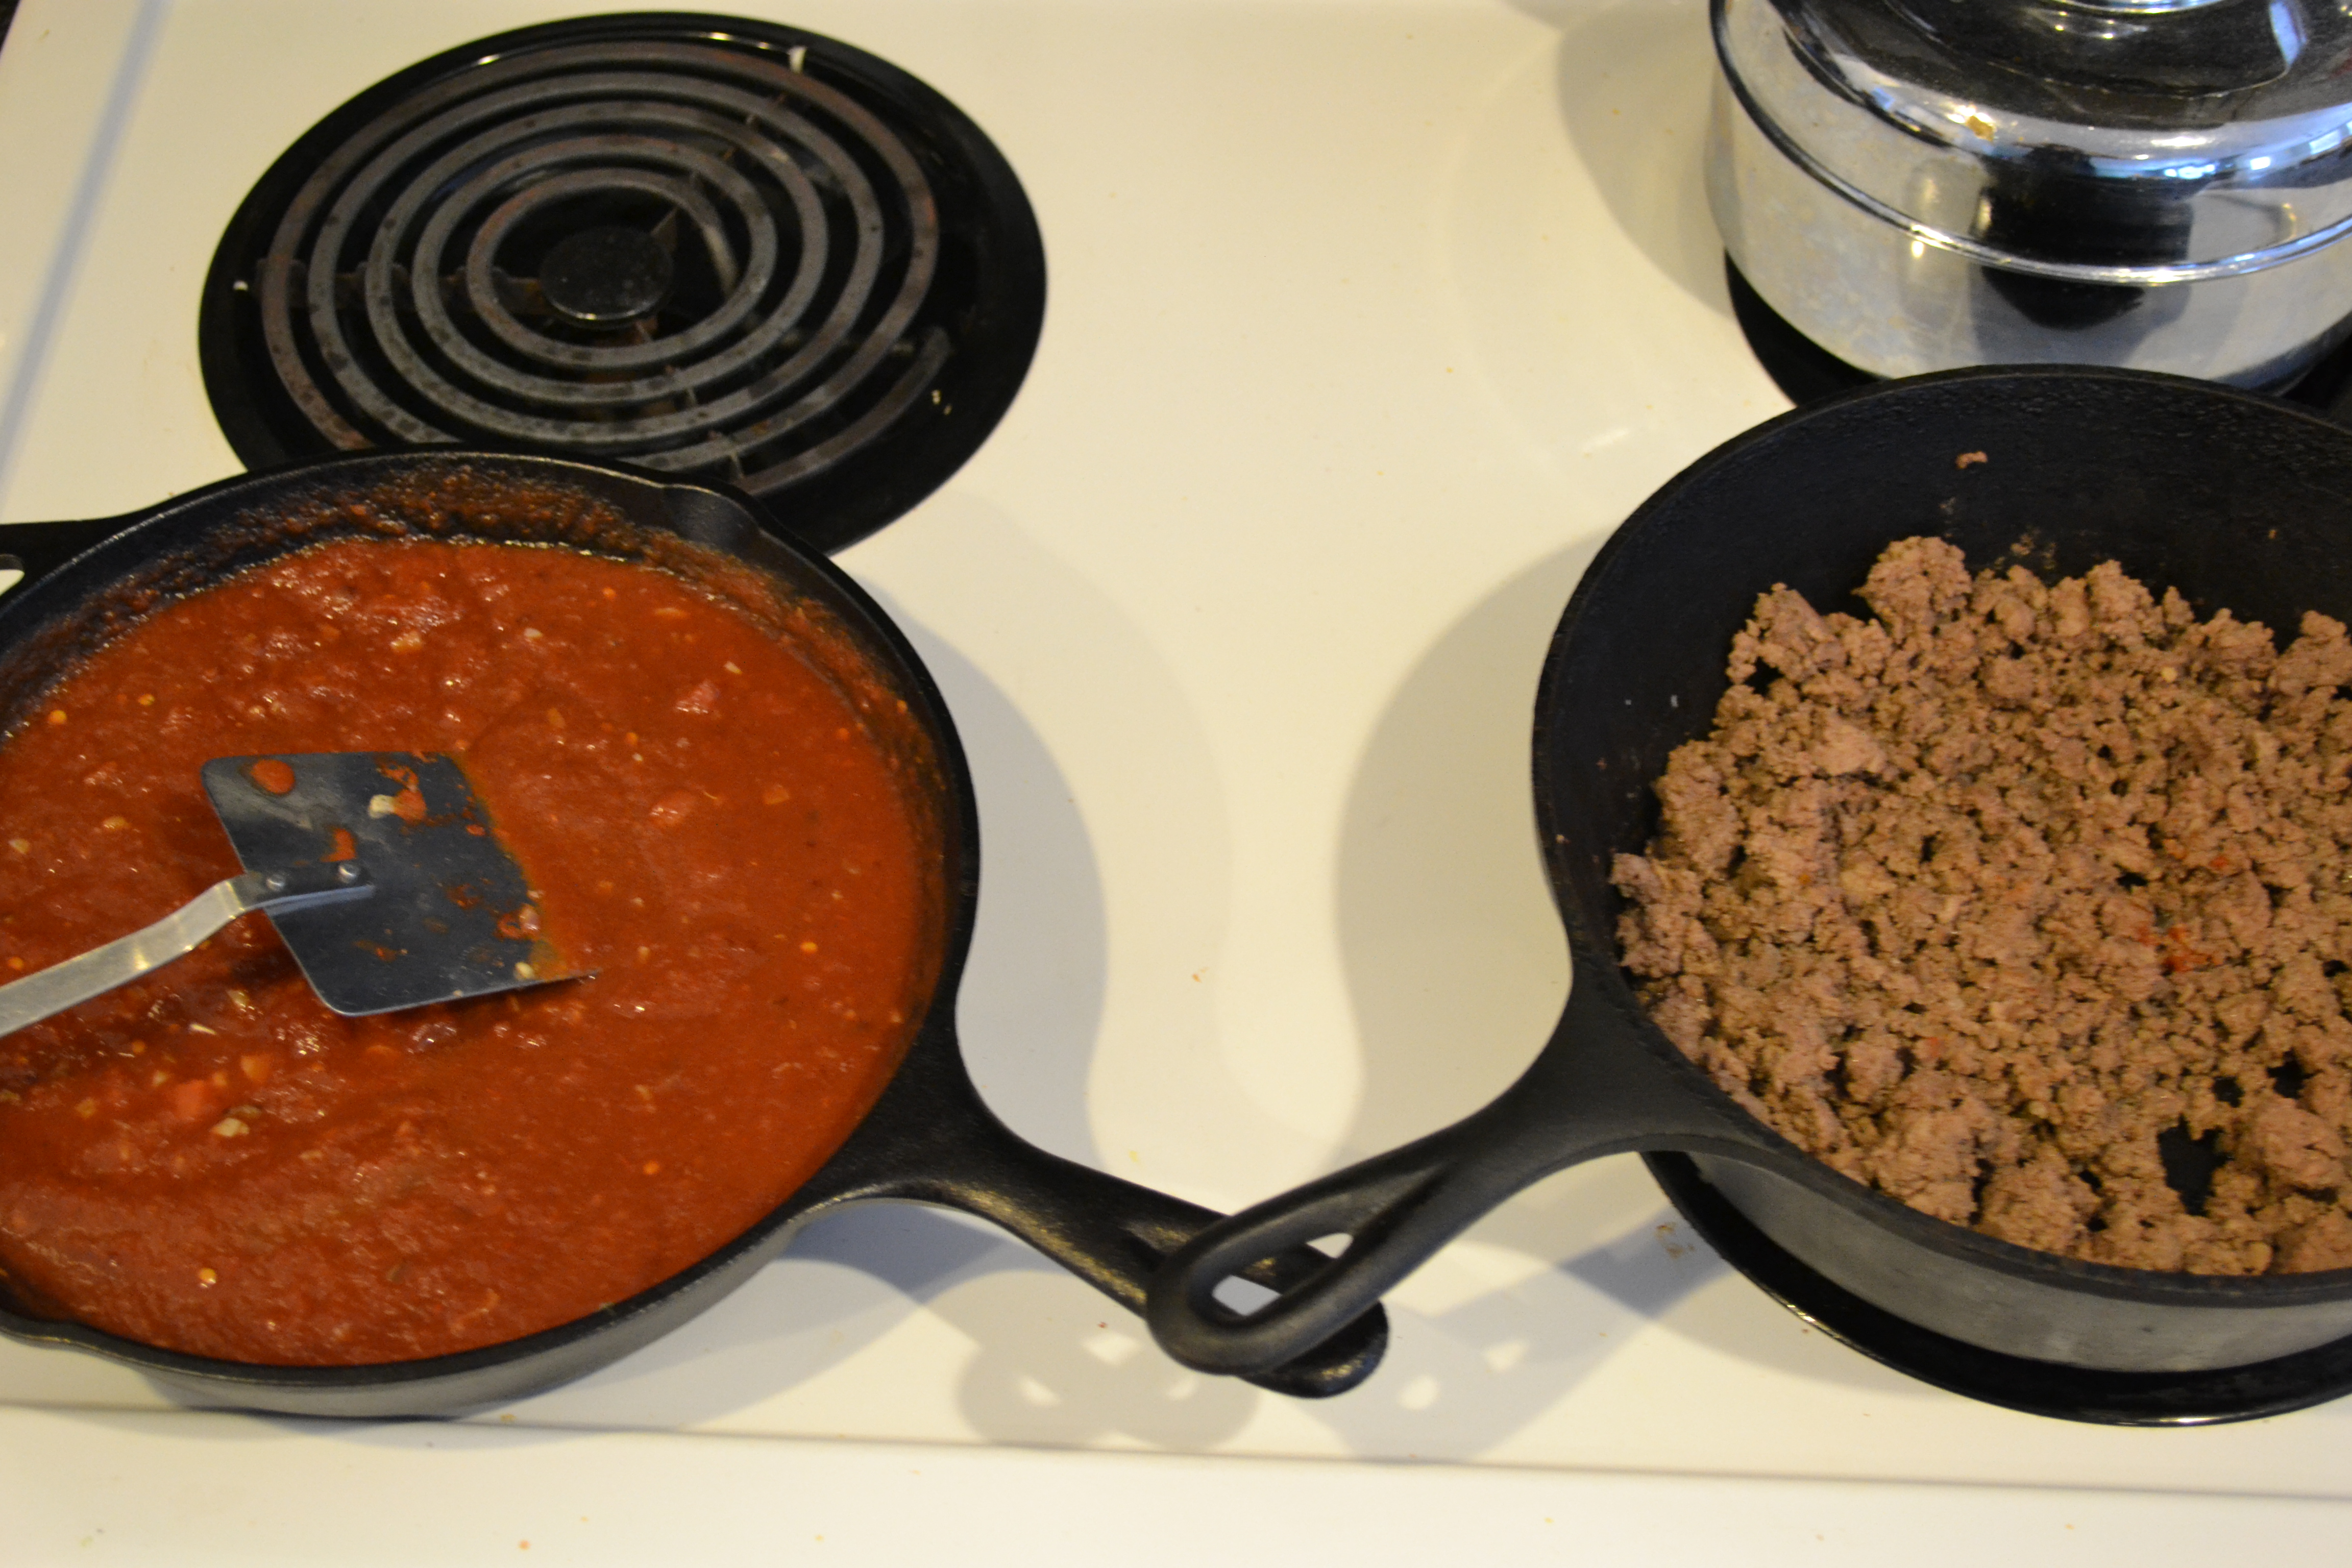
2. In another skillet, brown ground meat, seasoned with salt and pepper mix. Ground venison does not need to be drained. There is no fat to render out. It will, however, release some water. I always leave it in since it is like a delicious stock. Add tomato mixture to browned meat. Continue simmering.
3. In a bowl, mix ricotta cheese, two eggs, salt, and thyme until smooth.
4. Prepare 9 lasagna noodles according to package directions
.*PLEASE NOTE THAT MY JUNIOR DEERSLAYER, BLESS HER HEART, ACCIDENTALLY PICKED UP LASAGNA NOODLES THAT DON’T NEED TO BE BOILED AHEAD. FYI…. DON’T USE THESE. We found them lacking in texture and “toothiness” that pasta lovers know and recognize.

Set up a work station with noddles, ricotta mixture, meat sauce, and mozzarella
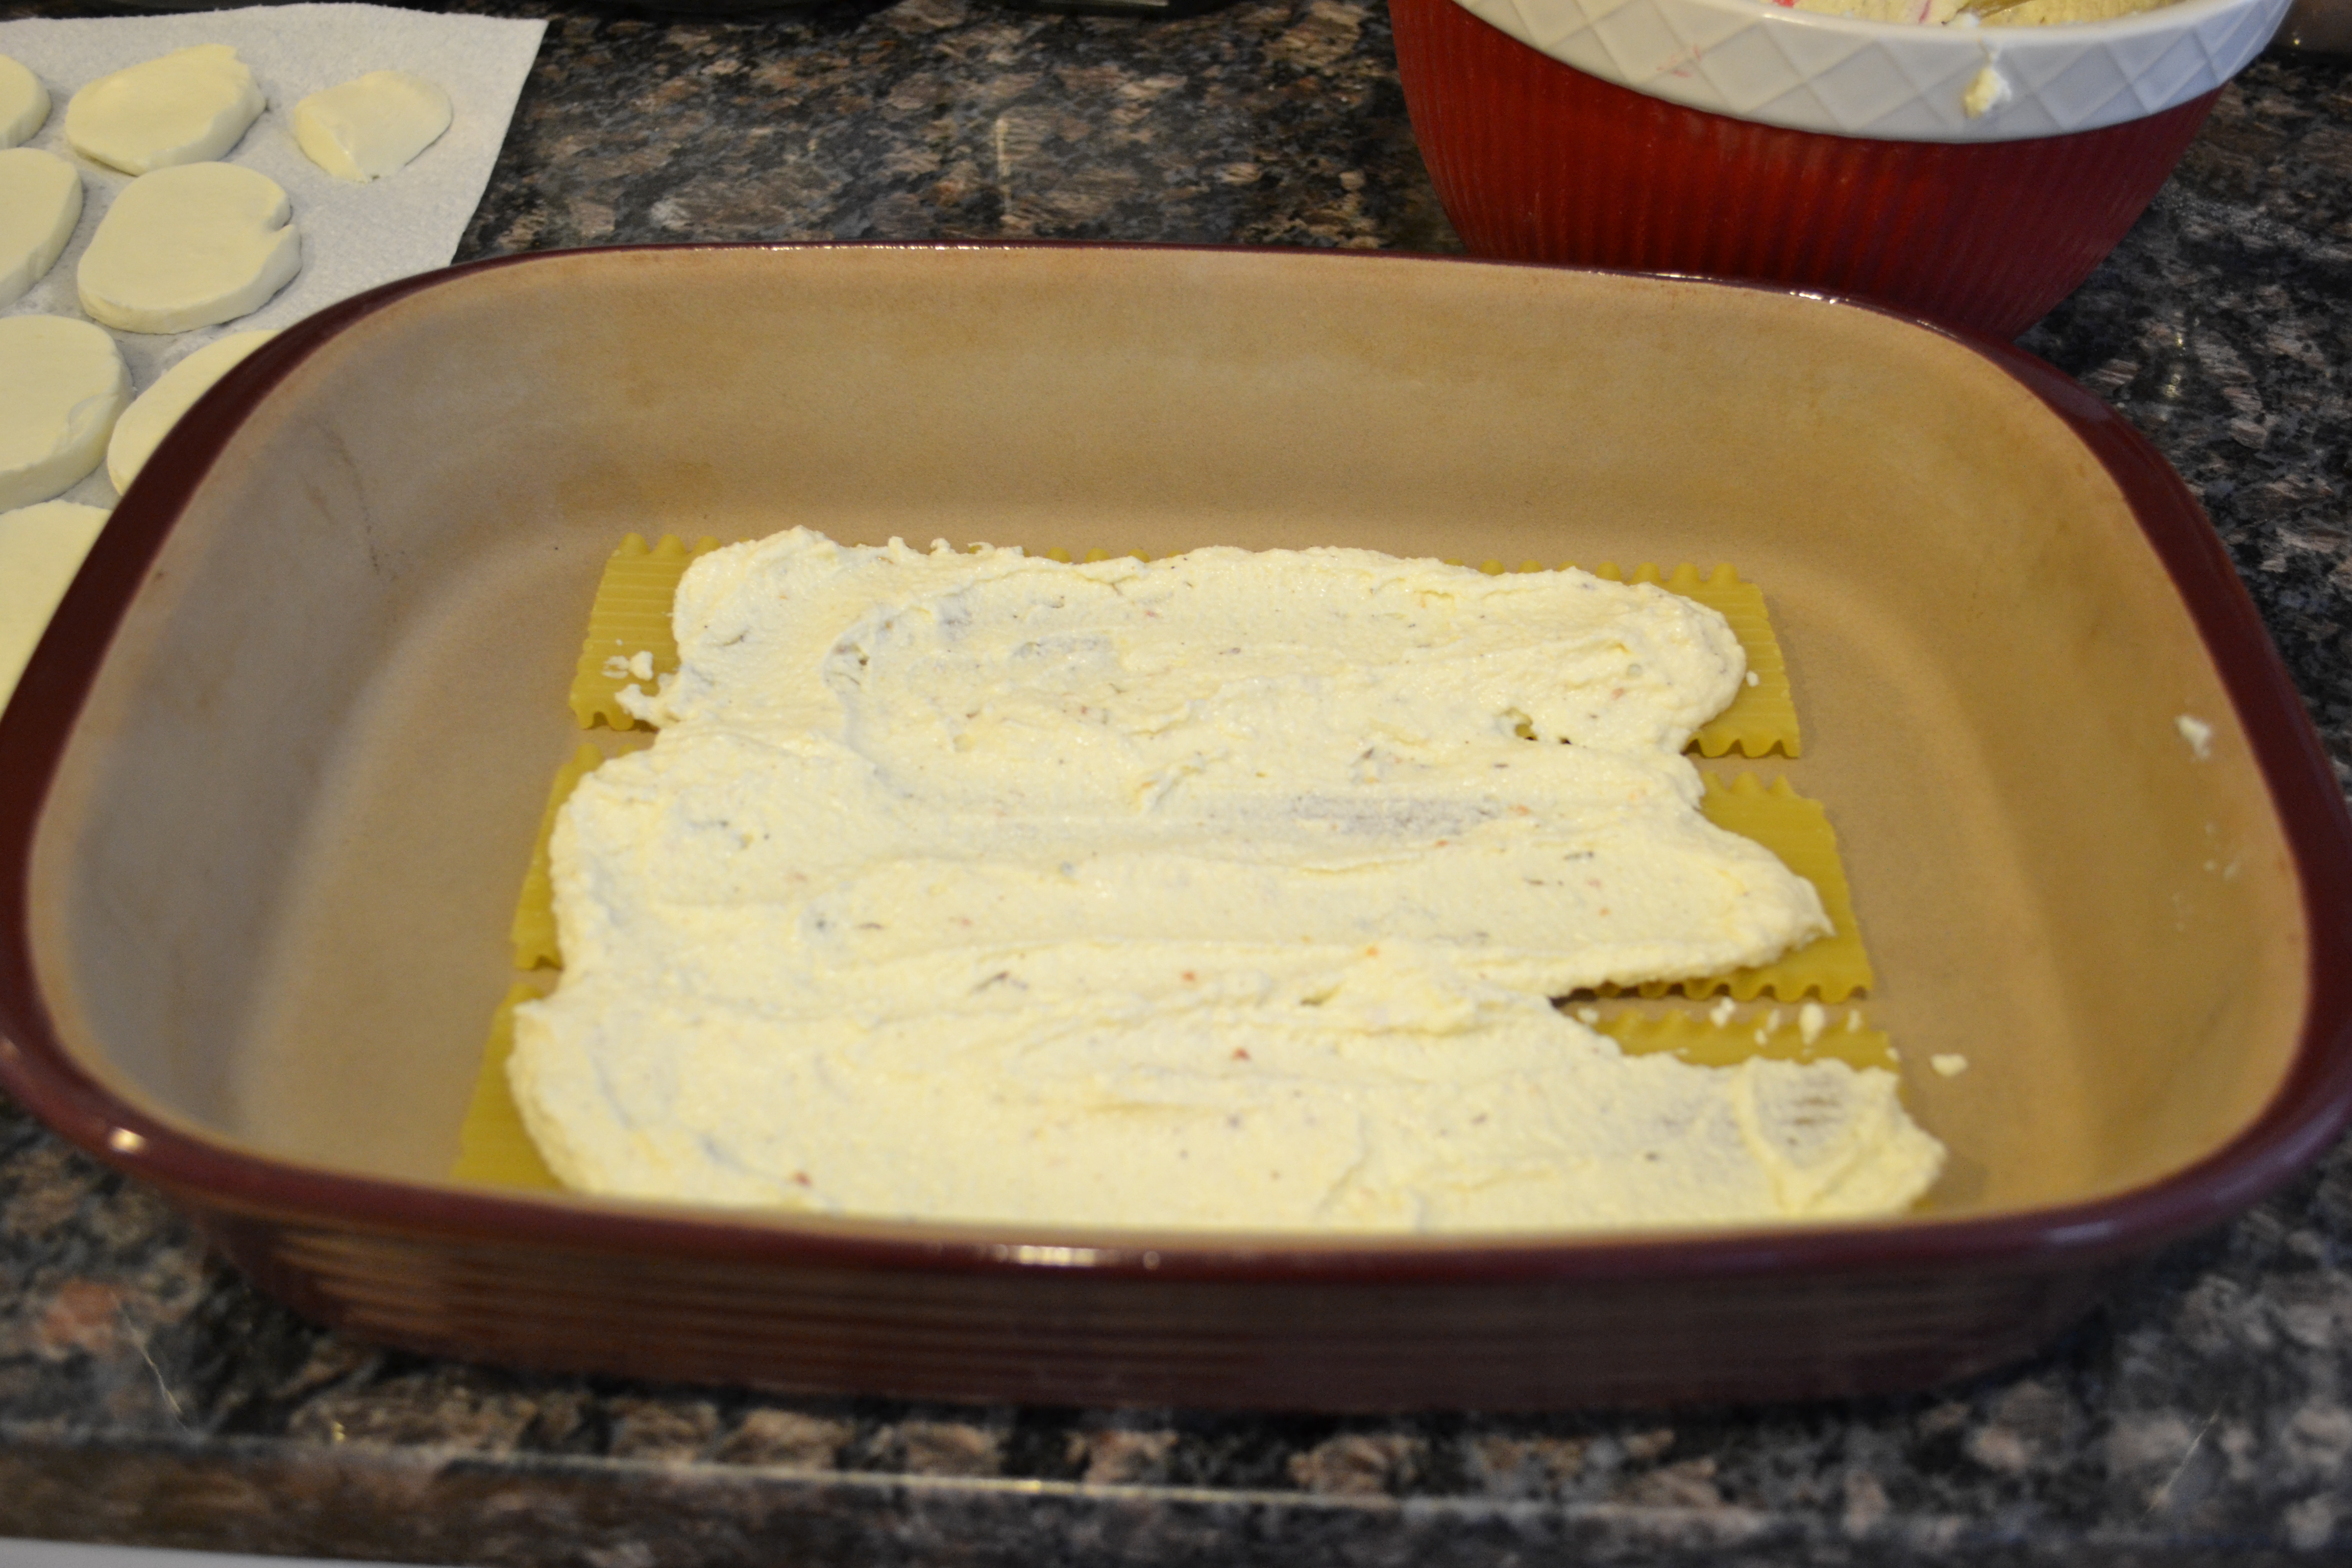
5. In a 9 x 13 baking dish, layer 3 lasagna noodles across the bottom. Spread half the ricotta mixture atop the noodles. I use a rubber spatula for this.
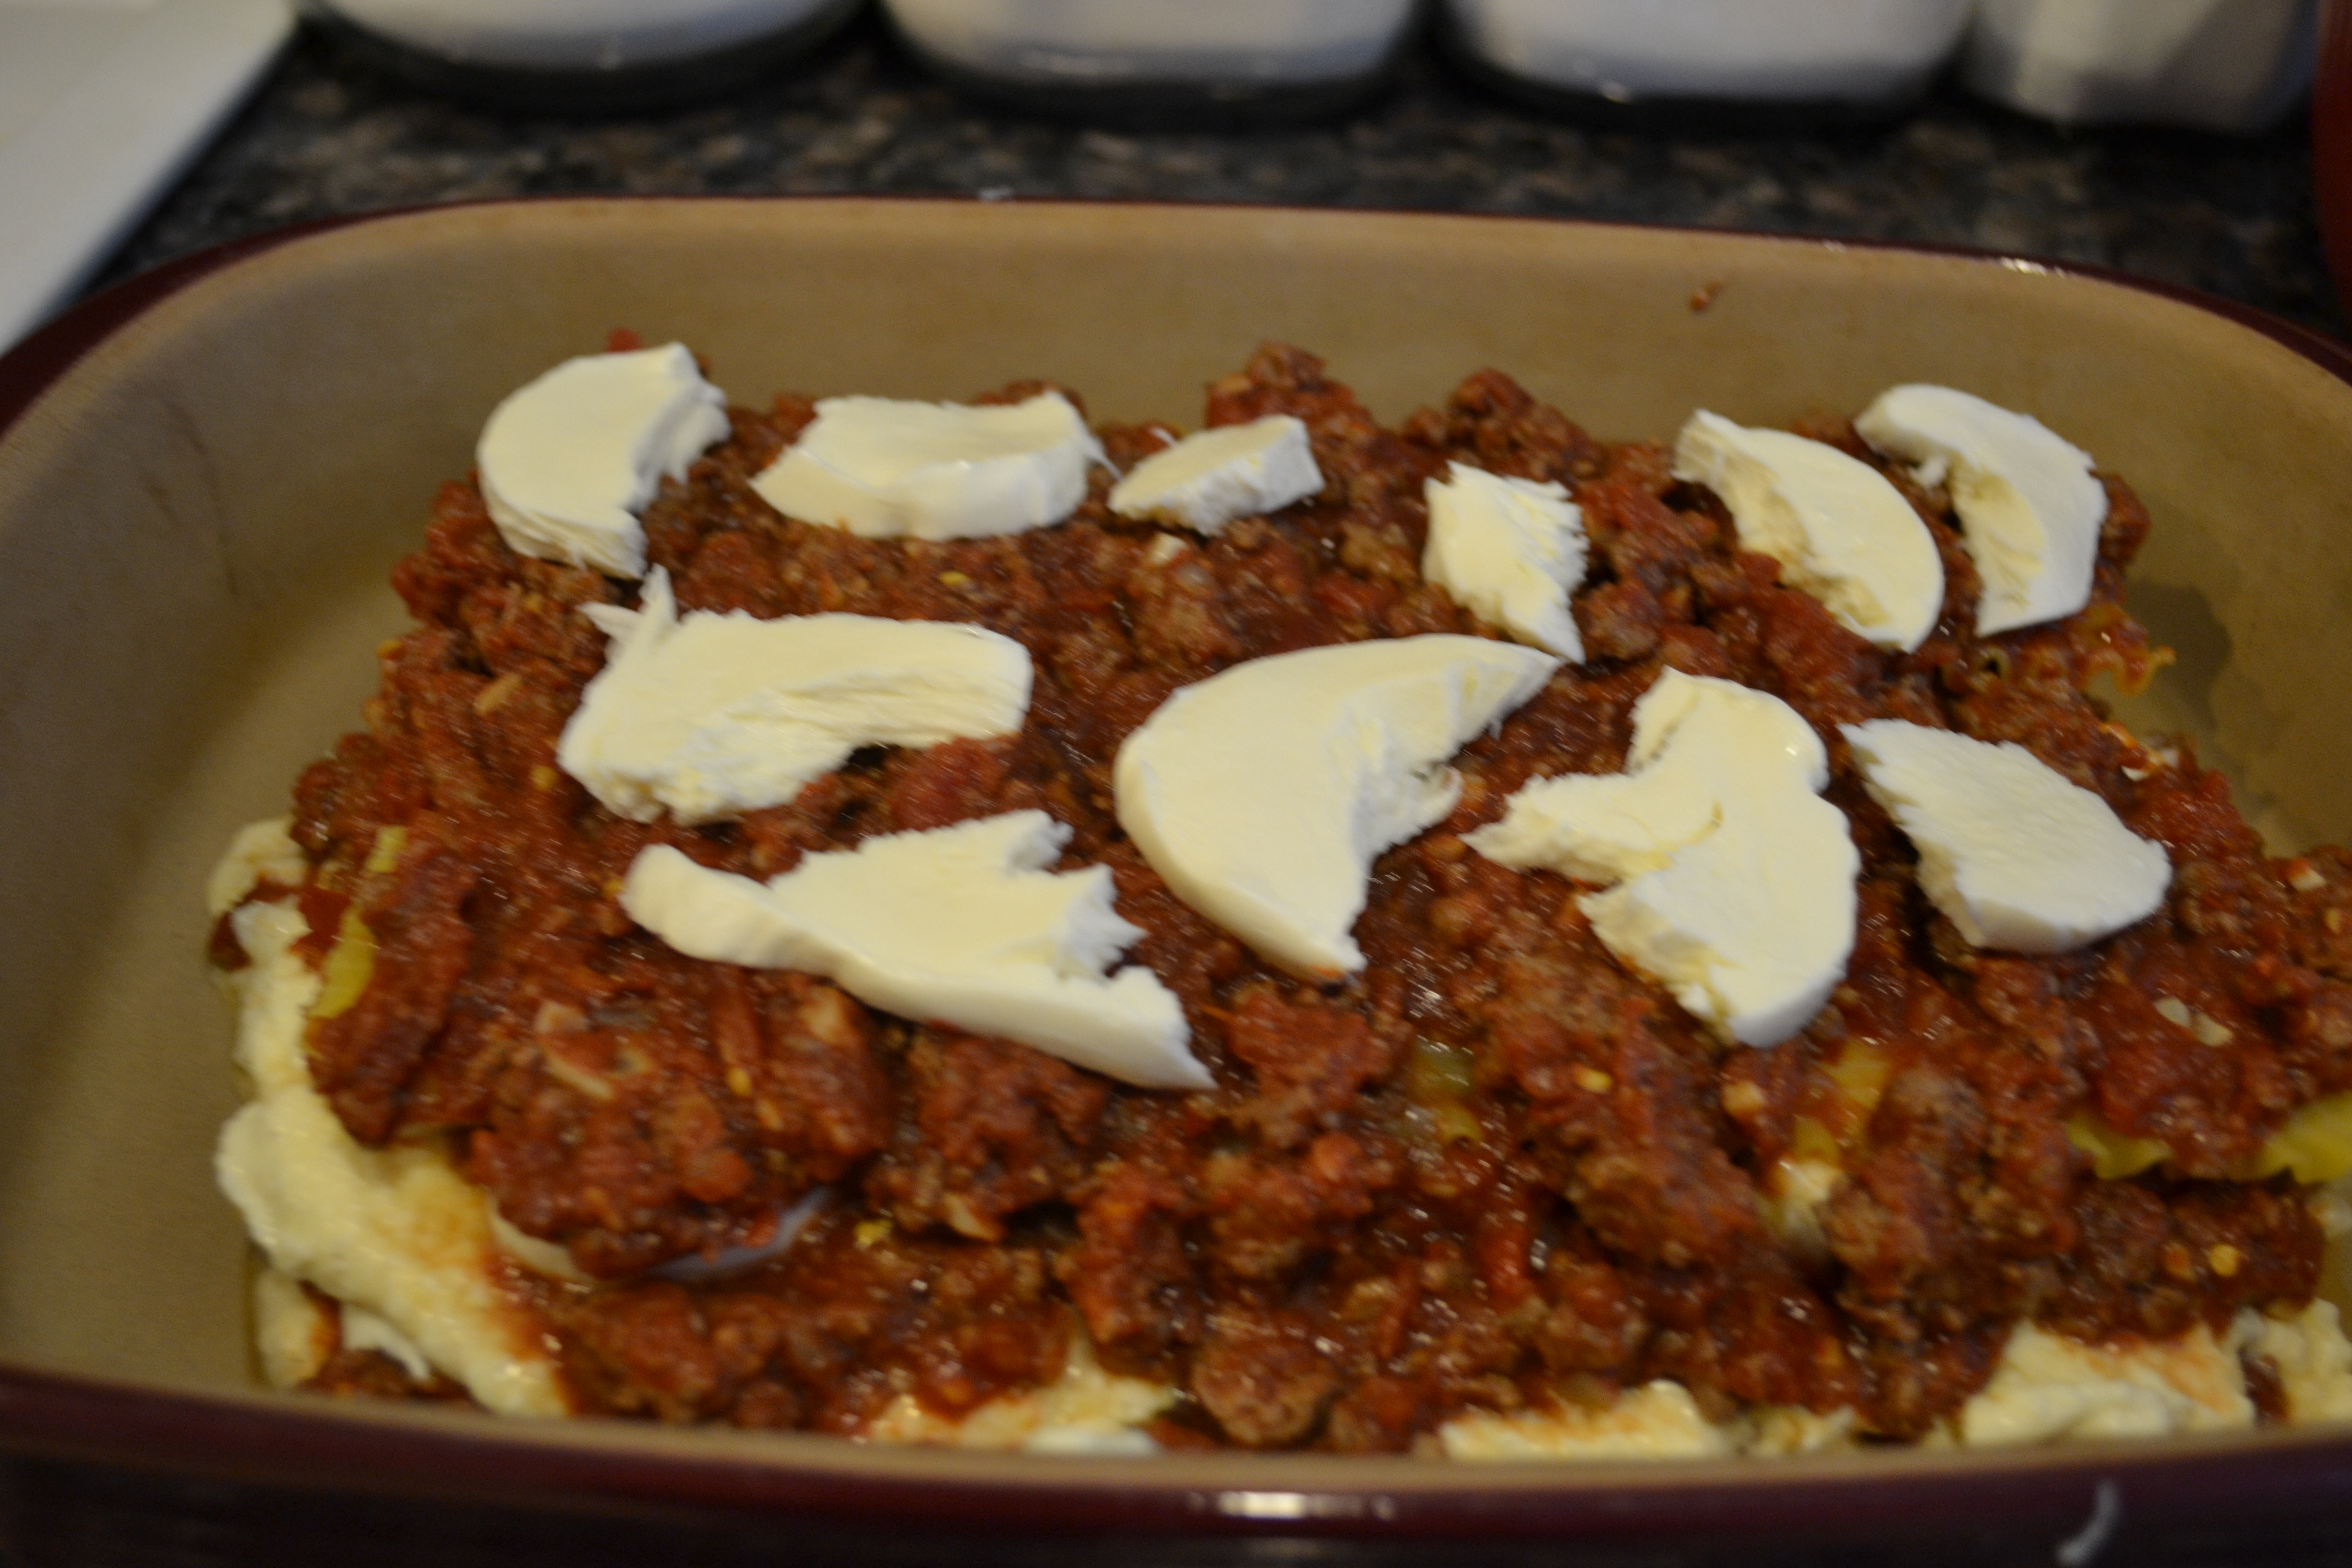
Cover the ricotta with approx. 1/3 of the meat sauce, followed by a layer of torn mozzarella. Fresh mozzarella should be dried on a paper towel.

Continue the layering process until the 3rd layer of lasagna noodles has been spread. This is the top layer and should be spread with remaining sauce to cover noodles completely. It is important that the noodles be covered completely so that they do not dry out. Mozzarella should top the lasagna to your liking.
6. Bake in a 350 degree oven for about 1 hour or bubbly and cheese is melted.
7. Allow to rest for 10 to 15 minutes before serving to allow lasagna to set so moisture can be reabsorbed and cutting will be easier.
8. Enjoy!
Waste Not Want Not

Venison Bolillo Tortas (Sandwiches)
I’ve said before that, when it comes to hunting, it’s important to me to use as much of a harvested animal as possible. While my part in the hunting process is limited to preparation of the meat, I feel strongly about not having any waste. If an animal is harvested, we should use every bit. My recipes reflect this philosophy as much as my family’s choice to process our own meat, making use of every possible cut.
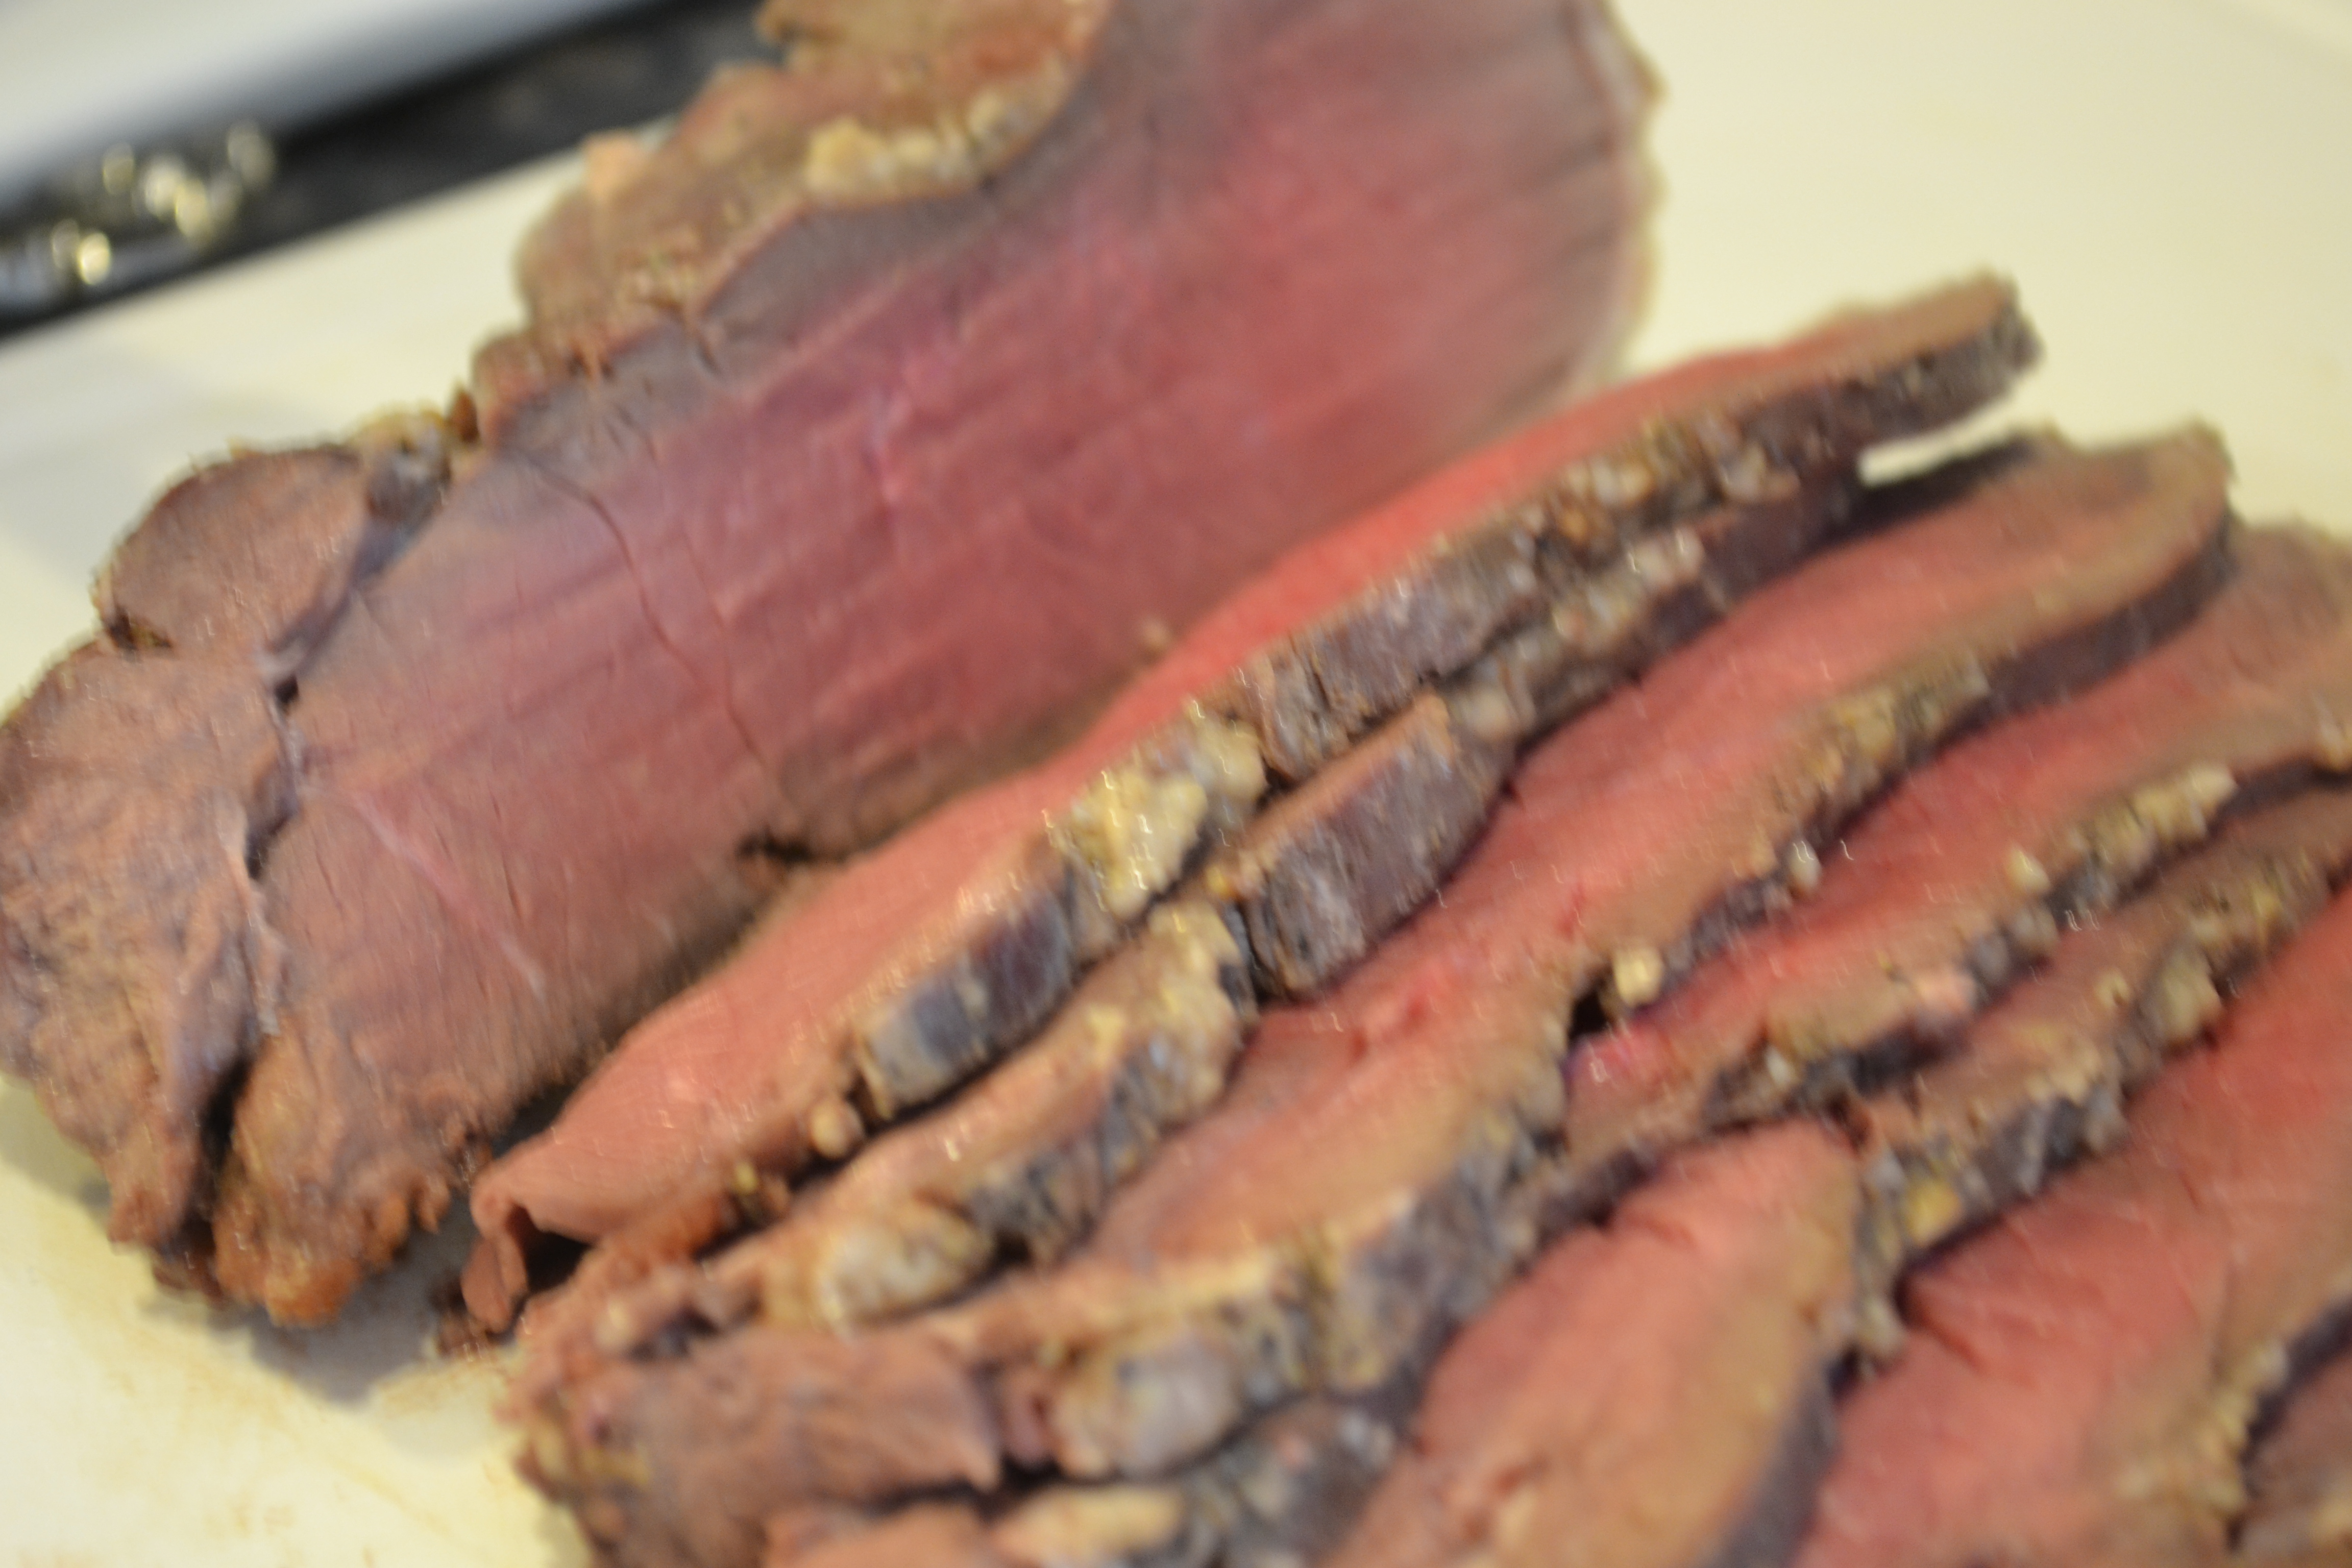
Previously, I’ve shared my recipe for bacon-wrapped garlic venison roast. It’s a favorite with my family. Often, we will have leftovers. I created the following recipe to use any leftover slices of roast. The slices should be rare to medium rare. Any end bits are too overcooked for this sandwich recipe and can be thrown into a zip bag and frozen for later use in soup, stew, or pot pie
*On a separate note, it has been brought to my attention by an unnamed junior deerslayer that sometimes my recipes have not photographed as appetizingly as they are in real life. Apparently, I will be editing some of my previous posts (this one, included) by producing some more visually-appealing photos. Stay tuned.
Venison Bolillo Tortas (Sandwiches)
pronounced bo-lee-yo

Thinly sliced venison (leftover from a roast), nice and rare
Bolillos (Mexican Rolls)
1 large onion, sliced
Approx. 20 oz. Baby Bella mushrooms, sliced (2 bags)
1 1/2 sticks of butter
Tommy’s Secret Salt & Pepper Mix
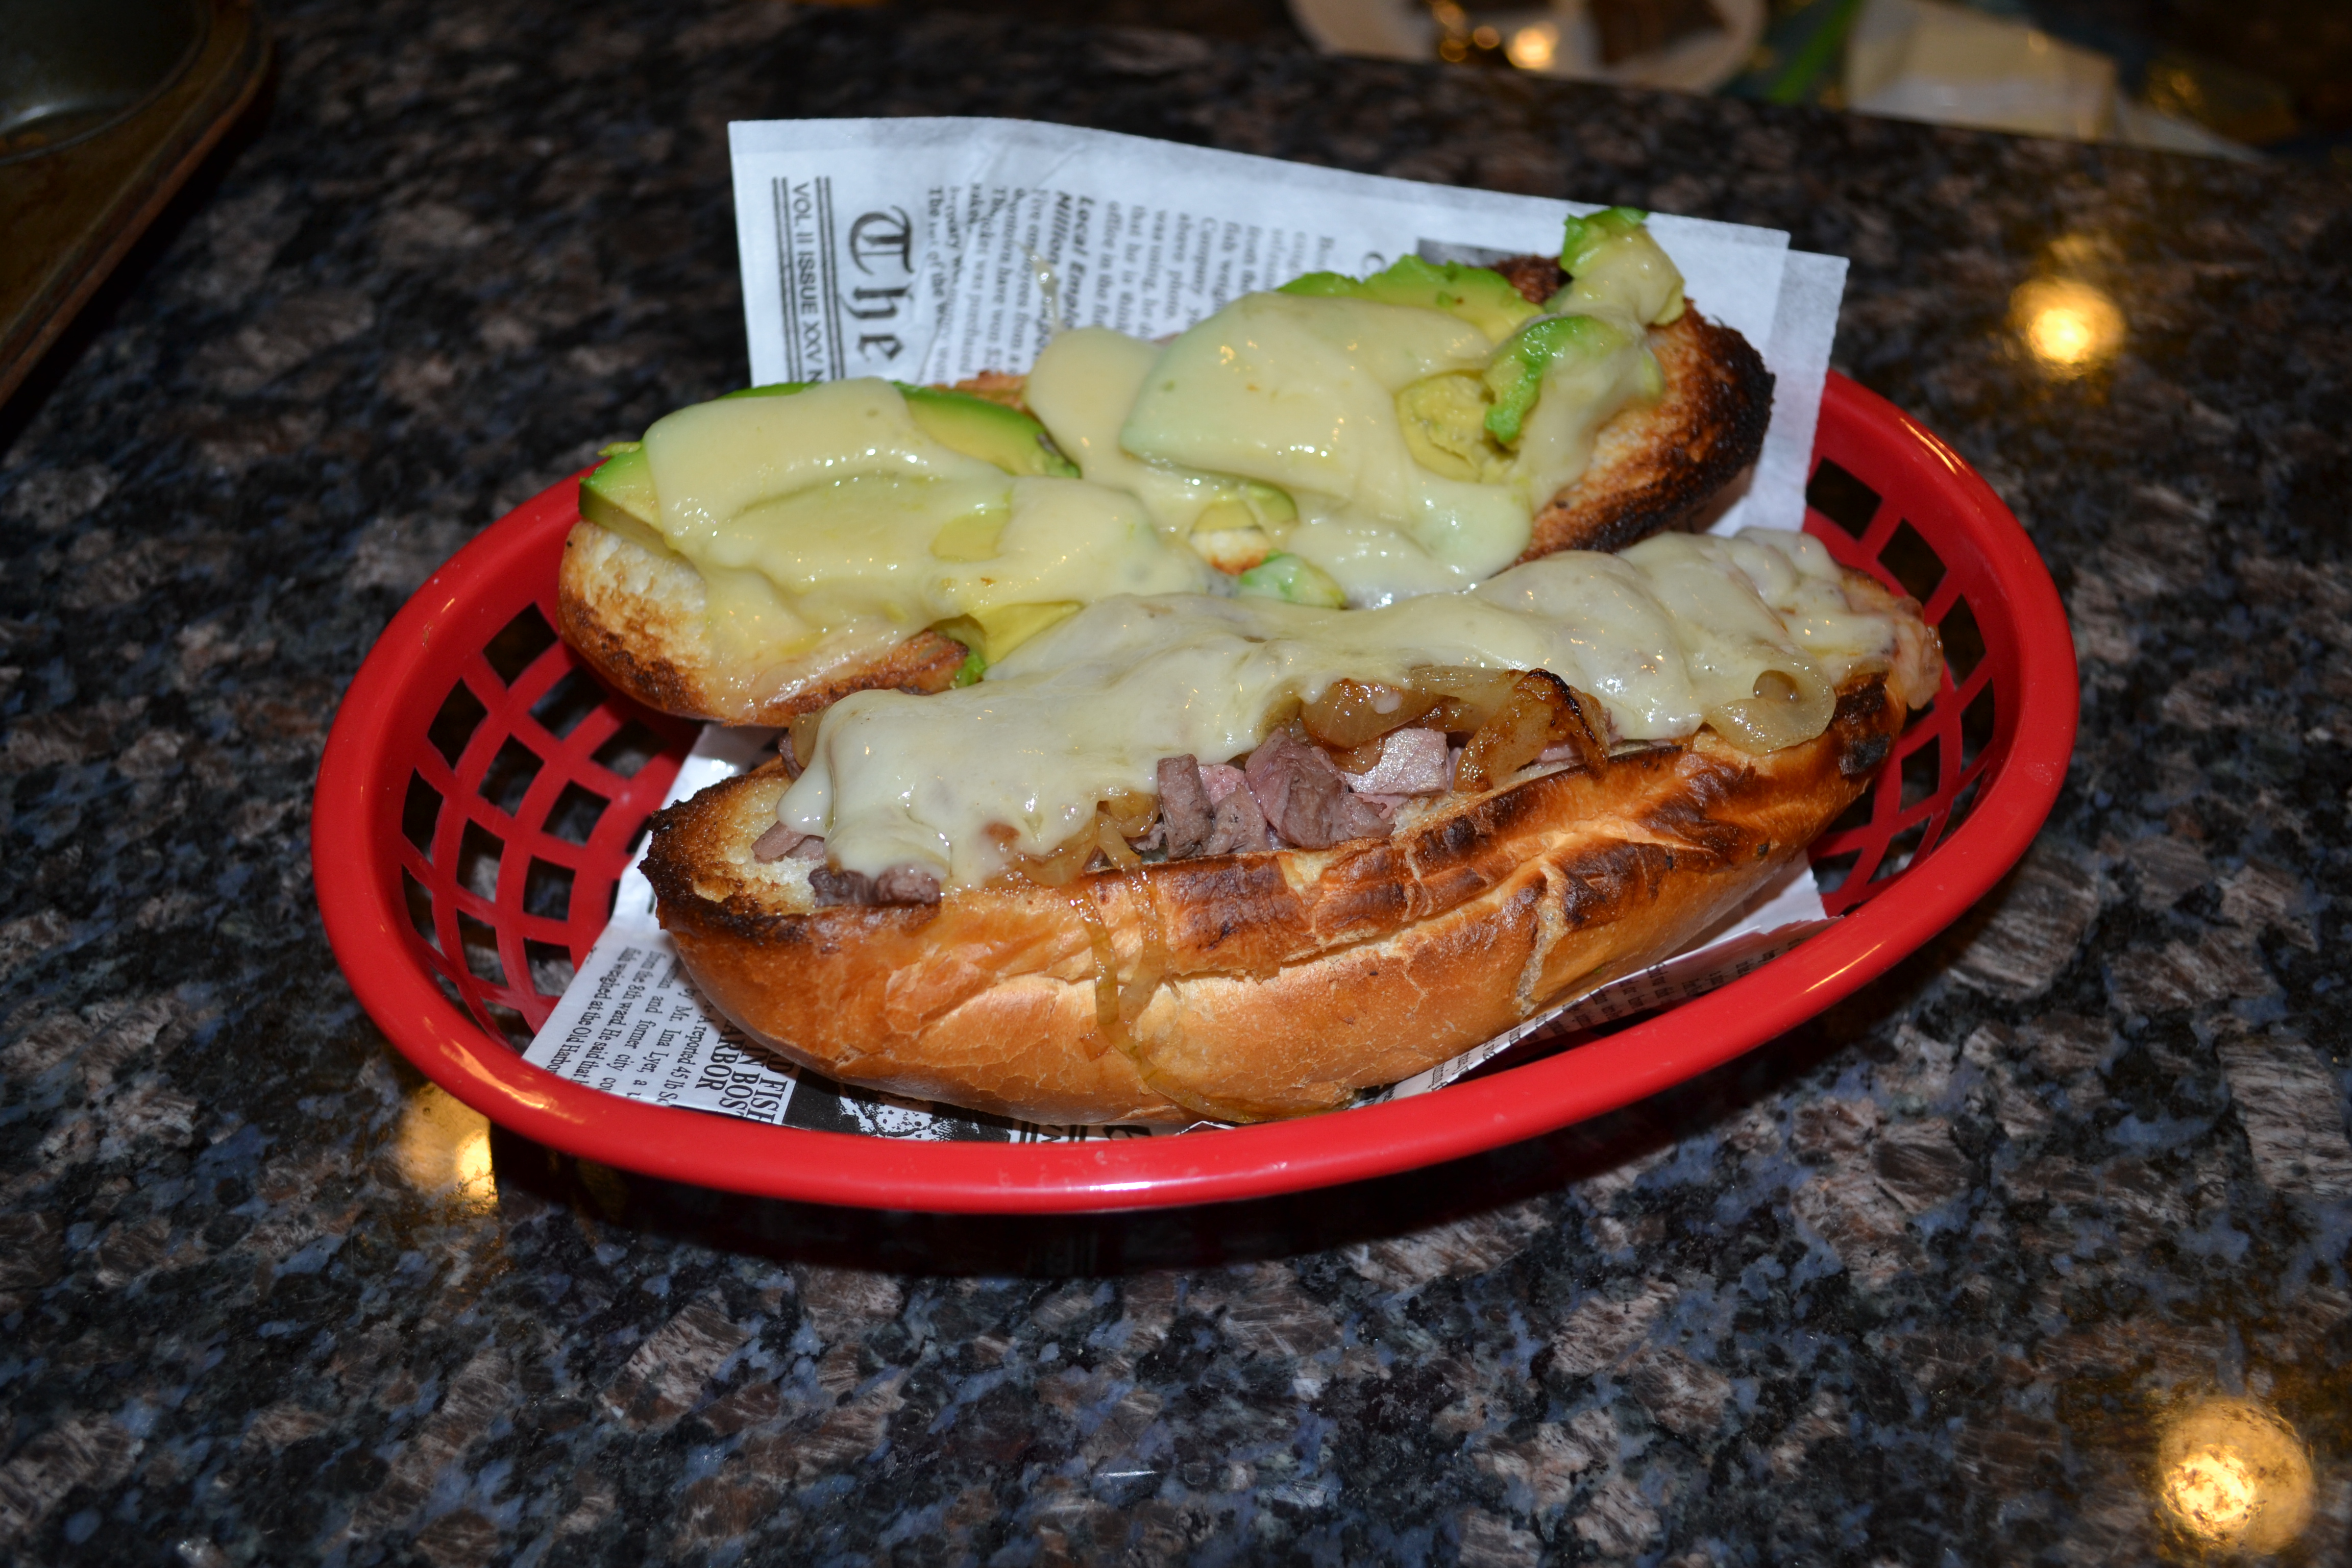
Sliced avocado
Thinly sliced Swiss or cheddar cheese (enough for each sandwich)
Spicy, stone ground mustard and/or
Horseradish sauce w/ mayo
(You may notice that there is no avocado in the photo. I make no excuses. Sorry, I forgot.)
- 1. Thinly slice leftover rare venison roast, carefully removing any sinewy and gristly bits
.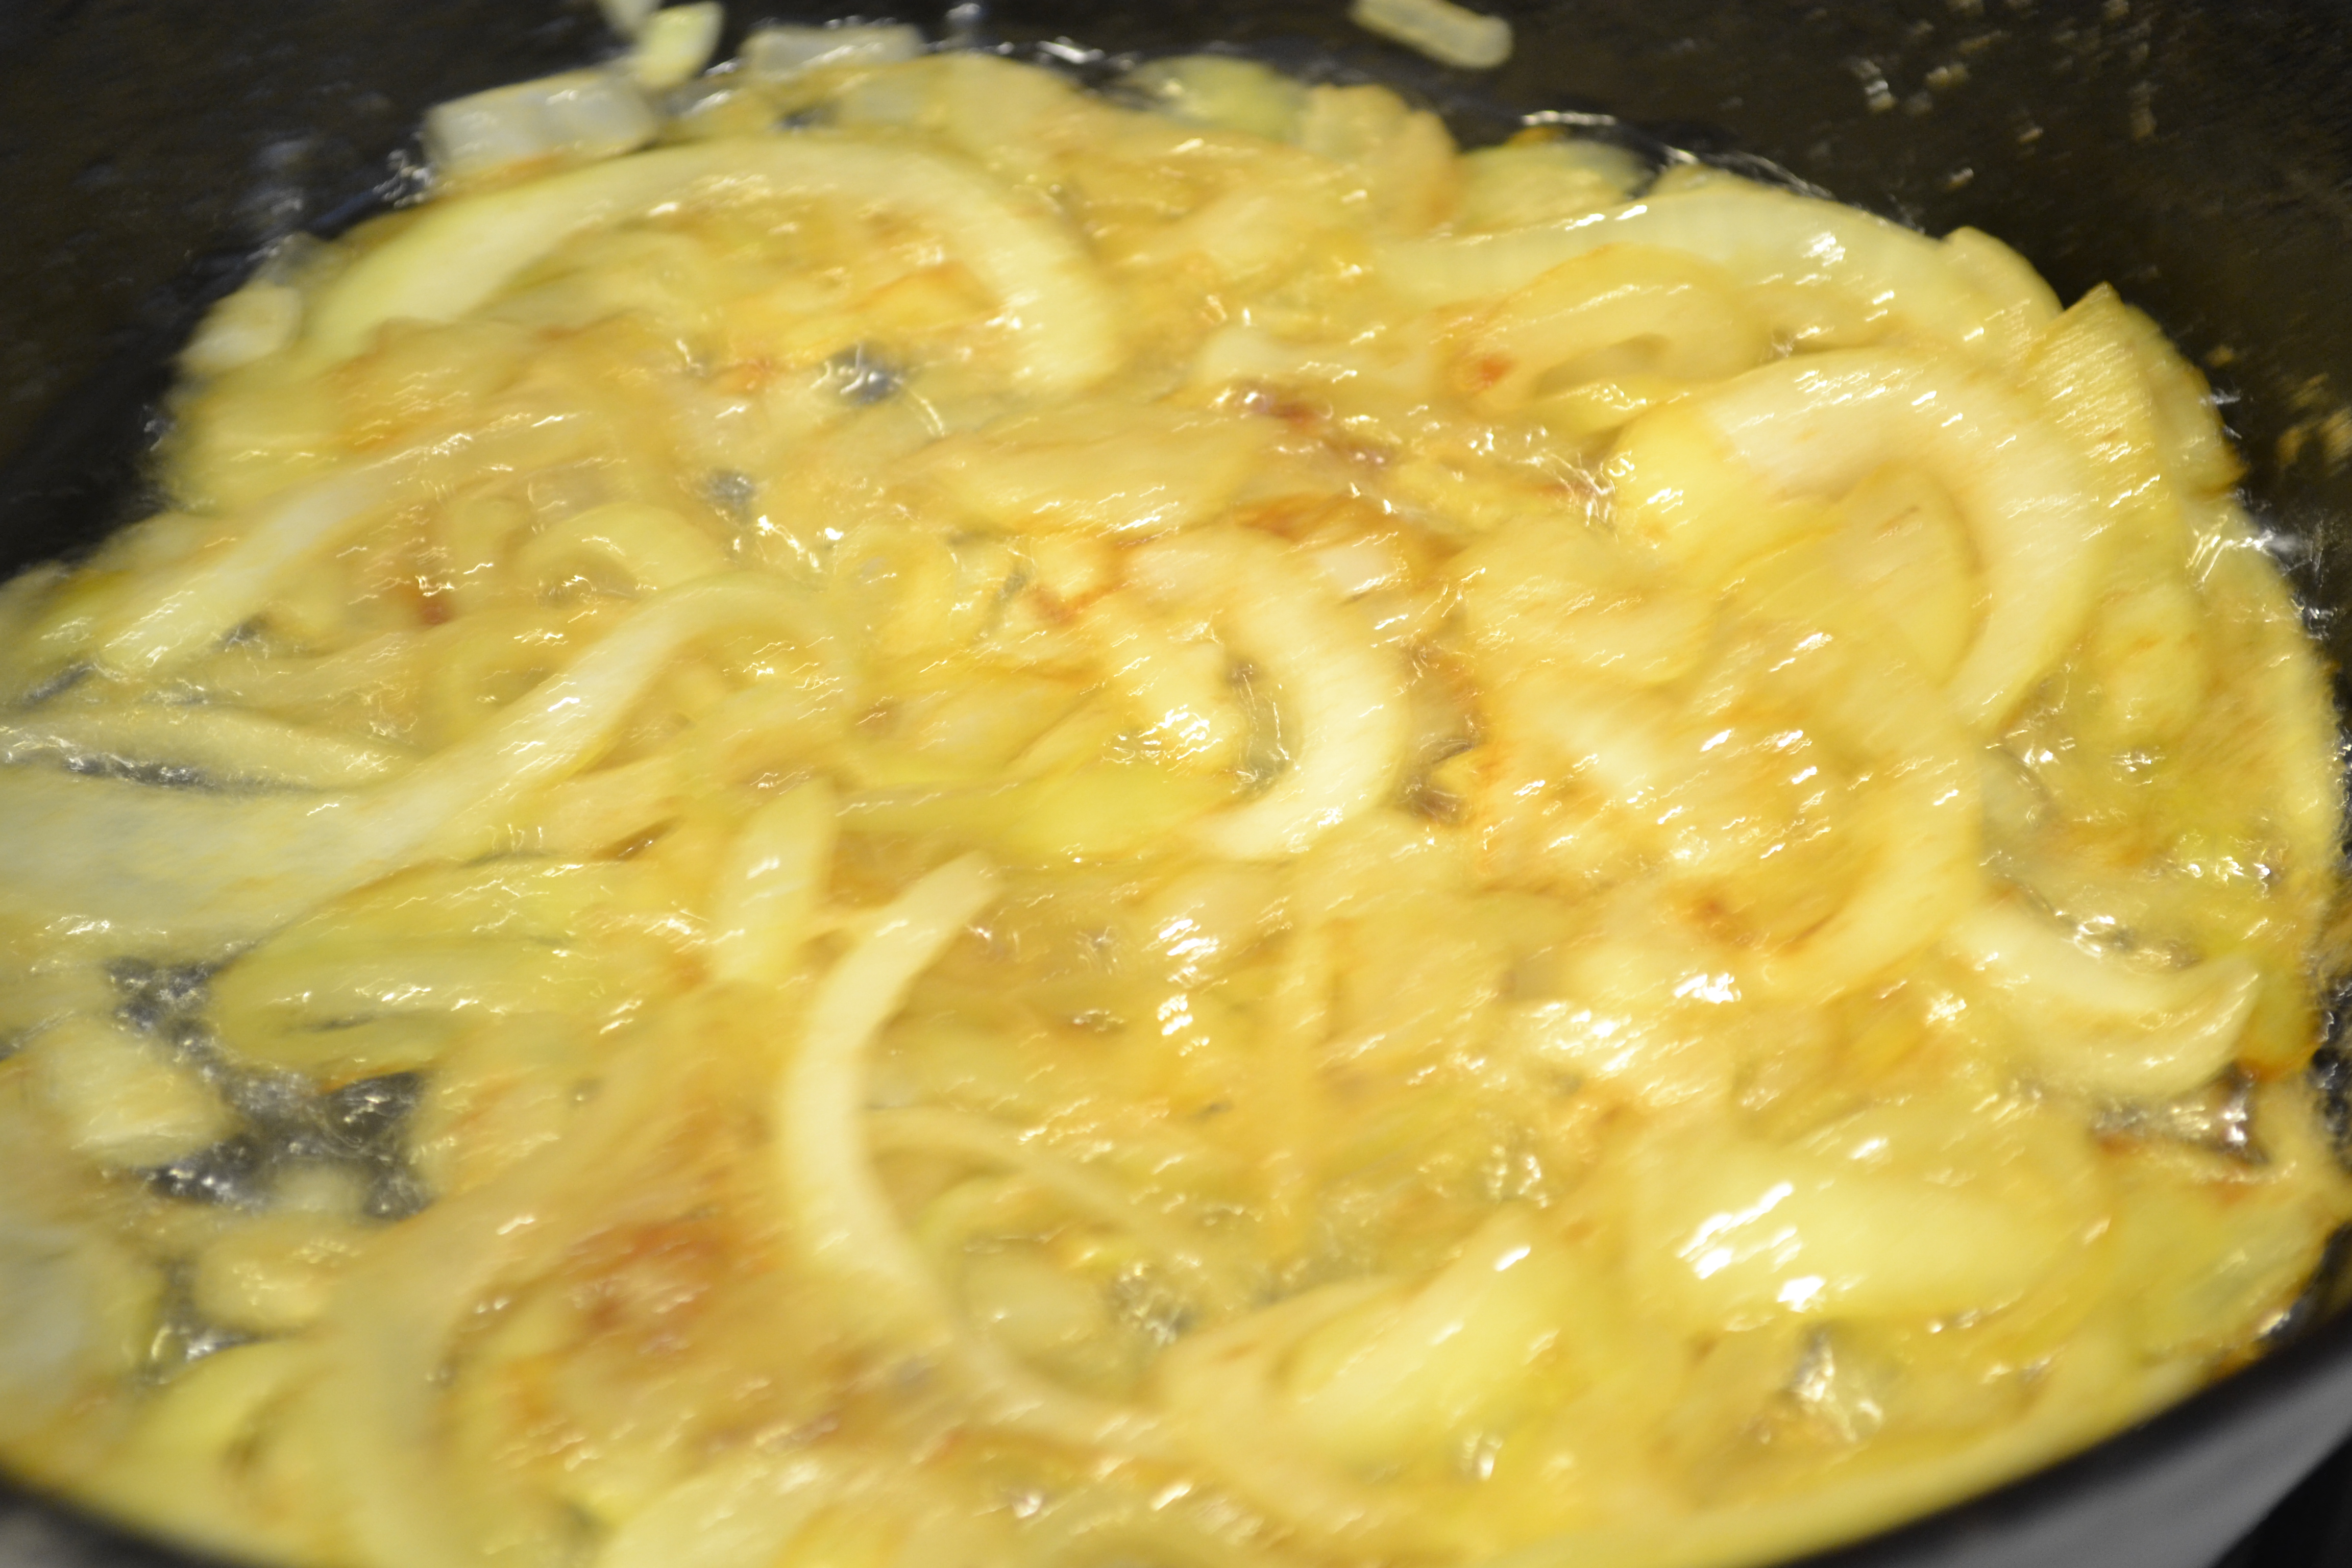
2. Sauté onions in butter in a cast iron skillet until caramelized. Season with Salt & Pepper mix.
3. Because I have a junior deerslayer who isn’t a devotee of onions, I set the onions aside in a bowl while the mushrooms sauté in the same pan. Apparently, it’s okay for the mushrooms to benefit from the flavor of the onions as long as ne’er the two shall meet. If you’re okay with sauteed onions WITH the mushrooms, the mushrooms can be added to the caramelizing onions in the skillet.
4. Slice bolillos in half. Place, cut side down, on a hot, well-buttered griddle. Smear around to coat cut edge with butter and toast until nicely browned.
5. Assemble the sandwiches. Start with mustard or horseradish/mayo spread. Top with venison, sautéed onion (if you can stand it), mushrooms, avocado, and a slice of cheese.
Place sandwich bottoms (assembled part) on a cookie sheet and broil until cheese melts.
Add top of toasted bolillo, slather with extra spread if desired, and enjoy. Delicioso!
Happy and Blessed Easter to all!
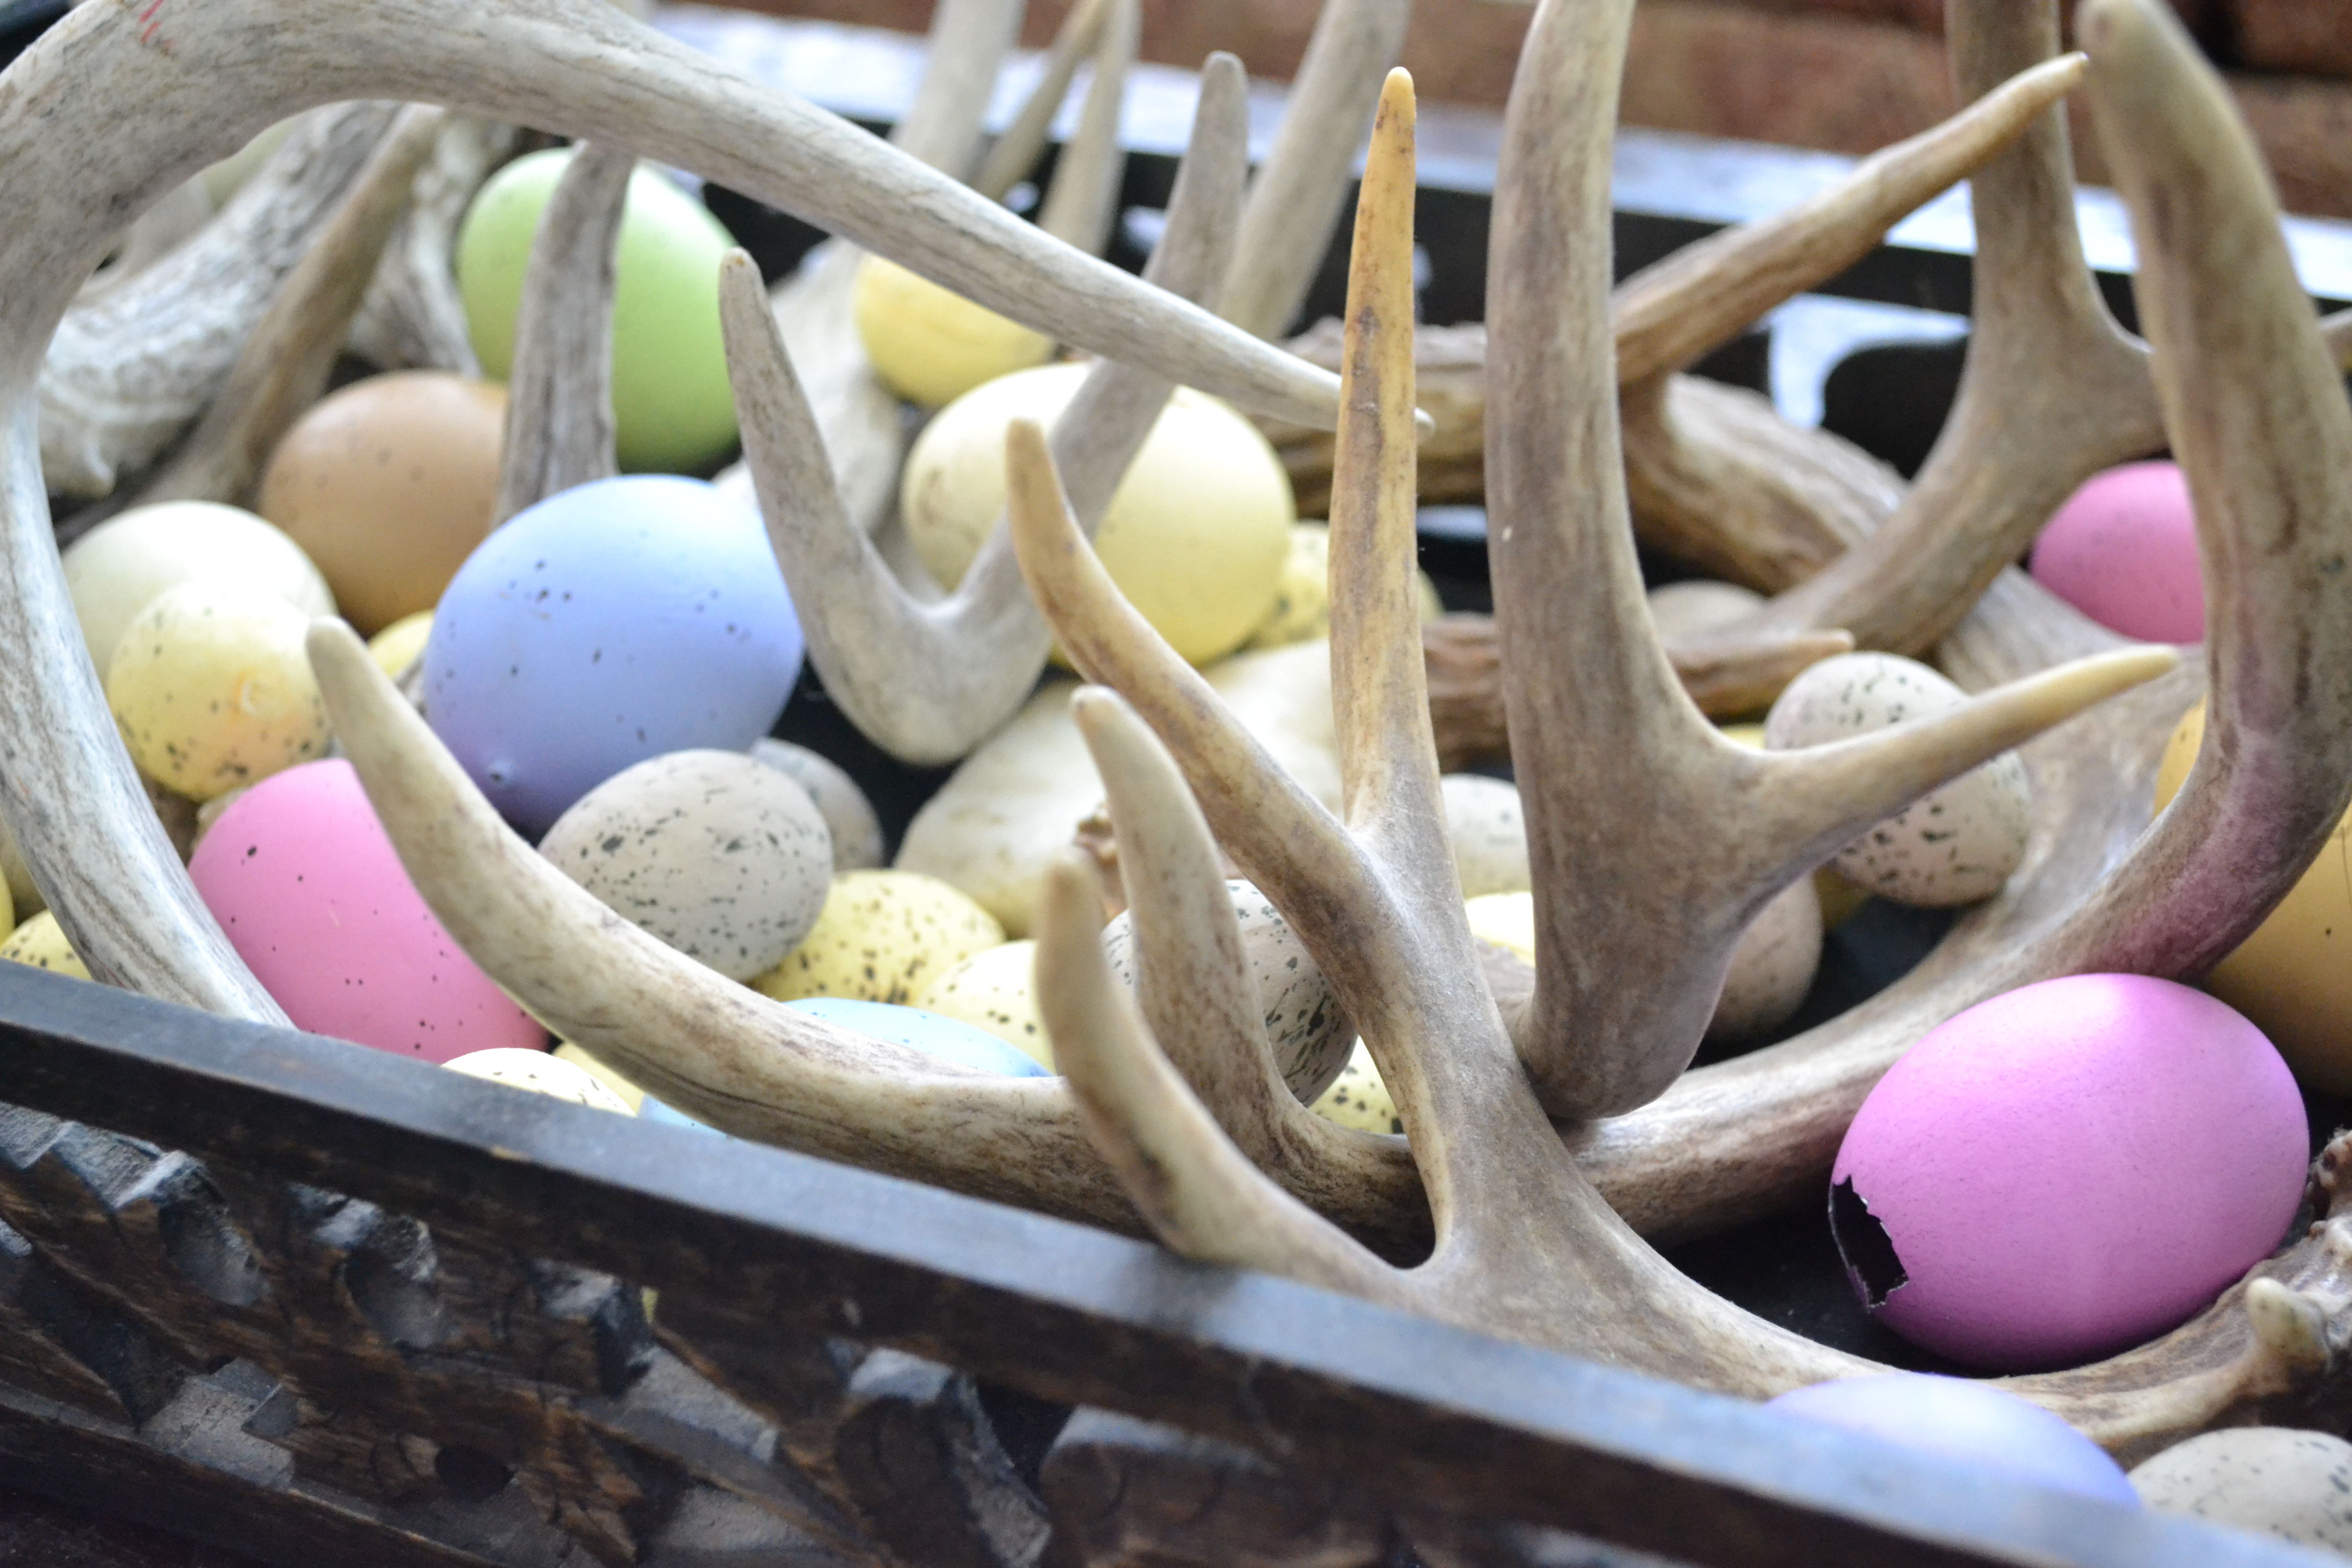
May all the deerslayers, pigslayers, bunnyslayers, possumslayers and their families have a very blessed and happy Easter. If you prepared an awesome wild game recipe for your special meal, let me know how it turned out.
As my junior Deerslayers have gotten older, they have taken it upon themselves to carry on the tradions started when they were little and add a few more.

The eggs look like they’re skiing but my junior deerslayer devised this clever method for drying the eggs after they were dyed.
This little guy seems a little defiant. “No, I will not deliver eggs!”

 Nina,the rabbit, was a craft project that my little one worked on this week. It’s good to be part of the deerslayer’s family.
Some Days Just Scream Out for Chili-Roni

Chili-Mac with Ground Venison & Ground Pork
Everyone has his/her favorite comfort food. My family loves chicken fried venison steaks with garlic mashed potatoes and cream gravy. We all love venison meatloaf. It makes the house smell great! Any type of pasta is comforting. But number one on my personal comfort food list is Chili-Roni. I’ve seen it called Chili-Mac. But it’s chili and macaroni & cheese mixed together in a wonderful conglomeration of feel good. Recently, I’ve actually seen it on menus in restaurants. I have to admit that I find it almost offensive to take a food that is perfect in its simplicity and try to upgrade it to gourmet status. But foodies are notorious for that.
What makes chili-roni perfect is that it is from my childhood. During the dawning of boxed dinners, TV dinners, and canned veggies, my mom created this snuggly blanket of a dish that always had me coming back for seconds. It, too, uses “the box”. Boxed macaroni and cheese is perhaps the most important part! The cheap stuff! I actually use the generic version of the store brand. Back in the day, there was Kraft and that was it. My mom was not the first to prepare chili-roni. It has been passed down for generations. It’s one of those dishes that kids the world over just love. All kids, everywhere!
After I experienced it as a kid, I noticed that pre-packaged and various other box and pouch prepared meals came up with versions. The fact is, chili-roni is so easy to prepare, why not do it yourself so that you know what’s going into it? Granted, boxed mac & cheese may not be the healthiest thing on the planet, but at least the amount of salt and chemicals can be kept at a minimum if you have a hand in the list of ingredients. You can also tweak the recipe as per your family’s preferences.
As with most of my recipes, ad-libbing is just a given. If you have canned spaghetti sauce in the fridge that might start growing a fur coat in a few days, use it instead of the tomato paste and water. Different type of noodles in the pantry? Okay, just don’t tell me! I have to say that the packet of powdered mystery cheese in the mac & cheese box IS a pretty important ingredient. Just so you know.
I’m gonna share the recipe, in all its simplicity. I thought about making everyone who makes the recipe sign a promise that no gourmet ingredients would be added, no substitutions (except perhaps beef for venison). Here it is, a window into my childhood!
Chili-Roni

1 lb. ground venison (or 1/2 venison, 1/2 pork)
1 box mac & cheese (store brand is fine)
1 small can tomato paste
1 cup water
1 tbsp. chili powder
1 tsp. garlic powder
a couple splashes Worcestershire sauce
salt to taste
1. Brown ground meat in a cast iron skillet. I ALWAYS sprinkle in a bit of salt & pepper mix as I brown meat. It helps with any gamey smell.
2. Boil water for boxed pasta. Prepare pasta, reserving powdered mystery cheese for later to be added to the chili mix.

3. Add tomato paste and remaining ingredients to browned meat. (I’m sure everybody knows this but my secret trick for a clean extrusion of tomato paste is to open the top and bottom of the can and just push it straight through. It saves me from scraping out the can. It saves probably 30 seconds or so that could be used to pour a glass of wine!) Stir in cheese powder and simmer for 15-20 minutes. Adjust seasoning to taste.
4. Drain pasta and add to chili. Done.
Wild Pork Done Right/ Wild Pork Done Easy
A couple of weeks ago, my deerslayer was called upon to put together a birthday extravaganza for the patriarch of the Deerslayer clan. The venue was a given; the family beach house near South Padre Island; rustic, grungy and the site of many, many great times had by all. The food? How about the whole wild pig we had in the freezer? Perfect! The method? Smoked on the grill, of course! My deerslayer worked with mesquite wood and a pit the way Picasso worked with oils. It was pure artistry. However, it required four men and a flatbed trailer to get the pit to its destination.
The day of the party arrived. Guests were greeted by “the traditional welcome of the deerslayer”.

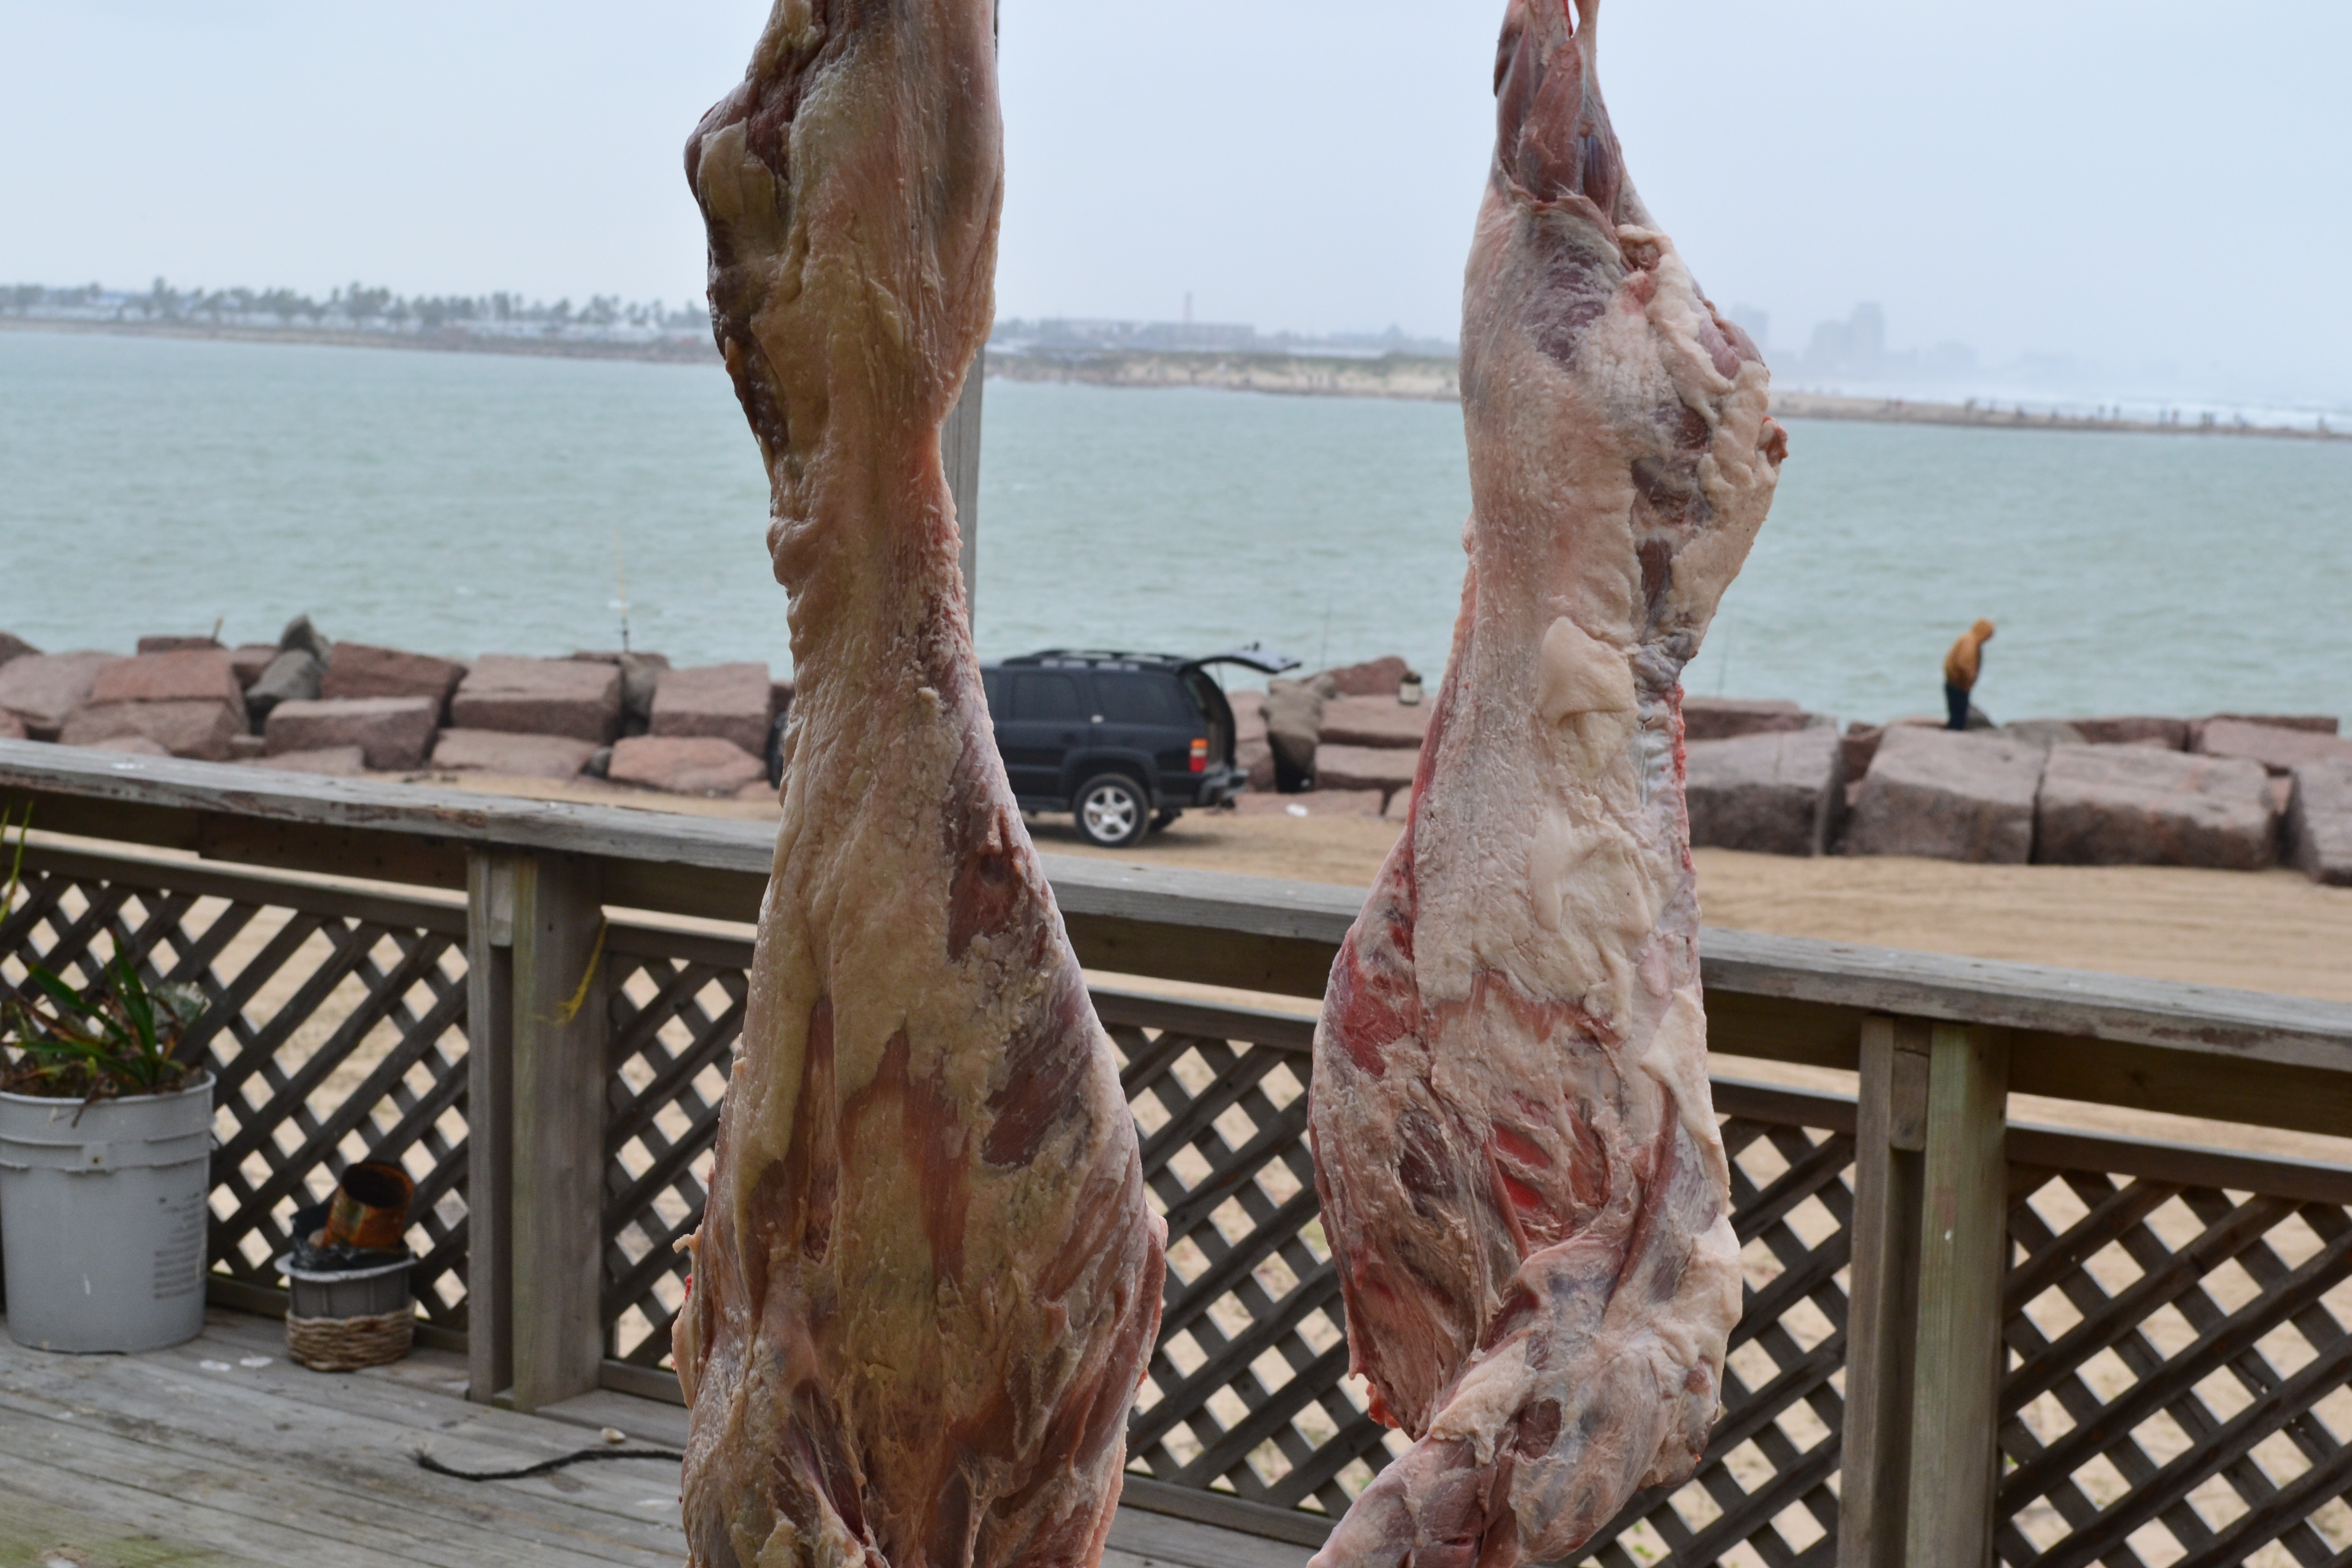
There’s nothing like a couple slabs of wild pig to welcome guests! They (the slabs of pork, not the guests) went onto the pit and smoked all day.

After 8 hours of snacking, storytelling, joking, beer drinking, and birthday festivities the main course was ready!

It was outstanding. I have to admit that I thought of my fellow bloggers at www.patronsofthepit.wordpress.com. I think that even they would be proud since they are experts of all things bar-b-qued and smoked.
An evening with family and friends, wild pork (and beer and wine), and beautiful views. It doesn’t get any better than this!

As wonderful a time as this was, it required a lot of preparation and planning and man-hours. There are times, however, when we just don’t feel like firing up the grill but still want the flavor of great pork. My deerslayer processed our pigs this year so that we kept some racks of ribs. Lots of racks of ribs to be exact because we got several wild pigs.
I decided to try something other than the traditional method. At this point, if “The Patrons of the Pit” are reading this, or any other BBQ purists, walk away! Just stop reading because you will shake your heads in despair.
Wild Pork Ribs (Done Easy)
I seasoned some pork ribs very liberally with Salt & Pepper mix, tossed them in my covered roasting pan with a can of Dr. Pepper, and braised them for a couple of hours at 350 degrees, turning occasionally.

Then I removed the lid, slathered them with my favorite new BBQ sauce, Skipkenny’s Whiskey BBQ Sauce, from New Braunfels. (It’s now available on Amazon! I bought a case!) I stuck them back in the oven for another hour until they began to fall off the bone.

The ribs were ready for dinner with beans and potato salad. They didn’t have the characteristic smoky flavor and smell of pit BBQ, but neither did I. While I love BBQ as much as the next person, I have to admit (as do my deerslayers) that this is a pretty decent alternative to no ribs at all! I’d be willing to prepare them this way again and my deerslayers said that they’d be willing to eat them!
Not Always the Cat’s Meow (Venison Marsala)

Like every other deerslayer’s wife on the planet, as hunting season winds down, I come to the realization that, as much as I embrace my vocation, being the wife of a deer slayer isn’t always all that great. Don’t get me wrong! There’s no title I’d rather hold, except perhaps “Empress of Deerslaying”. However, when the time comes to clean out the camper, wash the camo for the last time, and clean the coolers, I find myself starting to dwell on the negative.

I generally start feeling sorry for myself as I begin the cleaning and packing ritual that signifies the end of the season. I may even become, dare I say, cranky. My sense of humor is lacking.
“How many times have I told you to get the pig tusks off the kitchen counter? What are they doing in the dishwasher?”

“Can I have my roasting pan back now?”

It’s important to keep in mind that Deerslayers’ wives encounter situations unique to the title. For example, I was pleasantly surprised the other day when I returned home to discover a box from UPS on my front door step. I always get pretty excited about deliveries.
This time, however, much to my horror, I discovered that the package had been ordered by my Deerslayer. It seems that we had become the proud new owners of a “buck boiler”, a contraption used to aid in the creation of a DIY variety of European mount. For the novice deerslayer’s wife, a European mount is not a Kama Sutra position, but a trophy that hangs from the wall and includes only the bleached skull and antlers of a trophy buck, usually mounted on a polished medallion of wood. With that background information, it’s no wonder that I reeled at the sight of the “buck boiler”. I understood the implications immediately. Boiling a buck’s head until no meat remains brings up the immediate questions, “Where is this going to be done?” and “How bad will it smell?” and “Should I throw in some carrots, onions, and celery?”
Now, this is where a deerslayer’s wife differs from the norm: I was grateful, at this point, that one of the deer heads currently wrapped in a garbage bag and duct tape and occupying my extra refrigerator would find a new home. Just as a side note, we DID ask an unsuspecting guest to go get a beverage out of the above mentioned fridge during a recent visit just to see his reaction.
Outside. The boiling would take place outside. Good. Out of sight, out of mind. My deerslayer promised me that the process would not upset my normal routine of homeschooling, cleaning, cooking, doing laundry and the like… except that the junior deerslayers and I needed to keep constant watch to ensure that the water level of the electrically charged and vibrating bucket did not drop below the antler line of the deceased. It vibrated away all day, and all night. The neighborhood cats came to watch the proceedings. The entire process wasn’t as thorough as I had hoped, however. I envisioned pulling a beautifully bleached trophy from the foamy mire ready to display proudly. Not! Without going into too much grizzly detail, suffice it to say that there was more “internal cleaning” that had to be done. This required the use of my roasting pan and lots and lots of hydrogen peroxide… in my kitchen… on my counter! Continued soaking, bubbling, and bleaching in the sun resulted in a trophy that even a deerslayer’s wife would be proud to display.
Such is the life of the deerslayer and his family! On the upside, we have three freezers full of fabulous meat that will provide us with wonderful, healthy recipes such as the following:
Venison Marsala
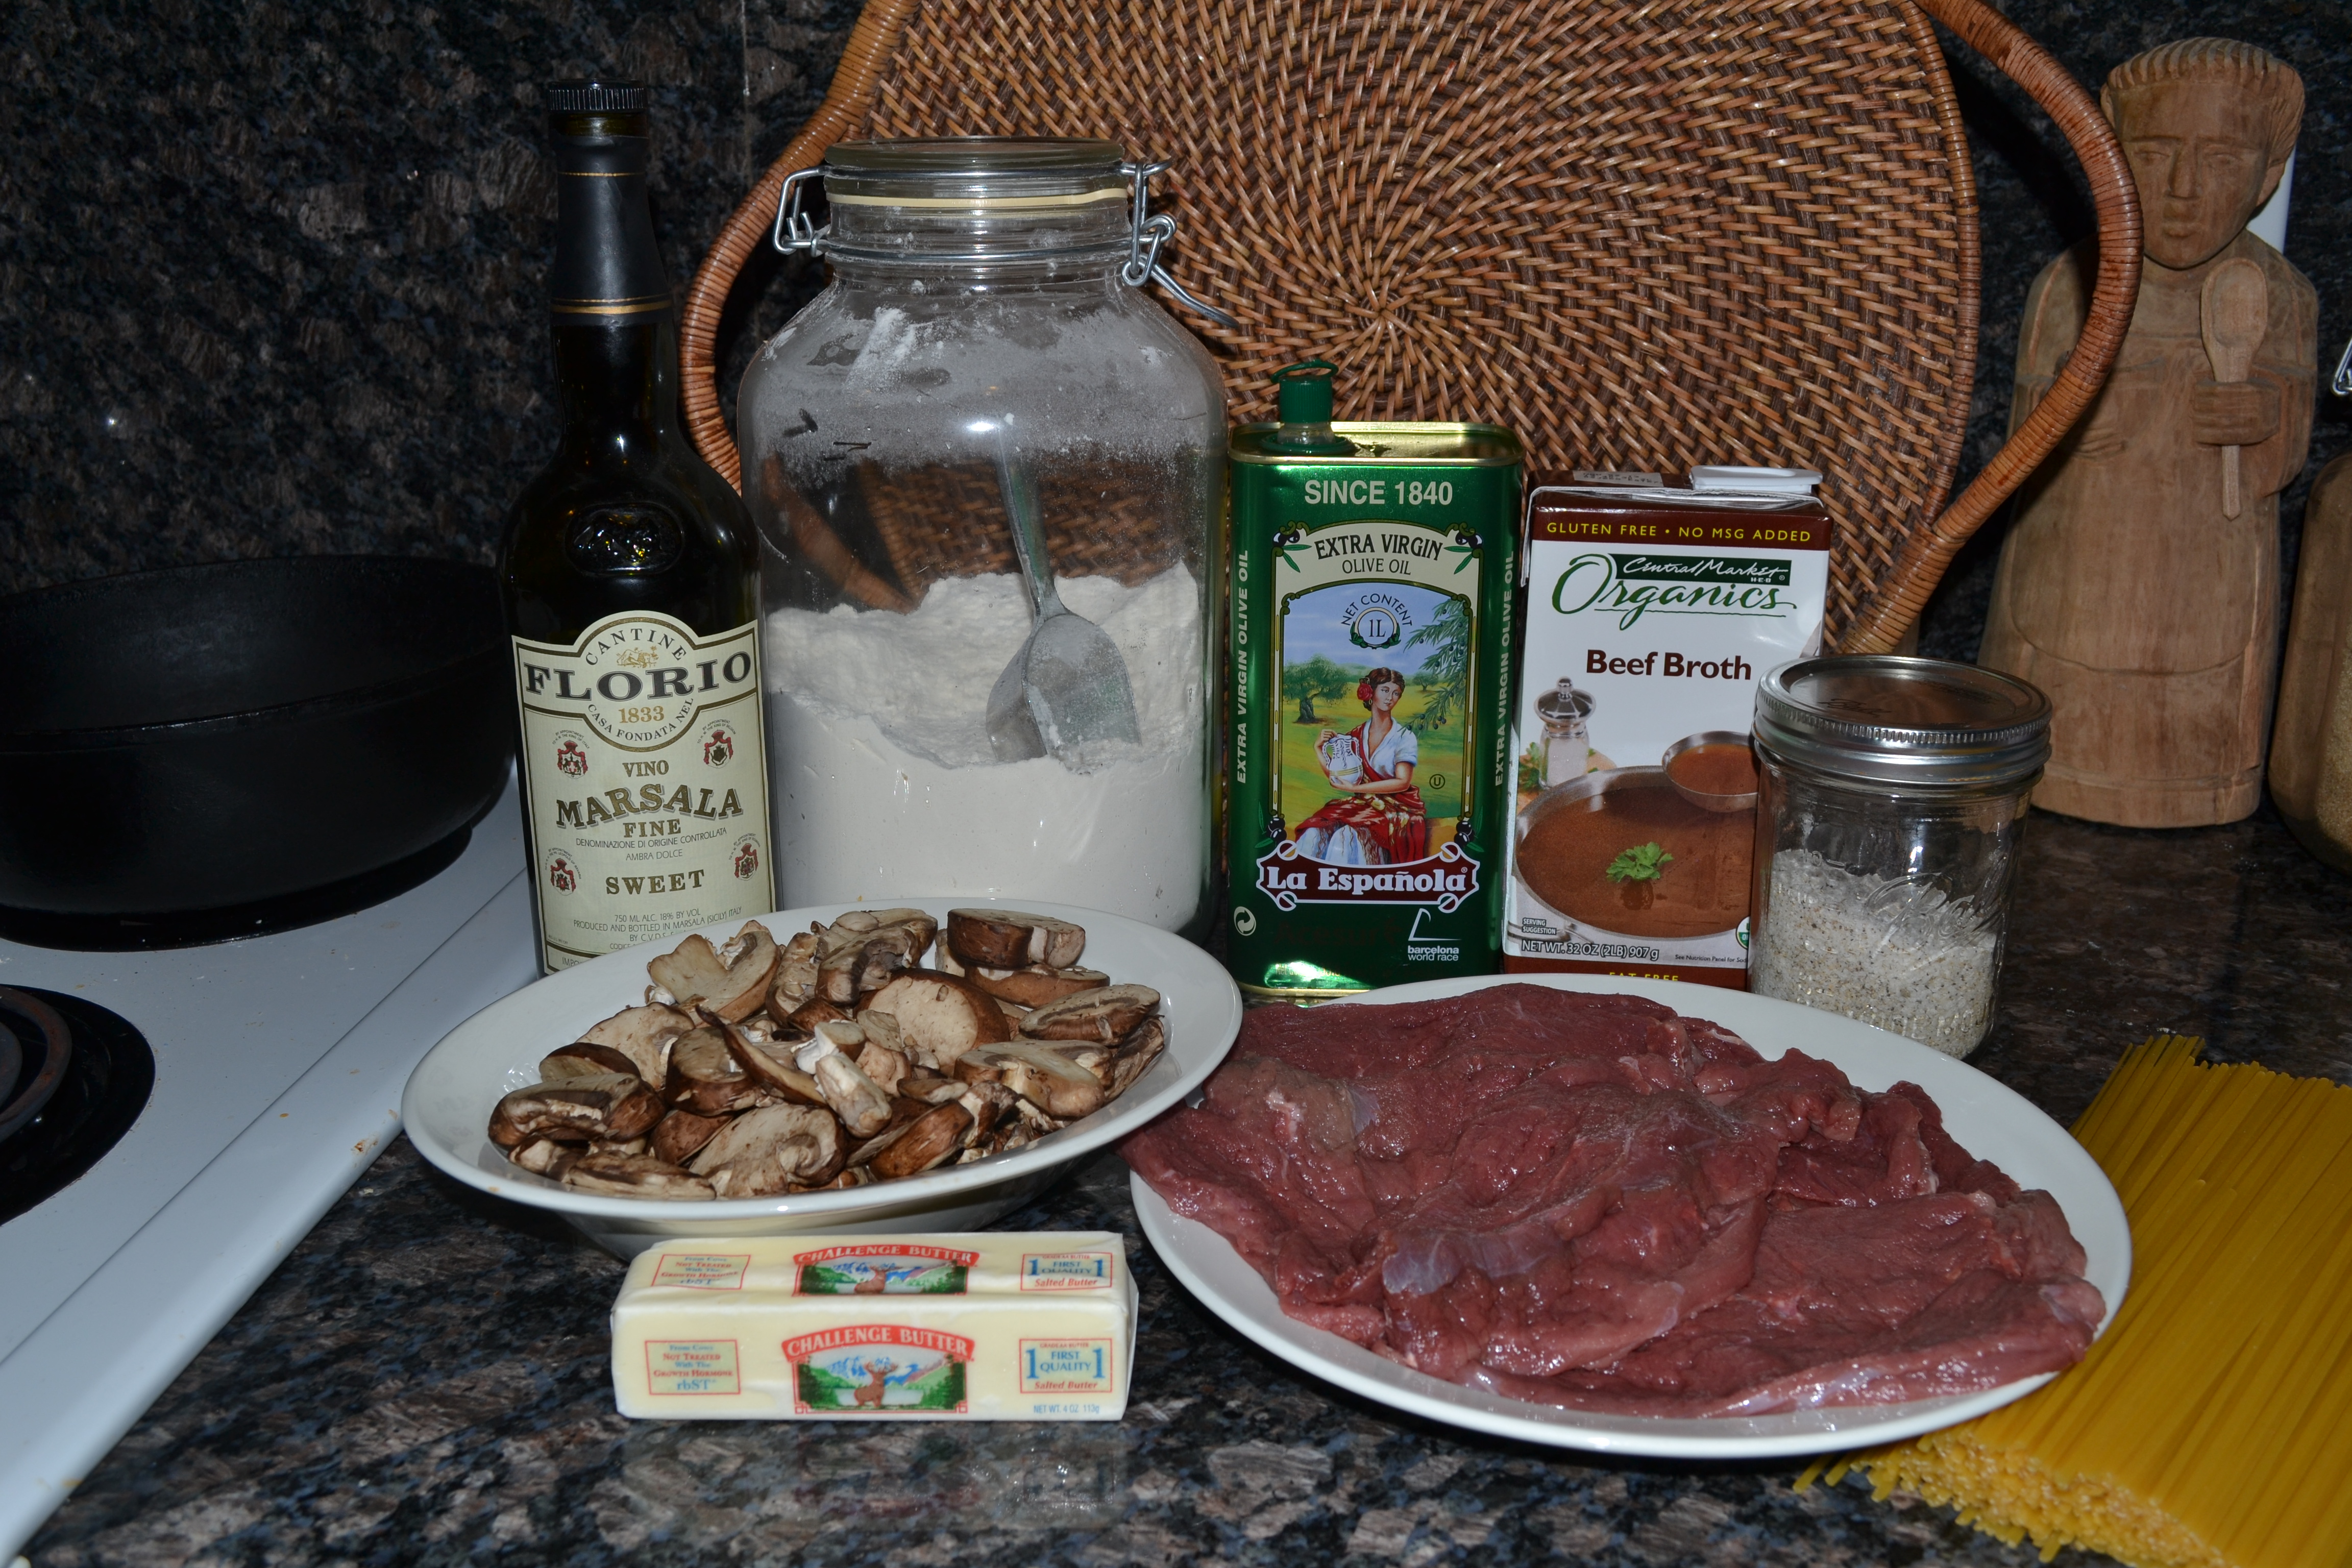
1 lb. pounded venison steaks
Tommy’s Salt & Pepper mix*
A couple scoops of flour on a paper plate for dredging steaks
4 tbsp. butter
¼ cup olive oil
10 oz. baby Portobello mushrooms (crimini)
½ cup Marsala
½ cup beef stock
1 tbsp. cornstarch
1 package fettuccini or linguini
Finely chopped chives or garlic chives
Pound out venison steaks and season with salt & pepper mix*. I always place my steaks in a zip bag and pound them out on a cutting board placed on a kitchen towel. They seem to keep their shape better and the process is less messy. The kitchen towel provides a buffer between the cutting board and counter top. Dredge with flour and set aside.
Begin boiling water for pasta. Follow package directions for pasta. It should be ready about the same time as the sauce.
Preheat large cast iron skillet with olive oil on the stovetop. On medium high heat, brown steaks. Set aside in an ovenproof pan. Place in warm oven, about 200 degrees.
In same cast iron skillet, sauté mushrooms in butter, scraping up crusty bits. Combine Marsala and stock in a measuring cup. Add to mushrooms in hot skillet, reserving about ½ cup. Combine reserved mixture with cornstarch. I usually pour my cool liquid and cornstarch into a jar, secure the lid, and shake until combined. Add to mushrooms and liquid, turn heat to medium and stir constantly until thickened. Return steaks to sauce mixture.
Pour pasta onto large platter. Place steaks on pasta. Pour sauce over. Sprinkle with chives or garlic chives. Serve.
*Find recipe in “Game Birds Interrupted”
Venison and/or Wild Pork Enchiladas with Creamy Poblano Sauce

This recipe has become my “go to” meal to prepare for company; either a small get-together or a camping group of 50. I’ve received compliments from fans of wild game and friends who didn’t realize they were sharing God’s wild bounty. I really like this recipe because it works equally well with venison or wild pork. It went over very well on our annual camping trip to Wyoming. It works particularly nicely because it can be frozen and can feed a large number of people. The enchiladas can be frozen without the sauce and transported in zip-lock bags. The sauce can be transported in clean, plastic milk containers in a cooler and can be heated and added at the last minute.
Venison (or Wild Pork) Enchiladas with Creamy Poblano Sauce
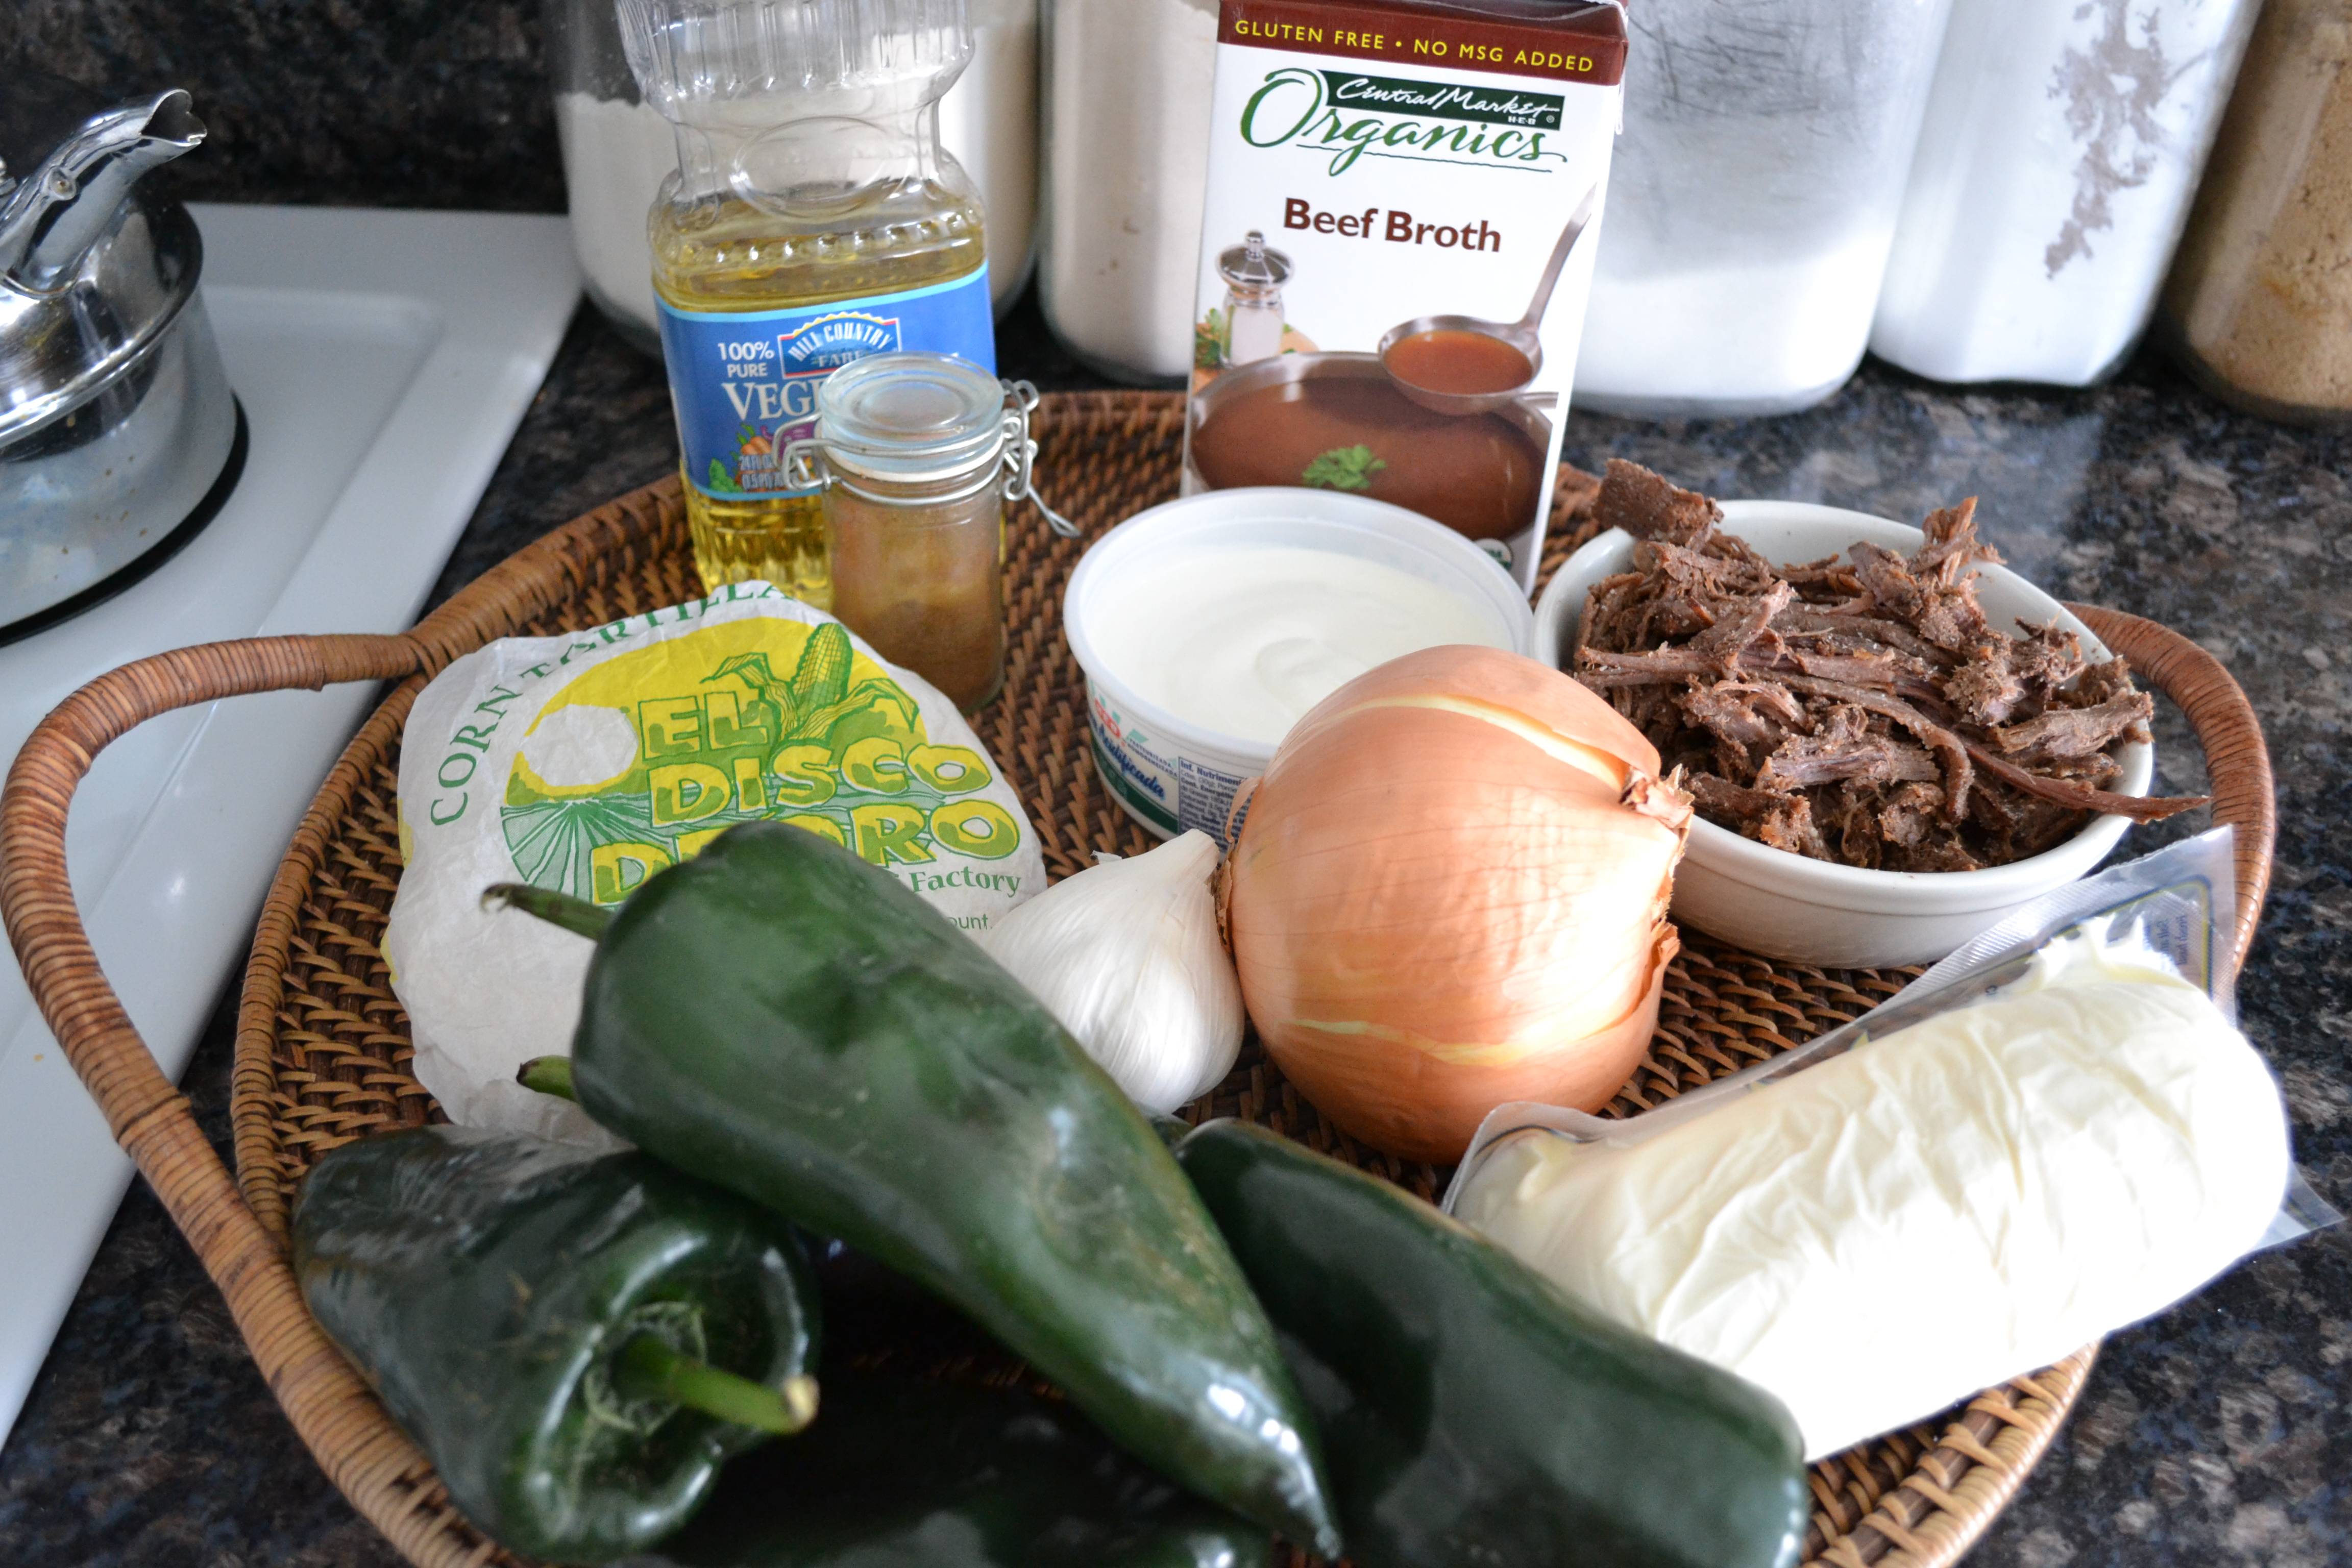
1 lb. cooked, shredded venison or wild pork (see all day cooking method in “Come and Take It”)
chili powder, comino (cumin) and salt to taste
beef stock and/or drippings from all-day-cooked meat
corn tortillas
corn oil
fresh mozzerella
5 poblano peppers
1/2 an onion, thinly sliced
3 or 4 cloves of garlic
approx. 5 oz. sour cream (just more than 1/2 small container)
1/2 cup beef (or venison) stock
salt and pepper to taste
Season shredded venison or wild pork with chili powder, comino, and salt to taste.
Heat about a 1/2 inch of cooking oil in a small skillet. When oil is pretty hot, coat one tortilla one side at a time until tortilla is soft.

Lay tortilla on a flat surface. Spread with a line of seasoned meat.
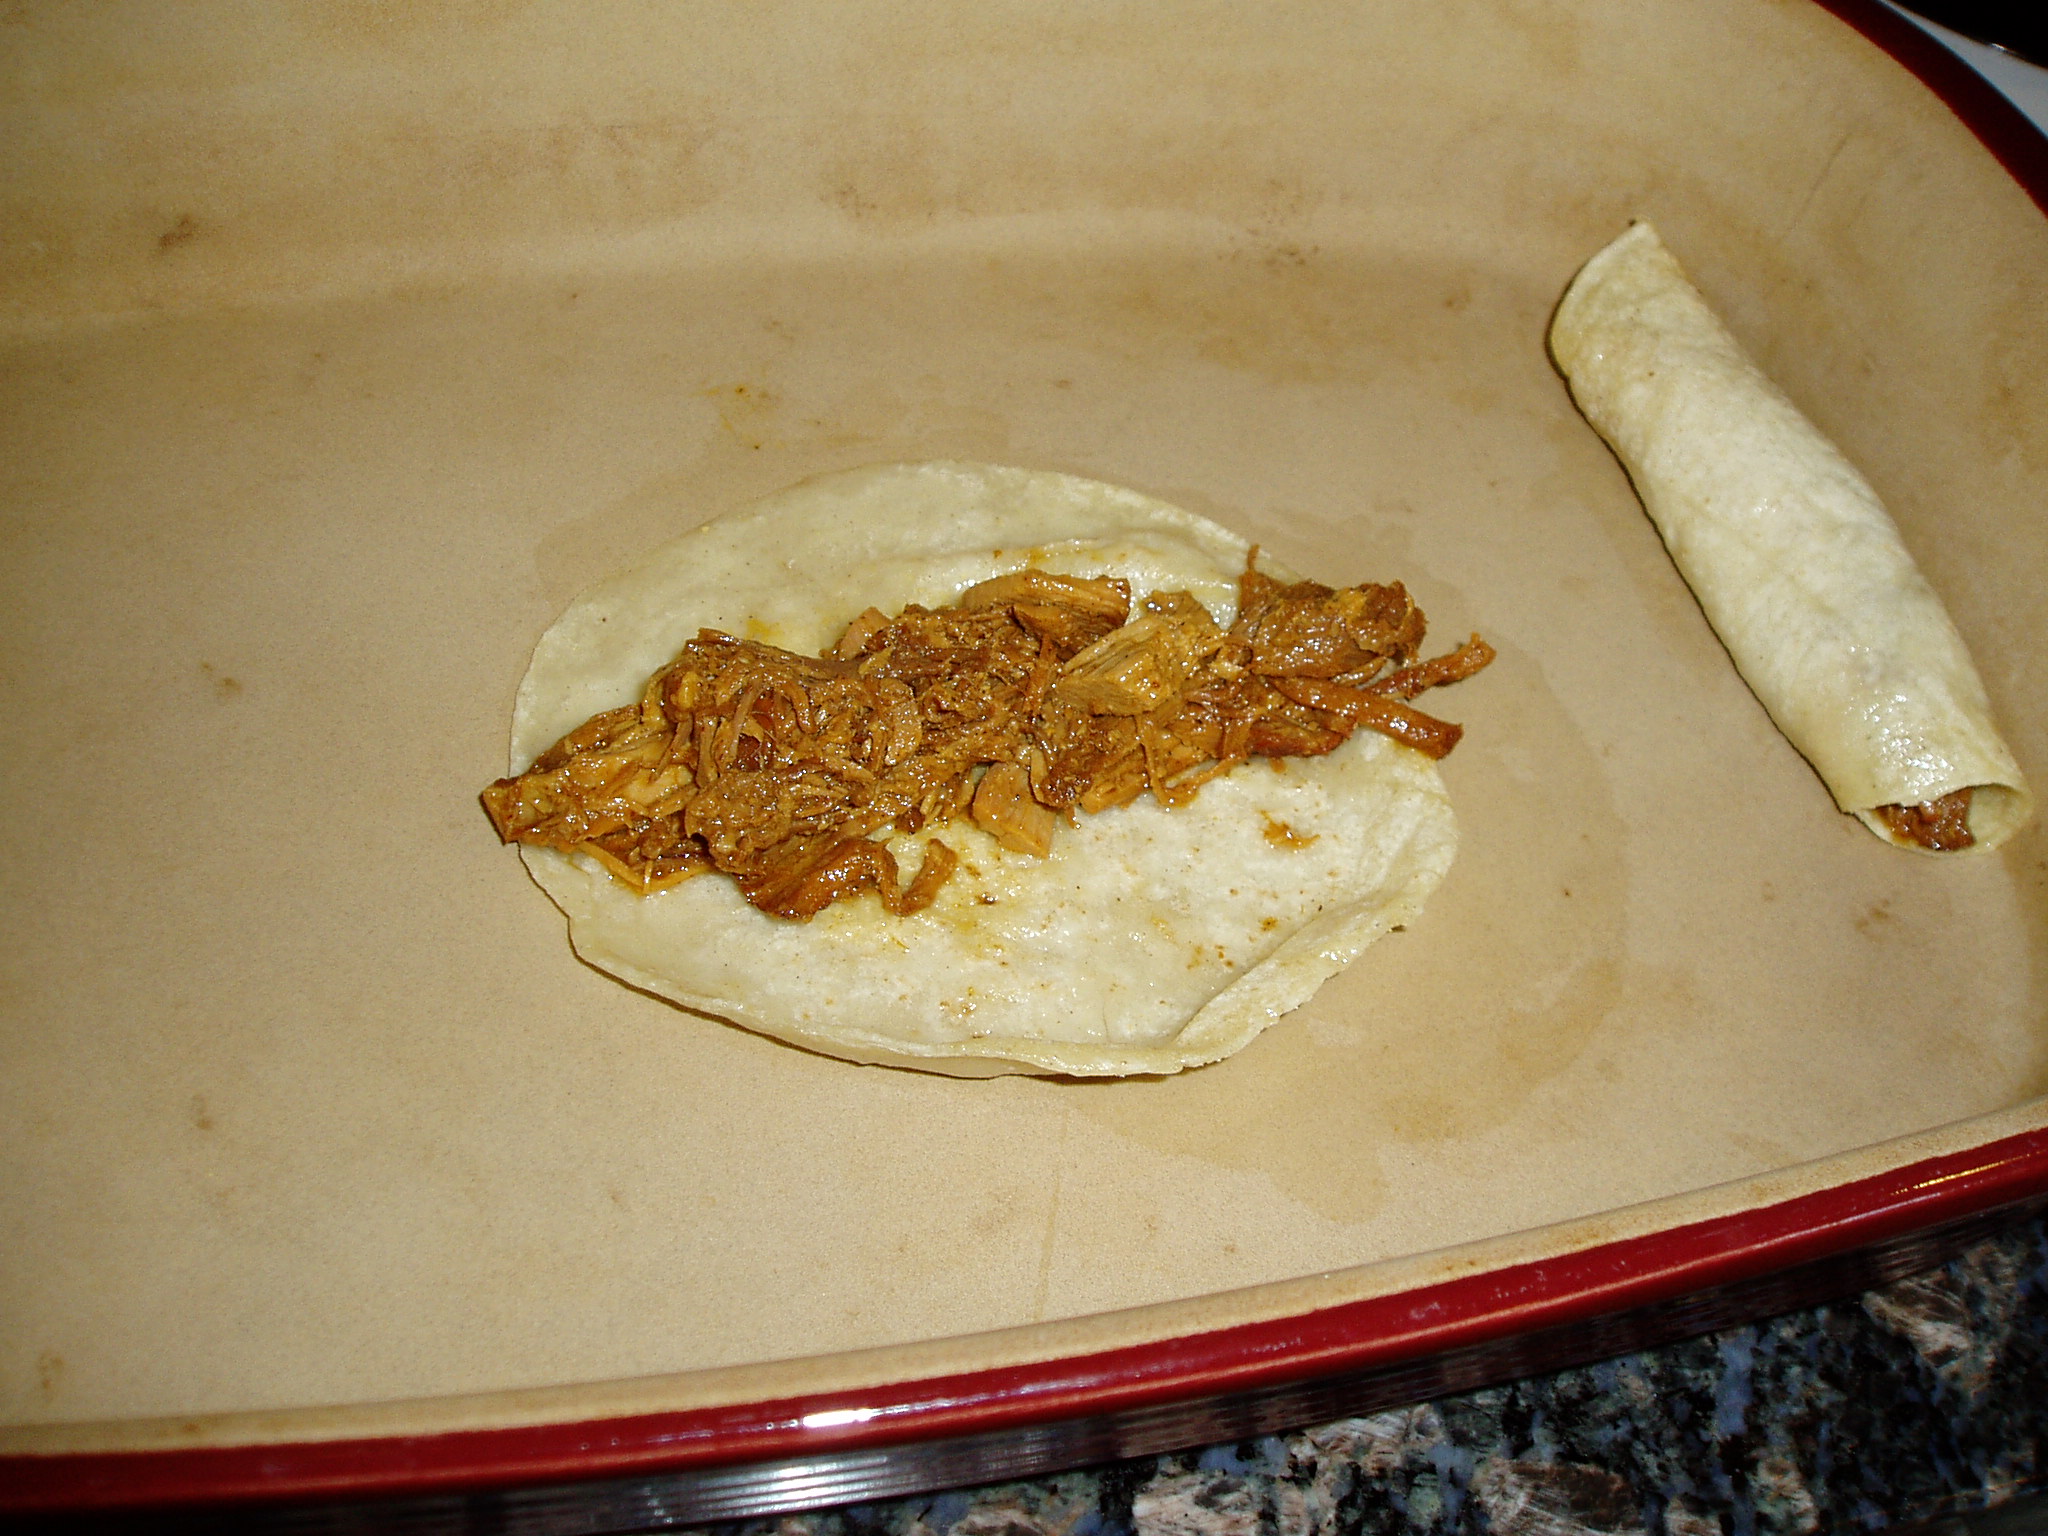
Roll ingredients into tortilla and lay enchilada in a 9 x 13 baking dish, seam-side down.
Continue this process until you have rolled as many enchiladas as you need. Set aside.

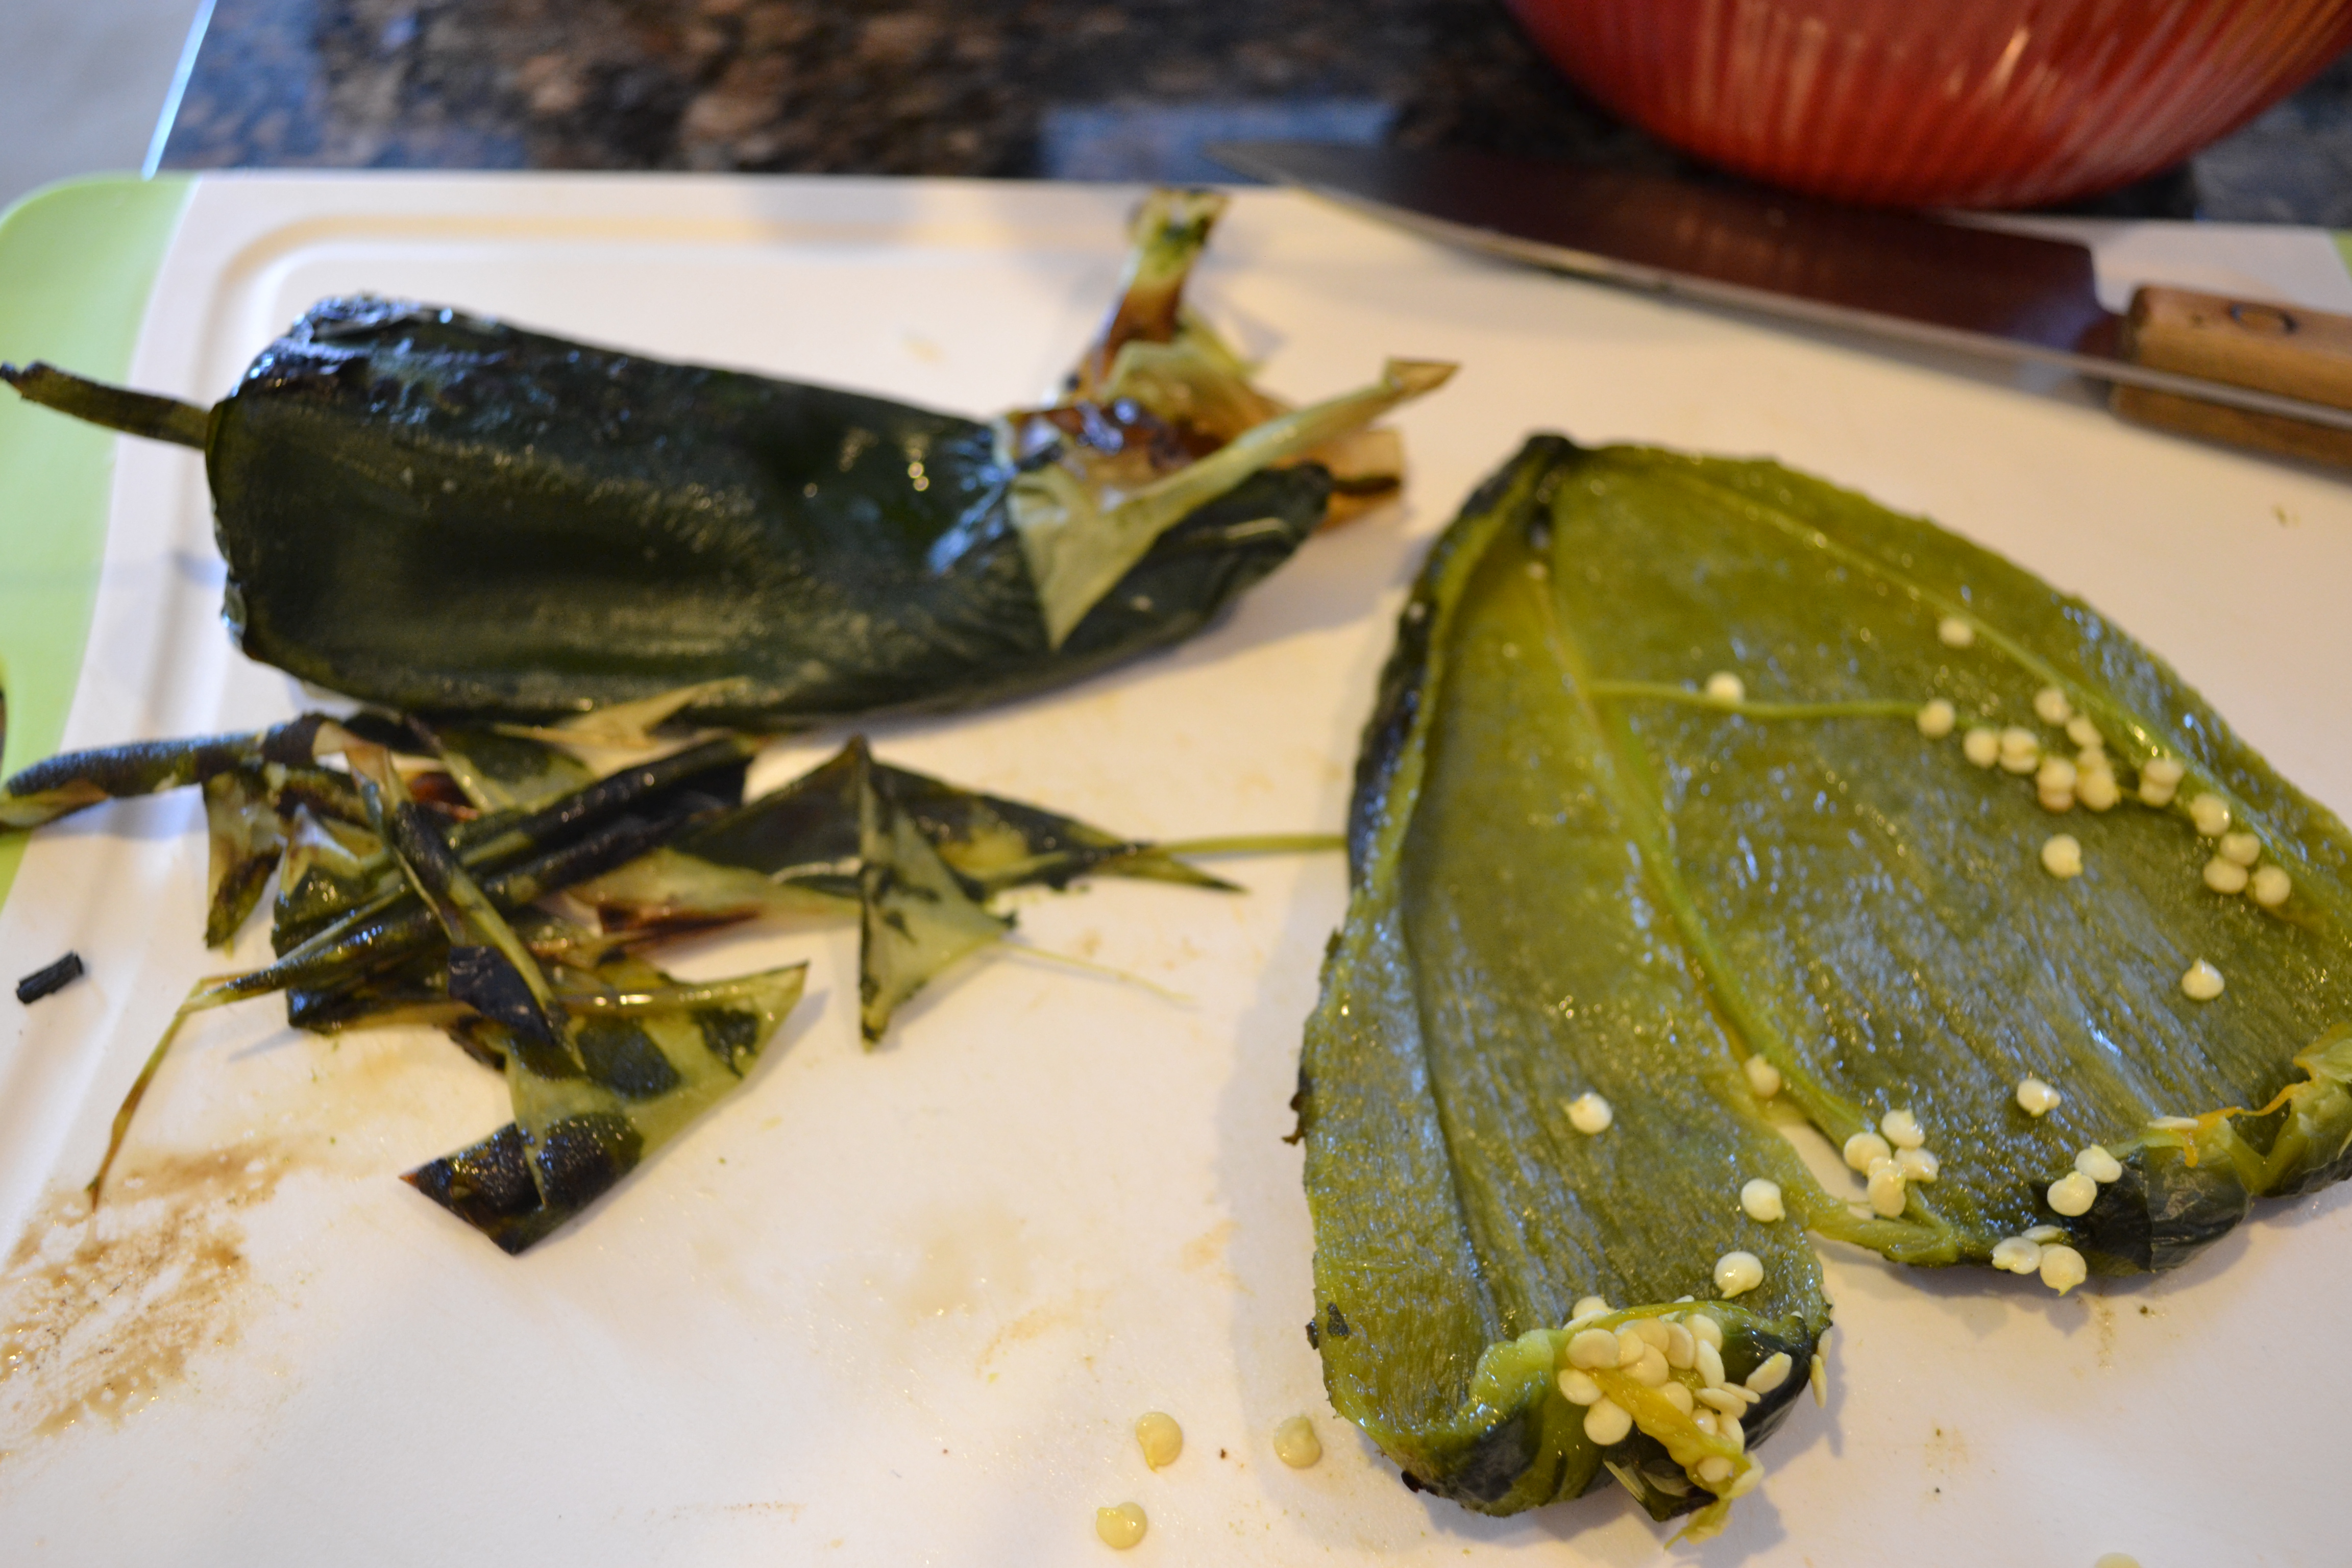
Remove stem ends of poblanos. Cut down the sides and remove seeds. Lay poblanos on a baking sheet, skin side up. Set under a broiler until skin chars and bubbles. Or poblanos can also be left intact and turned periodically until fully charred.

Remove poblanos to a bowl and cover with plastic wrap. Let rest for at least 20 minutes to allow skins to loosen.

Creamy Poblano Sauce
During this time, saute onions and garlic in a small amount of the corn oil used for the tortillas in a cast iron skillet.

Place onions and garlic in a blender. Add sour cream and stock.

Remove skins and seeds from poblanos and add to blender.
Blend ingredients. Add salt and pepper and blend again. At this point, you can adjust the heat of your sauce by adding additional sour cream and stock to produce less heat.

Poblanos are fickle indeed. Some of them are very mild while others are as hot as jalapeños. Unfortunately, there’s not really any way that I know of to determine the heat of the pepper until you taste it. This can be done after they are roasted. You’ll need to taste each one. If the poblanos are not as hot as you like, a jalapeno or two can be added to the roasting. If the poblanos seem to be pretty hot, additional sour cream and stock can tone things down a bit.
Once the sauce is just right, pour over enchiladas, dot with fresh mozzarella, and heat in a 350 degree oven for about 30-40 minutes until sauce bubbles and cheese is melted. Serve with sour cream.


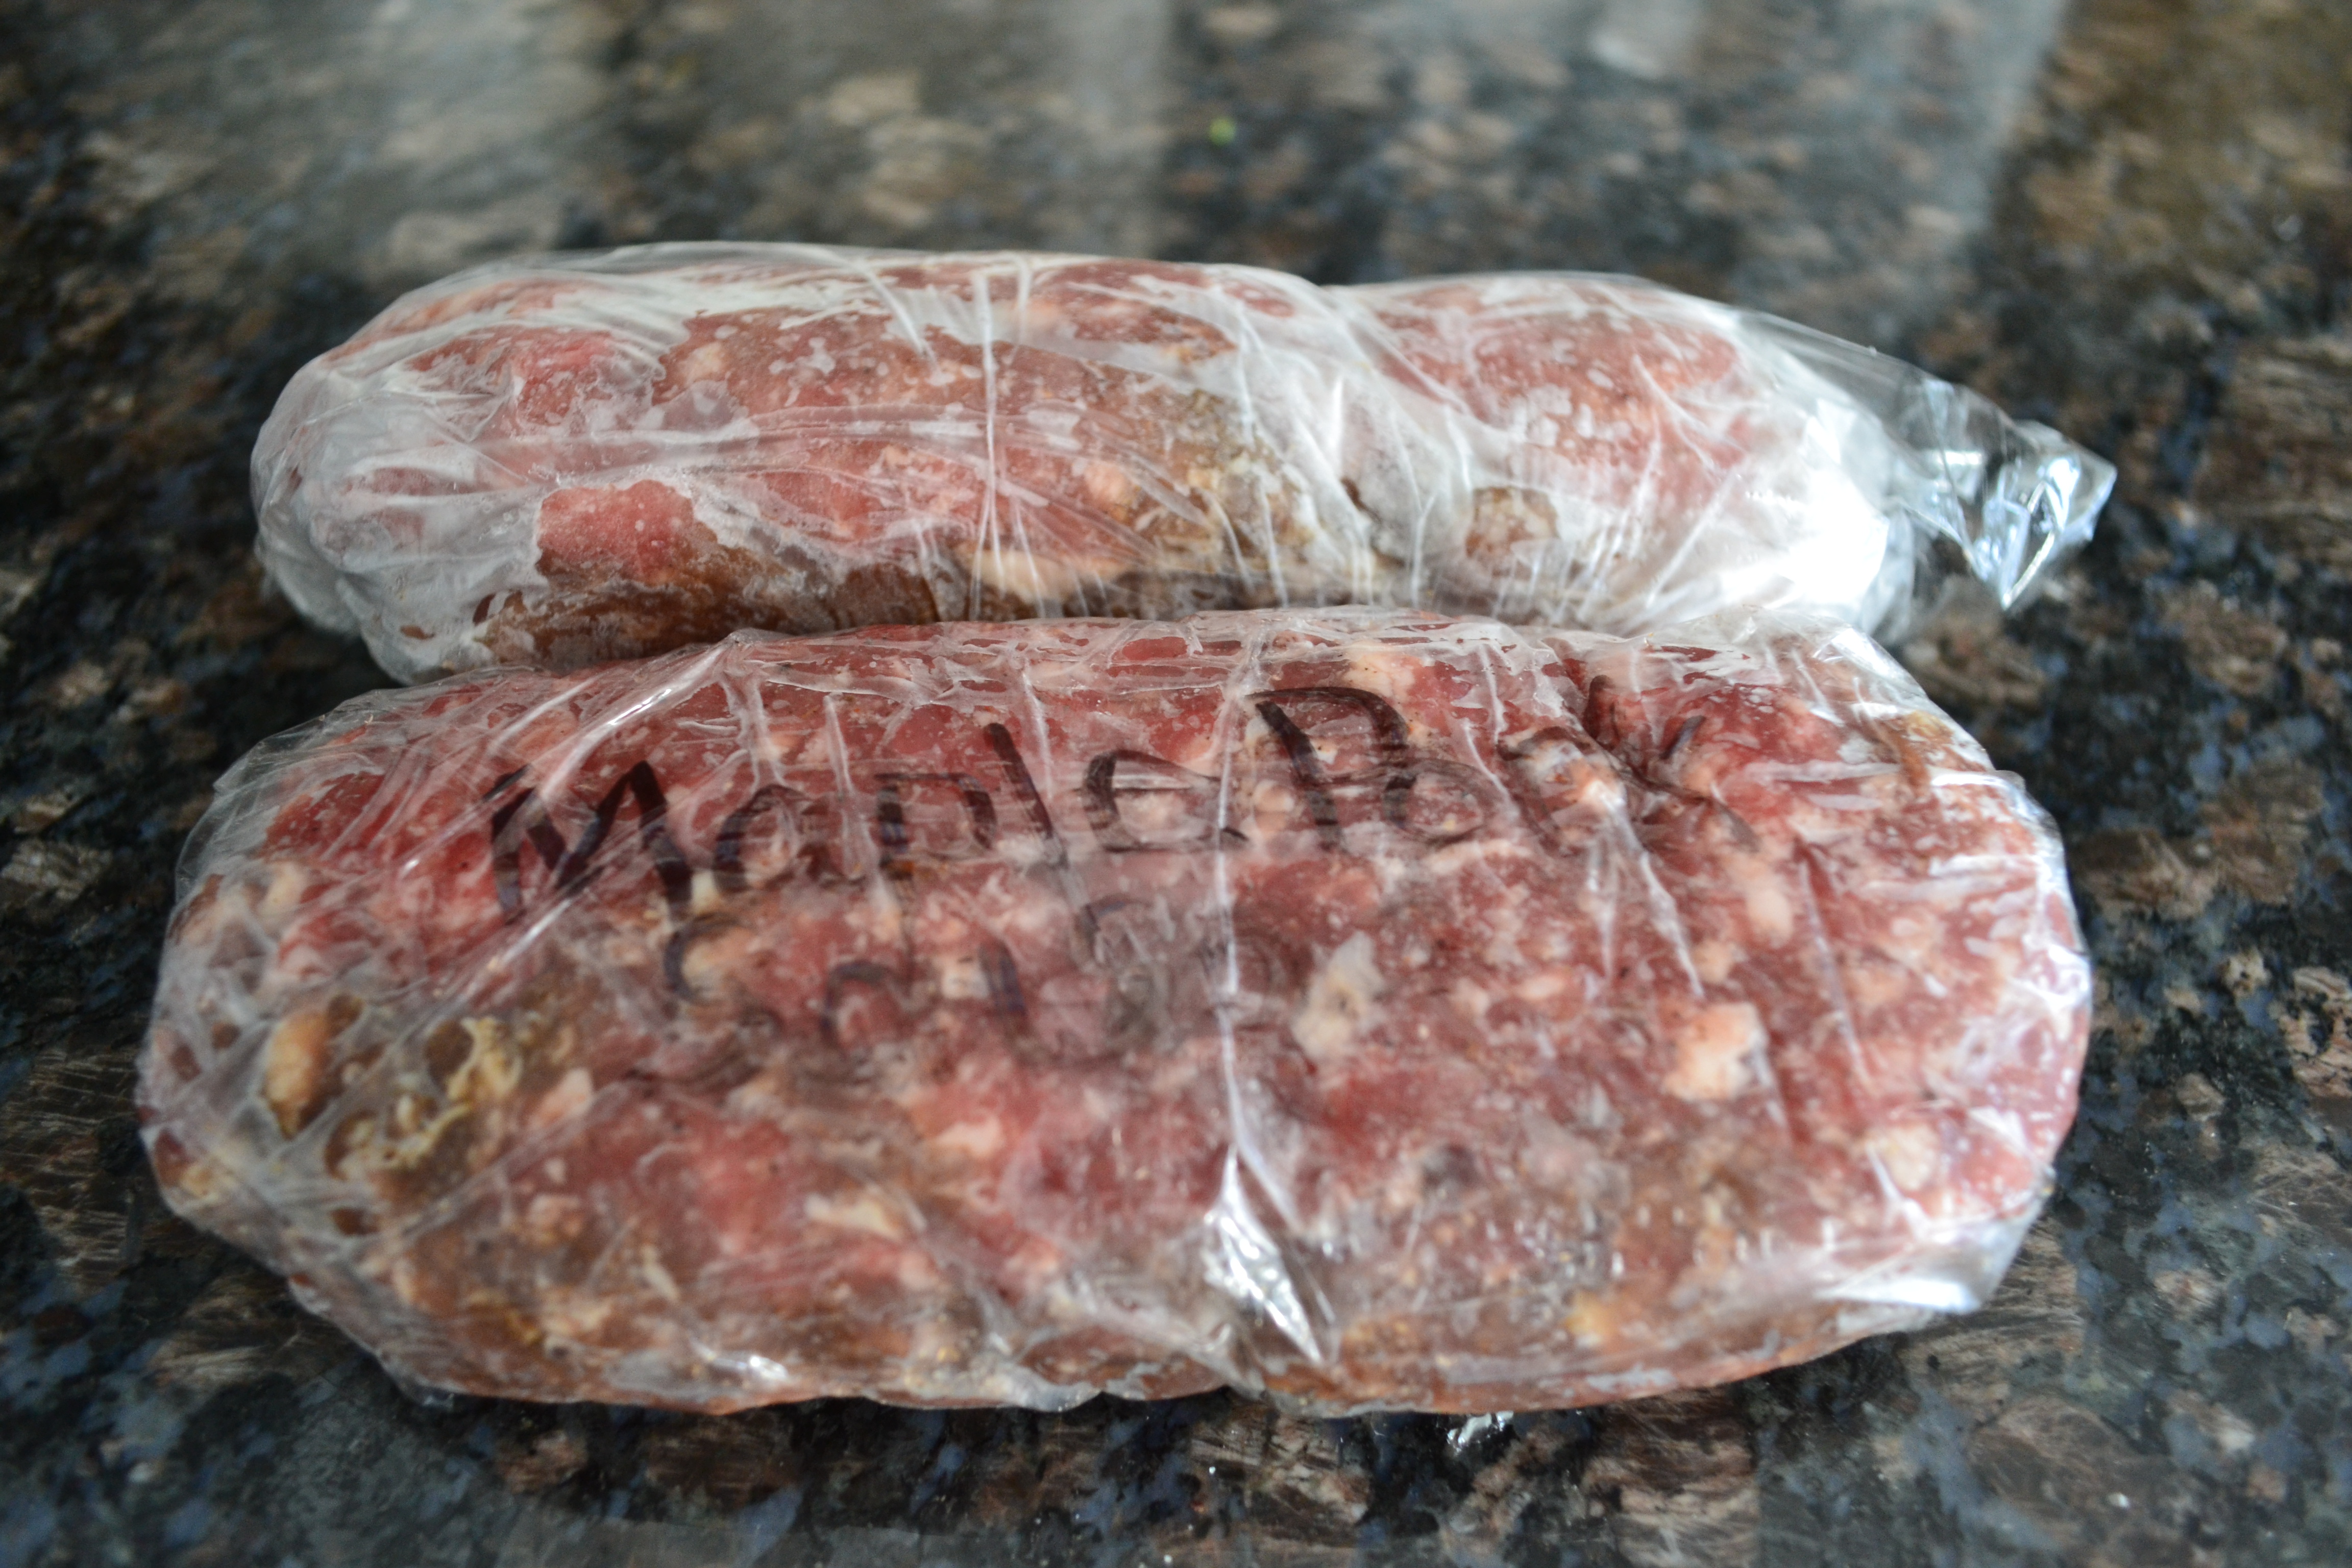
Maple Wild Pork Sausage

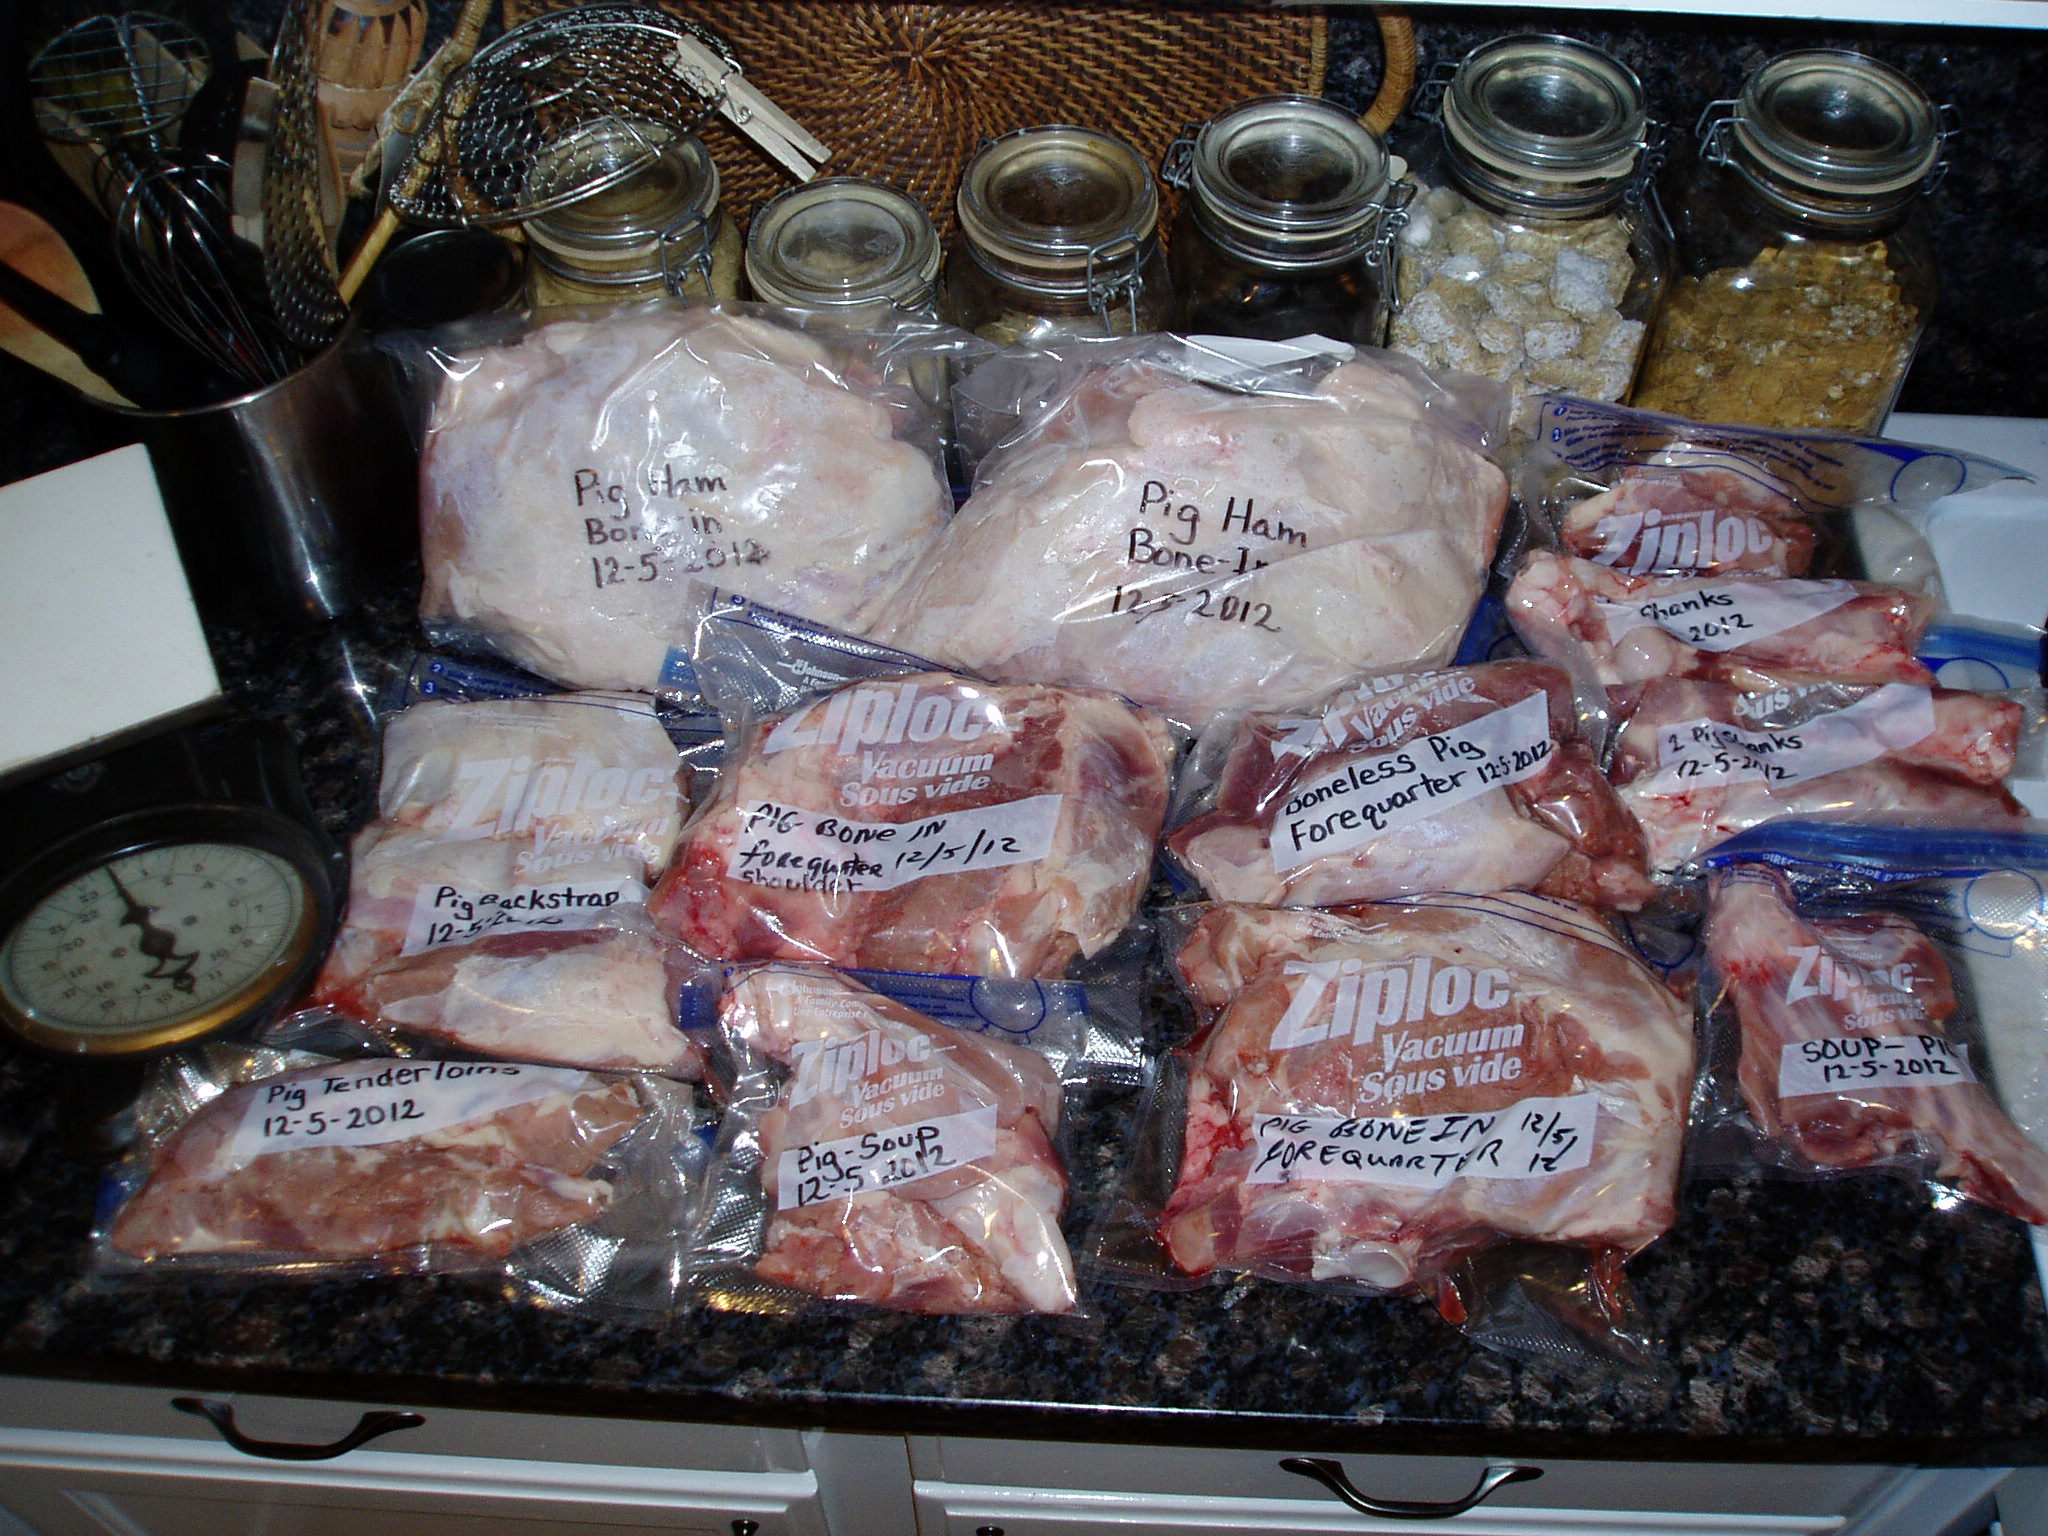
We were blessed this season to end up with a freezer full of wild pork. We have roasts, ribs, shanks, pork belly, and lots of ground meat.
I was particularly excited to have the ground pork. Last year, for the first time, I bought several of the pan sausage mixes. With some tweaking, I was pleased with the results. My pigslayers love breakfast sausage and I got thumbs-up all around.
One of the things I discovered from using the mixes is that my family prefers more intense flavor in the sausage than the recommended amounts suggested in the directions. Luckily, I learned a trick from a friend of mine that allows for the doctoring of the recipe before an entire batch of ground meat is wasted. Prepare one pound according to the directions, let it rest for about an hour in the fridge for the flavors to mix and absorb, then make a small patty and fry it up. Give it a taste test. If the intensity of flavor is to your liking, then you’re good to go. Prepare as large a batch as you need. If the flavor is lacking, tweak it up, make a patty, fry it up, taste again.
Usually, I prepare a only a couple of pounds of sausage at a time. Even though we have more than 20 pounds of ground wild pork packaged in one-pound bags, I like the versatility of having the plain ground meat in the freezer. I can pull out, thaw, and season up just what I want for the next week or so.
Maple Wild Pork Sausage

1 pound coarse ground pork
1/4 cup maple syrup
5 tsp. LEM Backwoods Maple Sausage Seasoning
1 tsp. Tommy’s Salt & Pepper Mix*
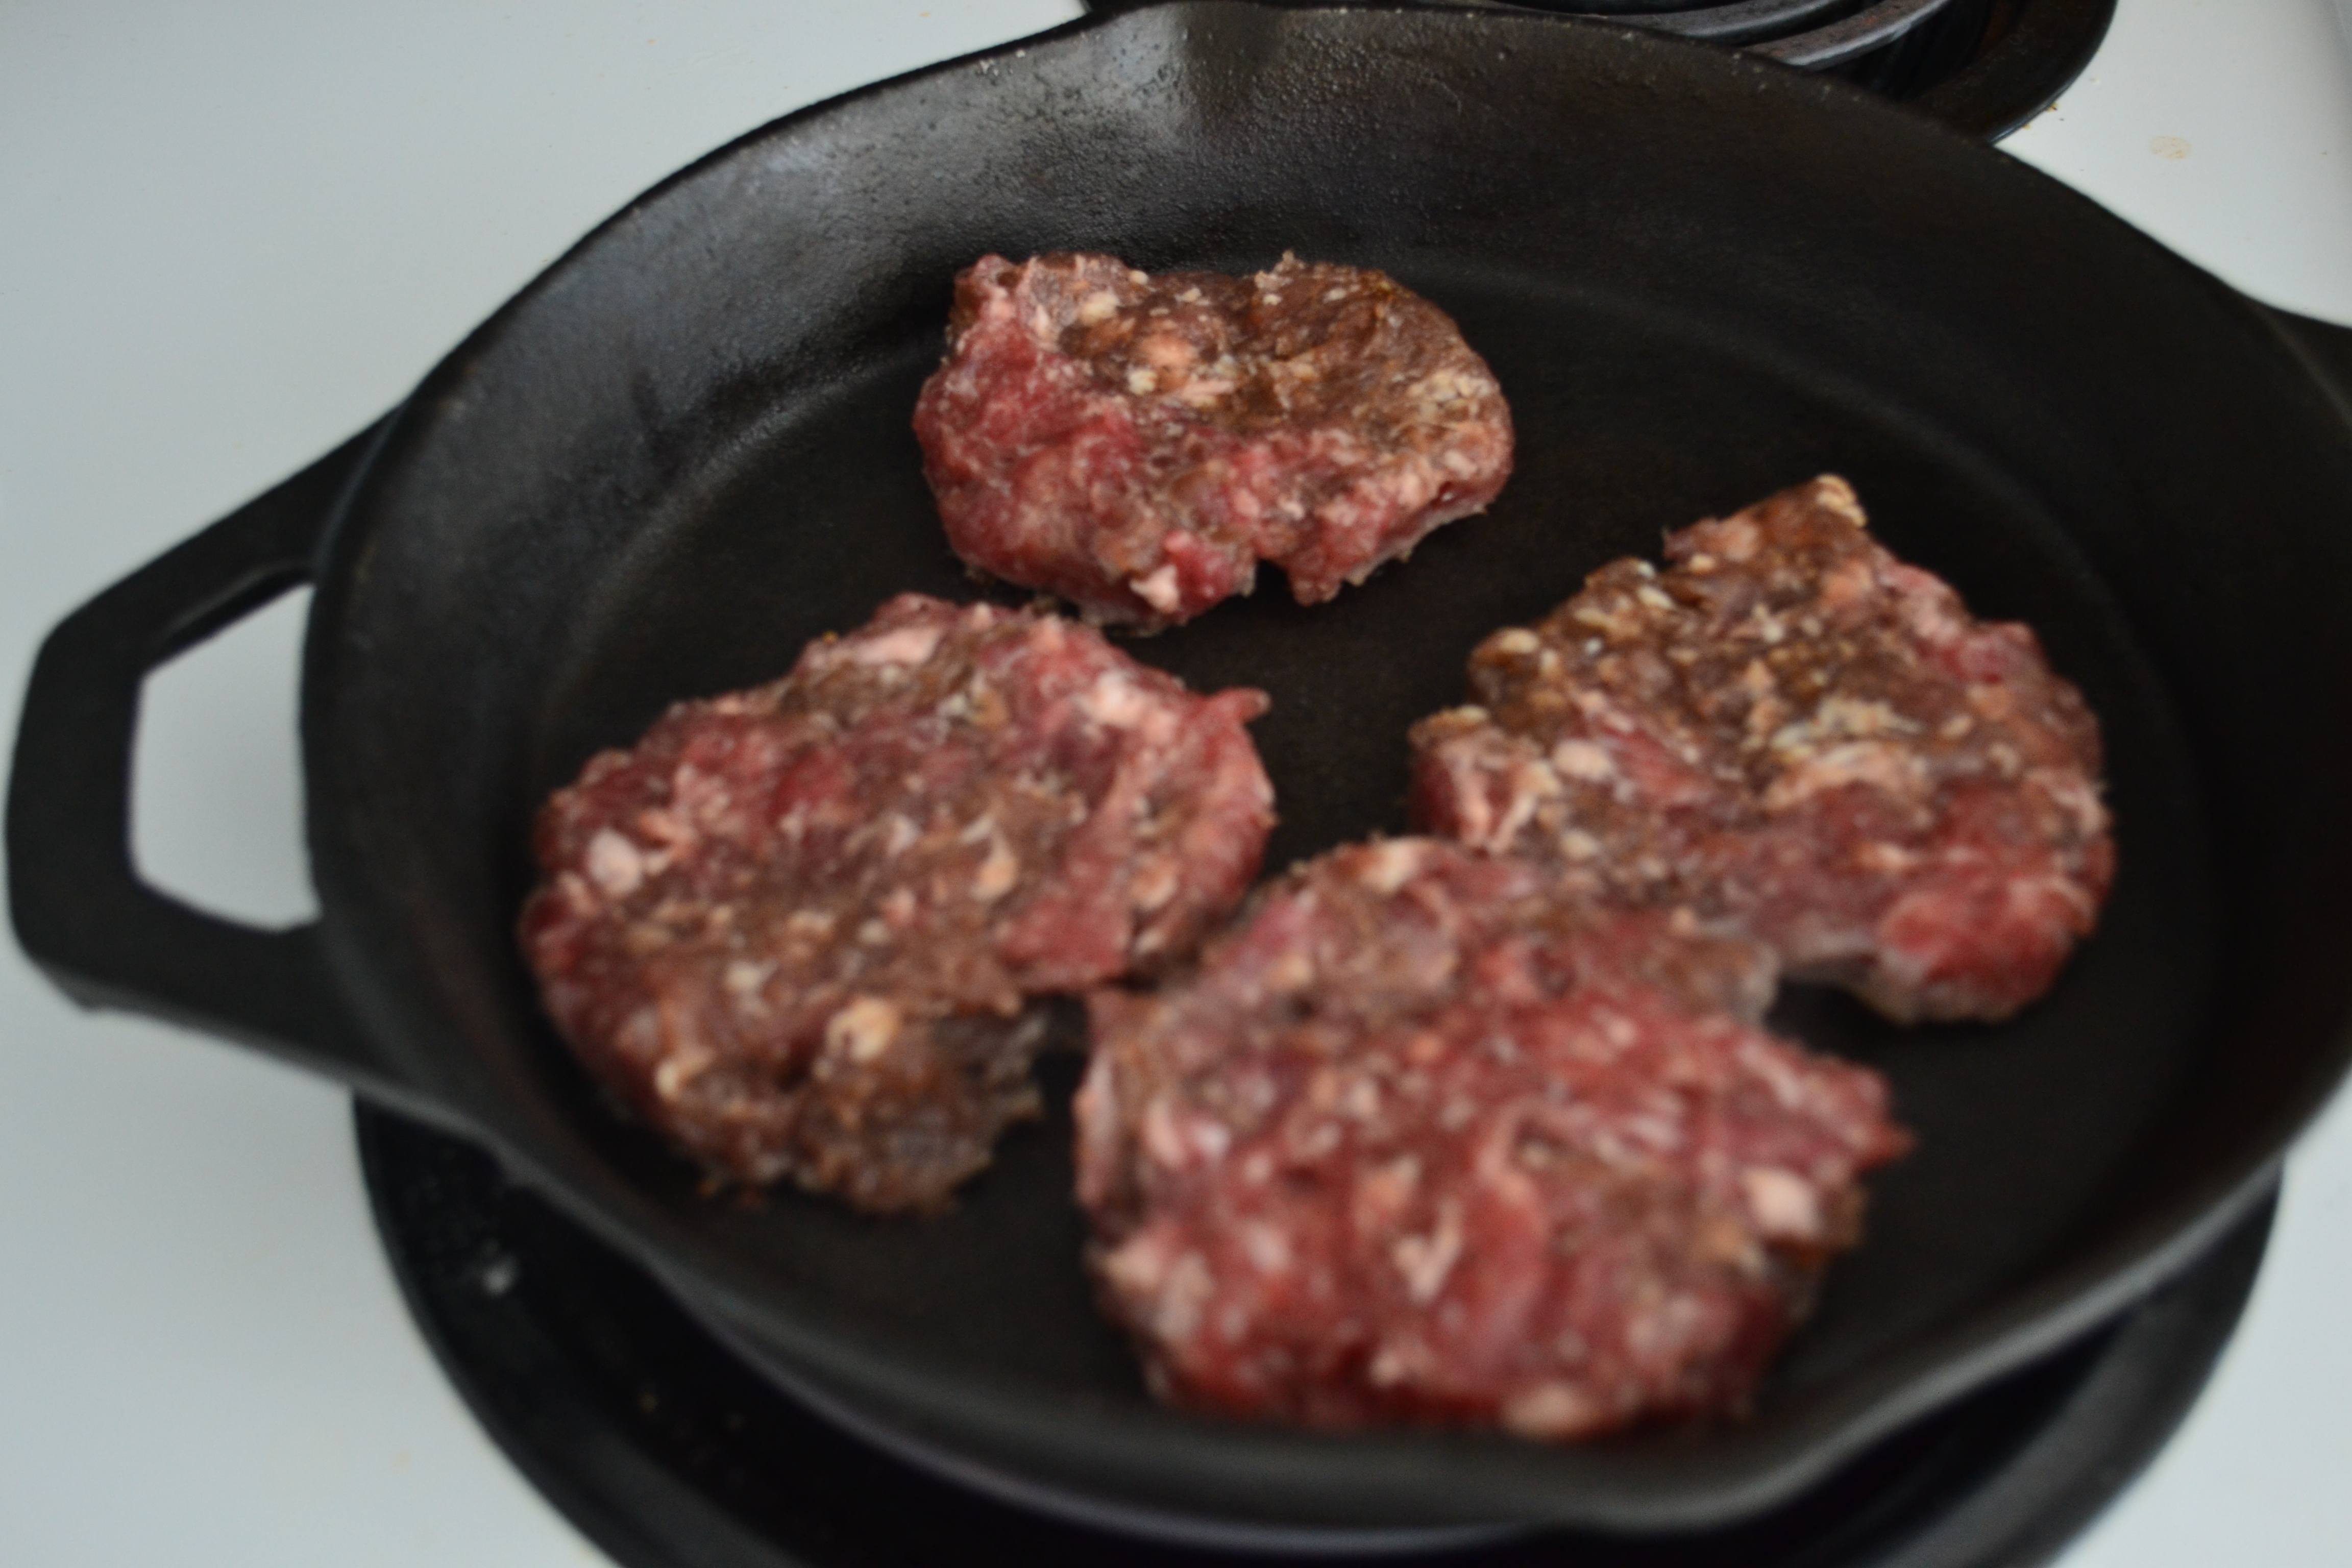
1. First of all, double, triple, or quadruple this recipe as desired. Second, don’t be afraid to adjust the recipe. Pork is very forgiving. You know what I mean! Combine maple syrup, seasoning mix, and salt & pepper mix in a measuring cup. In a bowl, add to ground pork using a fork or your very clean hands. Because of the maple syrup, the mixture will remain very sticky. Cover with plastic wrap.
2. Let flavors combine in the fridge for at least an hour. Make a small patty, fry it up about 4-5 minutes per side in a cast iron skillet over medium-high heat until beautifully browned and fully cooked inside since it’s pork. Do a taste test. If the flavors are too intense, add more ground pork. If too mild, add extra stuff.
3. Once you have achieved the desired flavors, fry up as in step 2. Or you can divide up into one pound rolls, roll up in plastic wrap and freeze.
This is the perfect thing to prepare for Valentine’s Day. Who needs chocolate when you can have pork?
* See recipe in “A Thing or Two about Game Birds”
Officially Older Than Dirt
It was my birthday this week. The older I get the less inclined I am to feel the need to throw a big Hoo-Hah to celebrate. However, this year was pretty awesome. My deerslayer surprised me with a great camera (a Nikon D3100).

I’ve really enjoyed photographing my recipes and the processes involved. This camera should provide me with a lot more options than my old point & shoot. I feared that the complexity of using a “real camera” would overwhelm me. This camera does everything that I could ever need and more. I secretly dreaded tackling the thick instruction manual, however. I was greatly relieved to discover that most of the instructions were on a DVD. It’s so much easier to watch someone flip a switch, attach a lens, push a particular button. My junior deerslayers and I were having such a good time photographing finished recipes and such that we really wanted to “do it like the experts”. This camera has the capabilities to do exactly that (even if I don’t yet)!
In addition to my fabulous new camera, one of my Junior Deerslayers prepared a fabulous citrus tart for my special day. Don’t forget that we live in the Rio Grande Valley and have citrus coming out our ears at this time of year (figuratively, of course). But, since I’ve always been particularly fond of citrus recipes of all sorts, she knew that it would be just the thing for my birthday. This one is now my new favorite. The praline crust is good enough to eat just by itself. As a matter of fact, she prepared extra crust so I could eat it with a spoon. I love that girl! This recipe calls for fresh citrus as well as frozen orange juice concentrate so it has a wonderful sweet-tart fresh burst of citrusy punch! My junior deerslayer topped the whole thing off with some fresh whipped cream. I polished the rest of it off with coffee the next morning!

.

.
.Which brings me to my next birthday surprise. My senior junior deerslayer brought me some delicious ground pecan-flavored coffee from Independence Coffee Company in Brenham, Tx. I’ve found that often flavored coffees can be overwhelming. This one was smooth and subtle. An absolute delight. The kitchen smelled wonderful. The combination of the pecan coffee with the citrus tart w/ praline crust was as much as any mom could ask for to round out a perfect birthday.
Citrus Tart
Praline Crust:
2 cups graham cracker crumbs
1/2 cup melted butter
3 tbsp. firmly packed brown sugar
1/2 cup ground pecans
1/2 tsp. cinnamon
Filling:
1 14 oz. can sweetened condensed milk
1/3 cup frozen orange juice concentrate, thawed
1/4 cup fresh lemon juice
2 large eggs, separated
Topping:
1 cup heavy whipping cream
3 tbsp. granulated sugar
1 tsp. vanilla
1. Mix all ingredients for praline crust. Press evenly into a 9 inch tart pan with removable bottom. Set aside. There will be some left over to eat with a spoon!
2. Whisk together sweetened condensed milk, orange juice concentrate, lemon juice, and egg yolks until blended.
3. Beat egg whites at medium speed with an electric mixer until stiff peaks form. Fold into citrus mixture and pour into prepared crust. Set on cookie sheet or foil on center rack in oven. Sometimes the butter in the crust will eek out and drip into the oven.
4. Bake at 325 degrees for 20 to 25 minutes just until filling is set. Remove to a wire rack to cool completely. Cover and chill at least 4 hours. Remove tart from pan, and place on a serving dish.
5. Beat whipping cream, sugar, and vanilla at medium speed with an electric mixer until stiff peaks form. Use pastry bag to pipe whipped cream onto tart or just plop artistically on top. Truly, there’s no such thing as unattractive whipped cream!
